
Looking for Cooling Fan location in Arc Raiders? Let’s learn the best spawn points, reliable Technological zones, fast farming routes, and smart extraction tips so you can grab all five Cooling Fans without wasting time.
Arc Raiders Cooling Fan Location Overview: Why These Technological Materials Matter
If you’re gearing up for Expedition Project Stage 2, you’ll quickly notice that Cooling Fans become a must-have item. They’re classified as Technological materials, and that alone tells you they’re not something you stumble across by accident.
Think of Cooling Fans as the backbone of your Framework upgrade—small, rare, and tucked away in areas most players sprint past. These little components are part of what you need before installing wiring, ventilation, and core systems for your Expedition caravan.
Because they aren’t found in everyday containers, players often get stuck wondering why they can’t get enough of them. That’s completely normal—their rarity is intentional, and knowing where they naturally appear gives you the edge.
It also helps to know that a Cooling Fan is more than just a loot item: if you recycle one, you get wires and plastic parts—classic crafting materials that help you build and upgrade other items. (arcraiders.wiki)
So before diving into farming routes or drop rates, it helps to understand one thing: Cooling Fans are tied directly to specific loot zones, and only appear inside specialized Technological containers. Once you know that, the hunt becomes way more predictable—and way less frustrating.
Arc Raiders Cooling Fan Containers: What Drops Them & Where They Actually Spawn
Why Container Type Matters for Cooling Fan Drops
When it comes to tracking down Cooling Fans, the real secret isn’t the map you’re on — it’s the type of container you’re opening. These fans don’t appear in random storage boxes or scattered loot piles.
Instead, they come from a very specific container category the game treats as high-value Technological loot sources.
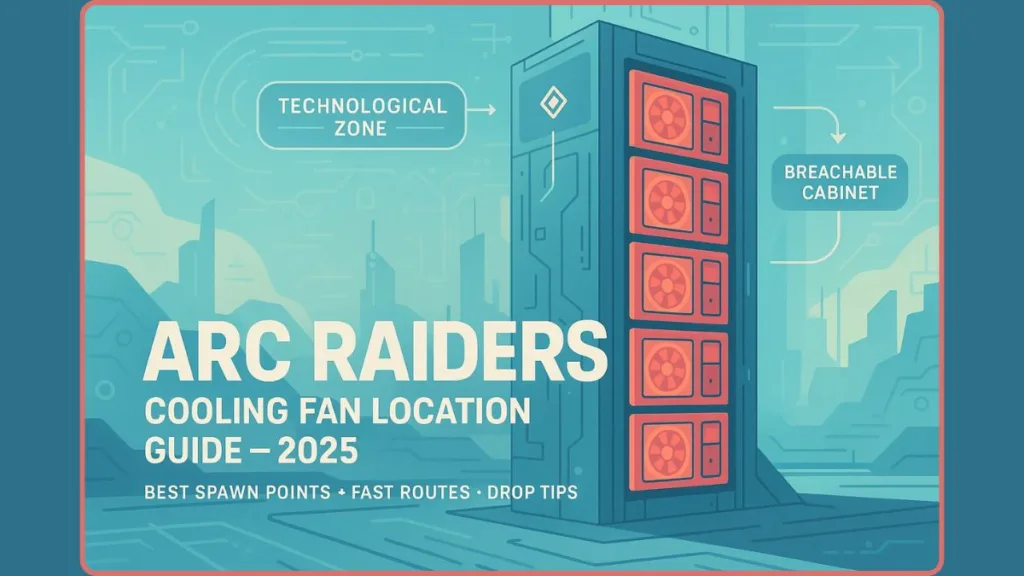
Breachable Cabinets: The Only Containers That Drop Cooling Fans
The containers you’re looking for are the tall, industrial-style breachable cabinets — the ones that look like server racks, electrical housings, or machinery lockers. They stand out because they’re bulkier than normal loot boxes and require the breach action to open. That extra step is intentional: these cabinets hold items the game considers rare, and Cooling Fans are part of that pool.
Color Variations Across Maps (Blue, Yellow, Grey)
You’ll also notice that these cabinets can appear in different colors depending on the region — blue in late-game areas like Stella Montis, and yellow or grey in mid-game or Industrial zones.
Despite the color shifts, the rule stays the same: if it’s a breachable cabinet with a tech-heavy design, it’s worth opening.
Where These Cabinets Usually Appear in Buildings
Another helpful detail is that these containers almost always spawn in rooms tied to engineering, data systems, or power infrastructure. Whether it’s a control tower, comms lab, or a multi-floor tech facility, the cabinet layout tends to follow the same pattern — clustered against walls, humming with machinery, and often surrounded by other Technological items.
Cooling Fans Are Rare (Why Random Containers Don’t Work)
To back up how rare Cooling Fans are: loot-tables confirm that Cooling Fan is classified as a “Rare, Technological” recyclable item — not a common drop.
That rarity means searching random containers is almost always a waste of time. Your best shot is to stick with containers designed for electronics or machinery.
How Recognizing These Containers Saves Your Time
And here’s the good news: once you learn to spot these server-style cabinets, you won’t waste time rummaging through low-value containers. You’ll move straight toward the spots that reliably generate fans, making each run shorter — and much more rewarding.
Best Arc Raiders Cooling Fan Locations & Fast Farming Routes
Finding Cooling Fans becomes much easier once you know which locations consistently spawn the right containers and how to move through them efficiently.

Each zone has its own rhythm, layout quirks, and danger levels, so choosing the right route can save you time and keep you alive long enough to extract with your loot.
Below are all the most reliable methods and routes players use to farm Cooling Fans quickly and safely — now with extra confirmed hotspots and loot-density notes.
Dam Battlegrounds Cooling Fan Route – Early-Game Technological Loot Strategy
The Dam Battlegrounds remains a top-tier option for early-game fans because some of its facilities double as Industrial + Electronics zones, giving higher spawn odds for Technological loot.
The standout spot here is the Power Generation Complex. According to loot-sector reports, this facility often houses multiple machinery rooms, operations rooms, and maintenance corridors — all with a decent chance at yielding Cooling Fans and other electronics when you breach the right cabinets.
Nearby, the Research & Administration block (R&A) and Control Tower are solid backups. These buildings mix tech-heavy rooms, data-terminals, and electric lockers, which seem to keep their loot pool rich in rare components.
If you want a micro-route: there’s a room near the Water Treatment elevator that reportedly has a cluster of 4–6 loot cabinets — a quick sweep here can sometimes yield multiple Cooling Fans per run.
Pro tip: go slow, breach carefully with your back to a wall, and check every machinery-heavy room — the spawn is random, but these areas maximize your odds.
Spaceport Cooling Fan Farming – Mid-Game High-Consistency Route
For many players, Spaceport hits that sweet spot between loot quality and manageable risk. It features widespread Technological buildings and electronics-heavy interiors, which tend to spawn Cooling-Fan-friendly containers.
The best loops begin at the Launch Towers — these vertical structures often contain multiple server-style cabinets, making them efficient for quick loot sweeps. Checking stairwells and utility rooms here can pay off.
Next, head to the Arrival Building, then swing through North and South Trench Towers, or even the Departure Building / Control Tower A6 cluster. These areas collectively offer a high number of containers per run, increasing your chance of snagging Cooling Fans.
If you play fast and stay alert (especially for ARCs or other raiders), Spaceport often returns enough fans to make an Expedition run worthwhile — sometimes even yielding all the fans you need in just one or two raids.
Buried City Cooling Fan Path – Space Travel Building Sixth-Floor Sweep
The Buried City, especially the Space Travel Building, is frequently recommended as the top mid-intensity loot zone for fans and other electronics.
The sweet spot inside this building is the sixth floor — several reports cite multiple server-rack cabinets lining the walls here. If you clear that floor carefully, you often secure a handful of Cooling Fans in one sweep.
Lower floors and other Technological-tagged rooms also have potential — but frequency drops off compared to floor six. Even so, this building remains a great balance of loot density and manageable enemy presence, especially compared to late-game zones.
Stella Montis Cooling Fan Farming – Late-Game High-Risk, High-Reward Zone
When you’re geared and ready for chaos, Stella Montis delivers high loot potential — and by extension, solid chances for Cooling Fans. The map’s dense indoor layout, multiple floors, and abundance of electrical/machinery rooms make it a hotspot for Technological loot.
Particularly good sectors are Assembly and Assembly Workshop — compact spaces, high cabinet density, and often less contested than central zones. Many players report getting multiple rare electronics (including fans) in single runs there.
If you prefer lower competition, Communications can be a quieter alternative. Fewer raiders tend to contest it, giving you breathing room to loot cabinets carefully.
But beware: corridors are tight, enemies roam constantly, and other players frequently sweep loot-dense paths — you’ll need good situational awareness. If you make it out, though, the rewards are often excellent, especially for late-game crafting or Expedition prep.
Multi-Map Cooling Fan Farming Cycle – Best Cross-Zone Strategy
If you don’t want to commit to one map, try this rotation strategy, optimized for loot density, route safety, and time efficiency:
- Start your session at Spaceport — quick clears, reliable spawns, low-to-mid threat.
- If Spaceport gets contested, pivot to Dam Battlegrounds (Power Generation Complex > R&A > Control Tower) for more consistent electronic-loot rooms.
- Run Buried City (Space Travel Building, 6th Floor) for a compact and repeatable farming sweep.
- Attempt Stella Montis only when you want high-reward loot and are prepared for the elevated risk — best for experienced players or squads.
This multi-map rotation spreads out your risk and exposure, while maximizing your total encounters with breachable cabinets across multiple environments.
Arc Raiders Cooling Fan Farming Strategy – Fastest Way to Get 5 Cooling Fans
Getting your hands on five Cooling Fans doesn’t have to turn into a long grind. With the right approach, you can streamline your run, minimize danger, and focus only on the spots that actually matter.
Think of this section as your “smart hustle” playbook — quick, predictable, and built to help you avoid unnecessary detours.
Target Technological Zones First for High-Probability Drops
Before you even begin a run, head directly toward areas marked with the Technological icon. These zones contain the highest concentration of electronics-heavy interiors, which naturally increases your chances of running into breachable cabinets.
Starting here eliminates wasted time and keeps your route tight and purposeful.
Use Compact, Repeatable Farming Loops for Maximum Efficiency
Instead of wandering across an entire map, focus on compact routes where cabinets spawn close together. The idea is to hit multiple high-value rooms in one straight path, extract fast, then restart if needed.
This keeps your farming predictable and helps you secure fans without overstaying in risky zones.
Guides confirm that smaller, electronics-dense buildings consistently deliver better results than large open areas.
Look for paths that include stacked floors, tight corridors, or clustered tech rooms, as these usually offer more loot per minute.
Follow a Fast Breach-and-Reset Rhythm to Stay Productive
Because loot spawns are randomized, even high-value buildings won’t always reward you. If after breaching a few cabinets you come up empty, it’s smarter to reset — jump to another structure or map.
This keeps your momentum strong and prevents wasted time in low-yield areas.
Multiple loot guides recommend this hit-and-move-on strategy as an effective farming method.
Avoid High-Traffic Zones Until You’re Prepared to Fight
Some sections — especially major loot buildings or central map areas — attract high player and ARC patrol activity.
Delaying entry into these zones protects your early loot and reduces the risk of losing progress before extraction.
Farming quieter or lesser-known areas first gives you a safer, smoother start.
Equip Mobility Perks or Tools to Boost Looting Speed
Any perk or item that increases your mobility, stamina, or zipline speed gives a noticeable edge.
Moving faster lets you sweep through cabinet clusters efficiently, escape risky encounters, and transition between buildings with less downtime.
This is especially valuable in multi-floor structures where vertical movement is key.
Use Safe Pocket and Extract Sooner to Protect Your Loot
Because rare loot like Cooling Fans is unpredictable, move fans into your Safe Pocket as soon as you collect them.
This ensures you keep them even if something goes wrong before extraction.
Once you have five Cooling Fans, extract immediately instead of pushing your luck — it’s the safest way to lock in your progress.
Rotate Between Multiple Maps to Avoid Dry Loot Cycles
If one map feels cold or overly contested, switch to another right away.
Rotating between Spaceport, Dam Battlegrounds, Buried City, and Stella Montis lets you tap into fresh loot pools and reduces downtime caused by unlucky spawns.
This rotation is widely recommended for faster, more reliable farming.
Why Arc Raiders Cooling Fans Are Hard to Find (Cooling Fan Not Spawning Explained)
If you’ve spent several runs searching for Cooling Fans and walked away empty-handed, you’re not alone. These items feel scarce because the game intentionally limits where they appear and how frequently they’re rolled in the loot system.
Understanding why they’re rare helps you plan smarter routes, manage expectations, and avoid wasting time in low-value areas.
Cooling Fans Sit in a Restricted Rare Loot Pool
Only Specific Technological Containers Can Roll Them
Cooling Fans belong to a tightly controlled Technological loot category, which is why they’re far less common than other electronics. The game only allows them to appear inside Server Rack, Electrical Box, or breachable machinery cabinets — nothing else.
Regular containers like drawers, desks, crates, or office lockers cannot roll Cooling Fans at all. Because most buildings contain a mix of container types, your actual odds of hitting the correct kind of loot source are lower than they seem at first glance.
This strict classification is one of the biggest reasons these items feel rare — the number of viable containers on each map is limited, and the rest simply can’t drop them no matter how many you open.
Cooling Fans Are Tagged as Rare Items
Expedition Progression-Sensitive Loot Is Intentionally Scarce
Cooling Fans are officially tagged as Rare Technological components, putting them in the same scarcity tier as high-end electronics used for multi-stage upgrades. This rarity isn’t accidental — it’s part of the Expedition progression system.
The game intentionally slows down how quickly players reach the Framework stage by making Cooling Fans harder to obtain. If fans were common, players could rush Expedition upgrades and skip large portions of the game’s risk-reward cycle.
Because of this rarity tag, even when you breach the correct cabinet, you’re only rolling the rare portion of that container’s loot table — and that roll is not guaranteed.
Loot Is Randomized Per Instance
Even High-Value Rooms Don’t Guarantee Rare Drops
Every match applies fresh RNG weighting to lootable areas. That means a room full of Technological containers may generate an abundance of electronics one match and virtually nothing the next.
This randomness affects:
- Cabinet type distribution
- Loot tier weighting
- Rare item chance modifiers
- Building-level spawn concentration
Because these variables reset each run, even ideal Technological rooms can end up “cold,” producing nothing but low-tier scrap. This is why running multiple short, fast routes is consistently more effective than staying in one building hoping the loot improves.
Competition Reduces Your Actual Loot Access
If Someone Gets There First, Your Spawn Is Gone)
Many maps funnel players into the same Technological choke points — areas that naturally contain the highest number of breachable machinery cabinets. If another raider reaches your route before you, they may have already looted the cabinets, making the building appear “dry.”
This is especially common in:
- Launch Towers
- Research & Administration complexes
- Stella Montis Assembly
- Buried City Space Travel floors
Even if the match technically spawned Cooling Fans, you may never see them if they were claimed by someone who arrived thirty seconds earlier.
High Enemy Density Disrupts Looting Flow
(Fewer Breaches = Fewer Chances at Rare Items)
Enemy patrols frequently redirect into Technological areas because the game treats these rooms as high-value points of interest. When ARCs or raider squads pressure you out of a room, you often miss multiple containers you would have otherwise breached.
This matters because:
- Every skipped cabinet removes a chance at rolling a fan
- Combat delays reduce route efficiency
- Fights force you to reposition, breaking your planned loop
- Loud breaches attract additional enemies, increasing disruption
If you consistently encounter heavy patrols, your total number of breached containers drops sharply, lowering your overall Cooling Fan probability.
Not All Breachable Cabinets Have the Same Loot Weighting
(Some Are Low-Tier Electronics Only)
While all machinery cabinets look similar, not all of them contain the same loot tier weighting. Some racks spawn primarily low-tier components like basic circuits or wires, while only a subset are eligible to roll rare electronics.
This split means:
- You might breach several “correct” cabinets that still can’t drop fans
- Technological rooms vary in rarity potential
- Certain buildings inherently have better rare-loot weighting than others
Understanding which buildings tend to produce rare spawns helps you avoid areas with predominantly low-tier cabinet types.
Loot Cluster Behavior Creates “Hot Runs” and “Dry Runs”
(Maps Change Their Loot Density Every Session)
ARC Raiders uses a cluster-based loot distribution system, meaning some runs concentrate electronics into a few hot buildings while others spread them thinly across the map.
This creates the familiar pattern:
Run A: two fans in one sweep
Run B: zero fans across several buildings
Run C: multiple rare items in a single floor
This clustering is normal — the game is built around this loot rhythm to encourage exploration and multiple loops instead of relying on one predictable farming spot.
Troubleshooting Arc Raiders Cooling Fan Drops: What to Do If You Still Can’t Find Any
If you’re running the right routes, breaching the right cabinets, and still not seeing a Cooling Fan, you’re not alone.
The game’s loot system can be streaky, but there are reliable ways to work around bad luck and improve your results.
Here’s a practical, no-nonsense checklist to help you bounce back and get those fans faster.
Verify You’re Inside True Technological Zones
Avoid Look-Alike Rooms That Don’t Roll the Correct Loot Pool
Some rooms may look electronic or industrial on first glance, but unless the area is marked as a Technological / Electronics zone, the containers inside might not roll the correct loot pool.
Always aim for buildings clearly flagged with the Technology icon on the map — you’ll see a dramatic difference in drop consistency there.
Focus on Multi-Floor, High-Density Structures
More Breachable Cabinets Means Higher Overall RNG
If you stick only to single-floor structures or random rooms, you’re drastically cutting your odds.
Buildings with multiple floors, tight corridors, and machinery or lab rooms tend to house more breachable cabinets, naturally improving your chance of hitting rare loot.
Maps like the Space Travel building in Buried City or the tall towers in Spaceport are great examples thanks to their naturally high loot density.
Avoid Highly Contested Zones
Early Looters and Player Traffic Reduce Your Chances
Many players target the same “known best” buildings. If you arrive too late, much of the loot may already be grabbed.
Players often report empty cabinets in high-traffic areas such as central research buildings, launch towers, or main corridors in late-game maps.
Try using less common entry points, side routes, or secondary Technological locations to stay ahead of competition.
Reset Early When a Building Feels Cold
Dry Loot Cycles Waste Time and Reduce Total Breaches
Even prime buildings can roll low-value loot because of the game’s loot randomization.
If you breach several containers and don’t see anything useful, leave immediately and move to another building or map. Staying too long in a “cold” building slows down your total fan count.
Using this fast-reset method keeps your run productive and avoids getting stuck in unproductive loops.
Boost Movement and Vertical Mobility
Cover More Buildings Per Match to Force Better RNG
Mobility perks or tools — such as increased sprint speed, stamina boosts, or faster zipline traversal — make a noticeable difference.
Faster movement lets you hit:
- More Technological rooms
- More cabinet clusters
- More floors and stairwells
- More high-value choke points
Increasing your total number of breaches directly increases your chance of seeing a Cooling Fan.
Start in Low-Traffic Zones Before Entering Hotspots
Secure Early Progress Without Pressure
If main hubs are chaotic, begin your run in a quieter corner of the map. Clearing an outer building or side tower first often gives you time to grab your first rare item without immediate enemy or player interference.
Once you have early momentum, you can safely head toward stronger or more contested regions.
Switch Maps When Your Loot Cycle Feels Unlucky
Map Rotation Helps Break Stale RNG Patterns
Loot distribution changes every match, so switching maps can reset your luck. Moving between Spaceport, Dam Battlegrounds, Buried City, and Stella Montis exposes you to fresh loot clusters and avoids bad RNG streaks.
This rotation-based method is one of the most reliable ways to stay efficient.
Use Your Safe Pocket and Extract as Needed
Protect Rare Items the Moment You Find Them
Once you pick up a Cooling Fan, store it in your Safe Pocket. If you’re eliminated before reaching extraction, you’ll still keep what matters most.
If you’re dealing with unlucky runs, extract as soon as you secure a rare item — especially if it’s your first or second Cooling Fan of the session. Saving your progress early prevents setback and frustration.
Related Arc Raiders Material Farming – Light Bulbs, Humidifiers & Rusted Gears
While you’re out hunting for Cooling Fans, you’ll naturally come across other materials that play a big role in Expedition upgrades and mid-game crafting.
Three of the most useful items you’ll bump into are Light Bulbs, Humidifiers, and Rusted Gears.
Each one has its own drop pattern, its own favorite container type, and its own ideal farming spots — and knowing where to look can save you a ton of time.
Light Bulb Farming in Arc Raiders – Reliable Car Spawns & Tech-Room Drops
Light Bulbs tend to be one of the more forgiving Technological-category items. They show up in a variety of electronics-heavy loot rooms, especially around electrical infrastructure zones rather than standard containers.
If you want to farm them efficiently, a very effective strategy is to check certain rusted cars on the map Dam Battlegrounds:
- One car near the Electrical Substation on the south side.
- Another near the Generator Hall extraction lift, close to abandoned buses at the north end of the map.
Players report these vehicles almost always drop at least one Light Bulb — often getting enough (five or more) over just a few runs.
Because Light Bulbs are required for Expedition Phase 3, this makes those car-spawn spots a reliable stop if you’re grinding multiple materials on one loop.
Humidifier Farming in Arc Raiders – Best Residential & Utility Zone Spawns
Humidifiers fall into a different loot flavor — they’re tied to environmental control systems, making them far more common in residential, utility, or support-infrastructure buildings.
The most consistent spawn-location players have found is a building on Buried City called Red Tower. On its second floor, there are two red security lockers that tend to reliably spawn Humidifiers — often giving at least one, sometimes both per run.
The tower is accessible from a ledge near the metro entrance, so players using light or “free” loadouts find it especially convenient: you can loot and extract quickly without heavy risk.
If Red Tower is contested or already looted, other residential blocks or apartment-style rooms across maps offer backup spawns — but with noticeably lower drop rates.
Because Humidifiers are part of Expedition Phase 4 requirements, having a go-to location drastically cuts down farming time.
Rusted Gear Farming in Arc Raiders – Industrial Zones, Garages & Generators
Rusted Gears belong to the Mechanical loot type and are heavily used for repairing structures, crafting mechanical items, and progressing through specific upgrade paths.
The best farming route involves targeting the following zones in Buried City:
- The Warehouse (especially eastern-side generators)
- Marano Station, particularly the car-park and station-adjacent areas
- A multi-level Parking Garage (loot all vehicles on each floor)
Vehicles and generators often yield Rusted Gears once breached or looted, and you can sometimes get two or three per run if you hit the right containers.
Because Gears drop from multiple container types — cars, generators, crates — they’re noticeably easier to stockpile while farming other resources.
Multi-Material Routes – Efficient Loops for Multiple Crafting Items
A handy trick is to route through buildings and zones that naturally blend Technological, Environmental, and Mechanical rooms — particularly:
- Industrial-adjacent blocks in Dam Battlegrounds
- Utility sectors of Spaceport
- Multi-floor structures in Buried City
These locations let you pick up Light Bulbs, Humidifiers, and Rusted Gears while you’re already hunting Cooling Fans — making your overall farming loop significantly more efficient.
FAQ: Arc Raiders Cooling Fan
Where do Cooling Fans spawn in ARC Raiders?
Only in Technological-marked zones, specifically inside large electrical / server-style cabinets or machinery lockers. Normal containers won’t drop them.
What containers have Cooling Fans?
Only breachable electrical cabinets or server racks — the tall metal cabinets in tech rooms. Desks, drawers, or crates don’t count.
How many Cooling Fans do you need for the Expedition Project?
You need five Cooling Fans to upgrade from Core Systems to Framework in the Expedition project.
Why are Cooling Fans so hard to find?
They’re a Rare Technological drop: only a subset of appropriate containers can roll them. Even in the right containers, spawn is random and competition or enemy raids often reduce your chances.
Do Cooling Fans spawn in regular containers or desks?
No — only special machinery-type cabinets or server cabinets have a chance. Regular desks/crates won’t drop them.
Does being in a Technological zone guarantee a Cooling Fan spawn?
No. Even in a proper zone, spawn is randomized — you might get nothing from a run, or be lucky and get several.
Do enemy patrols or other players affect spawn?
They don’t affect the loot tables themselves — but they can stop you from looting all cabinets safely, reducing your effective chances.
Is there a map where Cooling Fans drop more frequently?
Some maps have higher loot-density tech buildings. The Space Travel building in Buried City is commonly cited as one of the most reliable locations.
Can you increase Cooling Fan drop chances or optimize the hunt?
You can’t change the drop rates — but you can improve odds by targeting cabinet-dense, multi-floor tech buildings, resetting runs when dry, and avoiding contested zones.
Should you extract immediately after finding Cooling Fans?
Yes — because they’re rare and you only need five, storing them safely (such as in your safe pocket) and extracting early is the safest play.
Final Arc Raiders Cooling Fan Farm Route Summary & Best Spots to Extract Safely
If you want a clean, no-wasted-motion plan to secure Cooling Fans fast, this final section ties everything together into one simple route strategy. Think of it as your grab-and-go roadmap — efficient, predictable, and perfect for players who want results without running circles around the map.
The Quickest Overall Cooling Fan Route for Fast, Low-Risk Runs
A dependable rhythm to follow is:
- Start in a Technological-dense zone with multi-floor access
- Hit clustered cabinet rooms first
- Shift to a secondary tech sector if loot feels thin
- Extract after grabbing 1–2 Cooling Fans, then reset
This loop keeps your pace fast and protects your progress, especially when playing solo.
Fastest Cabinet-Dense Route to Hit First
Your most reliable sequence:
- Begin in Spaceport and clear its tower interiors and utility floors
- Sweep through nearby trench towers for extra cabinets
- Move on immediately if the rooms feel cold
Spaceport’s strong tech-building density makes this a top pick for fast, consistent cabinet farming.
Mid-Risk, High-Consistency Loop Ideal for Duos
For a balanced experience:
- Run Dam Battlegrounds
- Focus on Power Generation, Control Tower, and Research & Administration
- Prioritize machinery rooms and elevated floors
This path delivers steady results without the heavy danger seen in late-game zones.
High-Yield Late-Game Route for Geared Players
When you’re properly equipped:
- Head into Stella Montis
- Prioritize Assembly, Communications, Medical, and similar high-density sectors
- Breach carefully — enemy pressure is high
The payoff is excellent if you manage to extract, thanks to Stella Montis’ rare-tier loot weighting.
Best Spots to Extract Safely Without Losing Hard-Earned Loot
- Use outer-edge Extraction Points with lower player traffic
- Favor extracts near terrain cover or vertical obstacles
- Always store Cooling Fans in your Safe Pocket before extraction
- If your goal is five fans, leave as soon as you hit your target
A safe exit is just as important as finding the item itself.
Final Takeaway: Use Routes That Match Your Gear and Playstyle
You don’t need to search every corner. Focus on:
- Cabinet-dense buildings
- Multi-floor tech structures
- Short, repeatable loops
- Safe, low-traffic extracts
Combine these habits and Cooling Fan farming becomes smoother, faster, and far more reliable — even when RNG isn’t on your side.
Visit Our Post Page: Blog Page