
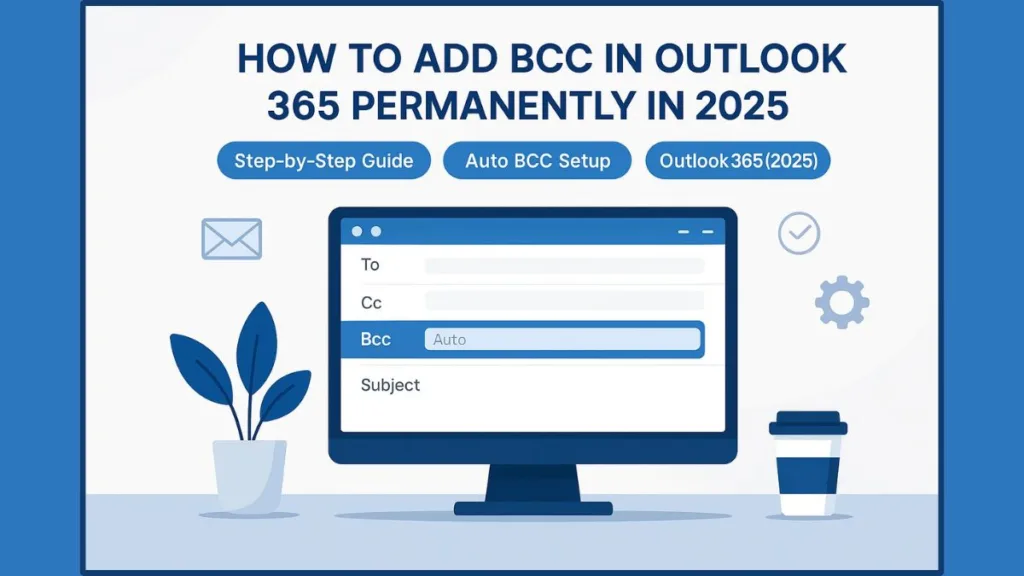
Learn how to add and keep the BCC field permanently visible in Outlook 365 in 2025. This step-by-step guide shows you how to automatically BCC all emails across desktop, web, and Mac. Helping you save time, protect privacy, and streamline communication.
Why Add BCC Permanently in Outlook 365
Email communication is at the heart of modern work, and a small feature like BCC (Blind Carbon Copy) can make a big difference in how professionally and privately you manage your messages. Whether you’re sending updates to clients, sharing announcements, or keeping internal stakeholders informed, using BCC helps you protect recipients’ privacy by keeping their addresses hidden from others.
However, many Outlook users find it inconvenient to manually enable the BCC field every time they compose a new message. It’s a repetitive step that can easily be forgotten, especially when you’re managing multiple emails throughout the day. By setting BCC to appear automatically, you not only save time but also ensure that your communication stays consistent and secure.
In this guide, we’ll show you how to make the BCC field permanently visible in Outlook 365—across desktop and web versions—so you can focus more on what matters: writing clear, private, and professional emails.
How to Permanently Add and Show BCC in Outlook 365 (Desktop, Web & Mac)
If you regularly send emails where privacy matters, keeping the BCC field permanently visible in Outlook 365 can save time and maintain consistency across all your communications. Outlook provides different ways to make this setting stick, depending on whether you’re using the desktop app (New or Classic Outlook), the web version, or the Mac app. Below is a complete, step-by-step guide for each version.
Enable BCC Permanently in New Outlook for Windows 10/11
The New Outlook for Windows offers a cleaner and faster interface, but by default, the BCC field is hidden to simplify the view. If you want to make it appear automatically while composing new emails or replies, follow these detailed steps:
- Open New Outlook on your Windows 10 or 11 computer.
- Click New Mail to open a blank message window or open any email and select Reply or Reply All.
- On the message ribbon, navigate to the Options tab.
- In the Show Fields group, click on Show BCC.
- The BCC line will now appear under the “CC” field in your compose window.
- Add any recipient’s email address to this field whenever you need to send hidden copies.
- If you close the email window and reopen a new one, Outlook may or may not retain the visibility setting depending on your version. To ensure it stays, keep your Outlook app updated to the latest build, as Microsoft is actively improving how preferences are saved in New Outlook.
This setup allows you to quickly toggle BCC on or off for new messages without hunting through menus each time.
Permanently Show the BCC Field in Classic Outlook (Desktop App)
The Classic version of Outlook allows you to permanently display the BCC field across all new, reply, and forward windows. Once configured, you won’t need to enable it again. Here’s how to do it:
- Launch Outlook (Classic) on your PC.
- In the top-left menu bar, select the Home tab.
- Click New Email to open a new message window.
- Go to the Options tab in the email ribbon.
- Click BCC in the “Show Fields” section. You’ll see a new line labeled BCC appear under “CC.”
- Do not send or save this draft message — instead, close it directly.
- Outlook will automatically remember your preference to display the BCC field.
Pro Tip: If you want deeper customization, you can use VBA scripting to ensure the BCC field is always visible for every account profile. Advanced users can even automate adding specific recipients (like your own email for records). However, make sure to back up your Outlook settings before editing VBA scripts.
From now on, every time you compose, reply, or forward an email, the BCC line will appear by default.
Always Show BCC in Outlook 365 Web (Outlook on the Web)
If you prefer to use Outlook 365 on the web, enabling the BCC field permanently can be done through your settings panel. This setting stays linked to your Microsoft 365 account, so it applies wherever you log in.
- Go to Outlook on the web and sign in with your Microsoft 365 account.
- Click the Gear icon (Settings) in the top-right corner of the page.
- In the sidebar that opens, scroll down and click View all Outlook settings.
- Under Mail, choose Compose and Reply.
- Scroll to the section labeled Message Format.
- Check the box beside Always show BCC.
- Click Save before closing the window.
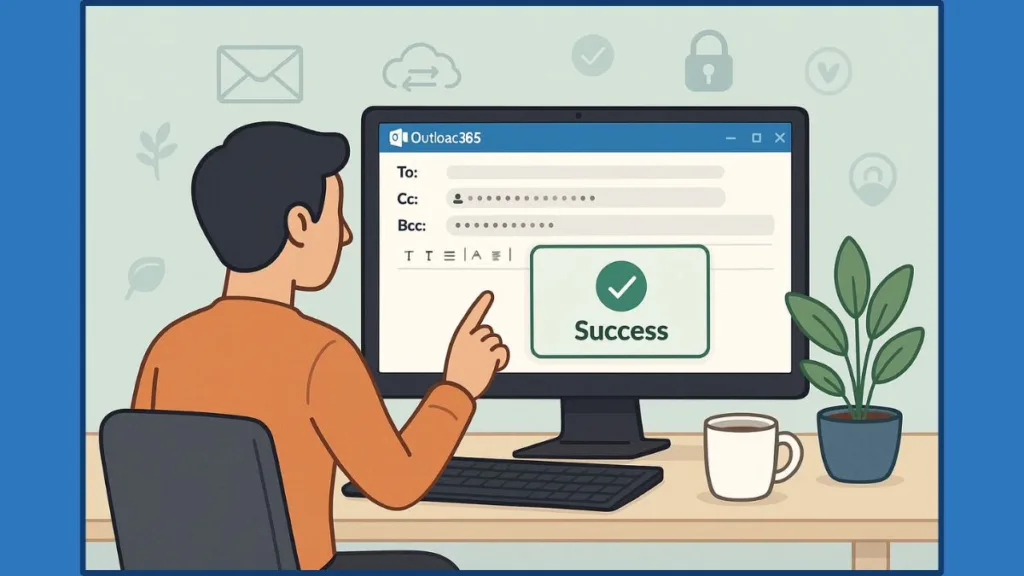
After saving, your preference is automatically synced. The BCC field will now appear every time you start a new email, reply, or forward — no additional setup required.
Enable BCC Field Permanently in Outlook for Mac
For Mac users, Outlook also provides a simple way to make the BCC field visible whenever composing messages. Here’s how:
- Open Outlook for Mac.
- Go to the menu bar and select Outlook > Preferences.
- Under the “Email” category, click Composing.
- In the Format and Fields section, find and select Show BCC field.
- Close the Preferences window to save your changes.
Once enabled, the BCC field will remain visible by default in every new message or reply window. This makes managing privacy straightforward across both personal and business accounts.
Having the BCC field permanently visible ensures that every email you send is composed thoughtfully and securely. It reduces manual steps, helps maintain recipient privacy, and streamlines your workflow — especially when managing client lists or sending professional updates that require discretion.
How to Automatically BCC Yourself or Others in Outlook 365
If you frequently need to send copies of your emails to a specific address—such as your manager, your CRM system, or even your personal backup—automating the BCC process can save a lot of time. Outlook 365 offers two reliable ways to achieve this: by using mail flow rules in the Exchange admin center or by setting up a VBA (Visual Basic for Applications) script within the desktop app.
Both approaches allow you to streamline your workflow without manually adding BCC recipients every time you send an email.
How to Automate BCC Using Mail Flow Rules in Microsoft 365 Admin Center
While the standard Outlook desktop app doesn’t have a built-in “Auto BCC” feature, Microsoft 365 administrators can create a mail rule that automatically sends a hidden copy of all outgoing emails to a chosen address. This is especially useful for business accounts or shared mailboxes that require consistent record-keeping and compliance monitoring.
Here’s how to do it step-by-step:
- Log in to the Microsoft 365 Admin Center: Visit admin.microsoft.com and sign in with your admin credentials.
- Access the Exchange Admin Center (EAC): Once logged in, open the navigation menu and go to Admin centers > Exchange. This will open the Exchange dashboard in a new tab.
- Open Mail Flow Settings: From the left sidebar, click Mail Flow. Then, under the top navigation bar, select Rules to manage message-handling policies.
- Create a New Rule: Click the + Add a Rule button, then choose Apply disclaimers or custom actions. This opens the rule configuration window.
- Name Your Rule: In the Name field, type a clear identifier such as Auto BCC for Outgoing Emails to make it easier to find later.
- Specify When the Rule Applies: Under Apply this rule if, choose The sender is…, and then select the account or group of accounts this rule should apply to.
- Set the BCC Action: Under Do the following, choose Bcc the message to…, and enter the email address that should receive the automatic blind copy (for example, manager@yourcompany.com).
- Save and Activate the Rule: Review the configuration carefully, click Save, and make sure the rule is turned On.
Once active, this rule ensures every email sent by the specified user(s) includes a hidden BCC recipient automatically—no need to add it manually.
Tip: “If you only need BCC automation for your own account and not for an entire organization, consider using an Outlook Auto BCC add-in like Ablebits Auto BCC for Outlook or Sperry Software Always BCC. These tools are easier to configure and don’t require admin permissions.”
How to Automate BCC with VBA Script in Outlook Desktop App
For users who manage their own Outlook setup, a VBA (Visual Basic for Applications) script can help automate BCC without requiring admin access. This method gives you complete flexibility—you can choose specific addresses, conditions, or actions for the automation.
Follow these steps to set up a VBA Auto BCC in Outlook:
- Open Outlook Desktop (Classic Version): Launch Outlook on your Windows device and ensure you’re using the desktop version, not Outlook on the web.
- Access the VBA Editor: Press Alt + F11 to open the Microsoft Visual Basic for Applications window.
- Locate ThisOutlookSession: In the left-hand Project Explorer, expand “Microsoft Outlook Objects,” then double-click ThisOutlookSession.
- Insert the VBA Code: Copy and paste the following code into the editor window:
Private Sub Application_ItemSend(ByVal Item As Object, Cancel As Boolean) Dim objRecip As Recipient Set objRecip = Item.Recipients.Add("youremail@example.com") objRecip.Type = olBCC objRecip.Resolve End Sub - Customize the Email Address: Replace
"youremail@example.com"with your preferred BCC recipient’s email address. - Save the Script: Go to File > Save, then close the VBA editor.
- Enable Macros in Outlook: To ensure the script runs automatically, go to File > Options > Trust Center > Trust Center Settings > Macro Settings and select Notifications for all macros or Enable all macros (depending on your organization’s policy).
- Restart Outlook: Close and reopen Outlook to apply your VBA automation settings.
Now, every time you send an email, Outlook will automatically include the chosen address in the BCC field, running silently in the background.
Tip: If your organization has restricted macro execution, ask your IT administrator before applying VBA automation. You can also export and reuse this script on another computer by saving it as a
.basfile.
Choosing Between Outlook Rules and VBA for Auto BCC
Both Rules and VBA serve the same purpose—automating BCC—but they cater to different needs:
- Mail Flow Rules (Admin Method): Ideal for companies, shared mailboxes, or teams that need standardized tracking and compliance. It works globally across user accounts.
- VBA Script (Personal Method): Best for individual users who want custom automation within their own Outlook setup. It’s flexible and doesn’t require administrative rights.
Pro Tip: If you want a simple, no-code solution, third-party tools like Sperry Software Always BCC or Ablebits Auto BCC make it easy to configure automatic BCCs with conditions such as specific senders, subjects, or folders—all without scripting.
By automating BCC using rules, VBA scripts, or Outlook add-ins, you eliminate repetitive steps and ensure every message is securely copied where it needs to go. These methods help Outlook 365 work smarter—so you can focus on communication rather than configuration.
Best Practices for Using BCC in Outlook 365 Effectively
Using the BCC (Blind Carbon Copy) field in Outlook 365 goes beyond simply hiding recipients — it’s about maintaining privacy, professionalism, and clarity in your communication. When used correctly, it can make your emails look cleaner, reduce inbox clutter for others, and ensure sensitive information remains confidential. However, because of how easily it can be misunderstood, it’s important to use BCC thoughtfully and strategically.
Respect Recipient Privacy with BCC in Outlook 365
One of the most valuable uses of BCC is protecting your recipients’ identities. When you send a message to a group of people who don’t know each other, listing them all in the To or CC fields exposes their email addresses to everyone. Using BCC keeps those details private while still ensuring everyone gets the same message.
This is especially important when sending announcements, newsletters, or invitations to multiple recipients outside your organization. By keeping addresses hidden, you demonstrate professional discretion and protect your contacts from potential misuse or spam.
If you regularly communicate with clients or external vendors, BCC also ensures compliance with data protection policies that require you to keep contact information confidential.
Tip: Before sending a group email, pause and ask yourself — do all recipients know one another? If not, the BCC field is your best friend for maintaining privacy and professionalism.
2. Avoid Overusing the BCC Field in Outlook
While the BCC feature is useful, relying on it too often can lead to confusion or mistrust. Overusing it—especially in professional exchanges—can give the impression of secrecy. If a colleague finds out they were copied discreetly on a message, it could erode trust or transparency.
Instead, use BCC only when necessary. For example, if you need to copy your manager on correspondence for visibility or recordkeeping, BCC is appropriate. However, if that person is expected to respond or engage, include them in the CC field instead.
It’s all about context—BCC is a quiet observer, not an active participant.
Tip: Ask yourself before adding a BCC: Would I be comfortable if the main recipient knew this person received the message? If the answer is no, reconsider using BCC.
3. Prevent Junk Mail and Spam Issues When Using BCC
Some spam filters treat emails with multiple BCC recipients as suspicious, as this technique is often used by spammers. To avoid your email ending up in the Junk Email folder, always send BCC messages from a verified domain and ensure recipients have added you to their Safe Senders list.
Here’s how you can prevent delivery issues:
- Keep your list of BCC recipients short.
- Avoid using BCC for mass emails—use an email marketing tool or mail merge instead.
- Ensure your email domain uses proper SPF, DKIM, and DMARC authentication for deliverability.
For organizations, configuring these authentication settings through the Microsoft 365 Admin Center can significantly improve message trustworthiness.
Tip: If you’re unsure whether your message will bypass spam filters, test it by sending to a few accounts first. This small step ensures your emails reach every inbox safely.
4. Be Cautious with Distribution Lists and Rules in Outlook 365
When using distribution lists (grouped contacts), placing them in the BCC field may cause issues with email sorting. Many users set up rules and alerts in Outlook that rely on seeing the recipient name in the To or CC field. If your message uses BCC instead, it might bypass their rules and end up in the wrong folder—or be missed entirely.
If you often send messages to the same group of people, it’s more efficient to use Outlook’s Contact Groups feature. This lets you manage members easily and ensures everyone’s messages are handled properly.
You can create one by going to Home > New Items > More Items > Contact Group, adding your recipients, and naming it appropriately. Then, use To or CC instead of BCC when communication transparency is required.
Tip: For frequent group communication, replace BCC lists with Contact Groups or shared mailboxes. This helps your recipients manage emails better and keeps your workflow more organized.
5. Manage ‘Reply All’ Chaos Using the BCC Field
One of the most practical uses of BCC in Outlook 365 is preventing “Reply All” overload—a common issue when multiple recipients start responding to the same thread. By placing all recipients in the BCC field, you prevent them from replying to everyone else on the list.
This is perfect for large announcements, company-wide messages, or project updates where you only expect replies from specific people.
If you’ve already sent a message and replies are spiraling out of control, you can regain control by sending a follow-up email:
- Click Reply All to the existing thread.
- Move the distribution list or recipients from To into the BCC field.
- Add only your own name in the To field.
- Write a note politely requesting that people respond directly to you.
Example:
“I appreciate everyone’s input. To reduce inbox clutter, I’ve moved the group to BCC. Please reply directly to me if you have additional feedback.”
Tip: When managing large groups or announcements, always use BCC from the start—it saves you and others from unnecessary email noise.
6. Combine BCC with Email Etiquette and Communication Clarity
Using BCC responsibly in Outlook 365 is about balancing efficiency with transparency. The field should never be used to secretly copy someone or share information behind another person’s back. Instead, think of it as a tool for maintaining organized and secure communication.
Before hitting send, double-check who’s included in each field. Make sure BCC recipients are there for legitimate reasons, such as recordkeeping, compliance, or privacy. Maintaining this discipline not only builds trust and credibility, but also keeps your communication process professional and respectful.
Tip: Use BCC to simplify—not complicate—email communication. When used ethically and thoughtfully, it reinforces professionalism and preserves privacy for everyone involved.
Using BCC in Outlook 365 effectively ensures privacy, cleaner email threads, and better communication control. By following these best practices, you can make every email not only efficient and secure but also a reflection of professionalism and respect toward your recipients.
Troubleshooting: When the BCC Option Doesn’t Show Up in Outlook 365
If the BCC field suddenly disappears or doesn’t appear where you expect it to, don’t worry — this is a common issue in Outlook 365. Sometimes it happens after an update, or when your email settings reset. Other times, you may be using a different layout or sending format (like HTML vs. Plain Text) that hides the field. Whatever the cause, getting it back is quick once you know where to look.
1. Check If the BCC Field Is Hidden in the Message Window
In most cases, Outlook simply hides the BCC field by default. To reveal it:
- Open a new email in Outlook.
- Go to the Options tab at the top of the message window.
- Click on BCC in the “Show Fields” section.
- You’ll now see the BCC field appear right below the “CC” field.
From this point forward, Outlook usually remembers your choice and keeps it visible for all future emails.
Tip: If you open multiple email windows, remember that each one keeps its own display settings. Turning on BCC in one doesn’t automatically activate it in others — so double-check before sending.
2. Ensure You’re Using the Correct View Mode in Outlook
Sometimes, the BCC field doesn’t show up because the message view is set to a simplified mode, like Simplified Ribbon or Minimal View, which hides some layout options. To fix this:
- Click on the small downward arrow or ‘More Options’ icon on your ribbon to expand the full view.
- Select Classic Ribbon to bring back all menu tools.
- Under the Options tab, click BCC again to ensure it’s visible.
If you’re using Outlook on the web (OWA), click on “BCC” in the message compose toolbar to toggle it on. Once enabled, it remains visible in subsequent emails.
Tip: Switching between web and desktop versions can reset your display preferences. If BCC appears missing after switching devices, re-enable it once — Outlook will remember your choice moving forward.
3. Verify That You’re Composing in the Right Format (HTML or Plain Text)
The email format you’re using can occasionally affect which fields appear. In Outlook 365, composing in Plain Text mode may simplify the layout and hide advanced options like BCC.
Here’s how to fix it:
- Open a new message.
- Go to the Format Text tab.
- Choose HTML or Rich Text instead of Plain Text.
- Go back to the Options tab and click BCC again.
Switching to HTML mode not only restores layout options but also gives you access to formatting tools and signature templates.
Tip: HTML format keeps your emails visually organized and fully functional. If your BCC field vanishes often, check that Outlook isn’t defaulting to Plain Text mode.
4. Check for Outlook Updates or Add-in Conflicts
If BCC still won’t appear even after enabling it manually, there might be a deeper configuration issue caused by outdated software or conflicting add-ins. These are small extensions that can interfere with Outlook’s UI.
Here’s how to troubleshoot this issue:
- Go to File > Office Account > Update Options > Update Now to ensure your Outlook is up to date.
- If the problem persists, open Outlook in Safe Mode by holding Ctrl while launching the app, or typing
outlook.exe /safein the Run dialog (Win + R). - In Safe Mode, open a new message and check if BCC appears.
- If it does, the issue is likely caused by an add-in.
- Go to File > Options > Add-ins, then click Go next to “COM Add-ins.”
- Uncheck unnecessary or outdated add-ins, click OK, and restart Outlook normally.
Tip: Outlook add-ins can be powerful, but too many can clutter your workspace or hide key features. Keep only those that you truly use regularly.
5. Reset Outlook’s Custom Views or Profile
If none of the above fixes work, your Outlook view settings might be corrupted. This can happen over time or after a major Windows or Office update. You can reset them safely:
- Close Outlook completely.
- Press
Win + Rto open the Run window. - Type
outlook.exe /cleanviewsand hit Enter.- This command resets all custom view settings to their default state.
- Reopen Outlook, start a new message, and enable BCC again from the Options tab.
If you still face issues, create a new Outlook profile:
- Go to Control Panel > Mail > Show Profiles > Add, and set up your account again.
- Open the new profile and check if the BCC field now appears consistently.
Tip: Before resetting views or creating a new profile, back up your Outlook data file (.pst or .ost) to avoid losing custom settings or stored emails.
6. BCC Field Missing Only in Replies or Forwards
In Outlook 365, the BCC field only appears in new messages by default. When replying or forwarding an email, Outlook hides the BCC field unless you enable it manually in the reply window.
To make it appear:
- Click Reply, Reply All, or Forward.
- Go to the Options tab in the new window.
- Click BCC to toggle it on.
You can also create a macro or Quick Step if you frequently use BCC in replies.
Tip: If you use BCC in most replies, setting up a Quick Step to include BCC automatically can save time and reduce the chance of forgetting it.
7. Check Organizational or Admin Restrictions
In some cases, Outlook 365 administrators disable the BCC field for compliance or internal communication policies. If you’re using a work or school account, your admin might have set these restrictions.
If you suspect this, contact your IT administrator and ask if there are mail flow rules or policy settings that hide or restrict BCC. They can confirm and, if appropriate, adjust your permissions.
Tip: Company-managed Outlook environments may limit certain features for privacy or recordkeeping. Always check with your IT team before making changes to system policies.
When the BCC field disappears, it’s rarely a permanent issue — it’s usually a small setting or layout glitch. By checking your message options, view mode, and add-ins, you can restore it quickly and continue managing your email privacy with confidence.
FAQs: Common Questions About Adding and Using BCC in Outlook 365
How do I make the BCC field automatically appear in Outlook 365?
You can easily set Outlook to always show the BCC field. In Outlook for Windows (New), go to Settings > Mail > Compose and reply, then check the box labeled Always show BCC. In Classic Outlook, simply open a new email, go to Options > BCC, and close the email without saving—it will remain visible in future messages.
Can I automatically BCC myself or someone else in every outgoing email?
Yes, Outlook allows this through automation. You can create a rule that BCCs a specific address for every message you send. For more advanced customization, you can use VBA scripts or add-ins like Auto BCC for Outlook to manage this automatically.
Why can’t I see the BCC field when composing emails?
If the BCC option is missing, it’s usually because it hasn’t been enabled in the message window. In the Options tab, look for Show Fields and select BCC. For Outlook on the web, open Settings, navigate to Mail > Compose and reply, and enable the option there.
Can recipients see who I’ve added in the BCC field?
No, recipients added in the BCC field remain invisible to others. This is why BCC is ideal for keeping recipient information confidential or when sending mass emails discreetly. However, remember that overusing it may trigger spam filters if you’re sending bulk emails frequently.
What’s the difference between CC and BCC in Outlook?
CC (Carbon Copy) lets all recipients see who else received the message, while BCC (Blind Carbon Copy) hides those details. Use CC when collaboration or transparency is needed, and BCC when privacy is the priority.
How do I view BCC recipients after an email has been sent?
Outlook typically hides BCC addresses in sent messages for security. However, you can use Advanced Print options or certain Outlook add-ins to include BCC information when printing or archiving emails. If you’re using Outlook with Exchange, your administrator may also help retrieve that data for auditing purposes.
Is there a way to add BCC in the Outlook mobile app?
Yes, open a new message in the mobile app, tap the three dots (⋯) or arrow icon, and choose Show BCC. Once visible, you can add recipients manually each time you compose a new email.
Does enabling BCC permanently affect my email’s delivery or spam rate?
Not directly—but using BCC excessively can cause emails to be flagged as spam if recipients or filters view it as suspicious. To avoid this, keep your Safe Senders List updated and use BCC responsibly for privacy, not mass marketing.
Can I set a default BCC for all users in my organization?
Yes, administrators can use the Exchange Admin Center (EAC) to create a mail flow rule that automatically BCCs a designated address for all outgoing messages. This is commonly used for compliance tracking or centralized logging.
Why does my BCC field keep disappearing after restarting Outlook?
This typically happens if Outlook settings weren’t saved correctly or if your version reverted to default mode after an update. To fix it, reopen a new email, re-enable the BCC field, and close the message without saving. This ensures your preference is stored permanently.
Conclusion: Simplify Email Privacy by Enabling BCC Permanently in Outlook 365
Mastering how to add and enable BCC permanently in Outlook 365 isn’t just about convenience—it’s about maintaining professionalism, efficiency, and privacy in every message you send. Once you configure Outlook to always show the BCC field, you eliminate repetitive steps and reduce the risk of exposing recipients’ email addresses unintentionally.
For those who send frequent bulk communications or manage multiple contacts, having BCC active by default ensures that every message remains discreet and well-organized. Whether you use Outlook on the web, desktop, or mobile app, this small setup change can streamline your workflow and make your communication process more secure and polished.
Beyond simply turning on the BCC field, take time to understand its role in your communication strategy. Using it wisely shows respect for recipients’ privacy and demonstrates professionalism—something that’s especially important in workplaces, client interactions, and large mailing lists.
Tip: Always review your recipient list before hitting send. Even with BCC enabled, thoughtful email management prevents confusion and maintains trust.
If you want to take this a step further, consider automating BCC using Outlook’s built-in rules, Quick Steps, or VBA scripts. These tools can automatically copy yourself or a designated address on every outgoing email—ideal for keeping track of sent messages or ensuring records are stored properly in a shared mailbox.
The flexibility of Outlook 365 gives you complete control over how you manage visibility, automation, and organization. Once you’ve set your BCC preferences permanently, you’ll notice how much smoother and safer your communication becomes.
In a world where privacy and professionalism go hand in hand, enabling BCC by default is one of the simplest yet most effective ways to maintain control over your emails. By following the right steps and applying a few smart practices, you can make Outlook 365 work exactly the way you need—efficient, consistent, and privacy-focused.
Useful Resources for Managing and Automating BCC in Outlook 365
Microsoft Support – Show, Hide, and View the BCC Field in Outlook for Windows: A clear, official walkthrough from Microsoft on how to enable or hide the BCC field in your Outlook client. Perfect for users who are new to the feature or need a quick reference.
Office 365 IT Pros – Using Mail Flow Rules to Auto-BCC Emails: A professional guide that explains how to set up mail flow (transport) rules in Exchange or Office 365 to automatically BCC specific addresses. Great for teams and administrators.
Microsoft Learn – Mail Flow Rule Actions in Exchange Online: An in-depth technical reference for configuring mail flow rules, including how to automate the BCC process securely within your organization’s email system.
Microsoft Tech Community – Auto BCC in Microsoft 365 Outlook Discussion: A helpful community thread where users share real-world solutions, experiences, and troubleshooting ideas related to automating BCC in Outlook 365.
Visit Our Post Page: Blog Page