
Struggling to connect a printer to your Mac? This guide covers 10 methods to add USB, wireless, AirPrint, Bluetooth, and IP printers on macOS, plus fixes for printers not showing up.
How Printer Setup Works on macOS
Getting a printer to work on your Mac might seem a little technical at first, but the good news is that macOS is designed to make the process surprisingly smooth.
Whether you’re using a USB, Wi-Fi, Bluetooth, or network printer, your Mac has built-in tools that help you get everything connected without the usual guesswork.
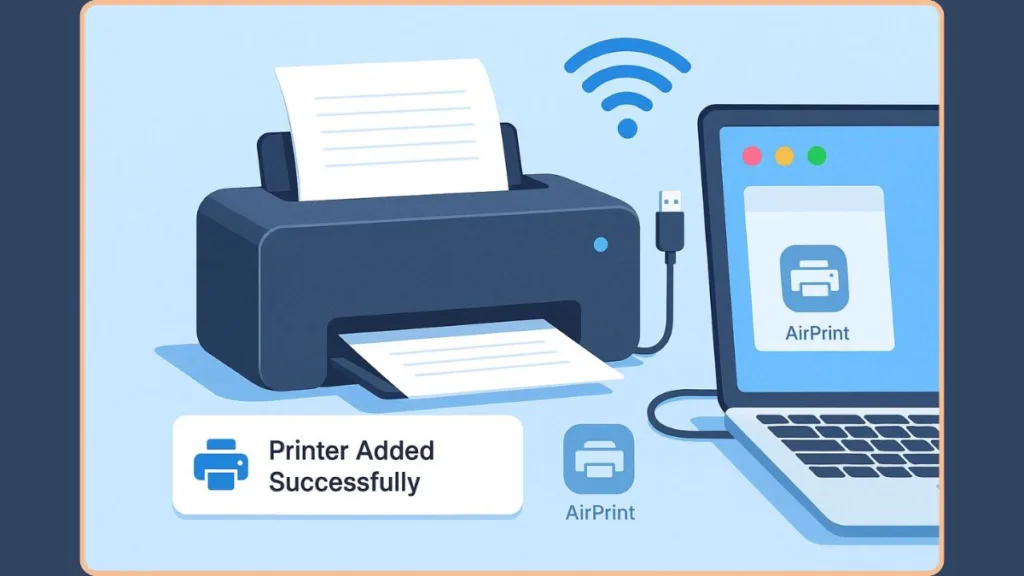
macOS relies on AirPrint, Apple’s driver-free printing technology, which lets many printers work instantly without installing extra software.
For printers that don’t support AirPrint, macOS handles the required driver setup for you, often automatically.
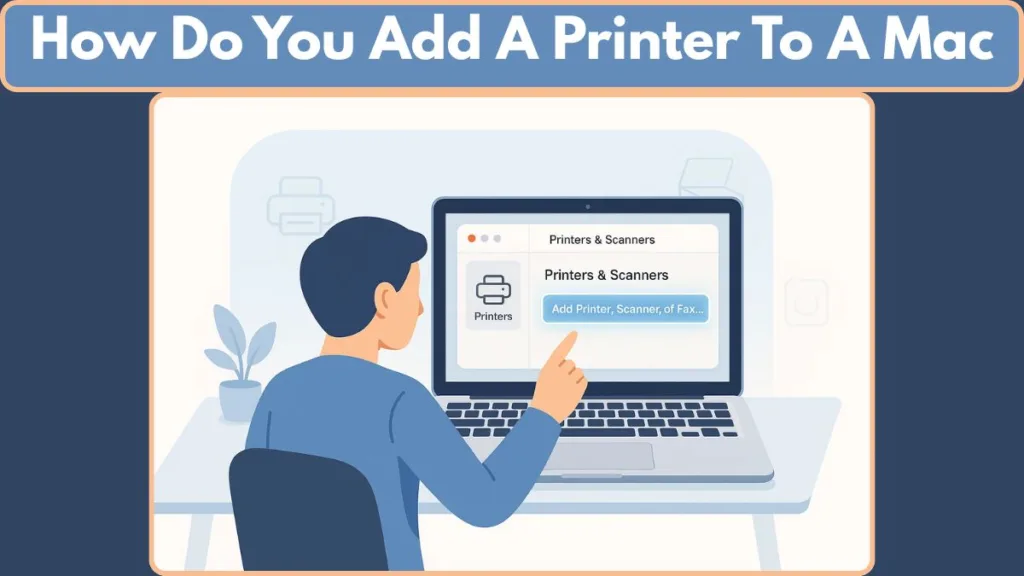
The main control hub for all printing tasks is System Settings > Printers & Scanners, where you add, manage, and customize printers.
Once you know where to look, setting up your device becomes straightforward — and that’s exactly what this guide is here to help you with.
In the sections ahead, you’ll learn how to connect any type of printer to your Mac with simple, step-by-step methods.
Before You Start: Essential Mac & Printer Preparation Checklist for Smooth Setup
Before diving into the actual setup, it helps to make sure your Mac and printer are both ready to go.
A little preparation upfront saves a lot of frustration later, especially when you’re dealing with wireless printers, older models, or printers that require special software.
Here’s a simple checklist to guide you:
Update Your macOS for Better Printer Compatibility
Your Mac works best with the latest printing tools built directly into the system.
Why it matters: Updating macOS ensures you have the most recent AirPrint improvements, driver compatibility fixes, and security updates that help your printer communicate smoothly with your Mac.
Tip: Go to Apple Menu > System Settings > General > Software Update to check for updates.
Prepare Your Printer Hardware Before Connecting to macOS
Before any software setup, make sure the printer itself is ready.
- Load paper into the tray
- Check ink or toner levels
- Make sure all protective seals (on new printers) are removed
- Confirm the printer shows no error messages
- Power it on and let it complete its startup process
If the printer has a small display, ensure it’s not showing alerts like “Low Ink,” “Paper Jam,” or “Check Cartridge.”
Connect Your Printer to Wi-Fi for Wireless Printing on macOS
A Wi-Fi printer must be connected to your network before your Mac can detect it.
- Use the printer’s control panel or mobile app to join your Wi-Fi
- Select the correct network name (SSID)
- Enter your Wi-Fi password accurately
- Prefer a 2.4 GHz network, as many printers don’t support 5 GHz bands
Important: Your Mac and printer must be on the same Wi-Fi network for AirPrint and wireless discovery to work reliably.
Install Required Printer Drivers for Non-AirPrint Models
Most modern printers work instantly through AirPrint, but older or specialized models may need extra software.
- Visit the manufacturer’s website (HP, Canon, Epson, Brother, Kyocera, etc.)
- Download the latest macOS printer drivers
- Install utilities needed for scanning, duplexing, or advanced printing features
- Restart your Mac after installation for best results
Some manufacturers delay updates after new macOS releases, so checking for compatibility notes helps avoid connection issues.
Gather Network Printer Details for IP-Based Setup
If you’ll be adding a printer using advanced methods like IP setup, prepare these details in advance:
IP Address (e.g., 192.168.x.x)
Hostname (e.g., printer.office.local)
Protocol (AirPrint, IPP, LPD, HP JetDirect)
Queue name, if required for enterprise printers
Verify USB Cable & Adapter Requirements for Wired Printer Setup
If you’re using a wired printer:
- Ensure the USB cable is Type-B to USB-A or USB-C compatible
- Newer MacBooks often require a USB-C adapter or multiport hub
Low-quality adapters can cause the printer to appear offline or fail to respond.
With these essentials in place, your Mac is fully prepared for a smooth, frustration-free setup. The next sections will walk you through connecting your printer using any method you prefer — from USB to Wi-Fi, Bluetooth, IP, WPS, and more.
10 Methods to Add a Printer to a Mac: Complete Step-by-Step Guide
Adding a printer on macOS can be done in several ways depending on how your printer connects — USB, Wi-Fi, Bluetooth, WPS, IP, or even a Windows-shared device.
Each method has its own workflow, and the right one for you depends on the type of printer you have and how you prefer to use it.
Below, you’ll find all 10 methods, explained clearly and in a friendly, easy-to-follow way — with up-to-date info and helpful context from Apple and printing standards.
Method 1: Add a USB Printer to Your Mac — Easiest Plug-and-Play Setup
USB printers remain one of the most reliable options because they avoid Wi-Fi issues entirely.
A USB printer usually appears automatically in System Settings > Printers & Scanners as soon as you connect it.
Here’s how to complete the setup:
You can connect the printer using a USB Type-B to USB-A or USB-C cable, depending on what your Mac supports.
If you’re using a newer MacBook with only USB-C ports, a USB-C adapter or hub will be necessary to plug in the cable.
Power on the printer and give macOS a moment to detect it. Open Printers & Scanners, where the printer should appear instantly. If it doesn’t, click Add Printer, Scanner, or Fax… and select it manually.
USB printers are great for anyone who wants a stable, cable-based connection without dealing with network configurations.
Method 2: Add a Wi-Fi Printer to Your Mac — Connect Wireless Printers Easily
Most modern printers support wireless printing, allowing you to print from anywhere in your home or office network.
Here’s how to add one:
Use your printer’s control panel (or its companion app) to connect it to your Wi-Fi network.
Make sure your Mac is connected to the same Wi-Fi network, since features like AirPrint rely on shared network access.
Open System Settings > Printers & Scanners. Click Add Printer, Scanner, or Fax… and wait for your printer to appear. Select it and click Add to finish.
Wireless printers work best with AirPrint, which avoids the need for additional drivers or complex setup.
Method 3: Manually Add a Printer on Mac — When Auto-Detection Fails
If your printer doesn’t appear immediately, you can still connect it manually.
Make sure the printer is powered on, and if it’s wireless, double-check that it’s properly connected to your Wi-Fi network.
Open System Settings > Printers & Scanners. Click Add Printer, Scanner, or Fax…. Check the Default tab or wait briefly — printers often show up after a moment.
Select your printer and click Add.
Manual addition is especially helpful if your network is crowded or the printer takes time to broadcast its signal.
Method 4: Add a Network Printer to Mac Using Its IP Address — For Advanced & Office Use
Network printers often require you to add them using their IP address or hostname.
Here’s how:
Go to System Settings → Printers & Scanners. Click Add Printer, Scanner, or Fax….
Switch to the IP tab (the globe icon). Enter the printer’s IP address, such as 192.168.x.x, or its hostname. Choose a Protocol — commonly AirPrint, IPP, LPD, or HP JetDirect/Socket. Fill in a Queue name if needed, then assign a Name, Location, and select the appropriate driver/software. Click Add to finish.
This method is ideal for office printers, enterprise environments, and printers that don’t appear automatically.
Method 5: Add a Bluetooth Printer to Your Mac — Wireless Setup Without Wi-Fi
Bluetooth printers are helpful when you want wireless printing without relying on Wi-Fi.
Here’s how to set one up:
Enable Bluetooth on both your Mac and the printer. Some printers require enabling Bluetooth discoverability.
Open System Settings > Printers & Scanners. Click Add Printer, Scanner, or Fax… and wait for the device list to update. Select your Bluetooth printer and click Add.
Bluetooth printers are excellent for portable or compact printers, though they have a limited range.
Method 6: Add a Printer to Mac via WPS — Quick Wi-Fi Setup With a Button Press
If both your printer and router support WPS (Wi-Fi Protected Setup), your printer can join the network easily.
Press the WPS button on the printer to begin pairing. Within two minutes, press the WPS button on your Wi-Fi router. Once connected, go to Printers & Scanners. Click Add Printer…, and your printer should appear on the list.
WPS is ideal for printers without screens or manual Wi-Fi controls.
Method 7: Add a Printer on Mac Using a Configuration Profile — For Managed / Enterprise Printers
Some enterprise or school printers need a configuration profile to work correctly.
Download the configuration profile provided by your IT team or printer manufacturer. Double-click the file to begin installation, following the prompts that appear.
Go to System Settings > Profiles to confirm that the profile is installed.Open Printers & Scanners and click Add Printer, Scanner or Fax…. Select the printer from the list and click Add.
Profiles ensure that printers requiring authentication, permissions, or special network settings work properly.
Method 8: Add a Windows-Shared Printer to Your Mac — Sharing Across Mixed OS Setups
If the printer is connected to a Windows computer, you can still access it from your Mac.
Make sure the Windows user has enabled printer sharing.
Open System Settings > Printers & Scanners on your Mac. Click Add Printer, Scanner or Fax…. Browse the Windows Workgroup to locate the shared printer. Select it — you may be asked for the Windows username and password. Choose the appropriate driver or a compatible generic one, then click Add.
This setup is perfect for homes or offices using both Windows and macOS systems.
Method 9: Add a Mobile or AirPrint Printer on macOS — Simplest Wireless Printing for Apple Devices
AirPrint is the fastest way to print without installing extra software.
Connect your printer to your Wi-Fi network. Make sure your Mac is on the same network.
Open System Settings > Printers & Scanners. Click Add Printer, Scanner or Fax…. Select the AirPrint printer from the list and press Add.
AirPrint also works with iPhone and iPad, making multi-device printing seamless.
Method 10: Add Enterprise or Office Printers on macOS Networks — For Complex Work Environments
Enterprise printers may require additional information and permissions.
Get the printer’s IP address, hostname, protocol, or queue name from your IT administrator.
Install any required drivers, authentication tools, or enterprise printing software.
Open Printers & Scanners and click Add Printer….
Depending on the setup, use the IP tab, Configuration Profile, or Network Discovery.
Select the correct driver and complete any required authentication prompts.
Office printers often support secure printing, PIN codes, and department IDs, so follow your organization’s instructions closely.
How to Find a Printer’s IP Address on a Mac
Tracking down your printer’s IP address can sometimes feel tricky — but macOS gives you a couple of reliable ways to find it, and there are alternate fallback methods too.
- Open System Settings > Printers & Scanners (or System Preferences on older macOS versions), and select the printer from the list.
- Click Options & Supplies (or “Printer Info/Details” depending on your macOS version). In many cases, the IP address appears next to Location or under the “Network” or “General” info tab.
If the IP doesn’t appear there, you have these fallback methods:
- Use the printer’s control panel (if available) to print a “Network Configuration Page” — this typically shows the IPv4 or network address assigned to the printer.
- On macOS, you can also enable the printing subsystem’s web interface:
- Open Terminal > Utilities
- Type
cupsctl WebInterface=yesand press Enter - Open a web browser and go to
http://localhost:631/printers/— this page lists all configured printers and often shows the IP or hostname under “Connection” or “Location.”
Knowing your printer’s IP address is especially useful when you’re using manual IP-based setup, connecting to office or network printers, or troubleshooting connectivity issues.
Customize Printer Settings After Adding Your Printer to macOS
Once your printer is added to macOS, you can tailor settings to match your printing needs — and macOS gives you a few useful tools for that.
- Go to System Settings > Printers & Scanners and select your printer. Then click Options & Supplies (or equivalent) to open its configuration panel.
- From here you can set a Default Printer — handy if you use multiple printers (home, office, shared) so macOS chooses your preferred one automatically.
- Check the Print Queue to manage or cancel pending print jobs; useful when jobs get stuck or you need to reorder printing.
If your printer supports it, some advanced features may be available under Options, such as:
Duplex / Two-Sided Printing: If your printer supports automatic double-sided printing, enable its “Duplex Unit” or “Two-Sided” option under the printer’s settings. Then, when you print, select Two-Sided in the print dialog and choose binding preferences (long-edge or short-edge) depending on how you want the pages oriented.
Paper Tray / Feed Options, Stapling / Finishing Settings, if your printer supports them — these usually appear under the printer’s Options or Finishing tab in the print dialog.
Also — if you like a certain configuration often (for example: duplex + grayscale + draft quality), you can save these as a Preset in macOS. That way, you don’t need to adjust settings every time.
Customizing printer settings helps you get consistent prints, avoid manual tweaks each time, and make the most of your printer’s capabilities.
Troubleshooting: Fix Printer Not Showing Up on Mac (Ultimate Detection & Connectivity Guide)
When your printer refuses to show up on your Mac, it can slow down your whole workflow. The good news? Most discovery issues come from a handful of common causes — and each one has a reliable fix.
Below is a detailed, user-friendly checklist to help you diagnose and solve the problem step by step.
Check Printer Power, Readiness & Error Indicators
Before diving into network or software fixes, confirm that your printer is fully operational.
- Make sure the printer is powered on, awake, and not in sleep mode.
- Look for any error icons, warning lights, or messages like Paper Jam, Low Ink, Toner Empty, or Cover Open.
- Some printers pause themselves after a long idle time — press the printer’s OK, Wake, or Resume button if available.
A printer stuck in an error state will not broadcast itself over Wi-Fi or USB, so it won’t appear in macOS.
Verify Matching Wi-Fi Networks: The #1 Reason for “Printer Not Found”
Wireless printers and macOS rely heavily on low-level discovery services like Bonjour and mDNS. These technologies only work when devices share the same Wi-Fi network.
- Your Mac and printer must connect to the same SSID (Wi-Fi name).
- Avoid having the Mac on 5 GHz while the printer is stuck on 2.4 GHz — some printers don’t support dual-band Wi-Fi.
- If you recently changed routers or passwords, reconnect your printer manually through its control panel.
If the printer is on a guest network, VPN, or isolated network, your Mac cannot detect it.
Restart Devices in the Correct Order: A Simple Fix That Works Wonders
A coordinated restart flushes cached network data and resets discovery protocols.
- Turn off the printer, unplug it briefly, and turn it back on.
- Restart your Wi-Fi router to refresh network assignments.
- Restart your Mac to reload services like Bonjour and CUPS.
This sequence resolves many cases where the printer “exists” but isn’t being advertised to macOS.
Inspect Printers & Scanners Panel for Offline, Paused, or Stuck Devices
Head to System Settings > Printers & Scanners and look closely at the printer list.
- A greyed-out printer labeled Offline, Paused, or Not Responding may be blocking your Mac from adding or detecting new ones.
- Open the Print Queue to check for stalled or frozen print jobs.
- Remove any printers you no longer use — old drivers can interfere with new installations.
A jammed queue or paused printer can prevent new devices from appearing in the list.
Recheck USB Cables, Ports & Adapters (For Wired Printers)
If you’re using a USB printer:
- Confirm the cable is fully inserted on both ends.
- Try switching USB ports on your Mac.
- If you’re on a USB-C–only MacBook, make sure you’re using a certified USB-C adapter or hub.
- Swap the cable with a known working one — faulty USB cables are far more common than people expect.
Low-quality hubs or cables can prevent macOS from detecting the printer entirely.
Check Driver Support or AirPrint Compatibility
macOS uses AirPrint as its preferred, driver-free printing technology. If your printer is AirPrint-compatible, it should appear automatically.
If not:
- Visit your printer manufacturer’s website and download the latest macOS driver.
- Install the driver, restart your Mac, and try adding the printer again.
- Some multifunction printers require additional software for scanning or duplex support.
Missing or outdated drivers often cause printers to “partially” appear or not appear at all.
Reset the macOS Printing System for a Full Refresh
This is a powerful reset option that clears corrupted printer settings.
- Open System Settings > Printers & Scanners.
- Control-click inside the printer list.
- Select Reset Printing System… (you’ll need admin access).
- macOS will remove all printers. Add yours again afterward.
This is a last-resort but highly effective fix — it rebuilds macOS’s entire printing subsystem.
Check Router Settings for Device Blocking or Isolation
Some routers have restrictive features that prevent printers from appearing.
Look for:
- MAC address filtering
- AP or client isolation
- Guest Wi-Fi
- Firewall blocking LAN devices
If any of these are on, your Mac will not see the printer.
Disabling isolation or adding your printer to allowed devices can instantly solve the issue.
Confirm Printer IP Address & Network Availability
If you’re adding the printer manually by IP and it’s not appearing:
- Print a Network Configuration Page from the printer.
- Confirm the printer has a valid IPv4 address (e.g., 192.168.x.x).
- Ensure the IP doesn’t belong to another device — IP conflicts cause discovery failures.
- Verify the subnet matches your Mac’s network (most home networks use 255.255.255.0).
A printer without a valid IP address will not appear on any Mac or iOS device.
Update macOS and Printer Firmware
Updates frequently include improvements for:
- Wireless stability
- AirPrint compatibility
- Driver patches
- Security fixes
- Printer discovery enhancements
Keeping both your Mac and your printer’s firmware updated ensures smooth communication.
If your printer suddenly stopped appearing after a macOS update, installing the latest printer firmware often fixes it.
Test the Printer on Another Device to Narrow Down the Issue
If your iPhone, iPad, or another Mac can detect the printer:
- The printer is functioning correctly.
- The issue is most likely related to a macOS configuration, driver, or network setting on the problematic device.
This helps you isolate the issue instantly — saving time and unnecessary troubleshooting.
Official User Guides for Popular Printer Brands
Here are the official user manuals & support pages for each major brand — short, useful, and ready for readers who want the manufacturer’s instructions or downloads.
- HP — User Manuals & Support: Official HP printer manuals, drivers and support resources (search by model).
- Canon — Official Manuals & Web User Guides: Canon’s online manual portal (PIXMA, MAXIFY, imagePROGRAF and more).
- Epson — Support, Manuals & Epson Connect: Epson’s printer support hub with manuals, drivers and Epson Connect setup.
- Brother — Manuals & Support Downloads: Brother’s model lookup for user guides, FAQs and Mac drivers.
Tip: Click the brand link, enter your printer model, then download the User Manual or Mac drivers for the most accurate, model-specific instructions.
Frequently Asked Questions: Short, Accurate Answers
Why is my Mac not finding my printer?
- Because the printer and Mac aren’t on the same Wi-Fi network (or network mismatch).
- Or the printer may be powered off, in error state, or stuck offline.
- Also, if the printer isn’t AirPrint-compatible and lacks proper drivers, macOS may fail to detect it.
How do I manually add a printer to my Mac?
Go to System Settings > Printers & Scanners > Add Printer > IP tab, then enter the printer’s IP address, select protocol (like AirPrint or IPP), and click Add.
Do I need to install drivers for printers on macOS?
Not if your printer supports AirPrint — macOS will print without extra drivers. But for older or non-AirPrint printers, you need to download and install the manufacturer’s macOS driver.
Where do I find printer settings on my Mac?
Open System Settings > Printers & Scanners. From there you can choose default printer, manage print queue, rename printer, or access advanced options like duplex printing or tray settings.
How do I check my printer’s IP address on a Mac?
Select the printer in Printers & Scanners, then go to Options & Supplies → General or Network tab — the IP should be listed there. Alternatively, print the printer’s Network Configuration Page from the printer itself.
What should I do if my printer shows “Offline” on macOS?
- Check power, connectivity (Wi-Fi or USB), and reboot printer — connection issues often cause “Offline” status.
- Remove and re-add the printer in Printers & Scanners.
- If still stuck, reinstall drivers or try a system printing reset to clear mis-configurations.
Can I print from iPhone or iPad to the same printer?
Yes — if your printer supports AirPrint and is connected to the same Wi-Fi as your Mac or iOS device, you can print from iPhone/iPad directly without extra setup.
How do I reset the printing system on macOS?
Go to Printers & Scanners, right-click on the printer list area, choose Reset Printing System…, then re-add your printer. This removes old queues, drivers, and lets you start fresh — great for persistent issues.
Can I connect a Mac to a printer shared from a Windows PC?
Yes — as long as Windows has Printer Sharing enabled, macOS can connect to it via network sharing and appropriate drivers.
Are all printers compatible with macOS?
Not all — but many modern printers support AirPrint or have macOS-compatible drivers. Before buying, check manufacturer specs for macOS support or AirPrint compatibility to avoid setup issues.
Final Tips: Essential Best Practices for Seamless Printing on macOS
As you wrap up your printer setup, a few final pointers can help keep everything running smoothly long after the initial installation.
Prioritize macOS Updates & Printer Firmware for Maximum Compatibility
Updates may feel routine, but they play a big role in stable printing. Apple recommends keeping macOS updated via Software Update to maintain compatibility with new printers and printing technologies.
New macOS releases frequently include printing fixes, AirPrint enhancements, and improved driver reliability.
Printer firmware updates also help fix bugs, strengthen Wi-Fi stability, and improve overall performance.
Choose AirPrint for the Most Reliable macOS Printing Experience
If your printer supports AirPrint, use it — it remains the most seamless and reliable printing method on macOS.
AirPrint avoids drivers entirely and works instantly with Mac, iPhone, and iPad, offering a consistent experience across your Apple ecosystem.
Ensure All Devices Stay on the Same Wi-Fi Network for Smooth Discovery
For wireless printers, your Mac and printer must stay on the same Wi-Fi network for features like Bonjour discovery to work properly.
This helps eliminate the classic “Printer Not Found” issue.
Most printers perform best on 2.4 GHz networks, especially older models.
Restart Your Devices to Resolve Random Printing or Connectivity Glitches
Printers can occasionally lag or freeze due to temporary network or cache issues. Restarting your Mac, printer, and router provides a clean reset.
This quick step often fixes:
- Slow printing
- Missing printers
- Jobs stuck in the queue
- AirPrint hiccups
Keep Your Printer Clean & Maintained for Better Print Quality
Routine care helps your printer stay dependable:
- Check ink/toner levels regularly
- Clean printheads or rollers if your printer offers maintenance tools
- Keep paper away from moisture
- Run built-in cleaning cycles when available
These habits help reduce jams and improve print quality.
Create Print Presets for Frequently Used Settings
If you regularly print using specific preferences — like two-sided printing, grayscale, or high-quality mode — saving them as Print Presets saves time.
Presets ensure consistent results without changing settings every time.
Use High-Quality USB Cables & Adapters for Wired Printing
If you’re using USB:
- Choose certified USB-C adapters
- Avoid weak or loose cables
- Keep cable lengths reasonable for stable communication
High-quality accessories prevent unexpected disconnects and recognition issues.
Revisit “Options & Supplies” After Adding New Printer Accessories
Anytime you upgrade printer hardware — like adding extra trays, duplex units, or memory — check your printer’s “Options & Supplies” panel.
macOS might not detect accessory upgrades automatically, so enabling them ensures you get full functionality.
Final Notes: Keep Your macOS Printing Workflow Smooth & Stress-Free
You now have everything you need to set up, operate, and maintain your printer confidently on macOS. Whether you’re using USB, Wi-Fi, Bluetooth, AirPrint, or IP printing, these best practices help ensure a smooth experience every time.
Printing on Mac doesn’t have to be complicated — with thoughtful setup and a bit of ongoing care, your printer stays fast, responsive, and ready when you need it.
Visit Our Post Page: Blog Page