
Do you want to secure your data by backing up your iPhone on Windows 10 or 11? Learn how to back up your iPhone to a Windows PC with easy methods that keep your data safe and accessible.
Backing up your iPhone to a Windows PC isn’t just a tech task—it’s a critical step in protecting your digital life. Whether you’re running Windows 10 or Windows 11, this complete, step-by-step guide will walk you through everything you need to confidently back up iPhone to PC without confusion or guesswork.
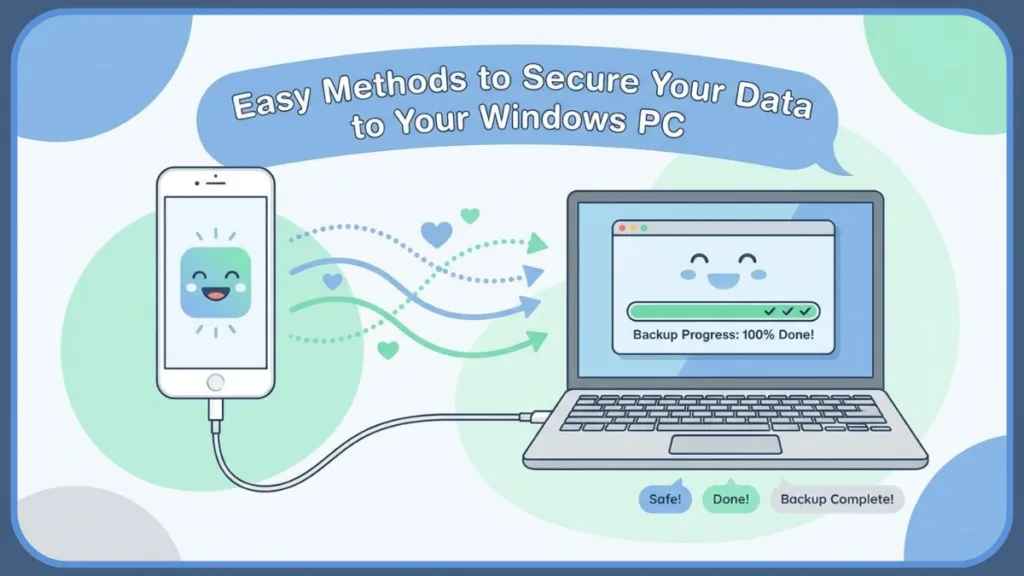
A local backup to your Windows machine gives you a full snapshot of your iPhone data, including photos, messages, app settings, and more.
Unlike relying solely on iCloud backup, this method doesn’t count against your cloud storage limit and keeps your data within your control, safely stored on your computer hard drive.
In the sections that follow, you’ll learn:
- How to back up using Windows-native tools
- How to handle backups with and without iTunes
- What to do if your iPhone doesn’t appear on your PC
- And smart tips to avoid common backup errors
This isn’t just technical instructions—it’s your data protection blueprint for long-term peace of mind.
Why Backing Up Your iPhone to a Windows PC Is More Important Than You Think
Think about everything stored on your iPhone: irreplaceable photos from family events, important text messages, work documents, and even saved Health data.
Now imagine losing all of that in an instant—due to a dropped phone, a failed iOS update, or accidental damage. The reality is that millions of people don’t regularly back up their device, putting their digital memories and critical files at serious risk.
That’s exactly why knowing how to back up iPhone to Windows PC should be at the top of your checklist. Here’s why this process matters so much:
Complete Data Protection (Beyond iCloud Limits)
While iCloud backup can automatically save your data to the cloud, it’s limited by storage caps and requires a stable internet connection.
A local backup to your Windows computer stores a full copy of your iPhone data that you can access instantly whenever you need it.
Full Control Over Your Data
Backing up to your own PC means you decide where your backup lives and how it’s managed—no third-party servers, no storage subscriptions, and no surprise limits.
Ready for Any Situation
From upgrading to a new iPhone to recovering after a crash or system error, a Windows PC backup lets you restore everything quickly. It’s especially valuable if you’re preparing to sell, trade-in, or reset your device.
Peace of Mind Every Time You Connect
Unlike cloud backups that happen only when your phone is idle, on Wi-Fi, and plugged in, a manual PC backup gives you immediate reassurance that all your essential data is safe before the next big change.
In short, if you depend on your iPhone for photos, communication, work, or personal records, backing it up to your Windows PC isn’t optional—it’s essential.
Why You Should Back Up Your iPhone to a Windows PC Instead of Relying Only on iCloud
Relying only on iCloud backup may feel convenient, but it isn’t always the most reliable or complete solution. If you truly want control, flexibility, and long-term security, you should back up your iPhone to a Windows PC as a primary or secondary option.
Here’s why a Windows PC backup gives you an edge over depending only on iCloud.
No Storage Limits Holding You Back
iCloud offers limited free storage, and once that space fills up, backups can fail silently.
When you back up iPhone to PC, your storage limit depends on your hard drive space, not a subscription plan. This makes local backups ideal for users with large photo libraries, videos, and heavy app data.
Works Even Without an Internet Connection
An iCloud backup needs a stable internet connection to complete successfully. A local iPhone backup on Windows works entirely offline.
As long as you have your Lightning or USB-C cable and PC, you can create a full backup anytime, making this method perfect for emergencies or slow networks.
Faster and More Predictable Backup Performance
When you back up iPhone to a Windows computer using a cable, the process is often faster and more stable than cloud backups. There’s no waiting for uploads to finish and no risk of Wi-Fi interruptions breaking the process.
More Reliable Before Major Device Changes
If you’re planning to update iOS, reset your iPhone, sell or trade in your device, or move to a new phone, a PC backup gives you a reliable restore point. You always know exactly when the backup was created and what it contains.
Using iCloud and PC Backups Together for Maximum Safety
We recommend a dual-backup strategy—use iCloud for automatic daily protection and Windows PC backups for full, manual snapshots. This way, your data stays protected even if one method fails.
In short, iCloud is convenient, but backing up your iPhone to a Windows PC gives you control, speed, and peace of mind, without ongoing storage costs.
Before You Start: What You Need to Back Up iPhone to a Windows PC Successfully
Before you begin the process to back up iPhone to Windows PC, taking a few minutes to prepare can save you hours of frustration later. A smooth backup depends on having the right tools, enough storage, and proper system settings in place.
Essential Requirements for a Successful iPhone Backup
To successfully back up your iPhone to a Windows PC, you need:
- A Windows computer running Windows 10 or Windows 11
- Your iPhone with its charging and data cable
- Either the Apple Devices app (for Windows 11) or iTunes (for Windows 10)
You should also ensure that your PC has at least 20–30 GB of free storage, especially if you have a large amount of photos, videos, or app data. Keeping your iPhone updated to the latest iOS version is equally important to avoid compatibility problems.
Tip: If your iPhone storage is nearly full, your backup size will be large. Always make sure your PC has enough free space before starting the backup.
Optional Setup That Improves Backup Reliability
Using a high-quality USB cable can prevent random disconnections during backup. Connecting an external hard drive adds an extra layer of protection and storage flexibility.
Keeping your iPhone charged above 50% or plugged in during the backup helps avoid interruptions, and maintaining an updated Windows system ensures smoother device detection and faster performance.
Deciding Whether to Enable Encrypted Local Backup
You should decide early whether to enable encrypted local backup. Encryption is essential if you want to store Health and Activity data, saved passwords, Wi-Fi settings, and website credentials.
Important: If you encrypt your backup, the password cannot be recovered. You must store it safely. Without this password, the backup becomes permanently inaccessible, even to Apple.
Trusting Your Windows Computer
When you connect your iPhone to your Windows PC, always unlock your device, tap “Trust This Computer”, and enter your passcode when prompted. Without completing this step, your iPhone may not appear on your computer, and the backup process will not begin.
Preparing these essentials ensures that when you start the actual steps to back up iPhone to PC, the process runs smoothly, securely, and without interruptions.
Method 1: Backup iPhone on Windows 11 Using Apple Devices App
Backing up your iPhone to a computer with Windows 11 is now simpler and more streamlined thanks to the Apple Devices app. This modern application replaces the older iTunes workflow and focuses entirely on device management, backup, and restore, making it easier for Windows 11 users to keep their iPhone data safe.
Prepare Your Windows 11 PC with the Apple Devices App
To begin, make sure the Apple Devices app is installed on your Windows 11 PC. This app replaces iTunes for managing iPhones and provides a clean, intuitive interface designed specifically for newer Windows systems. Using this app ensures better compatibility and a smoother experience when you back up iPhone data to your PC.
- Step 1: Open the Microsoft Store on your PC.
- Step 2: Search for “Apple Devices“ and install the app (it is free).
- Step 3: Launch the app and agree to the terms. Note that installing this may disable iTunes on your system if you had it previously.
Connect Your iPhone and Trust the Computer
Next, connect your iPhone to your PC using the original USB or USB-C cable. Once connected, unlock your iPhone and respond to the “Trust This Computer” prompt if it appears. This trust confirmation is essential, as it allows your Windows computer to communicate with your iPhone and access its data for backup.
Choose the Correct Backup Settings
After your iPhone appears in the sidebar of the Apple Devices app, click on your device to open its details. Go to the General section where you’ll see options to Back up all of the data on your iPhone to this computer.
You can also choose to Encrypt local backup to protect sensitive information such as Health data, saved passwords, and Wi-Fi settings. Choose an encryption password you can remember because it cannot be recovered if lost.
- Step 1: Look for the “Backups” section in the main window.
- Step 2: Ensure the option “Back up all of the data on your iPhone to this computer” is selected (do not select “Back up your most important data to iCloud”).
- Step 3: Check the box “Encrypt local backup” if you want to save Health data and passwords.
Start the Backup and Monitor Progress
Once everything is set, click Backup Now to start the process. You’ll see a progress indicator showing backup status, and once complete, you can use the Manage Backups option to view the saved backups on your Windows PC.
- Step 1: Click the gray “Back Up Now” button.
- Step 2: Watch the spinning arrows in the sidebar to ensure the process is active.
- Step 3: Once finished, the “Last Backup” timestamp will update to the current time.
Extra Tips for a Smooth Windows 11 Backup
If your iPhone doesn’t appear, try reconnecting the cable or switching USB ports. You can also enable Show this iPhone when on Wi-Fi, so future connections can occur wirelessly after the initial setup.
Remember to leave your iPhone connected until the backup completes to avoid corrupting the file.
Using the Apple Devices app on Windows 11 offers a straightforward and powerful way to back up your iPhone with full control over your data.
Method 2: Backup iPhone on Windows 10 Using iTunes
If you are still using Windows 10, iTunes remains the official and fully supported method for creating an iPhone backup on your PC. While Windows 11 users now have the Apple Devices app, iTunes continues to provide complete backup functionality for many users.
Install or Update iTunes on Windows 10
Before starting, make sure iTunes is installed and fully updated on your Windows 10 computer. Using the latest iTunes version ensures that your iPhone and PC communicate properly and reduces the chance of errors during the backup process.
- Download: Get iTunes for Windows from the Microsoft Store or directly from Apple’s website.
- Update: If installed, open iTunes, click Help > Check for Updates to ensure you have the latest version.
Connect iPhone and Confirm Trust
Open iTunes on your PC and connect your iPhone using a USB or USB-C cable. Unlock your iPhone and tap Trust This Computer when prompted. Once detected, iTunes will show a small iPhone icon near the top left of the window.
Select Local Backup Options in iTunes
Click on the iPhone icon and locate the Backups section on the Summary page. Choose This Computer to store a local backup on your Windows PC.
If you want to include Health and Activity data, Wi-Fi passwords, and other sensitive data, enable Encrypt local backup and enter a password.
- Step 1: Click the Device Icon (a tiny phone symbol) located near the top-left corner, just below the menu bar.
- Step 2: Click Summary in the left sidebar.
- Step 3: Under the “Backups” header, select the radio button “This Computer”.
Run the Backup and Verify Completion
Click Back Up Now to initiate the backup. iTunes will display the backup progress along the top of the window. When the process finishes, iTunes shows the date and time of your last backup, confirming that your full backup has been stored safely on your Windows 10 PC.
Helpful iTunes Backup Tips
If iTunes doesn’t detect your iPhone, restart both your PC and iPhone. You can also enable Wi-Fi syncing in the Summary tab to back up without a cable in the future once set up properly. Check that iCloud backup is disabled if you want to avoid syncing conflicts during your local iTunes backup.
This approach remains a trusted and comprehensive method to create a local iPhone backup on Windows 10, especially for users who need full control over their device data.
What to Do If Your iPhone Doesn’t Appear on Your Windows Computer
When trying to back up your iPhone to a Windows PC, one of the most common hurdles is that the device simply doesn’t show up in either the Apple Devices app or iTunes interface. Fortunately, there are proven ways to fix this.
Check the USB Cable and Port First
Confirm that the cable you’re using supports both data transfer and charging. Some cables only provide power and won’t allow your computer to recognize the connection. Try switching to a different USB cable or using a different USB port directly on your PC.
Confirm the Trust Prompt on iPhone
When you connect your iPhone, unlock it and look for the “Trust This Computer” alert. Tap Trust and enter your device passcode. Without this confirmation, Windows will not allow apps to access your iPhone data.
Tip: If you accidentally tapped “Don’t Trust,” go to Settings > General > Transfer or Reset iPhone > Reset > Reset Location & Privacy to see the prompt again.
Update Windows, Apps, and Drivers
Ensure your Windows operating system, Apple Devices app, or iTunes software is up to date. Outdated software can prevent proper device detection. Also check the Apple Mobile Device USB driver in Windows Device Manager and update it if needed to allow your PC to recognize the iPhone correctly.
- Driver Check: Open Device Manager > Portable Devices. If you see your iPhone with a yellow warning icon, right-click and select “Update driver”. (See specific instructions for updating drivers here).
Restart and Reconnect Both Devices
Sometimes a fresh start is all that’s needed. Disconnect your iPhone, restart both your PC and iPhone, and reconnect. This refreshes the connection and often resolves detection problems.
Test the iPhone on Another Windows PC
If your iPhone still doesn’t appear after trying the above steps, test the connection on another Windows PC. If it shows up there, the issue likely lies in the original computer’s configuration or drivers rather than the iPhone itself.
These steps help resolve most situations where an iPhone doesn’t show up on a Windows PC, allowing you to continue your local iPhone backup smoothly and securely.
Method 3: How to Back Up iPhone to PC Without iTunes or Apple Devices App
If you want to back up some iPhone data without using iTunes or the Apple Devices app, there are reliable options that let you secure your essential files without the full system backup process. These methods work well if you’re focused on photos, videos, and personal media rather than a complete device snapshot.
Using File Explorer to Save Media Manually
One of the simplest ways to back up parts of your iPhone without iTunes or the Apple Devices app is through Windows File Explorer. Connect your iPhone to your computer with your USB cable and unlock your device.
Once it appears under “This PC” in File Explorer, you can open your iPhone’s storage and find your photos and videos inside the DCIM folder. From there, select and copy the files to a folder on your PC for safekeeping. This method gives you direct access to media files without needing a full backup system.
- Step 1: Go to This PC > Apple iPhone > Internal Storage > DCIM.
- Step 2: You will see folders named 100APPLE, 101APPLE, etc.
- Step 3: Drag and drop these folders to your desktop or pictures folder.
Important: If you get a “Device Unreachable” error, go to iPhone Settings > Photos and scroll to the bottom. Under “Transfer to Mac or PC,” change the setting from “Automatic” to “Keep Originals”.
Third-Party Backup Software Tools
If you’re looking for more control than manual file copying but don’t want to use Apple’s built-in tools, consider trusted third-party backup software.
Programs like iMazing allow you to connect your iPhone to a PC and choose exactly what data you want to back up. These tools can support selective backups, letting you save contacts, messages, or app data separately. Always download software from verified sources and confirm compatibility with your version of Windows and iOS before use.
Using Cloud Storage Services for Partial Backup
Another backup-without-iTunes approach is to use alternative cloud services such as Google Drive, Dropbox, or OneDrive to back up photos and videos.
Install the app on your iPhone, allow access to your media, and upload files directly. This doesn’t create the same type of local backup as iTunes or Apple Devices app, but it provides an accessible copy of your important photos and videos that won’t disappear if your device fails or is lost.
These non-iTunes backup options give you flexible ways to preserve critical iPhone files without relying on Apple’s official backup tools.
Where iPhone Backups Are Stored on Windows PC (Find, Access, and Manage Them)
When you back up your iPhone to a Windows PC using iTunes or the Apple Devices app, the backup files are stored in a specific folder on your computer’s drive. Knowing where these backups live helps you manage storage, free up space, or move them to safer locations.
Default Backup Folder Location
On most Windows PCs, iPhone backups are stored in the MobileSync folder inside your user profile. The exact path depends on the version of Windows and whether you use the Apple Devices app or traditional iTunes. Typically you’ll find your backups in:
- For Apple Devices App (Windows 11) & iTunes (Microsoft Store version):
C:\Users\[YourUsername]\Apple\MobileSync\Backup\ - For Classic iTunes (Desktop version):
C:\Users\[YourUsername]\AppData\Roaming\Apple Computer\MobileSync\Backup\
These folders contain a series of alphanumeric-named directories — each one representing a backup of your iPhone.
How to Access the Backup Folder
To open the backup folder quickly:
- Press Windows key + R to open the Run dialog.
- Type
%USERPROFILE%\Apple\MobileSync\Backupand hit Enter to go straight to your backups (for Windows 11 / Store apps). - If you’re using the older iTunes path, type
%AppData%\Apple Computer\MobileSync\Backupinstead.
Once you’re inside the folder, you can see all your saved backups, check the timestamps to find the most recent one, or delete old backups if you need to clear space.
Tips for Managing Backup Files
Backups can become large over time, so review them occasionally and remove outdated ones if they are no longer needed.
If your PC drive is running low, you can move the backup folder to a different location or external drive using file management or symbolic links.
Note: Always keep at least one recent backup intact before deleting older ones, so you don’t lose any important data.
How to Back Up iPhone to an External Hard Drive on Windows (Advanced but Safe Method)
Backing up your iPhone directly to an external hard drive isn’t officially supported by Apple, but you can work around this limitation by moving your local backup files after they are created. This is especially useful if your computer’s main drive is low on storage or you want added redundancy.
Step-by-Step: Move Your Backup to an External Drive
- First, create a local backup on your Windows PC using either iTunes or the Apple Devices app.
- Navigate to the default backup folder on your computer as described above.
- Connect your external hard drive to your PC and create a new folder on it where you want to store your backups.
- Copy and paste the entire backup folder from the default location into your external drive location.
Once the copy is complete, you now have a full backup sitting safely on your external storage that you can keep offline for added safety.
Optional: Create a Symbolic Link (Advanced)
If you want future backups to automatically go to your external drive, you can create a symbolic link (a kind of shortcut at the system level) from the original backup folder to your external drive folder.
This tells Windows to redirect the backup data without changing the way iTunes or Apple Devices app works. This advanced setup requires careful steps (like using mklink /J from the command prompt as an administrator), but it effectively moves your backup location while keeping the system compatible.
Instructions for creating a Symlink:
- Move Folder: Move your existing “Backup” folder from the
MobileSyncfolder to your external drive (e.g.,E:\iPhoneBackup). - Verify Removal: Ensure the original “Backup” folder is completely removed from the C: drive location so the
MobileSyncfolder is empty of that specific folder. - Open CMD: Press Start, type “cmd”, right-click Command Prompt, and select “Run as administrator”.
- Run Command: Type the following command (adjusting for your specific paths) and press Enter:
mklink /J "C:\Users\[YourName]\Apple\MobileSync\Backup" "E:\iPhoneBackup" - Confirm: You should see a message saying “Junction created.” A folder icon with a small arrow will appear in the original location, pointing to your external drive.
Why This Method Is Helpful
It helps if your main PC drive is low on space. You can keep an offline backup copy that isn’t tied to your PC’s internal drive.
Moving backups to an external hard drive gives you extra peace of mind, especially before major events (like iOS updates, selling your phone, or device reset).
Warning: This is an advanced method — always double-check that your backups are intact after moving them, and store your external drive in a safe place to avoid loss or damage.
Troubleshooting Common iPhone Backup Problems on Windows PC (Quick Fixes That Work)
Even when you follow the correct steps to back up iPhone to a Windows PC, occasional glitches can interrupt your progress. The good news is that most issues are familiar and have simple solutions that work, letting you get back on track with confidence.
1. Keep Software Up to Date
One of the most frequent causes of backup problems is outdated software. Make sure your Windows system, Apple Devices app, or iTunes is updated to the latest version before you begin.
New updates often include fixes for common bugs and improve compatibility with the latest iOS versions. If a backup attempt fails, update everything first and then try again.
2. Restart Your Devices
A quick restart of both your iPhone and your Windows PC can resolve many issues like connection glitches or temporary conflicts.
Power off your iPhone, turn off your computer, and then restart both. Once they’re back on, reconnect and try the backup again — many users have found this refreshes the connection and fixes errors.
3. Free Up Enough Storage Space
If your backup fails with a message saying there’s “not enough space,” ensure your PC drive has sufficient free space to accommodate the full iPhone backup size.
Backups can be large — especially the first time — so clearing excess files or temporarily moving big files can help.
4. Check for Corrupt Backups
If you see errors mentioning a corrupt or incompatible backup, the previous backup might be damaged. Deleting the old backup and starting fresh often resolves this. After removing the bad backup, attempt the backup again.
- How to Delete: In Apple Devices app, go to General > Manage Backups, select the backup, and click Delete. In iTunes, go to Edit > Preferences > Devices, select the backup, and click Delete Backup.
5. Fix Security Software Interference
Sometimes, antivirus or firewall software on Windows can interfere with the backup process.
If a backup won’t start or seems to hang, try temporarily disabling your security software (but remember to re-enable it afterward). This can help the Apple Devices app or iTunes communicate with your iPhone without interference.
6. Use a Different USB Port or Cable
Bad USB cables or certain USB ports (especially USB hubs) can prevent successful backups.
Switch to a different cable or plug directly into the PC’s USB port to improve stability. Ensuring a solid wired connection can make all the difference.
These practical fixes target the most common backup errors encountered on Windows, and following them usually gets your iPhone backup back on track fast.
What Gets Backed Up and What Doesn’t When You Back Up iPhone to Windows PC
Understanding what the Windows PC backup actually saves — and what it doesn’t — helps you manage expectations and ensures you’re protecting the data that matters most.
What Is Backed Up in a Local PC Backup
When you create a full backup using iTunes or the Apple Devices app, your Windows PC stores a comprehensive snapshot of your iPhone. This typically includes:
- Device settings, such as configurations and preferences
- App data, including data from third-party apps
- Messages (SMS and iMessage) and call history
- Safari bookmarks and history
- Contacts and calendars
- Health and activity data (if you chose Encrypt local backup)
Encrypted backups store even more, like saved passwords, Wi-Fi network settings, and keychain data, giving you the richest possible restore point.
What Isn’t Included in a Windows PC Backup
Even the most complete local backup won’t contain everything:
- Content from the iTunes and App Stores (downloads can be restored from Apple’s servers instead)
- Content synced from your PC or Mac (such as iTunes music or books)
- Data already synced to iCloud, like iCloud Photos or iCloud contacts
- Face ID and Touch ID settings (for security reasons)
- Apple Pay information and certain email data
Media like photos and videos are generally included in your PC backup — unless you’re using iCloud Photos, in which case the full-resolution originals may be stored in iCloud and not fully backed up locally.
Knowing these boundaries ensures you plan your backup strategy effectively: a local Windows PC backup captures almost everything you need for a full device restore, and encrypted backups add even more security and coverage.
Frequently Asked Questions (FAQ)
Here are answers to common questions about how to back up your iPhone to a Windows PC, ensuring your data stays safe and accessible.
How do I backup my iPhone to my PC without iTunes?
To backup your iPhone without iTunes, you can use the Apple Devices app if you are on Windows 11. Alternatively, you can use third-party software like iMazing or simply connect your phone via USB to manually transfer files (photos/videos) using Windows File Explorer.
Can I backup my iPhone to my PC instead of iCloud?
Yes, you absolutely can. Many users prefer this because it doesn’t require a monthly subscription and is faster for large backups. A local backup saves a complete snapshot of your phone directly to your hard drive, giving you full ownership of your data.
Does backing up an iPhone to a computer save everything?
A computer backup saves almost everything, including app data, settings, text messages, photos, and videos. However, it does not include Face ID settings, Apple Pay info, or content already synced to iCloud (like iCloud Photos). To save passwords and Health data, you must choose to encrypt your local backup.
Can I backup my iPhone to an external hard drive?
Yes, but it requires a workaround. By default, Windows saves backups to your C: drive. You can move these backups to an external hard drive or flash drive using a “symbolic link” (symlink), which tricks the system into saving data directly to the external drive.
How long does it take to backup a 128GB iPhone to a computer?
The time varies based on how much data you are actually using and your connection speed. A first-time backup for a 128GB iPhone can take anywhere from 30 minutes to 2 hours. Subsequent backups are much faster because they only save new changes (incremental backups).
Will backing up my iPhone delete everything?
No. Backing up is a copying process. It duplicates your data and saves it to a safe location. It does not delete, erase, or modify the data currently on your iPhone.
How do I backup my entire iPhone to my computer Windows?
The best way to backup your entire iPhone is to use the official Apple tools: iTunes (for Windows 10) or the Apple Devices app (for Windows 11). These tools create a full system image that can be used to restore your phone exactly as it was.
Final Verdict: The Best and Safest Way to Back Up iPhone to a Windows PC
When you weigh all factors — speed, control, security, and completeness — the best way to safeguard your iPhone data on Windows is with a regular local PC backup using either the Apple Devices app (on Windows 11) or iTunes (on Windows 10).
- Local backups give you full access to your data without internet dependence or storage limits.
- Choosing encrypted backups ensures that sensitive information, like passwords and Health data, stays protected and transferable.
- Keeping backups on an external hard drive adds a second layer of safety in case your main PC drive fails.
A backup strategy that combines regular local PC backups with optional iCloud backups gives you the most robust protection — essentially covering all bases so you’re never left without your important information.
Take Action Now: Secure Your iPhone Data Before It’s Too Late
You’ve learned how to back up iPhone to a Windows PC, why it matters, what to do when problems arise, and exactly what gets stored — and what doesn’t — in your backup. Now it’s time to put that knowledge into action.
Don’t wait until your iPhone is lost, damaged, or reset. Connect your device to your Windows PC today and create a fresh, secure backup. Make it a regular habit — ideally before every major iOS update or whenever you add new data you can’t afford to lose.
A few minutes now could save you hours of frustration later. Protect your photos, messages, settings, and memories by backing up your iPhone. Your future self will thank you for the peace of mind.
Visit Our Post Page: Blog Page