
Tired of unwanted newsletters and spam? Learn how to block emails in Outlook using the fastest methods for Windows 11—and keep your inbox clutter-free.
If your inbox is starting to feel like a dumping ground for spam, promotions, or random newsletters you never signed up for—you’re not alone. The good news is that you don’t have to live with it.
With a few quick tweaks inside Microsoft Outlook, you can block unwanted emails, filter out noise, and keep your inbox focused on what actually matters.
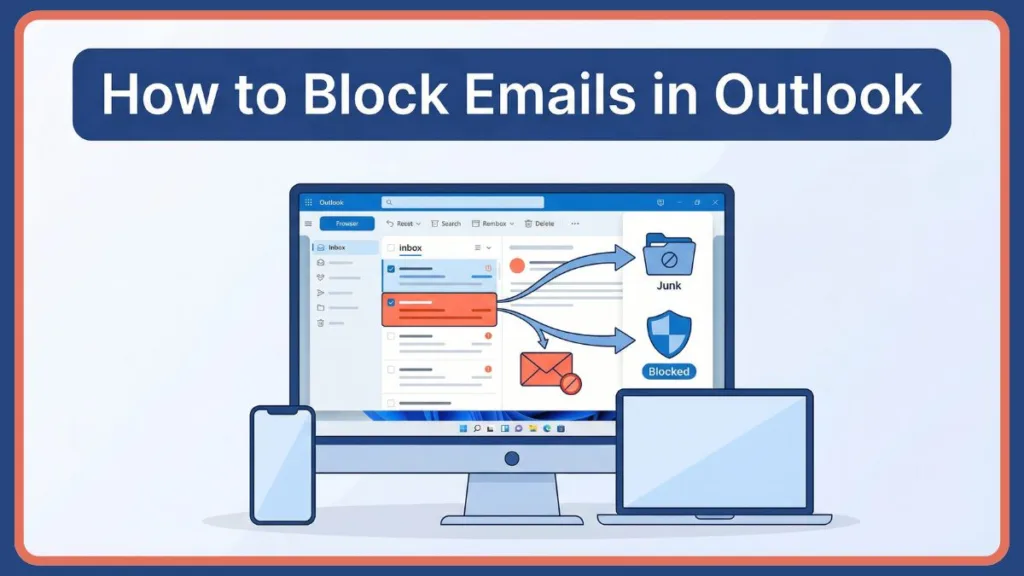
Once you block a sender in Outlook, their emails won’t clutter your inbox—they’ll be automatically redirected to the Junk folder.
Let’s walk through how to block emails on Outlook in Windows 11—and more importantly, how to do it in a way that actually works long-term.
Why Outlook Inbox Gets Cluttered (And Why Blocking Matters)
Your inbox fills up with unwanted noise for three predictable reasons.
Spammers Constantly Change Tactics
Even after you block someone, you might still see similar emails. Spammers rarely use the same address twice. They rotate email address variations, change domains frequently, and use automated tools to bypass standard filters. Over time, these low-value emails sit between you and the messages that matter.
Blocking one sender doesn’t stop the entire source — spammers adapt, so your filtering must adapt too.
Blocking Redirects Emails, It Doesn’t Delete Them
When you block an email, Outlook doesn’t physically stop the sender from hitting “send.” Instead, it intelligently redirects those messages straight to your Junk Email folder. While this gets them out of your main view, they are still technically arriving and taking up a small amount of space until your Junk folder is cleared.
Blocking is a filter, not a firewall — it redirects the mess out of your sight.
Inbox Clutter Destroys Productivity
A crowded inbox hides urgent emails and increases the time you spend managing distractions. A well-managed inbox saves time, reduces distractions, and improves your overall workflow. Blocking emails matters because it helps you reclaim your focus and creates a space where important emails actually stand out.
A clean inbox improves focus, productivity, and security.
Before You Block Emails in Outlook (Read This First)
Blocking Does Not Mean Permanently Gone
When you block a sender, their future messages don’t disappear forever. Instead, Outlook sends them straight to the Junk Email folder. Because emails stay there until you manually empty the folder or Outlook automatically deletes them (usually after 30 days), you can always recover something if it gets caught by mistake.
Blocked emails are not deleted—they are safely stored in Junk for review.
Different Outlook Versions Behave Slightly Differently
Not all Windows 11 users are looking at the same screen. Microsoft is phasing out the old Windows Mail app and migrating users to the New Outlook, but many still use Classic Outlook.
- New Outlook uses a Settings (Gear Icon) menu to manage blocked lists.
- Classic Outlook uses the Home tab and a dedicated Junk E-mail Options menu.
Your blocking strategy should match your Outlook version — knowing which app you have prevents frustration.
How to Block Emails in Outlook: Fastest Methods
If you want to stop emails from a specific sender, you don’t need to start with complex rules. You start with direct blocking. These methods filter out large volumes of unwanted noise and work reliably across Outlook versions.
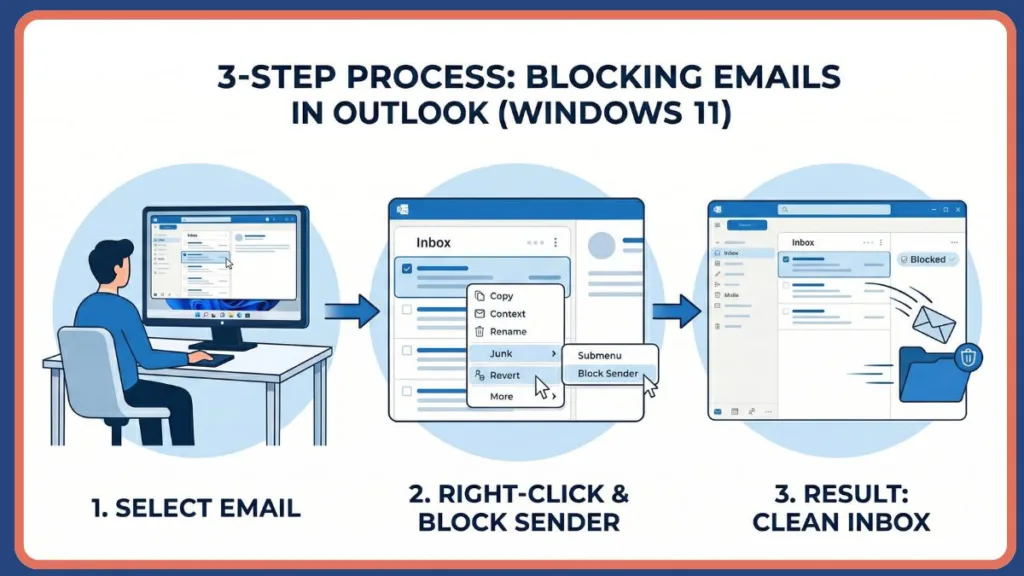
Block a Specific Sender (Fastest Overall)
This is the go-to option for most users and the simplest method. It works exactly the same whether you are using the New Outlook or Classic Outlook app.
- Open Outlook on your Windows 11 PC and head to your inbox.
- Find an email from the person (or company) you don’t want to hear from anymore.
- Right-click on the email.
- Go to Junk (or “Block” in some versions), and then click Block Sender.
- Confirm your choice—and that’s it.
This is the fastest answer to how to block emails in Outlook Windows 11 without digging into settings.
Block an Entire Domain
Sometimes, blocking one email isn’t enough—especially if you’re dealing with marketing campaigns or bulk spam. Instead of blocking user@example.com, you can block the entire domain, like @example.com.
If you are using New Outlook (Default on Windows 11):
- Click the Settings (Gear Icon) at the top right of your screen.
- Go to Mail > Junk email.
- Under “Blocked senders and domains,” click + Add.
- Type in the domain (e.g., example.com) and press Enter to save.
If you are using Classic Outlook:
- Go to the Home tab on the top ribbon.
- Click Junk → Junk E-mail Options.
- Go to the Blocked Senders tab.
- Click Add, type in the domain, and click OK.
Blocking a domain stops ALL emails from that source—making it far more effective than blocking one sender at a time.
Use Rules for Smarter Filtering
If your inbox is constantly under attack, rules can help you automate everything. You can create rules to move emails to specific folders, delete emails automatically, or filter messages based on keywords or sender patterns.
Rules act like a smart assistant—handling emails before you even see them.
Where to Find and Manage Blocked Emails
How to View Blocked Senders in Outlook
At some point, you’ll probably want to review who you’ve blocked—especially if something important gets caught by mistake. This acts as your central hub to view lists, add new senders, or remove old ones.
- In New Outlook: Click the Settings (Gear Icon) > Mail > Junk email. Your list is right there under “Blocked senders and domains.”
- In Classic Outlook: Go to the Home tab > Junk > Junk E-mail Options > Blocked Senders tab.
Everything is managed from this one place, making it easy to stay organized.
How to Unblock Emails in Outlook (When You Change Your Mind)
We’ve all been there—you block someone in frustration, then realize later you actually needed their email. Thankfully, undoing it is simple.
Navigate back to your Blocked Senders list using the steps above.
- In New Outlook: Click the trash can icon next to the email address.
- In Classic Outlook: Select the email and click Remove.
Unblocking instantly restores email delivery to your inbox moving forward. However, already blocked emails won’t move back automatically—you must manually drag them to your inbox.
Common Problems When Blocking Emails in Outlook
Blocking emails in Outlook is fast, but it isn’t friction-free. Most frustration comes from spammers adapting or misunderstood settings. If something feels broken, it usually isn’t. Here’s what’s actually happening and how to deal with it.
You Still Receive Spam From the “Same” Sender
You blocked an email, but a nearly identical one appeared the next day. This isn’t Outlook failing; it’s spammers rotating their addresses.
- What you do:
- Check the actual email address (not just the display name).
- Block entire domains whenever possible to reduce repeated spam.
- Use rules to filter based on recurring keywords in the subject line.
Spammers adapt constantly — domain blocking and keyword rules are your best defense.
Important Emails Are Going to Junk
You checked your Junk folder and found an email from a colleague or a subscription you actually want. Outlook’s automatic filtering sometimes gets overzealous.
- What you do:
- Go to your Junk folder, right-click the email, and select Not Junk.
- Add trusted contacts to your Safe Senders list in your Junk settings.
Safe Senders ensures important emails never land in Junk again.
The “Junk E-mail Options” Button is Missing
You are following a tutorial, but you cannot find the “Home tab” or the “Junk E-mail Options” button. This happens because Windows 11 pushes users to the new interface.
- What you do:
- Recognize that you are using the New Outlook app.
- Look for the Settings (Gear Icon) at the top right instead.
If a menu is missing, you are likely using the New Outlook instead of the Classic version.
Best Way to Block Emails in Outlook: Quick Comparison
Use this table to choose the right blocking method based on your goal, not guesswork. Every option trades off speed, control, and automation differently.
The best method isn’t universal — it depends on what you’re trying to achieve.
Quick Comparison Table
| Your Goal | Best Method | Where It Works Best | Why This Works |
| Stop one specific annoying sender fast | Right-click > Block Sender | New Outlook, Classic Outlook | Fastest possible block. One action redirects all future emails from that exact address to the Junk folder. |
| Stop a company spamming from multiple addresses | Block Entire Domain | Settings > Junk email (New) / Junk E-mail Options (Classic) | Catches variations. Instead of blocking 10 different sales reps, you block the whole company domain at once. |
| Filter out emails based on specific words | Create Rules | New Outlook, Classic Outlook | Acts as a smart assistant. Outlook filters emails automatically as they arrive based on the logic you define. |
| Ensure a VIP never gets blocked | Safe Senders List | Settings > Junk email (New) / Junk E-mail Options (Classic) | Protects important mail. Tells Outlook’s spam filter to completely ignore emails coming from trusted sources. |
FAQ: Blocking Emails in Outlook
These are the questions users ask right before or right after blocking emails. The answers are direct, short, and action-focused so you don’t have to second-guess what Outlook is doing.
How do I block emails in Outlook Windows 11?
The fastest way is to right-click the unwanted email, go to Junk, and select Block Sender. Confirm, and Outlook handles the rest. This works immediately to filter future messages from that address.
How can I see blocked email addresses in Outlook?
In New Outlook, go to Settings > Mail > Junk email. In Classic Outlook, open Junk E-mail Options from the Home tab and check the Blocked Senders tab.
Where are blocked emails stored in Outlook?
They are automatically moved to the Junk Email folder—not deleted permanently. They will sit there for review until you empty the folder or Outlook auto-clears it.
Can I completely block emails in Outlook so they never reach me?
You can block senders and domains, which redirects their emails to the Junk folder, but it cannot prevent the sender from physically sending the email. They will always technically reach your server, but Outlook keeps them out of your inbox.
Visit Our Post Page: Blog Page