
Learn how to block unwanted emails in Outlook in 2025 and keep your inbox clutter-free. Step-by-step guidance for Desktop, Web, and Mobile helps you stop spam, manage blocked senders, and maintain a secure, organized email experience.
Taking Control of Your Outlook Inbox
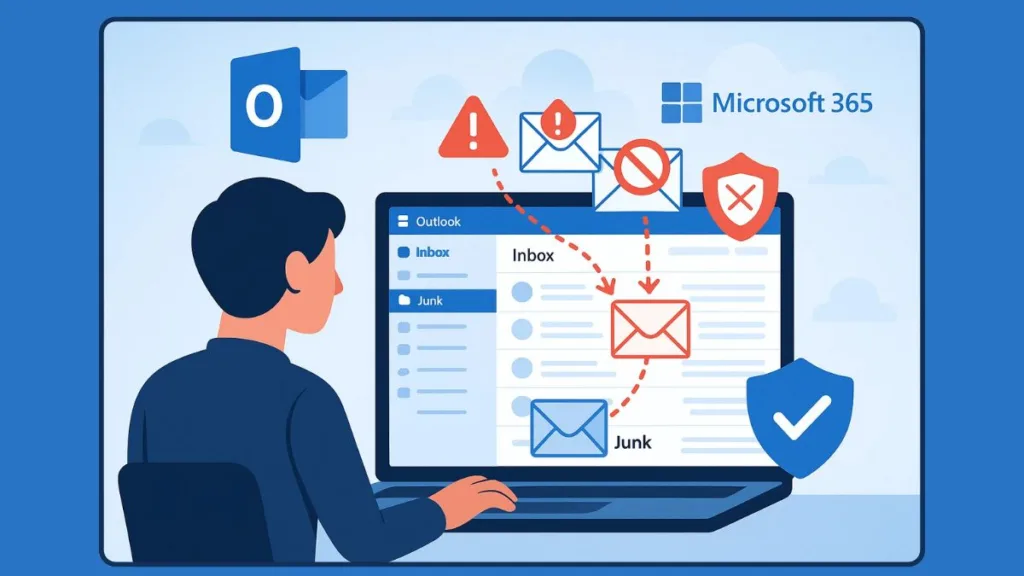
Unwanted emails can pile up quickly—whether it’s spam, endless newsletters, or even phishing attempts that pose a genuine security risk. For many users, Microsoft Outlook is at the center of daily communication, which means keeping your inbox organized is not just about convenience—it’s about productivity and protection.
If you’ve ever wondered how to block an email on Outlook, you’re not alone. Blocking senders is one of the most effective ways to stop unwanted messages from reaching your inbox, helping you filter the noise and focus only on what matters. Outlook provides built-in features that let you block specific email addresses, entire domains, or even manage blocked senders lists across different platforms like Windows, Mac, Web, and Mobile.
In this guide, we’ll cover the exact steps to block, unblock, and manage emails in Outlook across every version—ensuring you maintain a clutter-free inbox while staying one step ahead of spam and potential security threats.
Why Blocking Emails in Outlook Matters
Your inbox is more than just a collection of messages—it’s the gateway to your daily workflow, personal data, and security. Allowing spam or malicious emails to flood in not only clutters your productivity space but can also expose you to cyber risks such as phishing and scams. That’s why Outlook’s block sender feature isn’t just a convenience, it’s a necessary tool for inbox safety.
Inbox Control and Productivity
One of the most common reasons to block emails in Outlook is to keep your inbox under control. By sending unwanted messages straight to the Junk Email folder, you remove distractions, reduce digital clutter, and focus only on tasks that drive productivity. Whether it’s promotional emails you never signed up for or recurring newsletters you no longer read, blocking helps you reclaim valuable focus time.
Security and Safety Against Threats
Spam isn’t just annoying—it can be dangerous. Phishing emails disguised as legitimate communication may try to trick you into sharing sensitive information or clicking unsafe links. By using Outlook’s built-in blocking and junk email options, you dramatically lower the risk of falling victim to scams, malware, or email-based attacks. Blocking entire domains ensures you can stop repeat offenders and secure your communication environment.
Consistency Across Devices
Modern professionals rarely use just one device. From your desktop at work to your mobile app on the go, unwanted emails can follow you everywhere. Outlook enables you to block senders across Windows, Mac, Web, and Mobile, maintaining a consistent layer of protection and productivity without having to constantly delete or filter incoming junk manually.
Blocking emails in Outlook, therefore, is not just about convenience—it’s about email hygiene, digital security, and long-term efficiency.
Blocking Emails in Outlook by Platform
Outlook remains one of the most widely used email clients, but while its interface looks familiar across devices, the exact steps to block senders and unwanted messages differ depending on the version you use. That’s why it’s important to have a step-by-step tutorial for each platform—Windows, Mac, Outlook Web, Mobile apps, and the new Outlook for Windows 365.
Below, you’ll find a comprehensive walkthrough for every version of Outlook, ensuring you know exactly how to stop spam, newsletters, and phishing emails from cluttering your inbox.
How to Block an Email Address in Outlook for Windows (Desktop)
The Windows desktop version, or Classic Outlook, is one of the most common platforms. Blocking here is simple but powerful.
Step-by-step tutorial:
- Open Outlook on your Windows PC and go to your Inbox.
- Find the unwanted email and right-click on it.
- From the menu, hover over Junk and select Block Sender.
- Outlook will show a confirmation message. Click OK.
From now on, all emails from that sender will be automatically redirected to your Junk Email folder.
Advanced Blocking (Manual Method):
- Go to the Home tab > Junk > Junk Email Options.
- Select the Blocked Senders tab > click Add.
- Type the email address (example@email.com) or an entire domain (example.com).
- Click OK to save.
This is a great option when you want to block newsletters, domains, or repeated spam senders without waiting for a new email to arrive.
Blocking Emails in Outlook for Mac
If you’re working on a Mac, the steps are slightly different:
How to block an email on Outlook for Mac:
- Open Outlook and go to your Inbox.
- Select the email from the sender you want to block.
- On the top toolbar, click Block.
- If you don’t see this option, click the three-dot menu and choose Block Sender.
- Confirm your action. Outlook will send all future emails from this sender to the Junk folder.
Note: The new Outlook for Mac has limited blocking options. If the Block function isn’t visible, use the Outlook Web App (OWA) to add blocked senders.
How to Block a Sender in Outlook Web (Outlook.com / OWA)
Outlook Web (also known as Outlook.com or OWA) is widely used by both personal and Microsoft 365 business users.
Steps to block an email in Outlook Web:
- Go to Outlook Web and sign in with your Microsoft account.
- Click the Settings gear icon in the top right.
- Select View all Outlook settings.
- From the left-hand menu, go to Mail > Junk Email.
- Under Blocked senders and domains, click + Add.
- Enter the sender’s email address or domain (e.g., marketing@xyz.com or @xyz.com).
- Click Save.
Alternatively:
- Open an unwanted email > click the three-dot (- – – ) menu > choose Block > Confirm.
This ensures that all future emails from that sender or domain never reach your inbox again.
Blocking Emails on Outlook Mobile (iOS & Android)
Whether you use Outlook on iPhone or Android, you can block and report emails right from your phone.
How to block a sender on Outlook Mobile:
- Open the Outlook app on your smartphone.
- Tap the email from the sender you want to block.
- In the top-right corner, tap the three-dot menu (- – – ).
- Select Report Junk and then tap Block Sender.
- Confirm your decision.
From then on, future emails from that sender will go straight to the Junk folder.
Tip for iPhone users:
- Tap the sender’s name in the “From” field of the email.
- Select Block this Contact > confirm.
- Emails from this sender will automatically be moved to Trash instead of just Junk.
Blocking Emails in the New Outlook for Windows (Outlook 365)
Microsoft has introduced a new Outlook for Windows (rolled in with Microsoft 365), which offers additional blocking capacity and updated settings.
How to block senders in the New Outlook:
- Open Outlook (new) and click the Settings gear icon.
- Go to Mail > Junk Email.
- Under Blocked senders and domains, click + Add.
- Enter the email address or domain you want blocked.
- Click Save to confirm.
Key differences from classic Outlook:
- Capacity: You can block up to 10,000 addresses/domains, compared to only 1,024 in the classic Outlook.
- Third-party accounts: Blocking works only for Outlook-native accounts. If you’ve added Gmail, Yahoo, or iCloud accounts, blocking must be set up in those email providers.
- Junk folder: Emails in Junk will be automatically deleted after 14 days.
Unblocking in New Outlook:
- Go to Settings > Mail > Junk Email.
- Locate the blocked address/domain.
- Click Remove to unblock.
By following these tutorials, you can tailor your blocking strategy based on the Outlook version you use. Whether it’s a desktop client at the office, Outlook.com through your browser, or the mobile app on the go, these steps ensure a secure, organized inbox across all platforms.
Unblocking and Managing Blocked Senders in Outlook
Blocking a sender in Outlook is useful for reducing spam and phishing, but there may be times when you accidentally block someone important, or you simply change your mind. In such cases, Outlook provides simple ways to unblock email addresses and manage your list of blocked senders effectively. By learning how to review, adjust, and organize these settings, you can ensure that only the right emails reach your inbox without compromising on security.
How to Unblock a Sender in Outlook for Windows (Desktop)
If you use the Outlook desktop app on Windows, here’s how you can unblock senders with step-by-step instructions:
- Open Outlook on your PC.
- From the Home tab, click the Junk dropdown button in the toolbar.
- Select Junk Email Options from the menu.
- A new window will open. Go to the Blocked Senders tab.
- Here you’ll see a full list of email addresses and domains you’ve blocked.
- Select the address you want to unblock.
- Click Remove, then hit Apply > OK to confirm.
Once removed, Outlook will no longer treat that sender’s emails as junk, and their future messages will arrive in your inbox.
Tip: If you want to make sure emails from that sender never get marked as spam again, add them to your Safe Senders List by selecting the Safe Senders tab > Add > enter their email > OK.
How to Unblock a Sender in Outlook Web (Outlook.com / OWA)
Unblocking in Outlook Web is easy to manage directly from your browser settings:
- Login to Outlook Web at outlook.live.com.
- In the top-right, click the Settings gear icon.
- At the bottom of the sidebar, select View all Outlook settings.
- Navigate to Mail > Junk Email.
- Under the Blocked senders and domains section, you will see all addresses/domains you have blocked.
- Select the unwanted entry and click the trash bin icon (Delete).
- Click Save to confirm the changes.
That email address or domain will now be unblocked and messages will once again come to your inbox.
Unblocking and Managing Senders in Outlook Mobile (iPhone & Android)
On your smartphone, the Outlook Mobile app also gives you full access to blocked senders controls:
- Open the Outlook app on your iPhone or Android device.
- Tap the profile icon (top left) or swipe open the sidebar menu.
- Scroll down and choose Settings (gear icon).
- Navigate to the Mail section and tap on Blocked Senders and Domains.
- You’ll see the list of all blocked addresses.
- Tap the one you want to unblock and select Remove.
Alternative Method (Directly from Junk Folder):
- Open the Junk Email folder.
- Tap on a message from the blocked sender.
- Select the three-dot menu (- – – ) at the top.
- Tap Never Block Sender and confirm.
This way, their emails will not only be unblocked but also treated as legitimate moving forward.
Using the Safe Senders List for Trusted Contacts
The Safe Senders List in Outlook ensures that important emails will bypass filters and never end up in the Junk folder:
Windows/Desktop: Go to Home > Junk > Junk Email Options > Safe Senders tab > Add. Type the email address or domain and click OK.
Outlook Web: Navigate to Settings > Mail > Junk Email > Safe Senders and Domains > Add. Enter the trusted sender and hit Save.
Mobile App: Under Settings > Blocked and Safe Senders, add contacts to your Safe Senders list.
This feature is essential for businesses or professionals who want critical communication—like invoices, clients, or team members—to always go through without being accidentally flagged.
Managing Large Blocked Lists
Outlook has different limits on the number of blocked entries depending on the version:
- Classic Outlook for Windows/Mac: Allows up to 1,024 blocked email addresses or domains.
- New Outlook (Microsoft 365): Significantly higher—up to 10,000 addresses or domains, making it possible to manage large-scale blocks.
If you are nearing the limit:
- Block entire domains (e.g., @spammail.com) instead of individual addresses.
- Use rules and filters for advanced email management (such as blocking based on keywords or subject lines).
Why Managing Blocked Senders Matters
Blocking isn’t permanent unless you want it to be. By knowing how to unblock and manage senders, you can avoid missing legitimate messages, safeguard important conversations, and still enjoy the benefits of a clutter-free inbox. Outlook’s combination of Blocked Senders and Safe Senders Lists lets you strike the perfect balance between security and accessibility.
Additional Methods Beyond Blocking in Outlook
Blocking a sender is one of the fastest ways to keep unwanted emails out of your inbox, but it’s not always the best solution—especially when you’re dealing with newsletter overload, recurring spam campaigns, or malicious emails that change sender details frequently. Microsoft Outlook provides a range of tools beyond blocking that help keep your inbox safe, organized, and more efficient. By understanding and combining these methods, you can ensure your inbox works exactly the way you want.
Unsubscribe From Newsletters and Promotional Emails
Not every email you want to stop is spam. In fact, many cluttered inboxes are filled with legitimate newsletters, promotional updates, and marketing campaigns from services you once signed up for—sometimes without realizing it.
Instead of blocking them (which still keeps them in your Junk folder for 14 days), unsubscribing is the cleanest method:
- Open the newsletter or promotional email.
- Scroll to the bottom and look for an “Unsubscribe” link.
- Click the link; you’ll usually be redirected to the sender’s website.
- Confirm whether you want to unsubscribe from all emails or just certain categories.
Tip: Outlook often detects newsletters and automatically offers a visible Unsubscribe button at the top of the email, making the process quicker.
This ensures you stop receiving those emails entirely rather than just moving them to Junk. It’s particularly effective if you’re aiming for an Inbox Zero workflow where only critical communication gets through.
Mark Emails as Junk or Phishing for Smarter Filtering
If you don’t want to unsubscribe—or if you suspect the sender is malicious—marking emails as Junk or Phishing is better than blocking alone.
Mark as Junk: Moves the message to your Junk Email folder and teaches Outlook’s spam filter to recognize similar messages in the future.
Report as Phishing: Flags the email as a potential scam, deletes it, and helps Microsoft improve its anti-phishing and malware detection systems.
How to do it:
- Desktop: Right-click the email > Junk > select Junk or Phishing.
- Web: Open the email > three-dot menu > select Mark as junk or Report phishing.
- Mobile app: Tap the email > three-dot menu > select Report Junk.
These actions are more proactive than just deleting unwanted emails because you also contribute to keeping Outlook smarter and safer for all users.
Create Outlook Rules for Advanced Email Filtering
Standard blocking isn’t enough when spammers keep changing their addresses, or when you want fine-grained control over the types of emails reaching your inbox. This is where Outlook Rules come in.
Rules let you automate actions based on conditions you set:
- By Keyword: Example: Move all emails with “Lottery Winner” in the subject line automatically to Junk.
- By Domain: Route or block messages sent from @spamdomain.com.
- By Subject/Project: Move emails with “[Invoice]” to an “Accounts” folder for easy tracking.
- By Size or Attachments: Filter out large unsolicited emails or suspicious file attachments.
How to create Rules:
- Desktop: Go to Home tab > Rules > Manage Rules & Alerts > New Rule.
- Web (Outlook.com/OWA): Settings > View all Outlook settings > Mail > Rules > Add new rule.
This method is ideal for persistent spam where addresses keep rotating or for professionals who want advanced inbox organization.
Use the Safe Senders List as a Whitelist
While blocking and Junk settings keep out unwanted content, you also need a safeguard that ensures important emails never end up in Junk by mistake. This is where the Safe Senders List comes in.
- Safe Senders: Treats added email addresses or domains as trusted.
- Messages from Safe Senders will always appear in your inbox, even if Outlook’s spam filter suspects otherwise.
How to Add to Safe Senders:
- Desktop: Home > Junk > Junk Email Options > Safe Senders tab > Add.
- Web: Go to Settings > Mail > Junk Email > Safe Senders and Domains > Add.
- Mobile: Navigate to Settings > Mail > Blocked and Safe Senders > Safe Senders and add trusted contracts.
This is especially vital when you regularly receive business-critical emails from vendors, clients, or banks that shouldn’t ever risk being flagged as spam.
Blocking Entire Domains for Persistent Spammers
Some spammers bypass blocking by creating endless variations of addresses (e.g., spam1@scamdomain.com, spam2@scamdomain.com). Instead of blocking each individually, you can block the entire domain name so that no addresses from @scamdomain.com ever reach your inbox.
- Windows/Desktop: Junk > Junk Email Options > Blocked Senders > Add domain.
- Web: Mail settings > Junk Email > Blocked senders and domains > Add domain.
This method is far more efficient and long-term, particularly when dealing with bulk marketing senders or persistent malicious domains.
Understanding the Difference: Block vs. Junk in Outlook
Many Outlook users confuse marking Junk with blocking a sender, but the two tools behave differently:
- Block Sender:
- Permanently adds the sender/email domain to your blocked list.
- All future emails from them go straight to Junk automatically.
- Best for repeat offenders and known sources you never want to hear from again.
- Mark as Junk:
- One-time action that redirects that specific email to Junk.
- Outlook learns from your choices to improve filtering.
- Useful when you’re unsure about the source or just want to keep the inbox clean temporarily.
Think of Block Sender as a blacklist and Mark as Junk as training the spam filter. Using the two together enhances both your control and Outlook’s built-in defenses.
Smarter Inbox Management Through Combined Methods
Relying only on the Block Sender button is a good start, but it won’t solve every problem. By using a combination of methods—Unsubscribe, Junk reporting, Rules, Safe Senders, and Domain Blocking—you create a multi-layer defense:
- Unsubscribe handles legitimate subscription clutter.
- Junk/Phishing reporting strengthens security against threats.
- Rules provide custom automation against persistent or targeted spam.
- Safe Senders protects high-priority communication.
- Domain blocking stops entire networks of spammers with a single action.
Together, these methods transform Outlook from just an email client into a controlled, secure, and highly productive inbox environment—one that works to your advantage instead of distracting you.
Key Technical Notes on Blocking Emails in Outlook
When it comes to managing spam, junk mail, and phishing attempts in Outlook, knowing the technical details can help you make smarter decisions. Different versions of Outlook—Classic Desktop, New Outlook, Web, and Mobile—come with specific limits, behaviors, and restrictions that impact how blocking works. Understanding these technical notes ensures you get the most out of Outlook’s tools without running into surprises.
Blocked Senders List Limits
Not all versions of Outlook allow the same number of blocked addresses or domains.
Classic Outlook (Windows/Mac): You can add up to 1,024 email addresses or domains to the Blocked Senders list. Once you hit the limit, you’ll need to remove older entries or block broader domains instead of single addresses.
New Outlook for Windows (Microsoft 365): Microsoft expanded the limit to 10,000 addresses/domains, making it far more practical for business and heavy Outlook users.
If you constantly face new spammers, consider blocking on a domain level (@domain.com) rather than filling your list with individual addresses.
Junk Email Folder Retention Policy
When an email is blocked in Outlook, it doesn’t vanish immediately. Instead, blocked messages are directed to the Junk Email folder.
- By default, emails in the Junk folder remain for up to 14 days before Outlook deletes them permanently.
- Once deleted from Junk, these emails cannot be recovered (unless archived somewhere else).
This retention system gives you a buffer period in case you mistakenly block a legitimate sender.
Outlook Behavior Across Platforms
Blocking rules apply differently across devices, which can sometimes confuse users:
Windows & Mac Desktop Apps: Blocking here immediately creates entries in your blocked senders list.
Outlook Web / Outlook.com: Blocking updates directly inside your account settings, syncing across any device using that account.
Mobile Outlook App (iOS/Android): Mobile blocking works, but some unblocking or advanced options may require using Outlook Web or Desktop.
This means for full control, Outlook Web is the most comprehensive platform for managing blocked and safe senders lists.
Limitations With Third-Party Accounts in New Outlook
If you connect Gmail, iCloud, or Yahoo Mail to the new Outlook for Windows, Outlook’s built-in blocking tools won’t apply to those accounts. This means:
- Blocking a Gmail address inside Outlook won’t stop emails from appearing unless that block is also configured in Gmail itself.
- The same applies to Yahoo, iCloud, and any domain-based third-party services.
To fully secure those, always manage blocking settings both in Outlook and on the provider’s platform.
Block vs. Teams Integration Quirk
An often-overlooked detail: when you block a user in Outlook, their account may no longer appear in Microsoft Teams people search—unless you’ve had previous direct interactions with them.
Even if blocked in Outlook, you may still be able to chat or call them in Teams by entering their complete email address. This behavior depends on Teams tenant policies and may vary in organizational setups.
Safe Senders and False Positives
Sometimes Outlook mistakenly classifies important emails as spam. To avoid losing these messages:
- Add trusted addresses to your Safe Senders List.
- Safe Senders ensures emails from specific contacts go directly to your inbox, bypassing both filters and blocked list overlaps.
This is essential for critical communication, like bank notifications, invoices, or client messages.
Why These Notes Matter
By understanding these technical details—limits, storage policies, syncing behavior, and cross-platform restrictions—you can optimize how you use Outlook’s security tools. Instead of depending on one feature (like Block Sender alone), mastering the technical side helps you stay efficient, protected, and in control no matter how complex your inbox becomes.
Official Microsoft Resources for Blocking and Email Security
If you want to go directly to Microsoft’s official documentation, the following resources provide detailed tutorials and support articles on blocking senders, managing junk email, safe sender lists, and email security best practices. These guides ensure you’re aligning with Microsoft’s recommended workflows for keeping your mailbox organized and secure.
Blocking and Managing Emails in Outlook
Block a sender in Outlook Web – Microsoft’s official guide on adding or removing blocked senders, managing domains, and configuring junk email settings in Outlook.com (Web App).
Block a sender in Outlook Desktop – Step-by-step instructions for blocking senders in Outlook for Windows and Mac.
Use the Junk Email Filter – Explains how Outlook automatically identifies spam and how you can adjust filtering levels in your account.
Manage Safe Senders – Guide to adding trusted contacts to your Safe Senders list so important emails aren’t mistakenly flagged as junk.
Outlook Mobile and Email Management Tips
Outlook Mobile App Help (iOS & Android) – Official tutorials on how to block senders, report spam, and manage email notifications when using Outlook on smartphones.
Advanced Filtering with Rules – Instructions on creating custom rules to organize, redirect, or block emails based on sender address, subject keywords, or message conditions.
Visit Our Post Page: Blog Page