
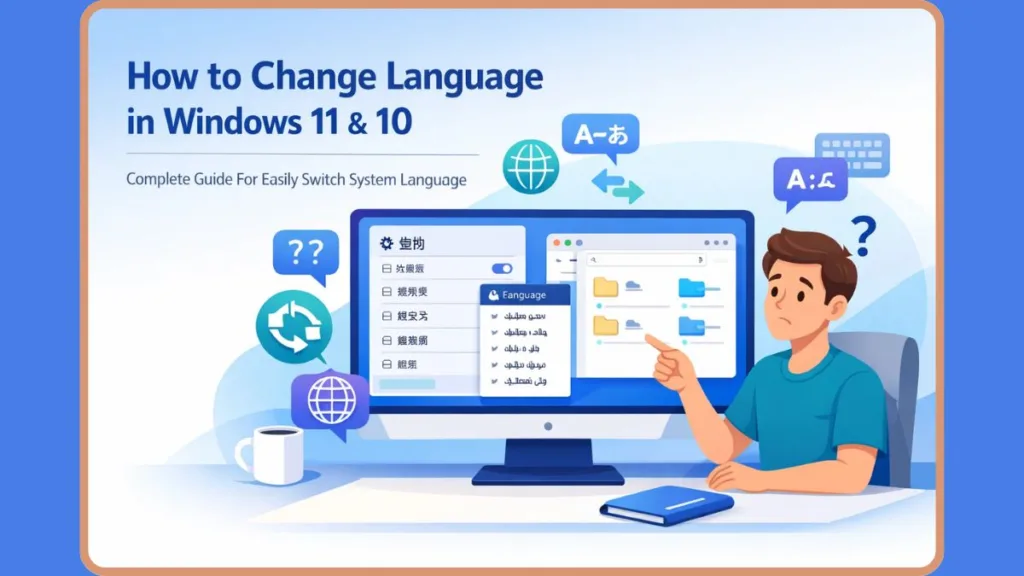
Learn how to change language in Windows 11 and 10, install language packs, switch display and keyboard settings, and fix language errors easily.
Changing the language in Windows might seem like a daunting task—especially if you’re looking at a screen in a language you don’t understand—but don’t worry. It is not a complex technical task, and most users assume it requires reinstalling the operating system or resetting the device. It doesn’t.
In reality, Windows 11 and Windows 10 both allow you to download, install, and apply a new display language directly from your system settings. Whether your device was purchased in another country, configured incorrectly during setup, or you simply want to work in a different language, the process is fully supported and completely reversible.
Before We Start Understanding the 4 Layers of Language
Before diving into the steps, it is important to understand how Windows handles language configuration. It’s not just one setting; there are four main components involved that work together to create your experience.
First, the Windows Display Language controls the interface language used in Settings, File Explorer, Desktop menus, and the Sign-in screen. Second, the Preferred Languages List determines how Microsoft Store apps and websites choose which language content to show you. Third, the Keyboard Layout Input Language strictly controls how characters are typed on your screen, which is separate from what you read. Finally, the Region and System Locale Settings affect date formats, currency, calendar style, and non-Unicode programs.
Many problems occur simply because these layers are misunderstood. This guide explains how to change the Display Language correctly, switch Input Methods quickly, reset language settings if something breaks, and troubleshoot when Windows refuses to change language.
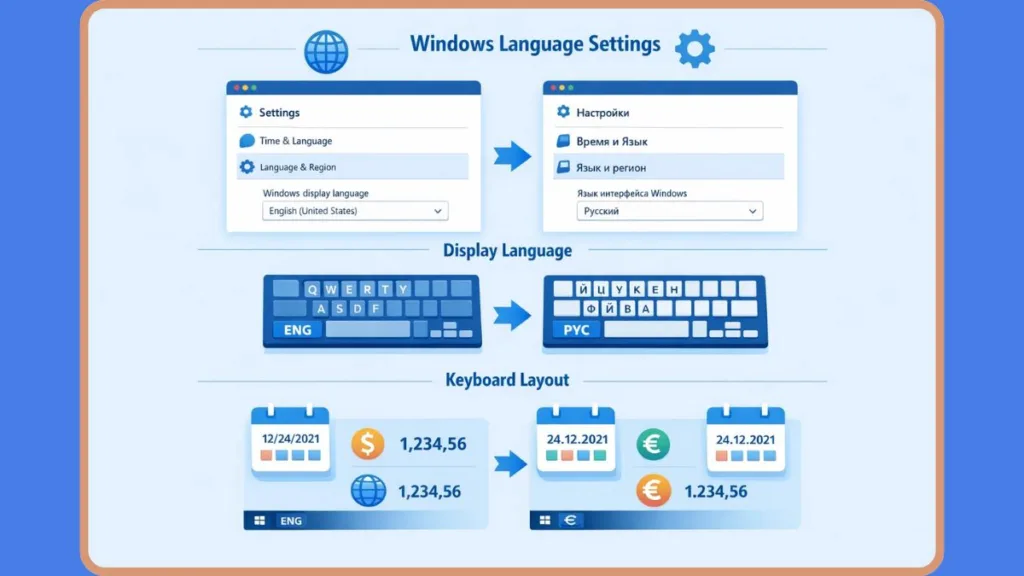
Changing Display Language Preferences Easily in Windows
The Windows Display Language defines the language used across your entire system interface. When properly configured, it updates system menus, built-in tools, and the login screen.
The Golden Rule: The full Language Pack must be installed before Windows can switch to it.
Step 1: Accessing the Main Language Settings Menu
To begin, you must open the main system settings. Click on the Start button and look for the Settings gear icon ⚙️. Once the settings menu is open, navigate to Time & Language, which is often represented by a clock icon 🕒. From there, select the option labeled Language & Region.
This section displays all currently installed languages and the order in which Windows prioritizes them. The order is significant because it affects system behavior beyond just the interface, influencing how apps and websites present content to you.
Tip: You can also press the Windows Key and type “Language settings” to open this page instantly.
Step 2: Installing a New Language from the List
Under the Preferred languages section, you will see a button marked Add a language, usually indicated by a prominent + sign. Click this to open the selection menu.
A searchable list will appear, allowing you to scroll manually or type the country name to locate the correct language faster. Once you have selected your desired language, click Next to proceed to the installation options screen.
Step 3: Confirming Critical Language Pack Installation
This is the most critical step in the entire process. On the installation screen, look under Optional language features and ensure that the box for Language pack is checked. Without downloading the full language pack, Windows utilities such as File Explorer and Settings will not fully switch to the new language.
Pro Tip: If you want the system interface to change immediately after installation, check the box that says Set as my Windows display language before clicking Install.
You can also select optional features such as Speech recognition or Text-to-speech at this stage, though it is worth noting that not all languages support every feature.
Note: Because language packs are downloaded from Microsoft servers, your device must be connected to the internet. The installation may take several minutes depending on connection speed.
Step 4: Applying the Display Language System Wide
After the installation completes, Windows will prompt you to Sign out. This step is not optional if you want the change to apply system-wide. You must select Sign out, wait for the system to log you off, and then log back in.
Once you have signed in again, the new language should apply across Settings, File Explorer, Desktop menus, System dialogs, and the Sign-in screen. If the changes appear partial or incomplete, try Restarting the device completely instead of only signing out.
Important Considerations for Admin Rights and Editions
There are a few restrictions and nuances to keep in mind.
First, Administrative privileges are required to change the display language. If the option appears greyed out, verify that you are logged in with an account that has administrator rights. Second, if you see a message stating that “only one language pack is allowed,” your device may be running a Windows Single Language edition. This specific version restricts users from switching display languages without upgrading the edition.
Additionally, be aware that some languages are not fully localized. In such cases, certain interface elements may remain in the first fully supported language found in your Preferred languages list.
For Windows 10 Users, the process is nearly identical, though the interface layout differs slightly; the steps remain located under Time & Language in Settings.
How to Change Language in Windows 11 via Shortcuts
Not every language adjustment requires reinstalling a display language. Often, you simply need to switch your keyboard layout or access language settings quickly to change how you type.
Quick Access to Language Settings
For the fastest route, press the Windows Key on your keyboard, type “Language settings,” and then press Enter. This instantly opens the configuration panel and eliminates the need to manually navigate through multiple Settings menus.
Switching Keyboard Layout Instantly
To cycle through your installed keyboard layouts while working, press Windows Key + Space. Each time you press this combination, the system switches to the next available layout in your list.
Note: This shortcut only changes how characters are typed. It does not alter the Windows interface language.
Alternatively, you can click the input language icon, which usually displays three letters like “ENG,” located in the taskbar system tray. This icon shows the currently active keyboard layout and allows you to switch between them with a mouse click.
Display Language vs Keyboard Layout
It is vital to distinguish between these two functions. Changing Display Language updates the interface text, such as menus and settings, while Changing Keyboard Layout affects typing behavior and key placement. These two settings operate independently, although Windows may automatically install a matching keyboard layout when you add a new display language.
Warning At the sign-in screen, be aware that your keyboard layout may have changed. Use the “password reveal” option (the eye icon 👁️) if necessary to confirm correct character input.
Managing the Input Language Icon Visibility
If the input language icon does not appear in the taskbar, you can restore it.
Go to Settings, navigate to Time & Language, and select Typing. From there, open Advanced keyboard settings. You will need to adjust options related to the Desktop language bar. Specifically, enabling the legacy desktop language bar may hide the modern taskbar icon, while disabling it restores the standard indicator.
Reset Language Settings in Windows 11 Fixing Bugs
Sometimes language changes do not apply completely. You may encounter issues where you see mixed language text, apps appearing in the wrong language, or incorrect date formats. A structured reset process solves most inconsistencies.
This reset is required in situations where the Display language changed only partially, some system elements remain untranslated, Microsoft Store content appears in another language, the Keyboard layout does not match expectation, or the Language keeps reverting after restart.
Step 1: Removing the Incorrect Language
Start by opening Language & Region settings. Look under the Preferred languages list, select the language you want to remove, and choose the Remove button.
Note: If the Remove option is greyed out, that language is currently set as the active display language. You must switch to another display language first before you can remove it.
Step 2: Reinstalling the Correct Language Pack
Once removed, add the language again. This time, ensure the full Language pack is selected during installation. Confirm the option to Set as my Windows display language.
Once installed, sign out and sign back in to apply the change fresh.
Step 3: Reordering Preferred Languages List
The order of languages in your list determines how Microsoft Store apps and websites select content language. You should move your desired language to the top of the list if needed.
While changing the order does not automatically change the display language, it directly affects content presentation in apps and online services.
Step 4: Adjusting Region Settings for Accuracy
Under the Language & Region menu, verify that the Country or Region setting matches your actual location.
Incorrect region settings may affect currency, calendar format, and Microsoft Store availability. You can also adjust the Regional format setting here to match your preferred date and time standards.
Step 5: Changing System Locale For Legacy Apps
To fix issues with older programs, open Administrative language settings. Locate the section labeled Language for non-Unicode programs, select Change system locale, and choose the correct language.
This ensures compatibility with legacy software. After changing the system locale, use the Copy settings option within the same menu to apply this configuration to the Welcome screen, System accounts, and New user accounts. You must Restart the device to finalize this reset.
Step 6: Disabling Language Sync If Necessary
If you use a Microsoft account, language preferences may sync across multiple devices, which can cause settings to revert unexpectedly.
To prevent this, go to Accounts settings, select Windows Backup, and find Remember my preferences.
Turn off the option for Language preferences. After confirming a stable configuration, you can re-enable sync. Resetting language settings does not delete personal files or installed applications.
Windows 11 Can’t Change Display Language Troubleshooting
If Windows refuses to switch the display language, one of several specific causes is usually responsible.
First, the Language Pack might not be installed fully; strictly installing the keyboard layout is insufficient, so verify that the complete language pack is downloaded. Second, you might face a Single Language Edition Restriction. If you see a message indicating that only one language pack is allowed, your license may not support multiple display languages.
If the Display Language Dropdown is greyed out, administrative permissions may be missing, requiring you to log in as an administrator. Similarly, if the Remove Button is greyed out, Windows does not allow removing the active display language, so you must switch to another language first.
In cases where Changes Revert Automatically, language sync via your Microsoft account may be overriding local changes; disable sync and reapply your settings. If Partial Translation Remains, note that some languages are not fully localized, and Windows will use the first fully supported language in the Preferred languages list for missing elements.
If the Microsoft Store Shows a Different Language, remember that the top language in Preferred languages determines Microsoft Store app and website language, so reorder the list accordingly. Finally, if the Keyboard Layout Unexpectedly Changed, note that display language installation may automatically add a corresponding keyboard layout; you will need to adjust keyboard settings manually to restore your preferred layout.
FAQ About Changing Language in Windows 11 and 10
Can Windows language be changed without reinstalling the operating system?
Yes. Both Windows 11 and Windows 10 support full display language changes directly in Settings without any need for reinstallation.
Does changing language affect files or installed programs?
No. Language settings only modify interface text and system formatting. Your personal files remain untouched.
Can multiple languages be installed at once?
Yes, you can install multiple languages unless your device is restricted by a Single Language edition license.
Why is the display language option unavailable?
The option may be unavailable due to an edition limitation, a missing language pack, or insufficient permissions on your user account.
How can I change the language on the login screen?
To change the login screen language, ensure your display language is correctly set, and then use the Copy settings feature in Administrative language settings to apply your current settings to system accounts.
Final Thoughts on Managing Windows Display Language and Region Settings
Changing the language in Windows is a structured configuration process involving display language, keyboard layout, preferred language order, and region settings. Understanding how these layers interact prevents most issues.
If something does not work correctly, the issue is typically related to incomplete language pack installation, account synchronization, edition limitations, or region mismatch. By carefully installing the correct language pack, confirming display settings, adjusting preferred order, and verifying region configuration, you can fully personalize your Windows environment without reinstalling the system.
With proper configuration, switching languages becomes straightforward, flexible, and entirely reversible, allowing you to adapt your device to your needs at any time.
Official Microsoft Support
Language packs for Windows (Microsoft Support) – This official page shows how to add and install language packs step-by-step, including how to set a new display language in Windows 11 and Windows 10.
Manage the language and keyboard/input layout settings (Microsoft Support) – A detailed Microsoft guide about installing languages, setting the Windows display language, and handling keyboard/input layouts. Official language and keyboard settings guide
Add languages to Windows images (Microsoft Learn) – Microsoft documentation that explains how Windows handles language packs at the system level if you’re building or customizing language configurations.
Visit Our Post Page: Blog Page