
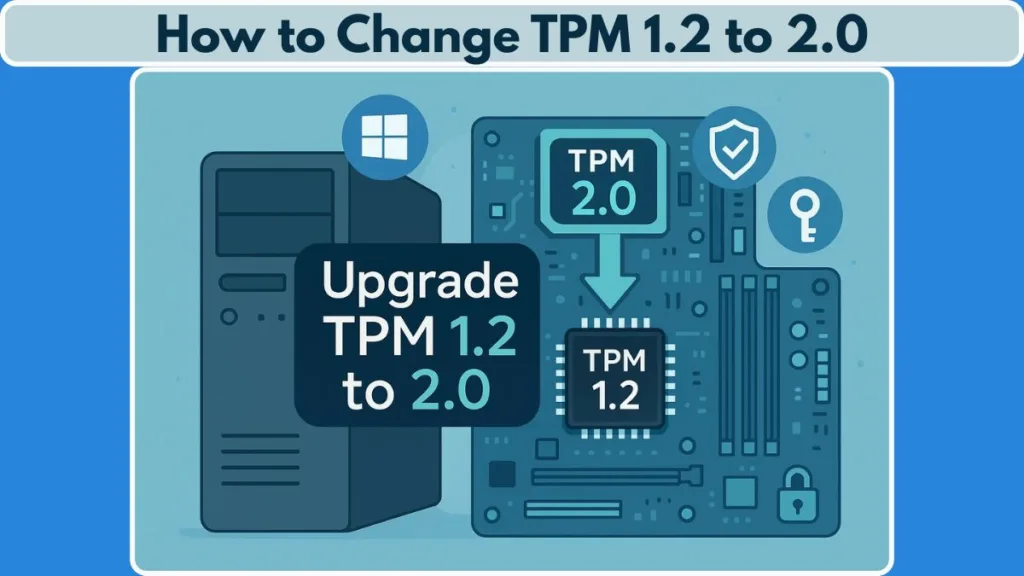
Curious how to change TPM 1.2 to 2.0 on your PC? This easy, step-by-step guide will help you enable TPM 2.0, strengthen your system security, and get ready for Windows 11 without any headaches.
Why TPM Matters More Than Ever
If you’ve tried installing Windows 11 and got stopped by a message about “TPM 2.0 required,” you’re not alone. For many PCs built in the last decade, the Trusted Platform Module (TPM) is already there — but it may be running an older version, or simply not switched on.
This is where the journey from TPM 1.2 to 2.0 comes in. It’s less about a confusing tech upgrade and more about unlocking the security standard that Windows 11 is built around. TPM 2.0 doesn’t just tick the compatibility box; it powers features like BitLocker drive encryption, Windows Hello for secure sign-ins, and stronger protection against modern threats.
Think of it as upgrading the lock on your front door: TPM 1.2 keeps things closed, but TPM 2.0 ensures they’re truly secure, using smarter keys and stronger safeguards.
In this guide, we’ll break down how to check what version of TPM you have, when and how you can upgrade, and the exact steps to safely enable TPM 2.0 on your device. No jargon overload — just clear steps to get your system ready for Windows 11 and the security benefits that come with it.
What is TPM and Why Upgrade from 1.2 to 2.0?
When people first hear about TPM (Trusted Platform Module), it often sounds like another hidden setting buried deep in their PC. In reality, TPM is one of the most important security foundations of a modern computer. It’s a small chip (or built-in firmware on many newer systems) that works as a digital safe for sensitive information. Instead of relying only on software, TPM uses hardware to generate, store, and protect encryption keys. This makes it much harder for attackers to tamper with your system at its core.
TPM 1.2 vs 2.0: Understanding the Difference
TPM 1.2 was introduced years ago and provided a strong baseline for protecting passwords and certificates. But over time, as cybersecurity threats evolved, its capabilities started showing limitations. It primarily supported SHA-1, an algorithm that is now considered outdated and vulnerable.
TPM 2.0, on the other hand, is designed for today’s needs. It supports modern cryptographic algorithms such as SHA-256, which is far more resilient against attacks. With TPM 2.0, your device is prepared to handle stronger encryption standards, advanced identity protection, and system integrity checks that keep unauthorized changes at bay.
In simple terms:
- TPM 1.2 = An older lock that still works, but can be picked by determined intruders.
- TPM 2.0 = A newer, smarter lock designed to resist today’s break-in methods.
Why TPM 2.0 is a Must for Windows 11
Microsoft made TPM 2.0 a requirement for Windows 11 installations, and it wasn’t just to make life harder for upgraders. The move is about raising the baseline for device security across millions of PCs. With TPM 2.0 enabled, you gain access to:
- BitLocker Drive Encryption: Ensures your data is unreadable to anyone who doesn’t have the right credentials, even if your device is stolen.
- Windows Hello: Provides secure PIN or biometric logins that never store passwords in plain text.
- Device Encryption for Modern Standby: Keeps lightweight, always-on devices safer without draining performance.
- System Guard and Credential Guard: Blocks malicious code from taking over the boot process or stealing your credentials.
These are not optional perks; they’re now part of the core Windows 11 experience, and TPM 2.0 is the key that unlocks them.
Beyond Compatibility: Long-Term Benefits of TPM 2.0
Even if you’re not planning to jump to Windows 11 right away, enabling or upgrading to TPM 2.0 is an investment in your PC’s future security. As more software, services, and cloud features rely on hardware-backed encryption, TPM 2.0 ensures your system remains aligned with modern standards.
It also offers peace of mind: you don’t have to worry that the lock protecting your digital identity will go obsolete before your computer does.
How to Check if You Already Have TPM 2.0
Before diving into an upgrade, it’s important to confirm what version of TPM your PC currently has. Skipping this step can lead to unnecessary updates or confusion, especially since some PCs are already capable of running TPM 2.0 but have it disabled by default. Checking your TPM version is straightforward and can be done using built-in Windows tools without any additional software.
Option 1: Using the Windows Security App
Windows includes a Security app that provides a clear overview of your device’s protection features, including TPM. Here’s how to check:
- Open Settings by pressing
Windows + Ior selecting the gear icon from the Start menu. - Navigate to Update & Security > Windows Security > Device Security.
- Look for a section called Security processor.
- If this section is missing, your TPM might be disabled in the BIOS, or your device may not have one.
- If the section is visible, click Security processor details.
- Check the Specification Version. If it reads 2.0, your TPM is already up to date. If it shows 1.2, then your PC will need the upgrade to meet Windows 11 requirements.
This method is simple and gives you an immediate overview of whether your device is ready for modern security features.
Option 2: Using the TPM Management Console (tpm.msc)
For a slightly more technical look, the TPM Management Console provides detailed information about your chip and its status:
- Press
Windows + Rto open the Run dialog. - Type
tpm.mscand hit Enter. - The console will display one of the following messages:
- “Compatible TPM cannot be found” – Your TPM is either disabled or not present. Check your BIOS settings.
- “The TPM is ready for use” – The chip is active. Look under TPM Manufacturer Information for Specification Version to confirm whether it is 1.2 or 2.0.
This tool not only verifies the version but also indicates whether the TPM is active and ready, which is critical for features like BitLocker and Windows Hello.
Quick BIOS/UEFI Check
Some PCs, particularly custom-built desktops, ship with TPM disabled in the UEFI/BIOS even if the hardware supports 2.0. If your Windows tools indicate no TPM, you can check the BIOS directly:
- Restart your computer and enter BIOS/UEFI settings (commonly by pressing F2, Delete, Esc, or F10 during startup).
- Look under tabs like Security, Advanced, or Trusted Computing.
- Locate settings labeled TPM, Intel PTT, or AMD fTPM.
- Ensure the option is enabled, then save and exit.
- Return to Windows and repeat the steps above to confirm the TPM is now active and shows version 2.0.
Checking your TPM version upfront saves time and prevents errors during the upgrade process. It also gives you confidence that your PC is ready to meet Windows 11 requirements and take advantage of enhanced security features.
Step-by-Step Guide: How to Change TPM 1.2 to 2.0
Upgrading your TPM from 1.2 to 2.0 might sound technical, but with a systematic approach, it becomes a clear, manageable process. This section breaks it down into actionable steps while keeping your data safe and ensuring your system stays compatible with Windows 11.
Step 1: Backup and Suspend BitLocker
Before making any changes to TPM, it’s critical to protect your encrypted data:
- If BitLocker or other drive encryption is enabled, suspend protection. This prevents your system from locking you out during the TPM update.
- Open Control Panel > BitLocker Drive Encryption.
- Select Suspend protection next to your encrypted drives.
- Confirm and allow the system to temporarily pause encryption tasks.
By handling encryption first, you reduce the risk of data loss and make the firmware update process smoother.
Step 2: Verify Your Current TPM Version
Even if you’ve checked before, it’s best to confirm your TPM version immediately prior to the upgrade:
- Press
Windows + R, typetpm.msc, and hit Enter. - Look for “Specification Version” under TPM Manufacturer Information.
- Confirm it shows 1.2, which indicates the upgrade is needed.
This double-check ensures you’re not applying updates unnecessarily, which could complicate the process.
Step 3: Locate the Correct Firmware Update Utility
Different PC vendors provide manufacturer-specific firmware updates. Using the wrong update can disable your TPM, so it’s important to follow official guidance:
- Dell: Visit Dell Support and locate the TPM firmware update utility for your model.
- HP / HP Enterprise: Check HP’s official firmware update pages.
- Lenovo: Use Lenovo’s BIOS/firmware update tools to switch TPM 1.2 to 2.0.
Once downloaded, move the utility to a USB drive if needed for bootable updates.
Step 4: Apply Windows Updates Before Firmware
Microsoft strongly recommends installing all pending Windows updates before running TPM firmware updates. This ensures the system can properly recognize the upgrade and avoids potential errors.
- Open Settings > Update & Security > Windows Update.
- Install any critical or security updates.
- Restart your PC if prompted.
Skipping this step can cause the firmware update to fail or prevent TPM from functioning correctly afterward.
Step 5: Update the TPM Firmware
With backups done and updates applied, it’s time to run the firmware utility:
- Close all programs and ensure your PC is connected to a reliable power source.
- Launch the firmware update utility.
- Follow the on-screen prompts carefully.
- Do not interrupt the process — turning off the PC mid-update can brick the TPM.
- Once completed, the system will usually restart automatically.
At this point, your TPM chip has been upgraded to version 2.0, but it may still need to be enabled in BIOS/UEFI.
Step 6: Enable TPM 2.0 in BIOS/UEFI
The firmware update alone doesn’t always activate TPM 2.0. Access BIOS/UEFI to ensure it’s turned on:
- Restart your PC and press the BIOS key (commonly F2, Delete, Esc, or F10).
- Navigate to Security > TPM / Trusted Computing or Advanced Settings.
- Enable TPM, Intel PTT, or AMD fTPM, depending on your CPU.
- Save changes and exit BIOS.
Once back in Windows, your TPM should be active and recognized as version 2.0.
Step 7: Verify the Upgrade
After rebooting:
- Press
Windows + R, typetpm.msc, and check Specification Version. - Ensure it now reads 2.0.
- Check that Windows recognizes the TPM under Settings > Update & Security > Device Security.
Step 8: Resume BitLocker and Security Features
Now that TPM 2.0 is active:
- Resume BitLocker encryption to protect your drives.
- Reconfigure Windows Hello if needed.
- Your device is now ready to fully support Windows 11 security features, including Secure Boot, Device Encryption, and advanced system integrity protections.
Pro Tips for a Smooth Upgrade
Always use official OEM utilities; third-party tools can damage your TPM.
Ensure your firmware and BIOS are up to date before starting.
Back up important files even if BitLocker is suspended — extra caution is never wasted.
Avoid interrupting the update process; patience ensures a clean upgrade.
By following these steps, you transform your system’s security foundation and ensure Windows 11 compatibility without risking data loss or system instability.
Clearing TPM: Do You Need To?
After upgrading or enabling TPM 2.0, many users wonder whether they should clear the TPM. This step can seem intimidating, but when done correctly, it ensures the security module is in a fresh state and ready to handle Windows 11’s encryption and authentication features. Let’s break down what clearing TPM means, when it’s necessary, and how to do it safely.
What Does “Clearing TPM” Really Mean?
Think of your TPM as a digital safe that stores encryption keys, certificates, and other security data. Clearing the TPM doesn’t remove the chip itself — it erases all stored keys and resets the module to its default state.
- Why it matters: Any keys associated with old encryption or older TPM versions may not be compatible with the upgraded TPM 2.0 firmware. Clearing ensures your system starts fresh, minimizing potential conflicts with BitLocker, Windows Hello, or Secure Boot.
- Important warning: Once cleared, some features like Windows Hello PIN or biometric sign-in may stop working temporarily until reconfigured.
When Should You Clear TPM?
You should consider clearing TPM if any of the following apply:
- You just updated TPM firmware from 1.2 to 2.0.
- Windows prompts you after a firmware or security update that TPM configuration needs to be reset.
- You’re troubleshooting TPM errors or preparing a device for a new Windows 11 installation.
Do not clear TPM if you’re on a work or school PC without guidance from your IT administrator — this could lead to loss of access to encrypted files or corporate resources.
How to Clear TPM Safely
Windows provides a guided way to clear TPM without risking your system:
- Open Windows Security > Device Security > Security processor details.
- Select Security processor troubleshooting, then choose Clear TPM.
- Follow the prompts carefully and restart your PC when instructed.
- After restart, Windows may prompt you to reconfigure Windows Hello or re-enroll security keys.
Pro tip: Always back up your data before clearing TPM. Even though the operation only affects stored keys, it’s better to be safe, especially if you use BitLocker-encrypted drives.
Why Clearing TPM Helps After an Upgrade
Clearing TPM after moving from 1.2 to 2.0 ensures that:
- All old encryption keys tied to TPM 1.2 are removed.
- New cryptographic features in TPM 2.0 can function correctly.
- Windows 11 can fully enforce Secure Boot and Credential Guard protections without conflicts.
It’s a simple step that prevents unexpected errors while maximizing the security benefits of the upgraded TPM.
Clearing TPM may feel like a big step, but it’s often necessary after an upgrade. When done correctly and safely, it prepares your system to take full advantage of Windows 11’s security framework, ensuring your digital environment is secure, clean, and ready for future updates. If you need more help, visit Microsoft Official Document: Troubleshoot the TPM
FAQs: Clearing Up Your TPM Questions
Upgrading or enabling TPM 2.0 can raise several questions. Here’s a concise guide to common concerns, answered clearly so you can move forward confidently.
Does Windows 11 Require TPM 2.0 or 1.2?
Windows 11 requires TPM 2.0. TPM 1.2 is no longer sufficient for installation or for supporting modern security features like BitLocker and Windows Hello.
How Do I Check My Current TPM Version?
Press Windows + R, type tpm.msc, and hit Enter. Look under Specification Version in the TPM Management console. Version 2.0 means you’re ready; 1.2 indicates an upgrade is needed.
Can All TPM 1.2 Chips Be Upgraded to 2.0?
Not all PCs support an upgrade. Check your manufacturer’s firmware updates — some systems allow switching from 1.2 to 2.0, while others may require new hardware.
Is It Safe to Update TPM Firmware?
Yes, if you use official OEM utilities and follow instructions carefully. Always back up data and install Windows updates first to avoid errors.
Do I Need to Clear the TPM Before Upgrading?
Clearing TPM is recommended after a firmware upgrade, not before. It resets stored keys, ensuring compatibility with TPM 2.0 features.
Where Can I Find the TPM Firmware Update for My PC Model?
Check your PC manufacturer’s support site: Dell, HP, Lenovo, and others provide specific firmware utilities and instructions tailored to each model.
What if I Encounter TPM Errors During Windows 11 Installation?
Verify that TPM is enabled in BIOS/UEFI and that your system has the correct firmware version. If problems persist, consult your manufacturer’s support resources.
Conclusion: Securing Your PC with TPM 2.0
Upgrading from TPM 1.2 to 2.0 isn’t just a box to tick for Windows 11 compatibility — it’s a meaningful step toward a more secure, future-ready system. By following the proper steps to check your TPM version, apply firmware updates, enable the module in BIOS/UEFI, and clear TPM when necessary, you ensure that your device is fully prepared to leverage modern security features like BitLocker, Windows Hello, and System Guard.
Remember: success lies in planning and careful execution. Always back up your data, install Windows updates first, and rely on official manufacturer utilities to minimize risk. The result is a PC that not only meets Microsoft’s requirements but also protects your digital identity and sensitive data more effectively than ever before.
With TPM 2.0 active and your system ready, you can confidently move forward with Windows 11 upgrades or enjoy enhanced security on your current setup. It’s a small step with big benefits, giving you peace of mind and a safer computing experience.
Visit Our Post Page: Blog Page