
Free up space and fix update issues fast with this simple guide on how to clear the Delivery Optimization cache in Windows 10/11 safely. Learn the quickest methods, why this cache grows, and when you should remove it for smoother performance.
If you’ve ever opened Disk Cleanup and spotted something called Delivery Optimization Files, you’re not alone. Most Windows users pause right there—What is this, and can I safely delete it? The good news is yes, you can, and this guide shows you exactly how to clear the Delivery Optimization cache without risking anything important.
This simple cleanup can free up space, fix sluggish updates, and help your PC run a little smoother. Whether you’re on Windows 10 or Windows 11, this walkthrough makes the whole process easy, beginner-friendly, and completely stress-free.
What Are Delivery Optimization Files in Windows?
Think of Delivery Optimization as Windows’ way of sharing the workload behind the scenes. Instead of pulling every update from Microsoft’s servers, your PC can grab pieces of data from other devices nearby — or even from eligible internet peers — reducing the load on any single source.
These pieces get stored temporarily as Delivery Optimization Files, forming a local update cache on your machine. This cache helps speed things up the next time you or another device needs the same data. The idea is, if someone already downloaded the update, you don’t have to re-download the entire thing — smart, right?
In simple terms: these files are just temporary update fragments Windows keeps on hand to save bandwidth and make downloads faster.
A few additional points worth knowing:
- The feature works for OS updates, Microsoft Store apps, drivers, and more.
- Delivery Optimization decides dynamically whether to fetch data from Microsoft servers, local peers, or internet sources — whichever is faster.
- Because this system is designed for efficiency, the cache is temporary, and Windows clears older files automatically based on space, age, or update rules.
Bottom line: Delivery Optimization Files exist to make Windows updates more efficient by reducing redundant downloads and improving speed — but since they aren’t meant to stay forever, knowing how to clear them keeps your system running smoothly.
Why the Delivery Optimization Cache Gets Too Big
Why the Cache Keeps Expanding Over Time
The Delivery Optimization cache is helpful, but it doesn’t always know when to stop growing.
Over time, it collects multiple versions of update fragments, app packages, and temporary data that Windows no longer needs.
When these leftovers stack up, the cache can quietly turn into a space-hogging folder you didn’t sign up for.
Update Chunks and Windows Update Components Add Bulk
One common reason is that Windows keeps certain update chunks around “just in case” they’re needed again. Add in larger Windows Update components, and the cache naturally expands — especially for users on systems with limited storage.
Also, the cache lives on your system drive, and its growth is controlled by parameters like DOMaxCacheSize, DOAbsoluteMaxCacheSize, and DOMaxCacheAge. When these are left at default settings, the cache can quietly consume more disk space than expected.
DoSvc Activity Can Increase Disk Usage
You may also notice spikes in DoSvc (the Delivery Optimization service) activity. This happens when the service handles old data, downloads new content, or seeds updates to other devices.
If the folder isn’t trimmed regularly, that activity increases both disk usage and overall system load — sometimes even causing high memory or bandwidth usage.
Interrupted Updates Leave Behind Temporary Files
Another contributor is network-related delays or interrupted updates. If downloads fail midway, partial files stay behind as temporary files, waiting for Windows to deal with them later.
Sometimes “later” never comes—leaving these unused fragments sitting on your drive indefinitely.
Summary: Helpful but Overgrown Without Cleanup
Put simply, the cache gets big because it’s doing its job — storing and managing update data for speed and reliability. But without regular cleanup, it can overstay its welcome and nibble away at your valuable disk space and performance.
Is It Safe to Delete Delivery Optimization Files?
Absolutely — clearing Delivery Optimization Files is completely safe.
These files are simply temporary update fragments that Windows uses while downloading or sharing updates. Once those updates are installed, the cache no longer serves a critical purpose.
Deleting Delivery Optimization Files does NOT remove your updates or harm your Windows system in any way.
Deleting them won’t remove actual updates, break system features, or cause Windows to behave unpredictably. At worst, your PC may download a fresh copy of an update later, which is perfectly normal.
“Microsoft includes these files in Disk Cleanup because they are non-essential and safe to remove.”
Think of these files as leftover setup pieces Windows no longer needs. Removing them frees up space, reduces clutter, and keeps your system running smoothly — without any risk to your data or operating system.
How to Clear the Delivery Optimization Cache in Windows
Clearing the Delivery Optimization cache is one of the simplest ways to free up disk space, fix slow updates, and resolve leftover temporary file issues.
Windows gives you multiple built-in options — from intuitive tools to advanced commands — all safe and straightforward.
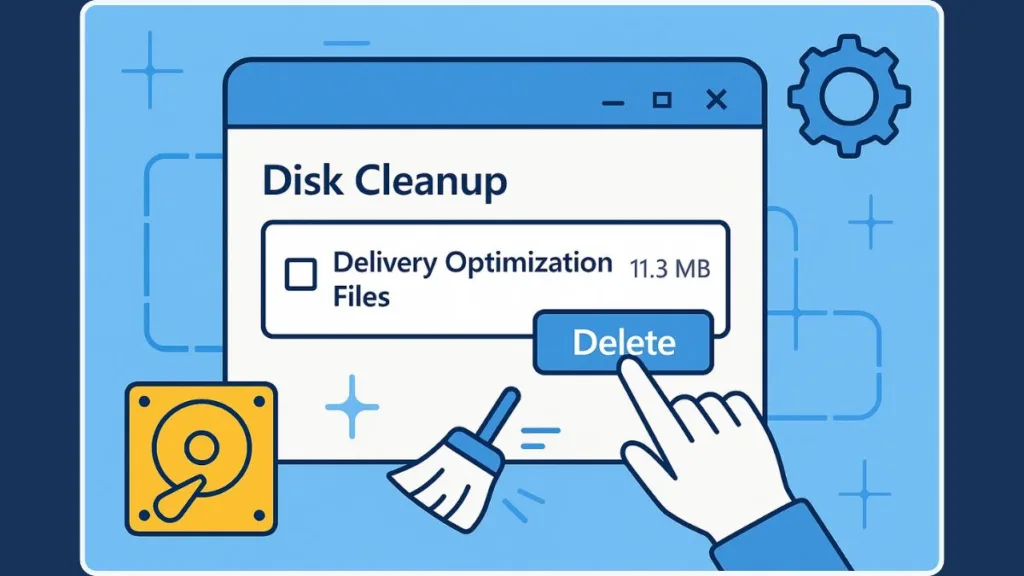
Method 1: Clear Delivery Optimization Files Using Disk Cleanup (Recommended)
The Disk Cleanup tool is the easiest way for most users to remove Delivery Optimization Files that Windows no longer requires.
- Open the Start Menu and type Disk Cleanup.
- Select your main drive (usually C:).
- Scroll to find Delivery Optimization Files.
- Check the box and click OK to delete them.
Microsoft places Delivery Optimization Files in Disk Cleanup because they’re completely safe to remove once updates are completed.
This method is ideal when you want a simple, guided cleanup.
Method 2: Clear Delivery Optimization Cache Using PowerShell (Fast One-Line Command)
PowerShell offers a direct command that wipes the cache instantly and cleanly.
- Search for Windows PowerShell and choose Run as Administrator.
- Enter this command:
Get-DeliveryOptimizationStatus | Clear-DeliveryOptimizationCache
PowerShell provides a fast, accurate way to clear outdated update fragments with a single command.
Perfect for users who prefer speed over menus.
Method 3: Reset Delivery Optimization Cache via Command Prompt (Fixes Corrupted Cache)
If you’re dealing with update errors or corrupted cache files, this deeper reset can help.
- Open Command Prompt as Administrator.
- Stop the DoSvc (Delivery Optimization Service):
net stop dosvc - Remove stored update data:
rd /s /q %systemroot%\SoftwareDistribution\Datastore - Restart the service:
net start dosvc
This reset forces Windows Update to rebuild its datastore, often resolving stubborn update failures.
A reliable method for troubleshooting.
Method 4: Delete Delivery Optimization Cache Through Windows Settings (Easy UI Path)
Windows 10 and Windows 11 include a built-in button for clearing these cached files.
- Go to Settings > Update & Security > Delivery Optimization.
- Click Advanced options.
- Select Clear under Delivery Optimization files.
This is the simplest built-in menu route for users who prefer staying inside Windows Settings.
Ideal for non-technical users.
Method 5: Manually Delete Delivery Optimization Cache Using File Explorer (Full Control Method)
If you prefer a hands-on approach, File Explorer lets you manually remove all cached items.
- Press Windows + E to open File Explorer.
- Paste this path into the address bar:
%localappdata%\Microsoft\Windows\DeliveryOptimization - Delete everything inside the folder.
Manual deletion clears leftover temporary files that Windows didn’t remove automatically—often caused by canceled or broken downloads.
Useful for power users who want full visibility.
Helpful Technical Notes About Cache Behavior (Accurate & System-Level Insight)
Windows controls the size and behavior of Delivery Optimization Cache using policies such as:
- DOMaxCacheSize
- DOAbsoluteMaxCacheSize
- DOMaxCacheAge
These settings determine how much data Windows keeps and how long it keeps it.
Tip: Clearing the cache never removes installed updates — Windows will re-download any required content automatically.
All the methods above work across Windows 10 and Windows 11 and are fully supported by Microsoft for managing storage, improving update reliability, and resolving common update issues.
How to Turn Off Delivery Optimization
If you notice spikes in bandwidth usage, unexpected DoSvc activity, or updates hogging your internet — turning off Delivery Optimization (or limiting it) can help.
This doesn’t stop Windows updates, it just stops peer-to-peer and shared-cache behavior.
Turn Off Delivery Optimization via Windows Settings
- Open Settings > Windows Update > Advanced options > Delivery Optimization.
- Toggle Off the option “Allow downloads from other PCs” (or “Allow downloads from other PCs on the Internet / local network,” depending on Windows version).
Turning off Delivery Optimization stops peer-to-peer update sharing, ensuring updates come only from Microsoft’s servers.
This ensures your PC doesn’t use upload bandwidth to serve updates to others, or download bits from unknown peers — useful if you have a limited or metered internet connection.
Adjust Bandwidth or Sharing Settings Instead of Full Disable
If you don’t want to completely disable the feature, but want to reduce its impact:
- In Delivery Optimization > Advanced options, you can limit upload/download bandwidth or restrict peer sharing.
- This way, Delivery Optimization stays active but becomes more network-friendly.
Limiting Delivery Optimization bandwidth is a smart middle-ground if you want efficient updates but without network strain.
Advanced: Delivery Optimization Cache Location Explained
If you like to peek under the hood, knowing where Windows stores Delivery Optimization cache gives you more control — especially useful for manual cleanup, changing cache location, or diagnosing issues.
Default Cache Location on Disk
By default, Windows stores cached update pieces, metadata, and temporary fragments at:
%localappdata%\Microsoft\Windows\DeliveryOptimization
This location is used by Delivery Optimization to store parts of updates temporarily, enabling peer-to-peer sharing or faster installs.
Configuring Cache Location, Size and Age (For Power Users / Admins)
Windows also lets you customize where the cache lives (if you want it on a different drive), and control how much space it uses and how long it stores data.
Key settings include:
- DOModifyCacheDrive — lets you move the cache folder to another drive (e.g. D:).
- DOMaxCacheSize / DOAbsoluteMaxCacheSize — cap how much disk space the cache can use.
- DOMaxCacheAge — controls how long cached files stay before expiry.
If you have limited SSD space, moving the Delivery Optimization cache to a larger drive reduces space pressure while keeping updates functional.
Why the Location Matter: For Cleanup or Troubleshooting
Knowing the cache path is useful when:
- You want to manually inspect or delete cache files not removed automatically, especially after interrupted updates.
- You want to move cache to a different drive (e.g. from SSD to HDD) to conserve space.
- You need to diagnose update problems or permission issues — sometimes peer-to-peer caching fails if the folder permissions or path are misconfigured.
This folder is just a temporary staging area — clearing or relocating it doesn’t affect already installed updates.
Precautions Before Clearing the Delivery Optimization Cache
Clearing the Delivery Optimization cache is safe, but a few precautions can help avoid surprises — especially if your PC is running important tasks or limited on space.
Backup Important Files: Because Better Safe Than Sorry
Even though the cache cleanup focuses on temporary update data, it’s always good practice to back up any critical documents or personal files before doing system-wide cleanup or maintenance.
Windows offers built-in tools for backup — you can use external drives or features like Windows Backup and Restore to safeguard your data.
Making a backup before maintenance gives you peace of mind — just in case something unexpected happens.
Create a System Restore Point: A Useful Safety Net
A system restore point is a snapshot of your OS settings and system files. If something goes wrong after cleaning up caches (or after updates), you can revert back to the restore point. Most Windows versions (10, 11) support this.
That said, automatic restore-point creation doesn’t always trigger for every action — especially for smaller maintenance tasks. It’s smart to manually create a restore point before you clear caches or delete system files.
Think of a restore point as a safety snapshot — easy to roll back to if system behavior changes after cleanup.
Wait for Ongoing Updates to Finish: Avoid Midway Interruptions
Before you clear the cache, check whether Windows Update or other system downloads are running. If updates are in progress, it’s better to wait until they’re completed. Clearing cache mid-update might lead to incomplete downloads or stale temporary files lingering around.
This helps ensure the cleanup removes only unnecessary fragments, and not parts of active updates or installations.
Understand What the Cache Actually Contains: Temporary Data, Not Essentials
The Delivery Optimization cache holds temporary update fragments, metadata, and partial download pieces — not installed updates or system-critical data. After an update completes successfully, these cached files are redundant.
That’s why clearing them is safe, and in many cases recommended for reclaiming disk space. Knowing this can help you feel confident that you won’t accidentally delete something vital.
These files are temporary by design — removing them cleans up space without harming your system.
Use Trusted Tools: Stick to Built-In Windows Utilities when Possible
Whenever possible, rely on official Windows tools like Disk Cleanup, manual cache folder deletion through File Explorer, or the built-in Settings > Delivery Optimization options. These methods ensure that you only remove safe-to-delete files.
If you use third-party cleanup tools, double-check what they target to avoid unintentional deletion of important files or system components.
These precautions help make sure the cleanup of Delivery Optimization is smooth, safe, and effective — especially for users who want to free up space or fix update-related hiccups.
FAQ: Delivery Optimization Cache Cleanup in Windows
Is it safe to delete Delivery Optimization Files?
Yes. Delivery Optimization files are just temporary cache files. Deleting them will not harm your Windows system or installed updates.
What happens if I delete Delivery Optimization Files?
You free up disk space and remove unnecessary temporary files. If needed in the future, Windows will simply re-download updates from Microsoft servers.
Why are Delivery Optimization Files sometimes so large?
Because Windows stores many update fragments, metadata, or partial downloads — especially after big updates or multiple app downloads. Over time, these add up.
Can I disable Delivery Optimization permanently?
Yes. Windows allows you to turn off the peer-to-peer sharing option via Settings: this stops P2P update sharing while still allowing updates from Microsoft’s servers.
Does clearing the Delivery Optimization cache speed up my PC?
It can help — mostly by freeing up disk space and removing clutter. It won’t directly boost processing speed, but it may improve update performance and reduce storage-related slowdowns.
Will deleting the cache fix Windows Update problems?
Often — yes. If the cache held corrupted or incomplete files, clearing it can help Windows rebuild update data correctly and resolve many common update errors.
Will Delivery Optimization Files come back after I delete them?
Yes Windows will recreate the cache if and when new updates or app downloads occur. That’s normal behavior and part of how Delivery Optimization works
Final Wrap-Up: When Should You Clear This Cache?
Clearing the Delivery Optimization cache isn’t something you need to do every day — but there are a few moments when it’s genuinely worth the effort. Think of it as a simple maintenance step that keeps your system tidy and updates running smoothly.
When You’re Running Low on Disk Space
If your storage is tight — especially on a small SSD — removing old temporary update fragments can free up valuable space right away.
Windows lists Delivery Optimization Files as safe-to-delete items in Disk Cleanup and Storage settings, making them an easy target during space shortages.
When Windows Updates Keep Failing or Stalling
If updates stall, fail to install, or behave unpredictably, a stale or corrupted cache may be contributing to the issue.
Clearing it gives Windows Update a clean base to rebuild fresh update data.
After Large Feature Updates or Interrupted Downloads
Major updates often download large update chunks, and interrupted downloads can leave behind unused pieces.
Clearing the cache after these events removes leftover fragments that no longer serve a purpose.
As Part of Regular System Maintenance
Including cache cleanup in your regular monthly or quarterly maintenance helps prevent silent buildup of update fragments.
A periodic cleanup keeps your system running smoother and avoids unexpected disk bloat.
When Network or Disk Performance Feels Off
If your PC shows unexpected disk usage, network slowdown, or heavy background activity from DoSvc, clearing the cache can help reset Delivery Optimization behavior.
This simple reset often calms down excessive bandwidth usage and background processing.
A quick cleanup now can save you from storage headaches and update hiccups later.
Clearing the Delivery Optimization cache is simple, safe, and effective — a small habit that helps keep your Windows system clean, responsive, and clutter-free over time.
Useful Official Resources for Clearing the Delivery Optimization Cache in Windows
How Delivery Optimization Works – Official Overview: Microsoft explains the full logic behind Delivery Optimization—how it downloads updates, uses peer-to-peer sharing, and why temporary cache files exist in the first place.
Delivery Optimization in Windows: Official Support Guide: A simple, user-facing guide from Microsoft that covers what the feature does and how Windows handles downloads in Windows 10 and 11. They also touch on storage behavior and built-in cleanup options.
Delivery Optimization Reference: Advanced Settings + Policies: If you enjoy understanding the technical side—like how cache size is controlled, how bandwidth limits work, or how admins can configure behavior—this documentation breaks it all down.
Free Up Drive Space in Windows: Microsoft’s general cleanup guide. It’s a handy reference if your goal is to create a well-rounded maintenance routine beyond Delivery Optimization.
Delivery Optimization & Privacy Details: A great page to share with readers who worry about security or data exposure. Microsoft explains what Delivery Optimization does—and importantly, what it doesn’t touch.
Monitor Delivery Optimization Usage: If someone wants to track bandwidth, see how much space the cache uses, or get a deeper look at optimization behavior, this monitoring guide is the best place to start.
Visit Our Post Page: Blog Page