
Stop typing emails one by one. Learn how to quickly create an email group in Outlook 365 in 2025, manage your contacts, and send updates with ease.
If you’re tired of typing the same set of email addresses every time you send an update, you’re not alone. Outlook gives you a simple way to pull everyone together under one name, so you can reach your team, class, or group in just a click.
It’s a huge time-saver—especially if you handle regular reports, project updates, or routine announcements.
Outlook officially describes a contact list (or what many people call an “email group”) as a collection of email addresses that helps you send messages to multiple people at once. This small feature can make a big difference in your everyday workflow.
Understanding Outlook’s Different Group Types
Before you get started, it helps to know that Outlook uses different terms depending on where you’re working. You might see Contact Group, Contact List, Distribution List, or even a Microsoft 365 Group.
Each option looks similar at first, but they work very differently. For example:
- A Microsoft 365 Group comes with shared tools like calendars and files.
- A Contact List is simply meant for sending messages to several people at once.
Most users only need the simple, personal list — nothing complicated.
This guide walks you through the straightforward method that helps you email multiple people quickly and stay organized without extra features you don’t need.
A Guide for All Outlook Platforms
Whether you use Outlook on Windows, Mac, the web, or the new Outlook app, the steps are simple to follow.
We’ll break everything down clearly—one version at a time—so you can set up your group quickly and start sending messages with confidence.
Quick Steps to Create an Email Group in Outlook 365
Sometimes you just need the fast version—no extra explanations, no navigating different menus. Here’s the quickest way to set up a group so you can start sending messages right away.
Fast Step-By-Step Setup
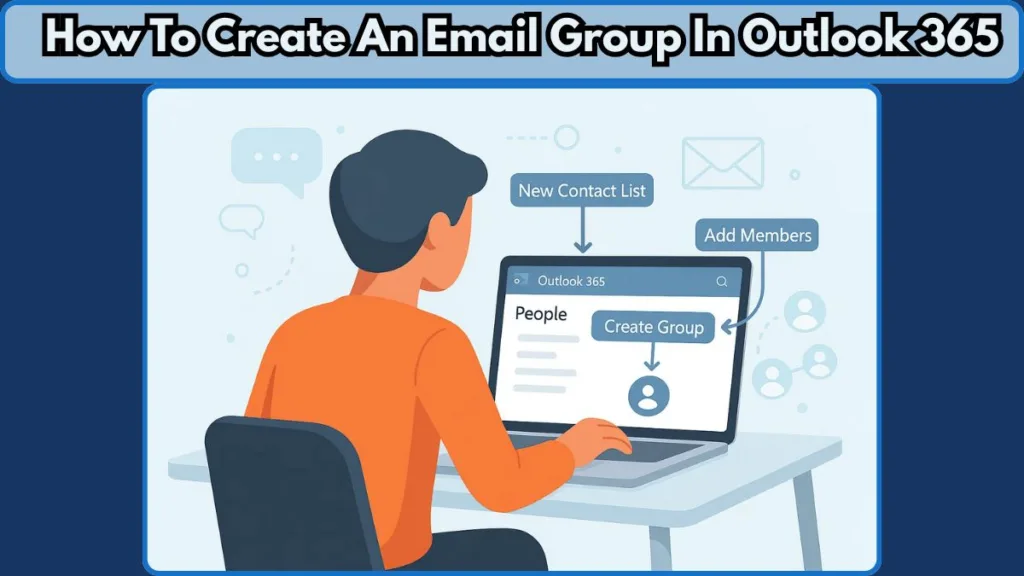
- Open Outlook on your device.
- Select the People view to access your contacts.
- Click New Contact Group or New Contact List (depending on your version).
- Type a name for your group.
- Select Add Members and choose where you want to pull contacts from.
- Click Save & Close to finish.
These steps follow the official Microsoft method for creating a new list.
Platform Notes You Should Know
- In the new Outlook for Windows, you may need to locate the All Contact Lists section before creating a new one.
- On Mac and Outlook Web, the option appears as New Contact List rather than “Contact Group.”
- Once the group is created, sending a quick test email to the group name helps confirm that everything is working properly.
What an Email Group in Outlook 365 Actually Means
An email group in Outlook is a personal list of contacts that lets you send one message to many people without entering each address manually.
You simply use a single group name, and Outlook delivers the email to everyone included.
This feature is especially useful for teams, project groups, departments, parent lists, or any set of people you communicate with regularly.
Why Outlook Uses Different Names for the Same Idea
Depending on the version you’re using, Outlook may call this feature a Contact Group, Contact List, or Distribution List. While the names vary, the purpose stays the same — a straightforward list that helps you email several people at once.
But here’s an important distinction: this is not the same as a Microsoft 365 Group. That option is designed for collaboration and comes with shared tools like shared mailboxes, shared calendars, document libraries, and even support for external guests.
Microsoft explains that a Microsoft 365 Group goes beyond simple email distribution—it includes a range of team-focused features that most people don’t need when they only want a simple contact list.
How an Email Group Helps You Stay Organized
- You keep everyone on the same page with one message, instead of individually typing addresses.
- You avoid missing someone or sending emails to outdated contacts.
- You save time with each email by using a group alias rather than a full list of names.
- You maintain a clean and structured contact system inside Outlook—making future communication smoother.
Because you’re working with a pre-built list, you spend less time on administrative steps and more time on the message itself.
Contact Group vs Microsoft 365 Group: Know the Difference Before You Start
Outlook uses the word “Group” in multiple places, and that’s where most people get confused. Before you create anything, it’s important to know which type of group you actually need.
One is meant for simple emailing, while the other is built for team collaboration.
Choosing the wrong one can lead to features you don’t want—or missing the ones you expected.
What a Contact Group Really Is
A Contact Group (also called a Contact List or Distribution List in some versions) is the simplest option. It’s a personal list stored in your Outlook contacts.
You use it when you want to send one message to multiple people without typing each address manually.
Key traits of a Contact Group:
- It’s private to you unless you manually share it.
- Members don’t get access to shared tools or calendars.
- It’s perfect for recurring updates, school lists, project teams, and small business communication.
- You only manage email addresses, nothing more.
Think of it as a quick-send list—easy, lightweight, and focused solely on emailing.
What a Microsoft 365 Group Includes
A Microsoft 365 Group is very different. This is a full workspace designed for collaboration across your organization.
When you create it, Outlook automatically sets up a set of shared tools for the entire team. Every Microsoft 365 Group comes with a shared mailbox, shared calendar, shared document library, and a shared OneNote notebook.
Additional features include:
- External users and guests can often be included, giving them access to group resources.
- Because the tools are integrated, it’s more complex than just sending a single email—you’ll often need to manage permissions, membership, and shared files.
So if you only want a convenient way to send a message to multiple contacts, a basic contact list is the right choice.
Which One Should You Choose?
- If you just want to send email to multiple contacts quickly → choose a Contact Group.
- If you want shared tools, organized collaboration, and centralized communication → choose a Microsoft 365 Group.
Most everyday Outlook users—especially those managing simple lists—only need the Contact Group option.
How to Create an Email Group in Outlook 365 (Step-by-Step for Every Version)
Creating a group in Outlook looks slightly different depending on the version you’re using. Each platform—Windows, Mac, the web, and the new Outlook app—places options in different menus, so following the steps that match your screen helps you avoid confusion.

Below, you’ll find clear instructions for every version, along with helpful notes to guide you through special cases and common variations.
Create an Email Group in Outlook for Windows
The Windows version of Outlook offers the most classic layout, which makes the process straightforward.
- Open Outlook on your Windows device.
- Go to the bottom-left corner and select People to open your contact view. This switches Outlook from your inbox to your full list of stored contacts.
- In the top toolbar, click New Contact Group. This opens a fresh window where your group will be created.
- Type a name for your new list. Stick to something clear—like Marketing Team or Parent Volunteers—so you can find it quickly later.
- Select Add Members and choose from:
- Outlook Contacts – ideal if members are already saved in your local contacts.
- Address Book – usually linked to your organization’s Global Address List, helpful for internal teams.
- New Email Contact – perfect if someone isn’t saved yet; you can add them instantly.
- After adding everyone you need, click Save & Close. Your new group now appears in your People list, ready to use.
Tip: This process works consistently across most Windows versions, including older editions like 2013 or 2016. Even if the interface looks slightly different, the People icon and New Contact Group option remain in the same place.
Create a Contact Group in Outlook for Mac
Outlook for Mac uses a cleaner, simplified interface, so the process feels slightly different.
- Open Outlook on your Mac.
- Click the People icon in the left panel to open your contacts.
- At the top, select New Contact List. This allows you to create a fresh group.
- Enter a name for your list. Keep it descriptive and easy to recognize.
- Click the Add (+) button to include members. You can add contacts manually or select people already stored in your account.
- Once everyone is added, select Save & Close.
Note: Some Mac users see the New Contact List option grayed out. This usually happens when On My Computer folders are disabled in Outlook. Enabling them instantly restores the button and lets you continue creating your group.
Create an Email Group in Outlook Web (Office 365)
The web version of Outlook is widely used because it’s accessible from any browser. Here’s how to create a group online:
- Sign in to Outlook in your browser.
- From the left-hand menu, choose People to switch from email view to your contacts.
- Click New Contact List (or New Group, depending on your organization’s setup).
- Add a name, optional description, and begin typing email addresses to add members. Outlook automatically suggests matches as you type.
- Select Create to finish building your list.
Good to Know: If you’re not sure who to add yet, you can complete the setup with an empty list. Outlook lets you return later to update, expand, or reorganize your group at any time.
Create a Group in the New Outlook App
The new Outlook experience—rolling out across Windows, Mac, and the web—combines features into a unified design.
- Open the new Outlook interface.
- In the left sidebar, select People or Groups, depending on your setup.
- Choose New Contact List or New Group.
- Enter the group name and add the people you want included.
- Click Create and your new list appears in your contacts.
Important: Selecting New Group creates a Microsoft 365 Group, which includes shared tools such as team calendars, shared mailboxes, and file libraries. If your only goal is to send emails to multiple contacts, always choose New Contact List to keep things simple.
Managing Your Outlook Contact Group (Add, Send, Edit, Delete)
Once your group is created, the real value comes from being able to manage it effortlessly. Teams expand, projects shift direction, people change roles—so your contact group needs to stay up to date. Outlook gives you flexible tools to add new members, send messages, refresh or rename your list, and remove the group entirely when it’s no longer needed.
This section breaks down everything you can do so your communication stays organized and accurate.
Add Members to an Outlook Email Group
As your team grows or your responsibilities shift, you may want to include additional people in your existing group. Outlook supports adding members from different sources, so you can keep the list relevant without rebuilding from scratch.
- Open Outlook and switch to the People view.
- Search for and open the group you want to update.
- Click Add Members to open your selection options.
- Choose where the new contacts should come from:
- Outlook Contacts for people already saved locally.
- Address Book / GAL for organizational or company-wide users.
- New Email Contact to manually enter someone new.
- Confirm your selections and click Save & Close.
Helpful Insight:
In some organizations, only the group owner is allowed to add new members. If you don’t see the option available, it may be restricted by your admin settings. This is common in enterprise environments to protect internal distribution lists and ensure consistent communication.
Why this matters: Keeping your group current ensures your messages reach every intended recipient, especially when working across dynamic teams or recurring communication cycles.
Send an Email to a Contact Group in Outlook
Sending messages to the entire group is one of the most useful features—and Outlook makes it extremely simple. Once your list is created, you won’t need to manually select each person again.
- Open a new email window.
- In the To field, begin typing the group name.
- When the group appears as a suggestion, click to select it.
- Write your message and press Send.
Additional Tips:
- If you’re messaging clients, parents, or large community groups, place the group in the BCC field to protect every recipient’s privacy.
- If your email does not reach certain members, review your group to confirm all addresses are accurate and active.
- Large organizations sometimes apply sending limits for security; if a message fails to send, it may be reaching the recipient limit for your plan.
Edit or Update Your Outlook Contact Group
A good list stays relevant only if it’s maintained. Outlook gives you full control to add new people, remove outdated entries, or change the group name as your communication needs evolve.
- Go to People in Outlook.
- Find and open the group you want to modify.
- To add new members, click Add Members and select your source.
- To remove someone, highlight their name and click Remove Member.
- To rename the group, edit the Name field at the top.
- Click Save & Close to save your changes.
Important Notes:
- Some versions of Outlook label this feature differently—such as Edit Contact List, Edit Group, or Manage Group. The function remains the same across versions.
- If contacts aren’t updating correctly, verify that your Outlook account is synced and that your internet connection is stable.
Why updating matters: Accurate contact lists help ensure your messages always reach the right people, minimizing miscommunication, especially during fast-moving projects.
Delete a Contact Group in Outlook 365
When a project wraps up or a list is no longer needed, you can safely remove it. Deleting a group helps you keep your contact area organized and clutter-free.
- Open the People view.
- Locate the group you want to delete.
- Right-click and choose Delete Group (or Delete Contact List, depending on your version).
- Confirm the deletion when prompted.
Before You Delete:
- Removing a group is permanent, meaning you won’t be able to reuse that list unless you rebuild it manually.
- If you think you may need the addresses again, consider exporting or copying the contacts before deleting the group.
- Some Outlook setups, especially business accounts, may allow a limited recovery window, but this varies by administrator settings.
Why deletion is useful: Cleaning up old lists keeps your Outlook workspace tidy, reduces clutter, and makes it easier to find the groups you actively use.
Common Outlook Contact Group Problems and How to Fix Them
Managing contact groups in Outlook is usually smooth, but there are times when things don’t work the way you expect. These issues can come from Outlook settings, account permissions, sync problems, or simply differences between Outlook versions.
The good news is that most of these problems have straightforward fixes.
Below you’ll find detailed explanations for the most common issues and exactly what you can do to solve them quickly.
Fixing the “New Contact Group” Button Greyed Out Issue
If the option to create a new group is unavailable, it’s usually because Outlook cannot access the folder it needs to store your contact lists.
Common reasons:
- “On My Computer” folders are turned off (common on Mac setups).
- Your organization restricts personal groups for security or compliance reasons.
- The new Outlook interface hides or restructures the option depending on your layout or account type.
How to fix it:
- On Mac, enable On My Computer folders in Outlook’s preferences to restore the option.
- Switch back to the classic Outlook interface if the new layout limits your access to features.
- Speak with your IT administrator if your organization controls who can create or modify contact groups.
Additional insight: Corporate versions of Outlook often disable personal group creation to keep communication centralized. If this is the case, even switching views won’t reveal the feature.
Fixing Contact Groups Not Appearing in the Outlook Address Book
If you created a group but can’t find it when sending an email, it’s likely a folder or syncing issue.
Possible causes:
- The group was saved in a different contact folder, not the default one.
- Your address book is displaying the Global Address List (GAL) rather than personal Contacts.
- Outlook hasn’t completed syncing after the group was created.
How to fix it:
- Check your People view and confirm the group is under your main Contacts folder.
- Change the address book filter in the email window from GAL to Contacts.
- Restart Outlook or refresh the browser (for Outlook Web) to reload the local address list.
Extra detail: In some setups, groups created on the desktop app may appear differently in the mobile app or web version due to how local vs. cloud contact folders sync.
Fixing “Cannot Create Contact List in Outlook Web” Problems
In Outlook Web (Office 365), the option to create new contact lists may not appear depending on your account type or organizational settings.
Why this happens:
- Your admin has disabled personal lists using policy controls.
- You’re logged into a restricted or school account that doesn’t allow personal lists.
- You mistakenly selected New Group, which is for Microsoft 365 Groups, not simple email lists.
How to fix it:
- Under the People section, look for New Contact List rather than the group option.
- Ask your admin if personal contact lists are permitted under your organization’s policies.
- Choose New Contact List when your intention is simply to create an email-only list.
Additional insight: Some school and enterprise accounts limit contact list creation to avoid data duplication and ensure all communications follow organizational rules.
Fixing Emails That Don’t Send to Your Outlook Contact Group
Even if a group looks correct, messages may still fail to send or reach only some members.
Typical causes:
- One or more email addresses are outdated, invalid, or incorrectly typed.
- Your Outlook plan has a recipient limit, and your group exceeds it.
- Outlook or your email provider flagged the message as bulk mail.
How to fix it:
- Edit the group and confirm each email address is correct and active.
- Keep your group below the recommended recipient limit to avoid delivery failures.
- Try sending a message without attachments or large formatting to test deliverability.
Important detail: Some business plans and email servers limit how many people you can email at once to reduce spam or accidental mass messaging.
Fixing Outlook Contact Groups Not Syncing Across Devices
If updates to your group aren’t appearing across your laptop, mobile device, and web version, you may be experiencing sync delays.
Common reasons:
- Outlook is operating in Offline Mode.
- The device hasn’t completed a server sync cycle.
- Contact storage differs—one device uses local folders while another uses cloud contacts.
How to fix it:
- Make sure Outlook shows Connected or Online.
- Restart Outlook or refresh the web page to force a sync.
- Sign out and sign back in to refresh all contact folders.
Extra insight: When different devices use different storage methods (local vs. cloud), lists update at different speeds. Consolidating all contacts into the cloud often reduces these issues.
Fixing “Cannot Add or Remove Members” in Outlook Groups
Sometimes you may not have permission to adjust the group, especially in professional environments.
Possible reasons:
- The group is part of the Global Address List (GAL) and controlled by your IT department.
- You’re not listed as the owner of the group.
- You created—or are editing—a Microsoft 365 Group, not a simple contact list.
How to fix it:
- Check the group details to see if there’s an owner listed.
- Contact your IT team to request edit permissions or adjustments.
- Confirm you’re working on a Contact Group, not a Microsoft 365 Group.
Helpful detail: Only the owner of a Microsoft 365 Group can change its members, and organizational policies may limit who can become an owner.
Fixing Duplicate Outlook Contact Groups or Contacts
Duplicates can happen after imports, migrations, syncing multiple devices, or merging departments.
Why duplicates appear:
- You created similar groups in different folders.
- An imported CSV file included multiple versions of the same contacts.
- Mobile syncing created duplicate entries that synced across devices.
How to fix it:
- In People, review and merge duplicate lists manually.
- Use built-in cleaning tools available in some Outlook versions to identify duplicates.
- Disable extra sync sources (like third-party apps) to prevent repeated duplication.
Extra insight: Cleaning up duplicates helps Outlook perform faster and reduces confusion when selecting recipients.
Conclusion
Creating and managing an email group in Outlook 365 is a simple yet powerful way to keep your communication organized, efficient, and consistent.
Whether you’re coordinating with a team, updating clients, or sharing information across a project, having your contacts organized under one easy-to-use name saves time and reduces hassle.
Outlook’s own guidance emphasizes that contact lists help you send one message to multiple people without entering each address individually — a major time-saver in both personal and professional workflows.
The Value of Choosing the Right Group Type
By understanding the difference between Contact Groups and Microsoft 365 Groups, and keeping your lists updated, you ensure your messages always reach the right people — at the right time.
Experts often recommend reviewing your group members regularly to avoid outdated or inactive addresses, which helps keep communication clean and reliable.
Staying Organized With Outlook’s Built-In Tools
Outlook gives you flexible options to add members, send messages instantly, edit group details, and delete lists when they’re no longer needed.
With a clean structure and regular maintenance, you spend less time managing lists and more time focusing on what truly matters: delivering meaningful updates, reminders, or announcements.
Professional guidance suggests maintaining fewer, well-organized groups to improve delivery success and avoid unnecessary clutter.
The Bigger Benefit: Staying Connected With Less Effort
In the end, a well-maintained contact group helps you stay organized, confident, and connected — no matter the size of your team or the frequency of your communication.
By investing a few minutes now and then to keep your lists updated, you’ll avoid mistakes, protect privacy, and keep your messaging smooth and reliable.
Useful Official Resources
If you want to explore deeper or double-check any steps while working in Outlook, here are some official Microsoft guides that offer accurate, easy-to-follow instructions:
Create a Contact Group in Outlook: A helpful guide that walks you through building a contact list on the Outlook desktop app.
Difference Between Microsoft 365 Groups and Contact Lists: A quick breakdown explaining when you should use a simple contact list versus a full Microsoft 365 Group.
Create, Edit, or Delete a Contact List in Outlook (New Outlook + Web): Covers every version — Windows, Mac, and Outlook Web — with clean, updated steps.
Learn About Microsoft 365 Groups in Outlook: Great if you want to understand shared inboxes, joint calendars, and how collaboration groups work.
Microsoft 365 Groups for Admins: Ideal for IT teams or anyone setting up organization-wide rules or permissions for Outlook groups.
Visit Our Post Page: Blog Page