
Learn how to do a mail merge in Outlook with this easy step-by-step guide. Send personalized bulk emails efficiently while keeping your communication professional and error-free.
Outlook Mail Merge Tutorial: What You Need to Know
If you’ve ever tried to send the same email to dozens—or even hundreds—of people, you know how messy it can get. Copying addresses into the “To” field feels clunky, using “CC” can expose everyone’s details, and “BCC” often strips away any sense of personalization. That’s where Mail Merge steps in.
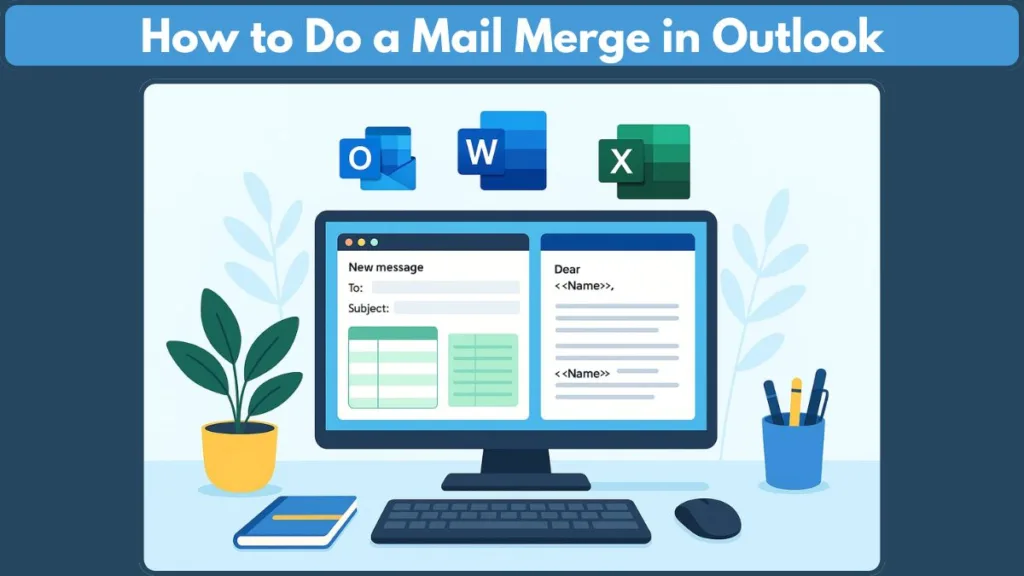
Think of it as Outlook’s way of blending your contact list with a ready-made email message, so each person receives something that feels personal rather than generic. It’s especially useful for business updates, event invitations, or client communications where sending one at a time isn’t realistic.
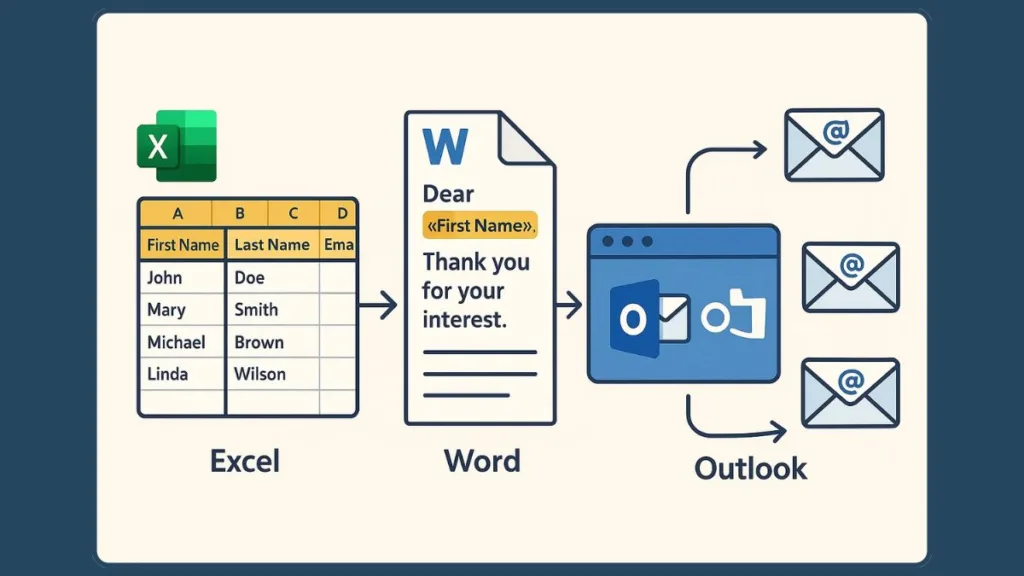
The best part? You don’t need a complex marketing tool to make it work. With the right setup, you can connect Excel data to Word, draft your message once, and let Outlook handle the delivery in the background.
More than efficiency, Mail Merge is about professionalism. By sending clean, individualized emails instead of a bulk blast, you build trust and avoid the common mistakes that can quickly damage credibility.
Microsoft Word and Excel Setup for Outlook Mail Merge
Prepare Your Contact List in Excel
Before you dive into sending emails, start by organizing your contact information. Each column in Excel should hold a specific piece of data, such as First Name, Last Name, Email Address, or Company Name. Make sure every entry is accurate and complete. A tidy list now prevents errors and saves time later.
Create Your Email Template in Word
Next, open Microsoft Word to draft your message. Think of this as your email template. Write your message clearly and professionally, leaving room for personalized details like the recipient’s name or company. This is what makes each email feel individual rather than generic.
Connect Excel and Word
Word allows you to link your contact list directly from Excel. By selecting the right spreadsheet and connecting the fields, you can automatically populate each email with the personalized information from your list. This is where a single draft becomes multiple customized emails ready for sending.
Why Preparation Matters
Spending time organizing your contact list and designing a clean email template ensures a smooth Mail Merge experience. It’s not just about efficiency—it’s about creating emails that look professional, reach the right audience, and maintain credibility. For official guidance check out Mircosoft support page on data sources you can use for a Mail Merge, to make sure your setup is seamless.
Best Ways To Do A Mail Merge In Outlook
Start Your Mail Merge in Word for Email
Before sending a batch of personalized emails, open Microsoft Word and navigate to the Mailings tab. Click Start Mail Merge and select E-Mail Messages. This sets your document to be treated as an email template rather than a printable letter.
At this stage, your email draft is ready to be connected to your contact list. Take a moment to ensure your content is clear, concise, and professional. Leave placeholders for personalized elements such as recipient names, company details, or other relevant information.
“Setting up your document correctly at the start ensures that the entire mail merge process runs smoothly and professionally.”
Select Recipients from Excel or Outlook Contacts
Next, click Select Recipients. You can choose an existing Excel spreadsheet or an Outlook contact list. If using Excel, verify that each column is clearly labeled and that every email address is correct. For Outlook contacts, ensure the list is up to date and organized logically.
Choosing the right recipient list is crucial, as it determines who receives the emails and reduces the risk of errors. Even a single missing or incorrect email can lead to confusion or unprofessional results.
“A clean and accurate recipient list is the foundation of an effective mail merge.”
Insert Personalized Fields for Individualized Emails
Once your recipients are selected, it’s time to personalize your message. Click Insert Merge Field to include data from your Excel columns or Outlook contacts. Typical fields might be First Name, Last Name, or Company Name.
Place these fields naturally within your email content. For example, writing “Hello «First_Name», we’re excited to share…” is more engaging than a generic greeting. This step transforms a single email draft into multiple personalized messages for each recipient.
“Personalization creates a connection with the recipient, making your message feel thoughtful and tailored.”
Preview Results to Check Formatting and Accuracy
Before sending, use the Preview Results option to review how each email will appear. Scroll through multiple records to ensure all merge fields populate correctly and that the formatting remains consistent.
This is also the stage to check for typos, missing data, or layout issues. Previewing helps avoid sending emails with errors, which could reflect poorly on you or your organization.
“Always preview your emails—what looks perfect in Word may not display exactly the same in the recipient’s inbox.”
Finish & Merge to Send Emails Through Outlook
Once you’re satisfied, navigate to Finish & Merge > Send E-Mail Messages. Select the email address column, type a concise subject line, and choose HTML format for readability. Clicking OK sends each message individually, keeping recipients’ addresses private.
This step ensures that your emails are secure, personalized, and professional, without exposing other recipients’ information.
“Sending emails individually protects privacy and maintains the professional integrity of your communication.”
Verify Sent Emails in Outlook for Accuracy
After sending, open Outlook and check the Sent Items folder. Verify that each email has been delivered successfully and that personalization fields display correctly. Spot-check a few emails to ensure names, company details, and other important information are accurate.
This final step confirms that your bulk email distribution is efficient, professional, and error-free.
“A quick review of sent emails guarantees that your message hits the mark and maintains your credibility.”
Mail Merge in New Outlook: What’s Different
The New Outlook brings a fresh approach to mail merge, designed to simplify the process and make it safer for everyday users. While the steps may feel familiar at first glance, there are a few key changes that can affect how you prepare and send your emails.
Streamlined Recipient Handling
One of the first things you’ll notice is that there’s only a single field for recipients. Unlike classic versions, you won’t see separate To, CC, or BCC fields. This change encourages privacy and reduces the chance of accidentally exposing contact details.
Distribution lists aren’t visible in the contact picker either. Instead, you can type the list name directly into the recipient field, then expand it into individual emails. Just be careful—if you forget to expand the list, every recipient could see everyone else’s address.
“The New Outlook nudges you toward safer email practices, protecting both you and your recipients.”
Limited Personalization Fields
Currently, the New Outlook version doesn’t support dynamic fields like First Name or Company Name. While this limits deep personalization, it encourages creativity in your messaging. Consider general yet warm greetings such as “Hello Team” or “Dear Valued Client” to keep emails engaging without individual fields.
This version is ideal for quick communications where efficiency and safety outweigh the need for highly customized content.
Adjusting Your Workflow
The steps to send emails remain similar: you create a message, link it to your recipients, and send it through Outlook. However, preparation is more important than ever. Cleaning up your lists ahead of time and crafting a message suitable for a broader audience ensures that your emails still feel professional and thoughtful.
Benefits of the New Approach
While it may feel restrictive at first, the streamlined design has clear advantages. Sending emails is faster, there’s less room for mistakes, and you can handle internal updates, small business notifications, or community announcements without relying on third-party services.
“New Outlook focuses on simplicity and privacy, giving you confidence that your messages are delivered correctly without unnecessary complications.”
Mail Merge Limitations in Outlook You Should Know
While Mail Merge in Outlook is a powerful tool for sending bulk emails efficiently, it does have some important limitations that can affect how you plan and execute your campaigns. Being aware of these constraints helps you avoid mistakes and ensures your messages maintain a professional appearance.
No Advanced Email Tracking
Outlook’s built-in Mail Merge does not include open rates, click tracking, or engagement reports. This means you won’t know who opened your email or interacted with the content. For businesses that rely on analytics to measure impact, this can be a significant limitation. Planning follow-up communications may require manual tracking or supplementary tools.
“Without tracking, you’ll need to rely on careful planning and feedback to understand the effectiveness of your messages.”
Limited Formatting Options
The formatting options for Mail Merge emails are basic. While you can use HTML for simple styling, advanced layouts, embedded images, or sophisticated templates aren’t supported. This can make it challenging to create visually rich emails for marketing campaigns, so keeping your design clean and readable is key.
Attachments Are Not Supported
Unlike regular Outlook emails, Mail Merge messages cannot include attachments. If your communication requires sending PDFs, spreadsheets, or other files, you’ll need to use alternative methods. A workaround is to include download links within the email, but this requires recipients to take additional steps.
Risk of Spam Filters
Sending a large number of emails in one batch may trigger spam filters, causing messages to land in junk folders. Outlook does not provide built-in scheduling or throttling options to mitigate this, so it’s best to send in smaller batches and ensure your content avoids spam-like patterns.
No Scheduling Functionality
Mail Merge messages must be sent immediately; there’s no built-in option to schedule delivery for a later time. If timing is important—such as sending announcements or reminders—this limitation requires careful planning to ensure your emails reach recipients at the intended moment.
Managing Large Lists Can Be Challenging
While Mail Merge can handle significant numbers of recipients, very large lists increase the risk of errors such as missing data or incorrect formatting. Ensuring your Excel spreadsheet or contact list is clean, complete, and well-organized is essential to avoid sending incomplete or unprofessional emails.
“Understanding these limitations allows you to plan smarter and avoid common pitfalls that could undermine your email’s impact.”
By keeping these constraints in mind, you can use Outlook’s Mail Merge more effectively. Preparation, clean data, and thoughtful messaging are your best tools for overcoming these challenges while maintaining professional, efficient, and reliable communication.
FAQs: Mail Merging in Outlook
Even with a clear process, many users have questions about how Mail Merge works in Outlook. Here, we address some of the most common concerns to help you feel confident every step of the way.
How Do I Send Mass Emails with Personalization?
To make each email feel personal, connect your contact list to your Word template and insert fields such as First Name or Company Name. This ensures every recipient sees a message that feels tailored rather than generic. Taking the time to craft thoughtful greetings can make a big difference in engagement.
Can I Do a Mail Merge Directly in Outlook?
While Outlook handles the sending, the mail merge setup happens in Word. Word acts as the template engine, pulling information from your Excel spreadsheet or Outlook contacts and feeding it into Outlook for delivery. Think of Word as the workspace where personalization happens before Outlook sends the emails.
How Do I Use an Excel Spreadsheet for a Mail Merge?
Create a well-structured Excel file with columns for each piece of information you want to include in your emails. Connect this spreadsheet during the Select Recipients step in Word, and insert merge fields where you want personalization to appear. Ensuring all email addresses are accurate prevents errors and makes the process smoother.
What Is the Easiest Way to Mail Merge in Outlook?
The simplest approach is to prepare your contact list in advance, draft a clear message in Word, insert personalized fields, preview your results, and then send via Outlook. Following this structured workflow minimizes mistakes and ensures that your emails reach the right recipients professionally and efficiently.
How Do I Send a Bulk Email Without Exposing Recipients?
Outlook automatically sends individual messages when using Mail Merge, so recipients will not see other email addresses. Just make sure any distribution lists are expanded properly if using the New Outlook version, as failing to expand them can expose addresses unintentionally.
Conclusion: Use Mail Merge in Outlook
Mail Merge in Outlook is a powerful way to send personalized emails efficiently, whether for business updates, invitations, or client communications. By preparing a clean contact list, drafting a thoughtful message, and carefully connecting Word, Excel, and Outlook, you can reach a large audience while maintaining a professional and personal touch.
While there are limitations—like basic formatting, no attachments, and lack of tracking—understanding them helps you plan smarter and avoid errors. Even with these constraints, Mail Merge is a reliable, time-saving tool for effective communication.
Official Microsoft Resources
- Mail Merge Overview – Introduction and setup instructions for combining Word, Excel, and Outlook.
- Prepare Data Sources for Mail Merge – Guidance on formatting Excel spreadsheets and Outlook contacts.
- Use Mail Merge for Bulk Email, Letters, Labels, and Envelopes – Covers the full scope of mail merge in Microsoft Word and Outlook, including letters and emails.
- Use Mail Merge in Word to Send Bulk Email Messages – Step-by-step guide focused specifically on sending bulk emails via Word and Outlook.
Visit Our Post Page: Blog Page