
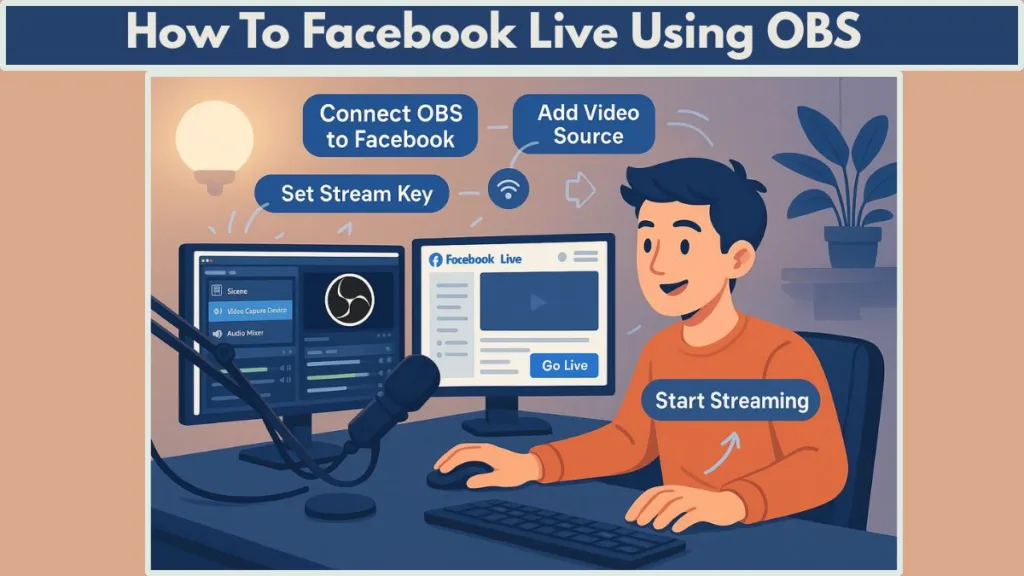
Are you looking for an easy way to go live on Facebook? Let’s learn how to Facebook Live using OBS with this simple step-by-step tutorial for beginners.
This complete 2025 guide shows you how to set up OBS Studio, connect your Facebook stream key, optimize your settings, and start streaming high-quality Facebook Live videos effortlessly.
Going live on Facebook can feel overwhelming at first, especially if you want a professional-quality broadcast that engages your audience and looks polished.
Open Broadcaster Software (OBS Studio) makes it possible for anyone to stream high-quality video directly to Facebook from a computer.
Whether you’re an aspiring content creator, a small business owner, or sharing special moments, this guide walks you through every step, from installation to going live, with detailed tips to maximize your streaming quality and viewer experience.
What Are The Essential Requirements Before You Start Streaming on Facebook Using OBS
Before opening OBS, it’s crucial to ensure your setup is ready for high-quality live streaming:
- A computer running Windows, Mac, or Linux.
- A stable internet connection, ideally with at least 5 Mbps upload speed for 1080p streaming.
- A webcam and microphone to capture video and audio.
- OBS Studio installed from the official OBS website.
- A Facebook account, page, or group where you plan to stream.
Having these essentials in place avoids technical issues during your broadcast. For professional-level streaming, consider investing in a dedicated microphone or external camera to enhance both video and audio quality.
How To Download and Installing OBS Studio on Your Computer for Smooth Facebook Live Streaming
OBS Studio is a free, open-source streaming software that works on Windows, Mac, and Linux, making it accessible to everyone.
Installing OBS correctly is the first critical step toward a smooth and professional live stream.
A proper installation ensures your software runs efficiently and avoids errors during broadcasts.
Step-by-Step Installation Process
Visit the Official OBS Website
- Go to OBS Studio download page and select your operating system (Windows, Mac, or Linux).
- Make sure you download the latest stable version to benefit from all updates, bug fixes, and performance improvements.
Download the Installer
- Click the download link for your OS.
- Depending on your browser, the file may be saved to your Downloads folder. Confirm it has fully downloaded before opening.
Run the Installer
- Open the downloaded setup file.
- Follow the installation prompts carefully. You may be asked to agree to the license terms—read and click I Agree to continue.
On Windows, you can select which components and plugins to install. Ensure OBS Studio is checked. Optional plugins can be added later.
On Mac, select the drive or partition for installation. A green arrow icon will confirm your choice.
Complete Installation
- OBS will now install on your system. Depending on your computer, this may take a few minutes.
- You might be prompted to enter your computer password (especially on Mac) to authorize the installation.
Initial Launch and Setup
Once installed, open OBS Studio. You will be prompted to review the license agreement. Click OK to proceed.
The auto-configuration wizard may appear. This tool can automatically optimize OBS settings for your system, including resolution, FPS, bitrate, and streaming output. You can choose to run it or configure settings manually.
If you choose the wizard, it will test your system performance and suggest optimal streaming settings.
Verifying OBS Installation
- Locate OBS in your Applications folder on Mac or the Start menu on Windows.
- Open OBS to ensure the software launches without errors.
- Check for updates under Help > Check for Updates to ensure you’re using the most stable version.
Optional: Installing Plugins and Tools
- OBS supports a variety of plugins that enhance functionality, including virtual cameras, custom transitions, and alerts.
- Visit the OBS Plugin Repository to explore options for improved streaming capabilities.
- Only install plugins from trusted sources to maintain stability and avoid conflicts.
By completing these steps, your OBS Studio installation will be fully ready for creating scenes, adding sources, and connecting to Facebook Live. Proper setup at this stage lays the foundation for a smooth and professional streaming experience.
How To Set Up Professional Scenes and Sources in OBS for High-Quality Facebook Live Streaming
One of the key advantages of using OBS Studio is its ability to create customizable scenes and manage multiple sources. Properly setting up scenes and sources not only makes your stream look professional but also allows smooth transitions between different content types, keeping your audience engaged throughout your broadcast.
Understanding OBS Scenes: How to Organize Your Live Stream Layout
A scene in OBS is essentially a canvas for your live broadcast. Each scene can contain multiple sources, such as cameras, microphones, screen captures, or images.
Organizing your stream into scenes allows you to switch between different layouts seamlessly during your broadcast. For example, you could have:
- A main scene with your webcam and overlay graphics.
- A screen-sharing scene for tutorials or presentations.
- A media scene for pre-recorded video clips or highlights.
Scenes are located in the bottom-left corner of OBS. To create a new scene:
- Click the
+icon in the Scenes panel. - Give your scene a descriptive name for easy identification.
- Repeat the process to create multiple scenes for different parts of your broadcast.
Adding and Configuring Sources in OBS for Facebook Live
Sources are the individual elements within a scene. OBS allows you to combine multiple sources, giving you full control over your live stream layout. Common source types include:
- Video Capture Device: Adds your webcam or an external camera. Adjust resolution, FPS, and audio input.
- Display Capture: Shares your entire screen or a specific window. Ideal for tutorials, presentations, or live gaming.
- Media Source: Plays pre-recorded videos, animations, or background loops. Supports formats like MP4, MOV, and GIF.
- Image: Adds static graphics like logos, banners, or lower-thirds.
- Text (GDI+): Insert titles, captions, or notifications for viewers. Customize font, color, and size.
- Browser Source: Displays web-based content such as alerts, chat widgets, or donation notifications.
To add a source:
- In the Sources panel, click the
+icon. - Choose the type of source you want to add.
- Configure the source settings, such as device, resolution, or file path.
- Click OK to add the source to the selected scene.
Arranging and Managing Sources for a Professional Facebook Live Broadcast
Once sources are added, you can reposition, resize, and layer them to create a professional layout:
- Drag and resize sources in the preview window to fit your scene.
- Use the Sources order panel to layer elements; sources at the top of the list appear above those below.
- Right-click a source to access options like filters, transform, and properties.
- Filters can enhance audio and video, including color correction, chroma key (green screen), or noise suppression.
Effectively Using Multiple Scenes and Scene Transitions in OBS
OBS allows you to switch between scenes in real-time. This is especially useful for live broadcasts that require different views:
- Scene Transitions: Choose from fade, swipe, or stinger transitions to make switching scenes smooth.
- Hotkeys: Assign keyboard shortcuts to quickly switch between scenes or toggle sources during your stream.
- Preview Mode (Studio Mode): See the next scene before making it live. This helps you check layouts and sources for errors before viewers see them.
Advanced Source Management and Audio Control for Facebook Live
- Group Sources: Combine multiple sources into a single group to move or resize them together. Useful for complex overlays.
- Duplicate Sources: Create multiple versions of a source for different scenes without reconfiguring settings.
- Audio Mixer: Manage all audio sources from one panel, adjusting volume levels, adding filters, or muting sources as needed.
- Scene Collections: Save different scene setups for various types of broadcasts, like gaming, tutorials, or Q&A sessions.
Best Practices for Scenes and Sources in OBS Studio for Facebook Live
- Plan Your Layout: Before going live, decide what elements you need and how your scenes will flow.
- Test Each Source: Check video quality, audio input, and file compatibility to avoid technical issues mid-stream.
- Use Overlays and Branding: Include logos, banners, or lower-thirds to make your stream recognizable and professional.
- Keep It Organized: Name scenes and sources clearly to quickly identify them during live broadcasts.
You can find detailed guidance directly from Facebook here: Facebook Live Best Practices for Scenes and Sources.
By carefully setting up scenes and sources, you gain complete control over your broadcast. This setup allows seamless transitions, professional overlays, and high-quality video and audio for your Facebook Live streams.
Proper scene management ensures that your content looks polished, engaging, and consistent throughout the broadcast, making it easier to focus on delivering high-quality content rather than troubleshooting technical issues during your live stream.
Best Ways To Configure OBS Settings for Optimal Facebook Live Streaming: Ensuring Smooth, High-Quality Broadcasts
Properly configuring OBS Studio settings is crucial for a professional and smooth Facebook Live stream. Optimized settings ensure your broadcast is high-quality, lag-free, and visually appealing, while also preventing issues like buffering, black screens, or audio delays.
OBS allows detailed control over video, audio, and output parameters, giving you the flexibility to tailor your stream to your audience and system capabilities.
Optimizing Video and Encoder Settings for High-Definition Facebook Live Streams
Base (Canvas) Resolution: Defines the workspace where all your sources are arranged. Set it to 1920×1080 (Full HD) for crisp, detailed video.
Output (Scaled) Resolution: Determines the resolution your viewers see. You can match it to your canvas or scale down to 1280×720 if your internet speed is limited.
Frames Per Second (FPS):
- 30 FPS: Ideal for talking-head broadcasts, tutorials, or casual streams.
- 60 FPS: Recommended for gaming, sports, or fast-moving content. Ensure your internet and hardware can handle the higher load.
Video Encoder Options:
- H.264 (x264): CPU-based encoder suitable for most setups.
- NVENC or AMF (Hardware Encoders): Reduce CPU usage, offload encoding to your GPU, recommended for systems with powerful graphics cards.
Careful selection of resolution, FPS, and encoder settings ensures smooth playback for viewers and prevents video lag or stuttering.
Setting Up Output Settings to Maximize Stream Stability and Quality
Streaming Bitrate:
- 1080p at 30 FPS: 4,000–6,000 Kbps.
- 720p: 2,500–4,000 Kbps.
Always leave 15–20% of bandwidth headroom to prevent interruptions due to fluctuations in internet speed.
Keyframe Interval: Set to 2 seconds, which is the Facebook recommended standard.
CPU Usage Preset (x264): Options range from ultrafast to veryslow. “Veryfast” is commonly used for streaming without overloading the system.
Profile: Set to high to achieve better encoding quality and reduce compression artifacts.
These output settings help maintain a consistent and professional-looking broadcast, preventing lag or pixelation during live streaming.
Configuring Audio Settings for Clear and Professional Sound
Sample Rate: Choose 44.1 kHz or 48 kHz, matching your microphone and system settings.
Channels: Select stereo to provide rich, balanced sound.
Audio Mixer Management: Adjust multiple audio sources, including microphone, desktop audio, and media playback.
Filters for Audio Optimization:
- Noise Suppression: Eliminates background hums or fan noise.
- Noise Gate: Blocks very quiet sounds to reduce distractions.
- Compressor: Maintains balanced audio, preventing sudden spikes or dips in volume.
Well-configured audio ensures that viewers experience clear, high-quality sound without distortions or interruptions.
Advanced Output Settings and Fine-Tuning for Facebook Live
Advanced Output Mode: Switch from “Simple” to Advanced to access:
- Bitrate control: Choose between CBR (Constant Bitrate) for stability or VBR (Variable Bitrate) for efficient compression.
- Encoder options: Customize GOP size, B-frames, and keyframe interval for optimized streaming.
Buffering Settings: Adjust buffering to minimize lag and maintain stream consistency even if internet speed fluctuates.
Recording While Streaming: Select high-quality formats (MP4, MKV) and configure separate bitrates for recording vs. streaming to prevent overloading your system.
These settings allow advanced users to fine-tune performance, ensuring the best combination of quality and reliability.
Enhancing Video Quality and Stream Presentation with OBS
- Scaling and Filters: Apply sharpening, color correction, or LUTs to improve visual clarity.
- Chroma Key (Green Screen): Remove backgrounds for professional overlays or virtual sets.
- Scene Transitions: Choose smooth fades, swipes, or stinger transitions for professional flow between scenes.
Proper enhancement improves viewer experience and makes your Facebook Live broadcasts look polished and engaging.
Best Practices for OBS Settings for Facebook Live
- Run a Test Stream: Conduct a private stream to verify video quality, audio levels, and transitions.
- Adjust for Internet Limitations: Lower resolution or bitrate if your network connection is unstable.
- Monitor System Performance: Keep an eye on CPU and GPU usage in OBS to prevent dropped frames.
- Update OBS Regularly: Use the latest version for performance improvements and bug fixes.
- Optimize Scenes and Sources: Align your OBS scenes with the output settings to ensure everything renders correctly for viewers.
By thoroughly configuring video, audio, and output settings, you can guarantee that your Facebook Live broadcasts are high-quality, stable, and professional.
These configurations allow you to focus on engaging your audience, adding creative overlays, and delivering a seamless live streaming experience without technical interruptions.
How To Connect OBS Studio to Facebook Live: Step-by-Step Guide for Seamless Broadcasting
Once your OBS scenes, sources, and settings are properly configured, the next critical step is connecting OBS to Facebook Live. T
his ensures your content reaches your audience without interruptions and allows you to fully control your broadcast from OBS. A correct connection is essential for a smooth, professional live stream.
Navigating to Facebook Live Producer
- Open your browser and go to Facebook Live Producer.
- Make sure you are logged in to the correct Facebook account, page, or group where you want to stream.
- Facebook will present two main options:
- Go Live Now (for direct webcam streaming)
- Use Streaming Software (for OBS or other encoders)
Select Streaming Software, as this option allows OBS to send your video and audio feed directly to Facebook.
Obtaining Your Facebook Stream Key
The Stream Key is a unique code that links OBS to your Facebook account. This key is private and essential—anyone with access to it can broadcast on your page.
- In Facebook Live Producer, select Streaming Software.
- Locate the Stream Key in the “Set Up Your Live Video” section.
- Click Copy to copy the stream key to your clipboard.
Important Tips:
- Never share your stream key publicly.
- If you suspect your key is compromised, generate a new one immediately.
- For scheduled streams, Facebook provides a persistent stream key option, which can be reused without updating OBS for each session.
Configuring OBS to Connect to Facebook Live
- Open OBS Studio and click Settings in the bottom-right corner.
- Go to the Stream tab on the left-hand menu.
- Under Service, select Facebook Live.
- Paste your copied Stream Key into the field labeled “Stream Key.”
- Click Apply and then OK to save your settings.
Testing Your Connection Before Going Live
Before broadcasting to your audience:
- In OBS, click Start Streaming. Your feed will now be sent to Facebook but won’t be live to viewers yet.
- Return to Facebook Live Producer and check the Preview Window.
- Verify that video is displaying correctly.
- Check audio levels to ensure your microphone is captured properly.
- Make sure overlays, transitions, and scene changes are functioning as intended.
Testing beforehand helps avoid common issues like black screens, incorrect aspect ratios, or muted audio.
Going Live on Facebook from OBS
Once you are satisfied with your preview:
- Add a title and description for your live stream to attract viewers and provide context.
- Set privacy and audience options:
- Public
- Friends
- Specific Groups or Pages
- Click the Go Live button on Facebook Live Producer.
- OBS will now broadcast your video feed live to your audience.
You can continue to manage scenes, sources, and audio levels in OBS while live, allowing dynamic changes throughout the broadcast.
Advanced Tips for a Stable OBS-Facebook Connection
- Persistent Stream Keys: Use persistent keys for recurring streams to reduce setup time.
- Monitor Bandwidth: Ensure your internet upload speed is at least 25% higher than your stream’s bitrate.
- Firewall and Network Settings: Confirm that OBS is allowed to send outgoing streams through your firewall.
- Backup Plan: Keep a backup device or secondary OBS configuration in case of system issues.
Going Live on Facebook Using OBS: Step-by-Step Guide for a Seamless Broadcast
After successfully connecting OBS Studio to Facebook Live, the next step is to start your broadcast.
Going live is more than just pressing a button—it involves final checks, audience settings, and live stream optimization to ensure your viewers have the best possible experience.
Performing Final Checks Before Starting Your Facebook Live Stream
Before clicking the Go Live button, take a few minutes to verify all aspects of your stream:
- Preview Video Feed: Ensure your camera, screen capture, and any overlays are displaying correctly. Check scene transitions and any media sources to avoid glitches.
- Audio Levels: Use the OBS Audio Mixer to confirm that your microphone, desktop audio, and any other audio sources are balanced. Avoid clipping or distortion.
- Internet Stability: Ensure your upload speed can handle your configured bitrate. A wired Ethernet connection is recommended for stability over Wi-Fi.
- Lighting and Background: Confirm your environment is well-lit, free from distractions, and consistent for professional-quality video.
Adding Stream Details and Audience Settings on Facebook
Once your OBS feed is ready:
- In Facebook Live Producer, enter a compelling title for your broadcast. Titles should be clear, descriptive, and engaging to attract viewers.
- Add a detailed description outlining what your audience can expect from the stream. Include relevant keywords naturally to help with discoverability.
- Select your audience settings:
- Public for maximum reach.
- Friends or Custom Groups for private streams.
- Pages if streaming for a business or community.
- Consider scheduling the stream in advance to notify followers and increase attendance.
Starting Your Facebook Live Broadcast Using OBS
- Click Go Live on Facebook Live Producer. OBS will continue streaming, and your feed will now be visible to your audience in real-time.
- Monitor the preview and live metrics on Facebook:
- Viewer count
- Live comments and reactions
- Stream health indicators
- Use OBS to switch scenes, add overlays, or play media clips dynamically during the broadcast. This keeps your stream engaging and professional.
Engaging Viewers and Moderating Interaction During Live Streaming
- Respond to Comments: Facebook Live allows real-time interaction. Engage with viewers by answering questions, acknowledging reactions, and encouraging participation.
- Pin Comments or Announcements: Highlight key messages, links, or calls to action to guide your audience.
- Moderate Chat: Assign moderators if streaming to large audiences to maintain a safe and friendly environment.
Monitoring Stream Quality and Troubleshooting Issues While Live
- Keep an eye on OBS performance metrics like dropped frames or CPU usage. Adjust output settings if necessary.
- Watch for Facebook stream warnings such as unstable connections or low bitrate alerts.
- Have a backup plan in case of technical issues, such as a second device or alternative streaming platform.
Ending Your Facebook Live Broadcast and Reviewing Analytics
- Once your content is finished, click End Live Video on Facebook.
- OBS can be stopped by clicking Stop Streaming, ensuring all resources are released.
- Review the stream analytics provided by Facebook to understand viewer engagement, peak viewership, and overall performance.
- Consider saving the broadcast for later use or repurposing it as content for other social platforms.
Advanced Tips and Techniques for a Professional Facebook Live Stream Using OBS Studio
Creating a professional and engaging Facebook Live stream goes beyond just connecting OBS Studio and clicking “Go Live.” Advanced techniques help improve stream quality, viewer engagement, and broadcast reliability.
These tips are designed for content creators who want to elevate their live streams, whether for gaming, tutorials, webinars, or business presentations.
Using Persistent Stream Keys and Scheduled Broadcasts for Stream Efficiency
- Persistent Stream Keys: For recurring broadcasts, use Facebook’s persistent stream key option. This allows you to reuse the same key for multiple sessions, saving time and avoiding configuration errors.
- Scheduling Streams: Plan and schedule live streams in advance to notify your followers. Scheduled broadcasts improve attendance rates and allow you to prepare content, overlays, and interactive elements ahead of time.
Optimizing Internet Connection and Network Settings for Stable Broadcasting
- High-Speed Internet: Ensure your upload speed is at least 25–30% higher than your chosen bitrate to prevent buffering and dropped frames.
- Wired Connection: Use Ethernet instead of Wi-Fi for a stable and consistent connection, especially for high-resolution streams (1080p or higher).
- Firewall and Router Configuration: Make sure OBS is allowed to send outgoing streams. Open relevant ports if necessary and disable bandwidth-heavy applications during your live broadcast.
Leveraging OBS Studio Features for Enhanced Viewer Engagement
- Scene Collections: Create multiple scene collections for different types of content. For example, one for gaming streams, another for tutorials, and one for Q&A sessions. This allows fast switching and organization.
- Hotkeys and Shortcuts: Assign hotkeys for scene transitions, audio muting, and source toggling to streamline your workflow during live broadcasts.
- Studio Mode: Preview scenes before making them live to avoid mistakes and ensure smooth transitions.
Improving Visual and Audio Quality for Professional Streams
- Overlays and Graphics: Use professional overlays, lower-thirds, and branding elements to make your broadcast visually appealing.
- Audio Filters: Apply noise suppression, compression, and equalization to your microphone for clear and consistent sound.
- Video Enhancements: Use color correction, LUTs, and sharpening filters to improve the visual quality of your feed.
Multi-Platform Streaming Strategies and Audience Expansion
- Restreaming: Use tools like Restream.io to broadcast simultaneously on Facebook, YouTube, and other platforms, increasing your reach.
- Cross-Promotion: Promote your live stream on multiple social media channels before going live to attract more viewers.
- Engaging Content: Plan interactive elements like polls, Q&A, and shoutouts to increase viewer participation.
Backup Plans and Contingency Measures for Uninterrupted Streaming
- Secondary Device or Stream: Have a backup computer or device ready in case your main system encounters technical issues.
- Recording While Streaming: Record your broadcast locally in OBS. This provides a high-quality version for repurposing content and ensures you have a backup if the live stream faces interruptions.
- Monitoring Tools: Use stream monitoring tools to track latency, dropped frames, and connection quality in real-time.
Post-Stream Analytics and Optimization for Future Broadcasts
- Facebook Insights: After your stream ends, review viewer metrics including peak viewership, average watch time, and engagement rates.
- Content Repurposing: Edit your broadcast into shorter clips or highlights for social media promotion.
- Feedback Integration: Gather viewer feedback and adjust future streams for better engagement and content quality.
FAQ About Facebook Live Streaming Using OBS
Here’s a concise FAQ section covering additional topics not discussed elsewhere in the blog post, aimed at addressing common questions from new and experienced streamers.
Can I Use OBS Studio on Multiple Devices Simultaneously?
Yes, OBS can run on multiple computers simultaneously, but each instance requires its own stream key. This is useful for multi-camera setups or separate broadcasts to different pages.
Is There a Limit to How Long I Can Stream on Facebook?
Facebook allows streams of up to 8 hours for regular accounts. For business or creator pages, longer streams may be supported, but ensure your system and internet connection can handle extended streaming.
How Can I Reduce Latency Between OBS and Facebook Live?
- Enable Low Latency Mode in Facebook Live settings.
- Adjust OBS buffering and bitrate settings to match your upload speed.
- Use a wired internet connection for more consistent transmission.
Can I Stream 4K Video Using OBS to Facebook Live?
Facebook currently supports up to 1080p at 60 FPS. While OBS can output 4K, Facebook will downscale it, so optimize for 1080p to maintain smooth playback.
How Do I Integrate Third-Party Plugins With OBS for Facebook Live?
OBS supports plugins for overlays, alerts, and automation. Install compatible plugins from the OBS official repository, configure them in OBS, and test them before going live.
Is It Possible to Stream to a Facebook Event Using OBS?
Yes, select the Event Page or Scheduled Live in Facebook Live Producer, then paste your OBS stream key to connect. This is ideal for webinars, product launches, or interactive sessions.
Can I Record My Stream in OBS While Broadcasting?
Absolutely. OBS allows simultaneous streaming and recording, letting you save a high-quality copy locally while your audience watches the live version online.
Conclusion: Mastering Facebook Live Streaming with OBS Studio for Professional Results
Streaming on Facebook using OBS Studio opens up a world of possibilities for content creators, businesses, educators, and hobbyists alike. By carefully setting up your scenes, sources, and settings, and connecting OBS to Facebook Live properly, you can deliver high-quality, engaging broadcasts to your audience.
A well-prepared stream ensures that viewers experience clear video, crisp audio, and smooth transitions, which significantly improves engagement and retention. Implementing advanced tips—like persistent stream keys, multi-platform streaming, and scene organization—can elevate your broadcasts from casual streams to professional productions.
Equally important is audience interaction. Engaging with viewers through comments, polls, and shoutouts creates a dynamic and interactive live experience, fostering loyalty and increasing reach. Monitoring performance metrics and learning from post-stream analytics will help you continuously improve your content.
Remember, successful Facebook Live streaming isn’t just about technical setup—it’s about planning, preparation, and creativity. From using professional overlays and audio filters to scheduling and promoting your streams, every element contributes to a polished, professional appearance.
Finally, consistency is key. Regularly streaming high-quality content using OBS helps build a strong online presence, attracts new followers, and keeps your audience coming back for more. By combining the technical insights shared in this guide with a focus on viewer engagement, you can master Facebook Live and make your broadcasts truly stand out.
Your journey to professional live streaming begins here, and with OBS Studio, the possibilities are virtually limitless. Take these steps, experiment, and watch your Facebook Live broadcasts reach their full potential.
Visit Our Post Page: Blog Page