
Stop missing out on rare loot! Discover how to find Raider Caches in ARC Raiders using our fast, reliable methods. From the ticking sound to red flag markers, we cover it all.
Why Raider Caches Are Worth Finding
If you want to progress faster in ARC Raiders, learning how to find Raider Caches is one of the smartest habits you can build early. These small, easily overlooked loot stashes are well worth the detour, especially when you’re trying to stock up efficiently without taking unnecessary fights. We recommend you treat Raider Caches as high-value side objectives rather than random distractions during a raid.
A single Raider Cache can reward you with quick-use consumables, ammo, weapons, useful attachments, and—if you’re lucky—valuable weapon blueprints. The in-game loot pool for Raider Caches includes ammunition, blueprints, grenades, healing items, shields, weapons, and weapon attachments, making them a surprisingly strong source of gear regardless of your current progression stage.
That makes them ideal for steady progression, challenge completion, and low-risk loot runs. More importantly, looting them directly counts toward objectives like “Raider cache dug up” or “Dig up Raider stash”, letting you advance tasks naturally while moving through the map.
We guarantee you that once you understand where to look, what to listen for, and when to prioritize cache hunting, Raider Caches stop feeling rare and start becoming a consistent source of rewards. With a bit of awareness and intentional play, what first feels like a hidden surprise quickly turns into an essential part of your raid strategy, especially when you’re chasing rare weapon blueprints reported by other players.
What Is a Raider Cache in ARC Raiders?
A Raider Cache in ARC Raiders is a small, standalone loot container that spawns naturally across maps during raids. Unlike obvious supply crates or high-traffic loot rooms, Raider Caches are designed to be subtle and easy to miss, often blending into their surroundings. We recommend you think of them as opportunistic loot stashes—they aren’t tied to major points of interest and don’t require combat to access. They contain a mix of loot such as ammunition, grenades, healing items, quick-use items, shields, weapons, and weapon attachments, making them a worthwhile find wherever you are on the map. Raider Caches tend to remain valuable loot sources both in regular matches and during special events that increase their spawn frequency.
Tip: Raider Caches are intentionally hard to spot visually, so relying on careful movement and awareness gives you an advantage over rushing players.
These caches typically appear off main paths, tucked near terrain edges, foliage, walls, or environmental clutter. You won’t see map markers, notifications, or icons pointing them out. That’s intentional. Raider Caches reward players who move carefully, explore deliberately, and rely on environmental awareness rather than sprinting between fights.
Important: The absence of markers means Raider Caches favor players who slow down and observe their surroundings.
Most importantly, a Raider Cache is not a dig site. Despite task names suggesting otherwise, there’s no interaction beyond opening the container. When you loot a Raider Cache, the game immediately registers progress for related objectives. Understanding this distinction prevents wasted time and helps you complete cache-related tasks efficiently without overthinking the mechanic.
Key Information: You do not need to dig—opening the cache is enough to complete related tasks.
At their core, Raider Caches exist to reward attentive movement and smart routing. Once you recognize how they fit into the raid flow, they become a reliable bonus rather than a lucky accident.
Pro Insight: Treat Raider Caches as part of your route planning, not a random find.
How to Identify a Raider Cache (What to Look and Listen For)
Audio Cues: Your Most Reliable Guide
If you’re serious about finding Raider Caches in ARC Raiders, your ears matter more than your eyes. These containers are intentionally low-visibility and often randomly placed, meaning you won’t always spot them visually on the first pass. That’s where audio cues become your strongest ally.
Audio Tip: The defining signal of a Raider Cache is a steady, clock-like ticking sound. This ticking grows louder as you approach and fades when you move away.
This unique ticking is designed to stand out from ambient noise, and once you get used to it, you’ll find yourself identifying Raider Cache locations far more consistently just by listening.
Key Strategy: When you hear ticking, stop moving and rotate slowly to isolate the direction before advancing. Moving too fast can cause you to walk past a cache without realizing it.
Visual Awareness: What to Look For
While sound is king when identifying Raider Caches, sight still plays a role once you’re close. A Raider Cache is compact, sits low to the ground, and often blends into grass, bushes, or terrain edges.
Important Visual Tip: If you’re near the ticking, scan around walls, rocks, shrubs, and cover—these are common hiding spots.
In some situations, especially during special map conditions, you may notice small visual indicators near a cache. Even then, audio remains the most reliable way to confirm you’re close.
Pro-Level Listening & Positioning
Mastering how you move and listen dramatically improves your success rate when searching for Raider Caches.
Pro Insight: Reducing background noise and focusing on environmental sound effects makes the ticking easier to detect, especially in quieter areas of the map.
Busy zones with gunfire, vehicles, or environmental effects can mask the sound, so pausing briefly to listen can reveal a cache you would otherwise miss.
By relying on this listen-first approach, you turn Raider Cache hunting from chance into a repeatable skill you can apply in every raid.
Fastest Way: Find Raider Caches During “Uncovered Caches” Event
Why Uncovered Caches Is the Best Method
If you want the fastest way to find Raider Caches in ARC Raiders, you should always prioritize raids with the Uncovered Caches map condition. This dynamic event dramatically increases the number of Raider Cache spawns across the map, turning an ordinary run into a high-efficiency loot opportunity that rewards players who search aggressively using both audio and visual cues. Uncovered Caches is one of several dynamic events that can affect maps like Dam Battlegrounds, Buried City, Spaceport, Blue Gate, and Stella Montis, making it one of the most reliable conditions for focused cache hunting.
How Cache Identification Changes During the Event
During Uncovered Caches, Raider Caches are no longer purely hidden. In addition to the familiar ticking audio cue, each cache typically appears with a temporary visual indicator when exposed. This red flag or marker allows you to spot Raider Caches from a distance and plan efficient routes between multiple spawns. While the ticking still grows louder as you approach, the addition of visual markers turns cache hunting into a multi-sensory detection process that significantly speeds up your run.
Key Advantage: The combination of audio cues and temporary cache indicators makes finding Raider Caches far faster than in standard matches.
Risk Factor: Volatile Cache Explosions
There is a clear trade-off during Uncovered Caches. Caches spawned under this condition are rigged to explode if left exposed for too long. These storm-unearthed caches are time-limited, and waiting too long can destroy the loot entirely while also alerting nearby Raiders.
Important: When you find a cache during Uncovered Caches, loot quickly and relocate—the ticking isn’t just a locator, it’s a countdown.
Why This Event Is Ideal for Tasks and Farming
This event often produces higher loot density and a greater chance for quality rewards per run, making it ideal when you’re chasing loot goals, task completions, or blueprint farming. When the modifier appears, shift your strategy from cautious exploration to fast, audio-guided sweeps across open terrain, prioritizing movement and awareness over extended looting.
Step-by-Step: Farming Raider Caches During Uncovered Caches
When the Uncovered Caches event is active, efficiency matters more than caution. To consistently farm Raider Caches in ARC Raiders, you need a simple, repeatable route that prioritizes speed, awareness, and loot discipline.
Follow these steps to maximize returns without exposing yourself longer than necessary.
Step 1: Queue Into a Raid With Uncovered Caches Active
Before dropping in, confirm the Uncovered Caches condition is active on the map. This event significantly increases the number of Raider Cache spawns scattered across the raid zone by storm activity. Raiders under this condition appear as temporarily exposed loot that must be collected before they detonate. The modifier can roll on multiple maps, making it one of the most loot-focused map events.
Tip: Treat Uncovered Caches raids as short, focused runs, not full clear attempts.
Step 2: Prioritize Open and Rural Routes
Once inside the raid, head into areas with less congested terrain like outskirts, fields, and rural passages. These locations are less likely to drown out the distinctive cache audio cue and allow you to hear ticking more clearly. Open areas make it easier to isolate sound and spot nearby cache indicators.
Key Focus: Fewer structures mean clearer audio and faster cache identification.
Step 3: Use Visual Indicators First, Sound Confirm Second
During this event, Raider Caches often appear with visual cues when they’ve been unearthed by recent storms. These temporary markers help you prioritize movement and reduce wasted time.
Important: Visual cues get you close — audio confirms the cache.
Step 4: Loot Fast and Relocate Immediately
Caches during Uncovered Caches are volatile. If left exposed too long, they will explode, destroying the loot and potentially alerting nearby Raiders. Act with urgency: open the container, grab priority items, and move on.
Rule: Open > Loot > Relocate. No exceptions.
Step 5: Sweep Neighboring Areas Before Extracting
Cache spawns during this event are widely distributed, not tightly clustered. After looting one, perform a quick perimeter sweep along your route to catch additional spawns before extracting. A controlled sweep often results in multiple caches per run.
Pro Tip: A clean perimeter pass beats random wandering every time.
Mastering this structured loop turns Uncovered Caches into the most reliable method for Raider Cache farming, task completion, and steady progression.
How to Find Raider Caches in Normal Matches (No Event)
Even when the Uncovered Caches event isn’t active, Raider Caches still spawn in normal ARC Raiders matches — you just need a more patient, audio-focused approach. In standard raids, success comes from deliberate movement, route discipline, and knowing where cache audio is easiest to isolate.
We recommend you adjust your playstyle slightly to maintain consistency without relying on special event cues.
Focus on Quieter Routes, Not Hot Zones
In normal matches, avoid crowded points of interest early on. Instead, move through outskirts, rural ground, and secondary lanes where environmental noise is minimal. Fewer gunfights and vehicles mean the ticking sound stands out clearly, giving you a better chance to identify Raider Cache locations before others do. Raider Caches often appear near bushes, rocks, and slightly off the beaten path, making quieter routes ideal.
Key Tip: The quieter the area, the easier it is to hear and isolate cache audio.
Use Sound to Triangulate the Cache
When you pick up the ticking audio cue, stop immediately. Rotate slowly to center the sound, then advance in short, controlled steps. This method lets you triangulate the cache’s position without overshooting it or exposing yourself unnecessarily.
Important: Moving too fast is the most common reason players walk past Raider Caches.
Search Likely Terrain, Not Open Sightlines
Once the sound is clear, scan low shrubs, fence lines, wall bases, and rock edges near your path. Raider Caches in normal matches are often partially obscured and rarely sit in the open. Let sound guide you to the general area, then use visual confirmation only at close range.
Pro Tip: If you can hear ticking but don’t see the cache, you’re usually standing within a few meters of it.
Loot Efficiently and Move On
Without event pressure, it’s tempting to linger — but that increases risk. Other Raiders can hear the same audio cue and may converge. Open the cache, secure the loot, and reposition immediately to maintain control of the encounter.
Rule: Loot clean, move fast, stay unpredictable.
By mastering this audio-first approach, you can consistently find Raider Caches in ARC Raiders even without special map conditions. This method rewards patience and environmental awareness, turning normal raids into steady, low-risk loot opportunities.
Reliable Raider Cache & Container Spots (Blueprint Hunting)
If your goal is weapon blueprint hunting in ARC Raiders, relying on random cache finds isn’t enough. We recommend you add a few reliable Raider Cache and container spawn pockets into your regular routes. These locations consistently roll Raider Caches, loot containers, or weapon cases, giving you a higher chance of pulling blueprints alongside standard supplies.
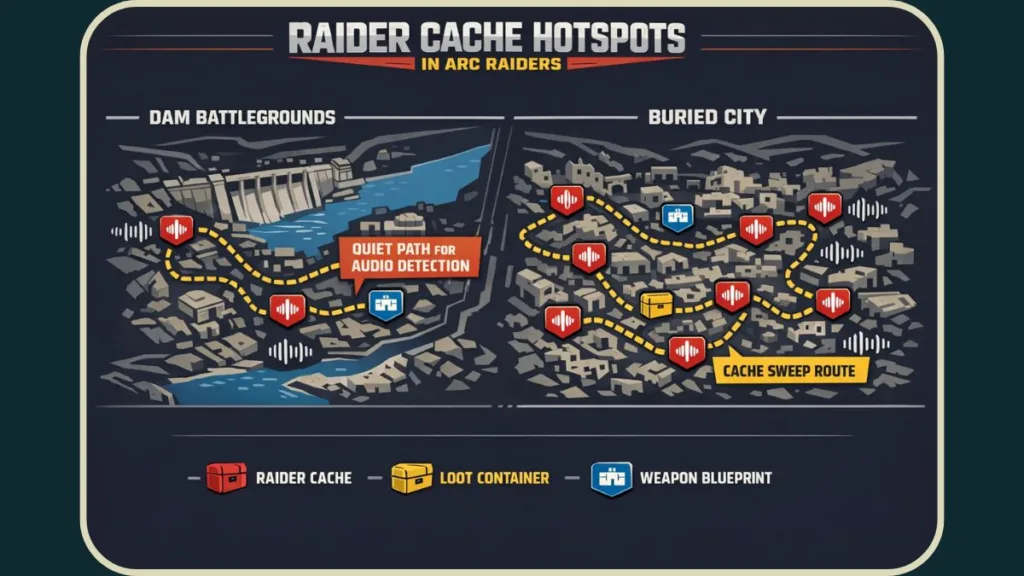
Dam Battlegrounds — Highway End Gap & Nearby Containers
One of the most consistent loot pockets on Dam Battlegrounds sits under the raised highway near the Broken Bridge between Raider Outpost East and East Broken Bridge. This small gap often spawns Raider containers and backpacks and is widely considered a strong spot for high-tier loot and weapon blueprint opportunities. Because this area is tucked away, it tends to be quieter and less contested, making it ideal for focused blueprint hunting runs.
To reach this pocket safely, approach from below using a zipline, or drop from the highway and hold vault to catch the ledge. Once inside, sweep all container spawns and cache pockets. This route can often net both standard loot and rare blueprints if you chain nearby containers efficiently.
Why it works: Quiet spawn pocket + consistent containers = increased blueprint chances.
Buried City — Edge Areas & Breach Rooms
In Buried City, several container pockets near the outer edges of the map are excellent for blueprint farming. These areas often include breach rooms, warehouses, or interior spaces that roll multiple weapon crates and loot containers in close proximity. The tight grouping increases your odds of pulling rare blueprints without navigating the most dangerous central zones.
Locations around Marano Station, outer warehouses, and apartment-style structures frequently spawn backpacks and weapon crates. While breaching doors is loud and can attract attention, the loot density usually justifies the risk when executed quickly.
Important: Breach rooms are high-value but time-sensitive — loot fast and reposition.
How to Use These Spots Efficiently
These locations work best when you fold them naturally into your raid route, not as forced detours. Hit them early if your spawn allows, or swing by mid-raid when nearby combat slows down. Combining these known container hubs with regular Raider Cache hunting significantly increases blueprint exposure without pulling you into heavily contested points of interest.
Pro Tip: Layer container pockets and cache routes together so one stop can roll both supplies and blueprints.
How to Complete “Raider Cache Dug Up” / “Dig Up Raider Stash” Tasks
If you’re stuck on objectives like “Raider Cache Dug Up” or “Dig Up Raider Stash” in ARC Raiders, the wording can be misleading. We recommend you focus on looting Raider Caches, not searching for a digging interaction. These tasks are designed to reward cache discovery, not excavation.
There is nothing to dig. Task progress triggers the moment you open and loot a Raider Cache, regardless of where it spawns or which map you’re on. Once you open the container, the objective updates automatically and counts toward your task completion.
Important: Opening the cache is enough — there’s no additional digging interaction required.
The most efficient way to complete these challenges is by prioritizing raids with the Uncovered Caches condition whenever possible. This event dramatically increases cache availability and reduces search time, making it possible to finish multiple task steps in a single raid.
Key Strategy: Stack task progress during Uncovered Caches instead of spreading attempts across normal matches.
If the event isn’t active, adopt a light, audio-focused route through quieter parts of the map. Plan a direct extraction once you’ve looted the required number of caches to avoid unnecessary risk from other Raiders or environmental threats.
By understanding how these tasks actually work, you avoid wasted time and turn what looks like a confusing objective into a straightforward checklist item. Raiders who internalize this approach improve task completion efficiency and free up more time for blueprint hunting or high-value loot runs.
What You Can Find in Raider Caches
If you’re wondering whether Raider Caches in ARC Raiders are worth stopping for, the loot answers that question quickly. These containers are designed to provide practical, immediately useful rewards, making them valuable at every stage of a raid. We recommend you treat Raider Caches as reliable supply boosts, not gamble-based loot drops.
Inside a Raider Cache, you’ll commonly find ammunition, grenades, healing items, quick-use items, shields, weapons, and weapon attachments—all of which help you stay prepared and adaptable during engagements. They’re part of the standard loot pool that keeps you stocked on what matters most in a raid: ammo, gear, and utility. Extra Raider Caches can also appear during certain map conditions, increasing your overall loot opportunities.
Key Takeaway: Raider Caches prioritize useful, raid-ready loot rather than filler items.
Beyond everyday supplies, Raider Caches have a chance to yield valuable weapon blueprints, including rare blueprints reported by the community. This makes them more than just transient supplies—they’re a loot node that contributes to long-term gear progression and unlock paths.
Because the loot pool in Raider Caches spans both immediate-use items and long-term progression tools, opening them keeps your momentum high and your inventory relevant. You resupply, adapt your gear, and remain flexible without detouring into heavy combat zones.
In short, Raider Caches reward smart routing and consistent exploration, giving you tangible value even when you’re not chasing high-tier loot.
Final Tips for Finding Raider Caches Consistently
If you want to find Raider Caches consistently in ARC Raiders, success comes from habit, not luck. We recommend you lock in a few repeatable behaviors that turn cache hunting into a natural part of every raid rather than a side activity you remember occasionally.
Build Cache Hunting Into Your Route Planning
The most reliable players don’t wander — they plan routes that naturally pass through quiet lanes, terrain edges, and low-traffic zones where Raider Caches are easier to hear and locate. Cache spawns follow radius-based placement, so they don’t always sit in one fixed spot. Planning movement through likely spawn corridors increases your odds every run.
Key Tip: Treat Raider Caches as route checkpoints, not random discoveries.
Let Audio Control Your Pace
Audio plays a central role in Raider Cache detection. The familiar ticking or clicking sound often leads you to a cache before you ever see it. Once you recognize this cue, you’ll start identifying cache locations more frequently, even in standard matches. Slow down when you hear it, reorient, then move forward in short, controlled steps to pinpoint the cache.
Important: Speed when traveling, patience when listening.
Know When to Commit — and When to Leave
Consistency doesn’t mean stubbornness. If an area is heavily contested, noisy, or filled with gunfire, cache audio cues can get masked. In those situations, it’s smarter to abort and reposition to quieter terrain rather than force a risky search.
Rule: If finding a cache puts you at risk, abort and reposition.
Stack Cache Hunting With Other Goals
The fastest progression happens when cache hunting, task completion, and blueprint checks overlap. Raider Caches contribute to both short-term raid resources and long-term progression, making them a valuable stop even when you’re focused on other objectives.
Pro Tip: One well-planned route can cover loot, tasks, and blueprints in a single run.
By applying these habits consistently, Raider Caches stop feeling situational and start becoming predictable sources of value. Master the rhythm, trust your audio awareness, and you’ll turn every raid into a controlled, rewarding run.
Visit Our Post Page: Blog Page