
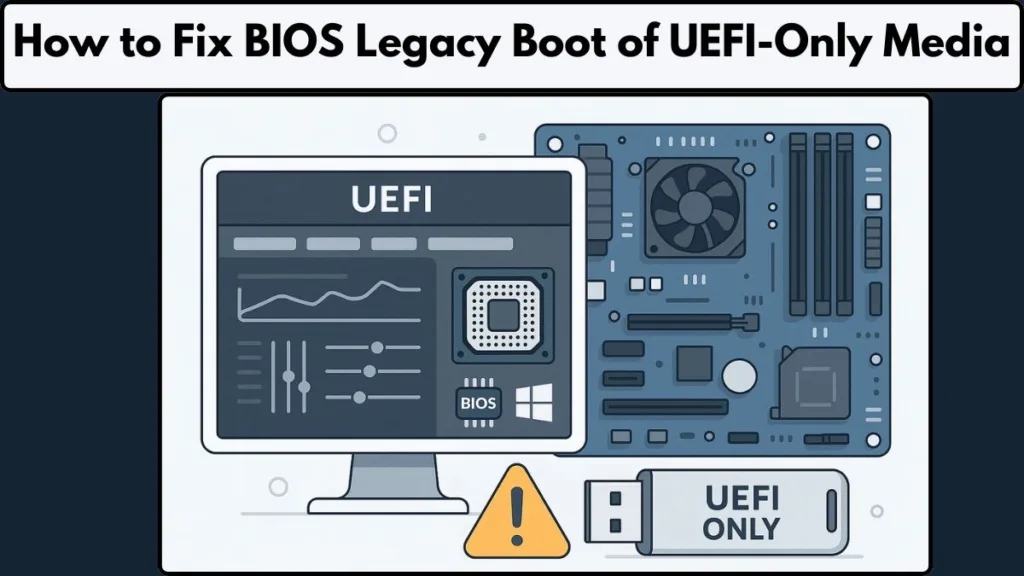
Are you getting the error message ‘BIOS Legacy Boot of UEFI-Only Media’ while installing Windows using USB? Let’s learn how to fix BIOS Legacy Boot of UEFI-Only Media with easy, step-by-step ways to fix it.
Why You See the “BIOS Legacy Boot of UEFI-Only Media” Error
If you’ve ever tried to install Windows on your computer and suddenly encountered a screen that says “BIOS Legacy Boot of UEFI-Only Media”, it can be confusing and even a little stressful. Don’t worry—you’re not alone, and this is a common situation, especially when setting up a new system or reinstalling Windows. Let’s break down why this happens in a way that’s simple to understand, even if you’re not very technical.
The Core Reason: Mismatch Between BIOS and USB Boot Mode
Your computer has a small but powerful piece of software called BIOS (or its modern version, UEFI) that tells your system how to start up. Think of it as the instructions for the very first steps your computer takes when it powers on.
Now, there are two main “styles” your computer can use to start up:
- Legacy BIOS Mode – This is the older method that many computers used for years. It’s reliable but doesn’t support some of the newer features, like certain types of hard drives or faster booting.
- UEFI Mode – This is the modern method that replaces Legacy BIOS. It supports faster boot times, larger hard drives, and more advanced security features.
Here’s the catch: your USB drive (the one you’re trying to install Windows from) is prepared for UEFI mode only. But your computer is currently set to boot in Legacy BIOS mode. Because these two modes are not compatible with each other, the computer cannot read the USB properly, and it throws up the “BIOS Legacy Boot of UEFI-Only Media” error.
Why This Happens So Often
- Default Settings: Many computers ship with Legacy BIOS mode enabled for backward compatibility.
- USB Creation Tools: Tools like Rufus, by default, may create a USB in UEFI mode. If your BIOS is set to Legacy, the mismatch happens.
- Newer Windows Versions: Windows 10 and 11 prefer UEFI installations for better security and faster boot times, making this error more common when using older BIOS settings.
How to Think About It
Imagine trying to plug a USB-C device into a USB-A port without an adapter—it physically won’t connect. Similarly, your system and USB drive “speak different languages” unless they are both set to use either Legacy or UEFI mode.
Understanding this mismatch is the first step toward fixing it. Once you know why it happens, the next step is learning how to fix it—which we’ll cover in the next sections with clear, step-by-step instructions.
Understanding Legacy BIOS and UEFI in Simple Terms
Before moving on to the fixes, it’s essential to understand what Legacy BIOS and UEFI actually are, and why they matter when installing Windows. Don’t worry—we’ll keep it simple, friendly, and non-technical, so you can grasp the concepts easily.
Legacy BIOS: The Old-School Way Computers Start
Legacy BIOS is the classic method your computer has used for decades to boot up. Think of it like an old-fashioned roadmap: it gives your system precise instructions on how to find your operating system and start Windows.
Some key points about Legacy BIOS:
- Reliability: It’s a tried-and-true method used by computers for many years.
- Compatibility: Works well with older hardware and older versions of Windows.
- Limitations: Doesn’t support modern features like very large hard drives, faster booting, or advanced security measures.
When your computer is set to Legacy BIOS mode, it expects the USB drive or installation media to be prepared in a way it understands.
If your USB is prepared for UEFI mode, Legacy BIOS cannot recognize it. That’s why you see the “BIOS Legacy Boot of UEFI-Only Media” error—it’s a communication mismatch between your system and the USB.
Pro Tip: If you want a detailed guide on converting your drive between MBR and GPT safely—without losing data—check out this step-by-step tutorial. This can help when preparing your USB drive or system partition for UEFI boot.
UEFI: The Modern, Smarter Way to Boot
UEFI (Unified Extensible Firmware Interface) is the modern replacement for Legacy BIOS. Imagine it as a high-tech GPS system for your computer startup—it knows the fastest, most efficient, and safest way to get Windows running.
Advantages of UEFI:
- Supports large drives: Works with hard drives over 2TB.
- Faster booting: Reduces startup times significantly compared to Legacy BIOS.
- Enhanced security: Features like Secure Boot prevent malicious software from loading before Windows starts.
- Seamless Windows integration: Especially optimized for Windows 10 and 11.
However, UEFI uses a different partition scheme called GPT (GUID Partition Table), while Legacy BIOS expects MBR (Master Boot Record). If the two do not match, your computer cannot read the USB drive, which leads directly to the error message.
Making Sense of GPT vs MBR
You don’t need to become a partition expert, but here’s a simple analogy:
- MBR (Legacy BIOS): Think of it as an old-style filing cabinet—simple, sturdy, works with older devices.
- GPT (UEFI): A modern filing cabinet with extra drawers—supports more features, larger storage, and faster access, but older systems may not recognize it.
If your USB drive is GPT and your computer is in Legacy mode, it’s like trying to open a modern filing cabinet with an old key—it simply won’t work.
CSM and Secure Boot: Extra Settings to Know
Two other important settings often appear in BIOS/UEFI discussions:
- CSM (Compatibility Support Module):
- Helps UEFI act like Legacy BIOS, allowing your system to boot older media.
- Useful if your system struggles to recognize a UEFI-only USB drive.
- Secure Boot:
- A security feature in UEFI that ensures only trusted software can load at startup.
- Sometimes temporarily disabling Secure Boot helps your USB be recognized, especially if the media wasn’t created with Secure Boot in mind.
These settings are good to know, but for most users, the simplest approach is either switching your BIOS to UEFI mode or recreating the USB drive for Legacy boot.
Key Takeaways for Users
- Legacy BIOS = Old, reliable, expects MBR USB drives.
- UEFI = Modern, faster, uses GPT USB drives, includes security features.
- Mismatch between BIOS mode and USB media is the root cause of the error.
- CSM and Secure Boot may help, but are optional for most users.
Understanding these differences makes fixing the error much easier, and sets you up for the next step: practical, step-by-step solutions to get Windows installed successfully.
Easy Ways to Fix the “BIOS Legacy Boot of UEFI-Only Media” Error
Now that you understand why the error occurs and the difference between Legacy BIOS and UEFI, it’s time to get hands-on and fix it. The good news is that this problem has a few clear solutions, and you don’t need to be a tech expert to follow them.
We’ll go step by step, and each solution is written in a way that’s easy to understand, even if this is your first time dealing with BIOS or USB installation media.
Option 1: Switch Your BIOS from Legacy to UEFI Mode
One of the simplest ways to fix this error is to change your computer’s boot mode from Legacy to UEFI. This aligns your BIOS with the UEFI-only USB, so the system can read it properly.
Step-by-Step Guide:
- Restart your computer and enter the BIOS/UEFI settings.
When your PC starts up, press the key shown on your screen to enter Setup, such as F2, F10, DEL, or ESC. It might flash briefly during startup, so keep an eye out for the prompt. - Locate the Boot Mode Setting.
Inside the BIOS menu, look for sections named Boot, Boot Options, or Boot Mode. Each manufacturer names it slightly differently, but the setting is usually easy to find. - Change Legacy to UEFI.
If your system shows a choice between Legacy/UEFI or has CSM support, choose UEFI only or enable UEFI while disabling Legacy. This ensures your PC can properly read the UEFI-only USB drive. - Save and Exit.
Press the key listed to Save Changes and Exit—often F10. Your computer will restart, and it should now recognize the USB drive prepared for UEFI.
Switching BIOS mode does not delete files on your computer, but it changes how the system starts, so taking a quick photo of your BIOS settings before making changes is a helpful precaution.
Pro Tip: If you want to convert your system from Legacy to UEFI without reinstalling Windows and without losing any data, follow this step-by-step guide. It provides detailed instructions and makes the process safe and beginner-friendly.
Option 2: Recreate Your Bootable USB for Legacy BIOS Using Rufus
If changing BIOS mode isn’t possible or you prefer to stay in Legacy mode, you can recreate your USB drive to be compatible with Legacy BIOS. Rufus is a free, reliable tool that allows you to do this.
Step-by-Step Guide:
- Download and Open Rufus.
Go to the official Rufus website and download the latest version. Once installed, plug in your USB drive and open Rufus. - Select Your USB Drive.
Choose the correct USB device from the dropdown menu so that Rufus knows which drive to format and make bootable. - Select the Windows ISO.
Click Select to locate the Windows ISO file you want to install. This tells Rufus what files to put on the USB. - Set Partition Scheme to MBR.
Change the Partition Scheme from GPT to MBR, and set the Target System to BIOS (or UEFI-CSM). This makes the USB compatible with Legacy BIOS mode. - Start the USB Creation.
Click Start to format the USB and create the bootable media. This may take several minutes depending on the USB speed. Make sure any important data on the USB is backed up first, because the process erases the drive.
Option 3: Use Microsoft MediaCreationTool for an Easier USB Setup
If Rufus feels complicated or you prefer a simpler, beginner-friendly method, Microsoft’s MediaCreationTool can automatically prepare a USB drive that works with your system.
Step-by-Step Guide:
- Download MediaCreationTool from Microsoft.
Use the official Microsoft website to get the tool. This ensures you have the latest version and avoids compatibility issues. - Run the Tool and Select “Create Installation Media.”
Open the tool and choose the option for creating installation media for another PC. - Choose Language, Edition, and Architecture.
Select the Windows version, language, and whether your PC needs 64-bit or 32-bit. Most modern PCs use 64-bit. - Select USB Flash Drive as Media.
Plug in your USB drive and select it as the target media. The tool will format it and copy the necessary files automatically. - Wait for the Tool to Complete.
The process may take some time depending on your internet speed and USB drive. Once finished, the USB is ready to boot, avoiding GPT/UEFI mismatches entirely.
MediaCreationTool is ideal for beginners because it handles all the technical details automatically, ensuring your USB works with your PC without requiring advanced settings.
Switching BIOS to UEFI is the most straightforward solution if your USB is UEFI-only. Recreating the USB for Legacy mode works if you cannot change BIOS settings or prefer Legacy boot.
Using MediaCreationTool simplifies the process and avoids common boot issues entirely. Any of these three methods will help your system recognize the USB drive and move forward with Windows installation.
Quick Advanced Tips to Resolve Persistent “BIOS Legacy Boot of UEFI-Only Media” Error
Sometimes, even after following the main fixes, your system might still show the “BIOS Legacy Boot of UEFI-Only Media” error.
This usually happens because of certain advanced BIOS/UEFI settings or firmware limitations. Don’t worry—these steps are beginner-friendly, clearly explained, and easy to follow.
How to Enable or Disable CSM (Compatibility Support Module) for USB Boot
The CSM (Compatibility Support Module) is a feature that allows your system to run Legacy BIOS-like booting while still using UEFI firmware. Adjusting CSM can often resolve boot issues when your USB drive isn’t recognized.
Step-by-Step Tutorial:
- Restart your computer and enter the BIOS/UEFI menu by pressing the key shown on the startup screen, like F2, F10, DEL, or ESC.
- Navigate to the Boot or Advanced Boot Options section. Look for CSM Support or Compatibility Support Module.
- If CSM is disabled, select Enable. If it’s already enabled and your USB still doesn’t boot, try disabling it temporarily.
- Press the key for Save and Exit (usually F10) and allow the computer to restart.
- Test booting from your USB again to see if the error is resolved.
CSM acts as a bridge between Legacy and UEFI modes, helping your system understand the bootable media when there is a mismatch.
How to Temporarily Disable Secure Boot to Allow USB Boot
Secure Boot is a UEFI feature designed to enhance system security by only allowing trusted software to load during startup. While useful for security, it can sometimes block USB drives not prepared for Secure Boot. Temporarily disabling it often fixes the boot issue.
Step-by-Step Tutorial:
- Enter the BIOS/UEFI settings by restarting your PC and pressing the designated key during startup.
- Navigate to the Security or Boot tab and locate Secure Boot.
- Change the setting from Enabled to Disabled.
- Save changes and exit the BIOS. The system will restart.
- Try booting from your USB drive. Once Windows is installed, you can return to BIOS and re-enable Secure Boot for security.
Disabling Secure Boot is safe when done temporarily and is often the key to resolving stubborn boot issues without reformatting your USB drive.
How to Update BIOS Firmware to Support UEFI and USB Boot
In some cases, the BIOS firmware itself may not fully support UEFI or certain USB partition schemes like GPT. Updating the BIOS ensures your system can read modern bootable drives properly.
Step-by-Step Tutorial:
- Identify your motherboard or PC model by checking your system documentation or BIOS.
- Visit the official manufacturer’s website and find the latest BIOS/UEFI firmware update for your model.
- Download the update and carefully follow the manufacturer’s instructions. This usually involves creating a USB with the update files or running a dedicated tool.
- Restart your computer and enter BIOS to confirm the firmware version is updated.
- Retry booting from your UEFI USB drive. With the updated firmware, the system should now recognize the media correctly.
Updating BIOS adds UEFI compatibility, improves hardware support, and often solves the “Legacy Boot of UEFI-Only Media” error without needing to recreate the USB.
Key Takeaways for Advanced Troubleshooting
Even if the main fixes don’t work, these advanced steps give you additional control over your system’s boot behavior.
Enabling or disabling CSM, temporarily turning off Secure Boot, and updating your BIOS firmware are all effective ways to ensure your computer can read a UEFI-only USB drive.
FAQs
Q1: How do I fix BIOS/Legacy Boot of UEFI-Only Media?
You can fix this by either switching your BIOS to UEFI mode or recreating your USB drive for Legacy boot using Rufus or MediaCreationTool. If issues persist, try enabling/disabling CSM or temporarily turning off Secure Boot.
Q2: What is the difference between UEFI and Legacy BIOS mode?
Legacy BIOS is the older boot method, reliable but limited, requiring MBR USB drives. UEFI is modern, faster, supports GPT drives, and adds security features like Secure Boot. A mismatch between your BIOS mode and USB media causes this error.
Q3: Should I switch to UEFI mode or recreate my USB drive?
If your USB is UEFI-only, switching the BIOS to UEFI mode is simplest. If you prefer to keep Legacy BIOS, recreate the USB using MBR partition scheme in Rufus or MediaCreationTool.
Q4: How do I create a UEFI bootable USB drive using Rufus?
Open Rufus, select your Windows ISO, set Partition Scheme to GPT, and Target System to UEFI. Click Start to create the USB. This prepares the drive for UEFI-only boot.
Conclusion – Fixing the Error Step by Step
The “BIOS Legacy Boot of UEFI-Only Media” error happens when your computer’s boot mode doesn’t match the USB drive. To fix it, follow these simple steps:
- Switch BIOS to UEFI Mode – Aligns your system with UEFI-only USB drives.
- Recreate the USB for Legacy BIOS – Use Rufus or MediaCreationTool with MBR partition scheme if you prefer Legacy mode.
- Use Advanced Settings if Needed – Enable/disable CSM or temporarily turn off Secure Boot. Update BIOS firmware if your system has compatibility issues.
By carefully following these steps, you can resolve the error and proceed with Windows installation smoothly. Checking your BIOS settings and USB partition scheme beforehand ensures a quick and trouble-free setup.
Useful Resources
Create Windows Installation Media: Official Microsoft guide for preparing USB drives for Windows installation.
Update BIOS Firmware: Intel guide on safely updating BIOS to support UEFI and new features.
Change Legacy to UEFI Without Reinstalling Windows: Step-by-step guide for converting Legacy BIOS to UEFI without losing data.
Rufus – Bootable USB Tool: Official Rufus website to create USB drives for Legacy or UEFI boot.
Convert MBR to GPT Safely: Step-by-step tutorial for partition conversion without data loss.
Boot to UEFI Mode or Legacy BIOS: Microsoft documentation explaining boot modes and compatibility.
Visit Our Post Page: Blog Page