
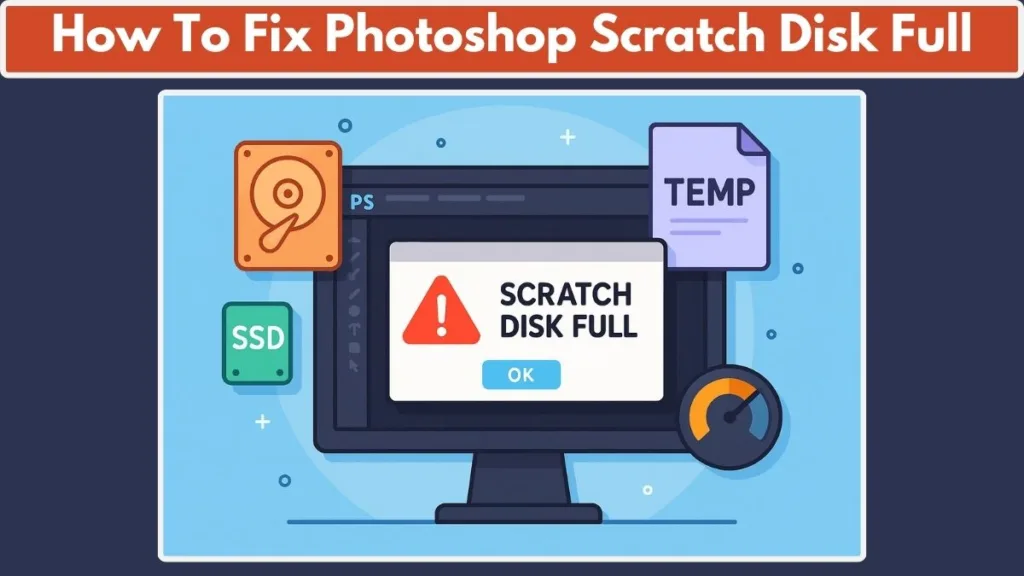
Are you getting the ‘Could Not Initialize Photoshop Because the Scratch Disks Are Full’ error message? Let’s learn how to fix Scratch Disk Full Photoshop error quickly and efficiently.
What is a Scratch Disk in Photoshop?
A scratch disk is a special section of your hard drive that Photoshop uses as temporary storage for files while you work. Think of it as virtual memory—when your computer’s RAM is insufficient to handle a large file or complex operation, Photoshop stores extra data on the scratch disk to continue running smoothly.
Why Scratch Disks Matter
Large Projects Need Space: High-resolution images, multiple layers, smart objects, and advanced filters can quickly use up your system’s memory. Without a scratch disk, Photoshop may lag, freeze, or crash.
Virtual Extension of RAM: Scratch disks act as a backup workspace for temporary data, letting Photoshop process complex tasks even when your computer has limited RAM.
Temporary File Storage: Every time you make changes, Photoshop saves cache files, history states, and undo steps on the scratch disk. This ensures you can undo actions, work on multiple layers, and keep your workflow smooth.
Key Components Stored on Scratch Disks
Temporary Files: These include partially rendered images, filter previews, or data created while Photoshop is performing operations.
Cache Files: Photoshop caches certain elements like brushes, smart object data, or image previews for faster performance.
History States: Every action in Photoshop is saved as a history state on the scratch disk, allowing you to undo changes or revert to previous versions.
Virtual Memory Swaps: When RAM is maxed out, Photoshop temporarily stores data here to continue working efficiently.
How Scratch Disks Affect Performance
Speed: Faster drives (like SSDs) make Photoshop more responsive when performing intensive tasks.
Capacity: Insufficient free space can trigger “Scratch Disk Full” errors, forcing you to pause or restart your workflow.
Configuration: You can assign multiple scratch disks, and Photoshop will use all available disks to optimize performance.
Why You Might See Scratch Disk Error
Even with modern hardware, Photoshop may display a scratch disk error if:
- Your scratch disk drive is nearly full.
- Photoshop is assigned to a slower or external drive.
- Temporary files or caches accumulate without being cleared.
- Large documents with many layers exceed available space.
Pro Tip: Keeping your scratch disk clean and assigning it to a fast drive with ample free space is crucial for maintaining smooth, uninterrupted Photoshop performance. For heavy editing work, consider using a dedicated SSD as your primary scratch disk while reserving your OS drive for other system tasks.
Why Photoshop Shows ‘Scratch Disk Full’ Error
The “Scratch Disk Full” error in Photoshop is one of the most common issues users face, and it can occur for a variety of reasons. Understanding why this happens is crucial to fixing the problem and preventing it in the future.
1. Insufficient Hard Drive Space: Photoshop relies heavily on your scratch disk as temporary storage. If the drive where your scratch disk is located has limited free space, the program cannot store temporary files, leading to errors.
- OS Drive: By default, Photoshop uses your operating system drive (e.g., C:\ on Windows or Macintosh HD on Mac) as the primary scratch disk.
- Free Space Recommendation: Adobe suggests keeping at least 50 GB of free space, but larger projects or high-resolution files may require significantly more.
Tip: Always monitor your disk usage and clear unnecessary files or move them to another drive.
2. Large Files and Complex Projects: Editing high-resolution images, working with multiple layers, or using smart objects and filters can consume huge amounts of scratch disk space. Even if your computer has plenty of RAM, Photoshop will use the scratch disk to handle extra temporary data.
- History States: Every change you make is stored in the scratch disk as a history state, allowing you to undo actions. More history states mean more scratch disk usage.
- Cache Files: Photoshop caches previews, brushes, and smart objects, which also take up space.
Pro Tip: Reducing history states or purging unnecessary cache files can significantly reduce scratch disk consumption.
3. Misconfigured Scratch Disk: Photoshop allows users to assign multiple drives as scratch disks. If the primary drive is slow or nearly full, you may encounter errors.
- External Drives: While you can assign external drives as scratch disks, performance depends on the drive speed. Slow connections (like USB 2.0) may not be sufficient.
- Multiple Drives: Assigning multiple scratch disks helps Photoshop distribute temporary files, improving performance and preventing errors.
Tip: Always choose fast, high-capacity drives as your scratch disk to avoid interruptions.
4. Accumulated Temporary Files and Cache: Photoshop generates temporary files and cache data whenever you open, save, or edit projects. Over time, these can accumulate and fill the scratch disk:
- Temporary PSD Files: Incomplete or unsaved files can take up space.
- Auto-Recovery Files: Photoshop’s auto-recovery feature periodically saves progress, which can add to scratch disk usage.
Tip: Regularly purge caches and delete temporary files to maintain free space.
5. Corrupted Preferences or System Issues: Sometimes, Photoshop’s preferences file may become corrupted due to a crash or system error. This can affect how Photoshop manages the scratch disk, causing the “Scratch Disk Full” alert even when there is enough free space.
- Resetting Photoshop preferences often resolves this issue.
- Ensuring your system is stable and updated also prevents preference-related errors.
6. Oversized or Incorrect Document Units: Using incorrect document units can inadvertently create very large files that consume excessive scratch disk space:
- Example: Setting width and height in inches instead of pixels for digital images can multiply the file size.
- Cropping or resizing documents with wrong units can similarly fill up the scratch disk quickly.
Pro Tip: Always check units when creating or resizing projects to optimize file sizes.
7. RAM Limitations and Virtual Memory: Photoshop uses RAM first, but when the system memory is maxed out, it relies on the scratch disk for virtual memory. Low RAM or insufficient scratch disk space can trigger errors.
- Allocating more RAM to Photoshop and optimizing memory settings helps reduce reliance on the scratch disk.
Check and Free Up Hard Drive Space for Photoshop Scratch Disk
One of the most common causes of the “Scratch Disk Full” error is insufficient free space on your hard drive. Photoshop relies heavily on your scratch disk for temporary files, cache data, and virtual memory, so even a few gigabytes of shortage can disrupt your workflow. Regularly checking and managing your storage is essential for smooth editing.
Why Free Space Matters
Photoshop requires at least 50 GB of free space on the OS drive, but complex projects, multiple layers, and high-resolution images may require significantly more. Limited free space leads to slower performance, crashes, or errors during startup. Having a dedicated scratch disk on a fast SSD improves performance and reduces the chance of errors.
Step 1: Check Storage Usage on Windows
Windows 10 and 11 provide built-in tools that make monitoring and managing storage easy. You can begin by clicking the Windows Start button and selecting the Settings (gear icon). From there, navigate to System → Storage to view your available disk space.
Once you see your storage overview, identify any large files, unused applications, or temporary data that can be deleted. Removing old programs or games that occupy significant space is often an effective way to free up storage.
Additionally, deleting temporary files can create substantial free space. Open the Run dialog by pressing Windows + R, type %temp%, and delete unnecessary files within the folder. After deleting, remember to empty the Recycle Bin to actually free up space.
To further optimize, Windows users can defragment their HDD using the Defragment and Optimize Drives tool. This improves read/write speeds, which can enhance Photoshop’s scratch disk performance. If your OS drive has limited space, consider storing Photoshop projects on a dedicated secondary SSD or external drive.
Step 2: Check Storage Usage on Mac
Mac users can also efficiently monitor storage and prevent scratch disk errors. Start by clicking the Apple icon → About This Mac → Storage → Manage. This opens a detailed view of your storage usage across categories such as Applications, Documents, iCloud Drive, and Temporary Files.
From here, you can move files to iCloud or an external drive to free up space. Don’t forget to empty Trash after deleting files to reclaim the storage.
For advanced management, Mac users can utilize Disk Utility to manage APFS volumes or erase partitions that are no longer needed. Keeping at least 50 GB free on your Macintosh HD or primary scratch disk ensures that Photoshop has enough space to operate efficiently.
How to Change Photoshop Scratch Disk for Better Performance
If you are frequently encountering the “Scratch Disk Full” error, changing the scratch disk to a faster or larger drive can significantly improve Photoshop’s performance. Photoshop allows you to assign one or multiple drives as scratch disks, ensuring the program has enough space for temporary files, history states, and cache data.
Why Changing Scratch Disk Helps
By default, Photoshop uses your OS drive (C:\ on Windows or Macintosh HD on Mac) as the primary scratch disk. If this drive is nearly full, slow, or cluttered with other files, it can lead to errors and reduced performance. Assigning a dedicated fast SSD as the scratch disk reduces the load on your OS drive and allows Photoshop to handle large projects smoothly.
Step 1: Change Scratch Disk Within Photoshop
To assign a new scratch disk:
- Open Photoshop.
- On Windows, go to Edit → Preferences → Performance. On Mac, go to Photoshop → Preferences → Performance.
- Locate the Scratch Disk section. Here, you can select additional drives or change the primary scratch disk.
- Check the box next to the drive you want to use, then click OK.
- Restart Photoshop for the changes to take effect.
This method ensures that Photoshop uses the fastest and most spacious drive available for temporary storage, reducing the likelihood of encountering errors during complex operations.
Step 2: Change Scratch Disk During Startup
If Photoshop fails to launch due to the “Scratch Disk Full” error, you can reassign the scratch disk during startup:
- Open Photoshop and immediately press and hold Ctrl + Alt (Windows) or Command + Option (Mac).
- Wait for the Scratch Disk Preferences dialog to appear.
- Use the drop-down menu to select a new primary scratch disk.
- Click OK to confirm and launch Photoshop.
This ensures you can start Photoshop even when the default scratch disk is full or unavailable.
Pro Tips for Scratch Disk Management
Always prioritize SSD over HDD for your primary scratch disk. SSDs provide faster read/write speeds, which are crucial for handling large files and multiple layers.
Assign multiple drives if possible. Photoshop will distribute temporary files across them, improving performance.
Regularly monitor free space on all scratch disks and clear unnecessary files to prevent future errors.
How to Clear Photoshop Cache to Free Scratch Disk Space
Another effective way to fix the “Photoshop Scratch Disk Full” error is by clearing Photoshop’s cache files. Cache includes temporary files, preview data, history states, and undo information. Over time, cache accumulation can occupy significant space on your scratch disk.
Why Clearing Cache is Important
Photoshop uses cache to store temporary information that speeds up editing. However, too much cache can consume scratch disk space and trigger errors or slow performance. Regularly clearing cache ensures Photoshop has enough free space for new projects and reduces the likelihood of crashes.
Step 1: Clear Cache Within Photoshop
To clear cache safely:
- Open Photoshop.
- Click Edit (Windows) or Photoshop (Mac) in the top menu.
- Hover over Purge in the dropdown menu.
- Select All to remove all cache data, including history states, clipboard data, and video cache.
You can also selectively clear cache by choosing Histories to remove undo states, Clipboard to clear copied data, or Video Cache for video files.
Step 2: Manage Scratch Disk by Deleting Temporary Files
In addition to purging cache within Photoshop, deleting temporary files stored on your hard drive can free even more space.
On Windows, open the Temp folder (Windows + R → %temp%) and remove unnecessary files.
On Mac, navigate to ~/Library/Caches/ and delete Photoshop-related temp files.
Make sure Photoshop is closed before deleting temporary files to avoid losing any active project data.
Pro Tips for Maintaining Cache Efficiency
Schedule regular cache purges, especially after completing large projects.
Limit the number of history states in Photoshop preferences to reduce cache usage.
Consider using a dedicated external SSD for large projects, keeping your main scratch disk free for temporary files.
Summary
By changing the scratch disk to a fast, spacious drive and regularly clearing cache, you can prevent the “Photoshop Scratch Disk Full” error, maintain optimal performance, and keep your workflow smooth. Proper scratch disk and cache management are essential for efficient editing, especially when working with high-resolution images and complex projects.
How to Change Photoshop Scratch Disk for Better Performance
If you are frequently encountering the “Scratch Disk Full” error, changing the scratch disk to a faster or larger drive can significantly improve Photoshop’s performance. Photoshop allows you to assign one or multiple drives as scratch disks, ensuring the program has enough space for temporary files, history states, and cache data.
Why Changing Scratch Disk Helps
By default, Photoshop uses your OS drive (C:\ on Windows or Macintosh HD on Mac) as the primary scratch disk. If this drive is nearly full, slow, or cluttered with other files, it can lead to errors and reduced performance. Assigning a dedicated fast SSD as the scratch disk reduces the load on your OS drive and allows Photoshop to handle large projects smoothly.
Step 1: Change Scratch Disk Within Photoshop
To assign a new scratch disk, first open Photoshop. On Windows, navigate to Edit → Preferences → Performance, and on Mac, go to Photoshop → Preferences → Performance. Within the Scratch Disk section, you can select additional drives or change the primary scratch disk.
Select the drive you want to use by checking the box next to it, and then click OK. Restart Photoshop for the changes to take effect. This ensures that Photoshop uses the fastest and most spacious drive available for temporary storage, reducing the likelihood of encountering errors during complex operations.
Step 2: Change Scratch Disk During Startup
If Photoshop fails to launch due to the “Scratch Disk Full” error, you can reassign the scratch disk during startup. Open Photoshop and immediately press and hold Ctrl + Alt on Windows or Command + Option on Mac. Wait for the Scratch Disk Preferences dialog to appear.
From there, use the drop-down menu to select a new primary scratch disk and click OK to confirm. Photoshop will then launch using the new scratch disk, allowing you to continue working even when the default drive is full or unavailable.
Pro Tips for Scratch Disk Management
Always prioritize SSD over HDD for your primary scratch disk, as SSDs provide faster read/write speeds, which are crucial for handling large files and multiple layers. Assigning multiple drives allows Photoshop to distribute temporary files across them, improving performance and stability.
Regularly monitor free space on all scratch disks and clear unnecessary files to prevent future errors. By following these practices, you ensure that Photoshop has enough workspace to function efficiently and avoid interruptions caused by full scratch disks.
How to Clear Photoshop Cache to Free Scratch Disk Space
Clearing Photoshop’s cache files is another effective way to resolve the “Photoshop Scratch Disk Full” error. Cache includes temporary files, preview data, history states, and undo information, and over time it can occupy significant space on your scratch disk.
Why Clearing Cache is Important
Photoshop uses cache to store temporary information that speeds up editing. However, excessive cache can consume scratch disk space, triggering errors or slowing performance. Regularly clearing the cache ensures Photoshop has enough free space for new projects and reduces the likelihood of crashes.
Step 1: Clear Cache Within Photoshop
To clear cache, open Photoshop and click Edit on Windows or Photoshop on Mac in the top menu. Hover over Purge in the dropdown menu and select All to remove all cache data, including history states, clipboard data, and video cache.
You can also selectively clear cache by choosing Histories to remove undo states, Clipboard to clear copied data, or Video Cache for video files. This approach gives you flexibility in freeing up space without losing important data.
Step 2: Delete Temporary Files on Your Hard Drive
In addition to purging cache within Photoshop, deleting temporary files stored on your hard drive can free even more space. On Windows, open the Temp folder by pressing Windows + R, typing %temp%, and removing unnecessary files. On Mac, navigate to ~/Library/Caches/ and delete Photoshop-related temporary files.
Make sure Photoshop is closed before deleting temporary files to avoid losing any active project data. This step ensures the scratch disk has maximum available space for Photoshop to operate efficiently.
Pro Tips for Maintaining Cache Efficiency
Schedule regular cache purges, especially after completing large projects. Limiting the number of history states in Photoshop preferences also helps reduce cache usage. For large ongoing projects, consider using a dedicated external SSD, keeping your main scratch disk free and preventing future errors.
Summary
By changing the scratch disk to a fast, spacious drive and regularly clearing cache, you can prevent the “Photoshop Scratch Disk Full” error, maintain optimal performance, and keep your workflow smooth. Proper scratch disk and cache management are essential for efficient editing, particularly when working with high-resolution images and complex projects.
How Do I Empty the Scratch Disk in Photoshop for Maximum Efficiency
When Photoshop frequently shows the “Scratch Disk Full” error, it may be necessary to empty the scratch disk to free up temporary space. Scratch disks store temporary files, cache data, and history states, so clearing them ensures the program runs smoothly, especially during large projects with multiple layers and high-resolution images.
Delete Temporary Files on Windows
On Windows, open the Temp folder by pressing Windows + R, typing %temp%, and pressing Enter. Look for files related to Photoshop, especially those starting with “PST” or “Photoshop,” and delete them. Ensure Photoshop is closed before deleting these files to avoid losing any active project data.
Delete Temporary Files on Mac
On Mac, navigate to ~/Library/Caches/ and delete Photoshop-related temporary files. You can also use Disk Utility to remove leftover temporary files or hidden cache folders that take up scratch disk space.
Clear Cache Within Photoshop
Inside Photoshop, go to Edit → Purge → All (Windows) or Photoshop → Purge → All (Mac) to remove all cache files at once. This deletes undo histories, clipboard data, and video cache, freeing up valuable scratch disk space. For selective clearing, choose Histories, Clipboard, or Video Cache to retain data you still need.
Move Files to External Drives
For large projects, consider moving completed files to an external SSD or HDD. This frees up space on your scratch disk and prevents future errors. A fast SSD is highly recommended for scratch disk use, as it significantly improves read/write speeds and overall Photoshop performance.
Adjust RAM Allocation and Performance Settings in Photoshop
Photoshop relies heavily on RAM allocation to manage temporary files, history states, and cache efficiently. Insufficient RAM can trigger scratch disk errors, slowdowns, lag, or crashes. Adjusting memory allocation ensures Photoshop uses your system resources optimally.
Accessing Performance Preferences
Go to Edit → Preferences → Performance (Windows) or Photoshop → Preferences → Performance (Mac). The Memory Usage section shows the amount of RAM currently allocated to Photoshop.
Increase Allocated RAM
Use the slider or input box to increase RAM allocation, keeping in mind that Photoshop should not consume all system memory. A recommended allocation is 70–85% of total available RAM, leaving enough for the OS and other applications.
Limit History States and Cache Levels
Each history state consumes scratch disk space. Navigate to History & Cache and reduce the number of history states to 20–50, depending on your workflow. Adjust cache levels according to project type: fewer levels for smaller documents, more levels for high-resolution or multi-layer files.
Additional Performance Tips
Disabling Automatically Save Recovery Information reduces temporary file usage but increases the risk of losing unsaved work. Always keep your scratch disk on a fast, large SSD, and avoid running multiple resource-heavy applications alongside Photoshop to prevent RAM shortages and scratch disk errors.
Correct Document Units and Efficient File Management in Photoshop
Incorrect document units or poor file management can create oversized files that consume excessive scratch disk space. Paying attention to units and organizing files efficiently helps prevent “Photoshop Scratch Disk Full” errors.
Use the Correct Units for Your Projects
When creating or resizing documents, choose appropriate units for your workflow. For digital projects, use pixels (px), and for print projects, use inches or centimeters. Wrong units can generate unnecessarily large files, consuming extra scratch disk space and memory.
Manage File Sizes and Layers
Large PSD files with multiple layers and high-resolution images take up more scratch disk space. Organize your projects by merging layers when possible, reducing image resolution if high resolution isn’t required, and saving completed projects to external storage or cloud services to free scratch disk space.
Regularly Clean Up Projects
Regularly delete unused files, old revisions, and cache data to maintain sufficient scratch disk space. This improves Photoshop’s speed, stability, and performance. Using external SSDs for large projects, backing up completed files to cloud storage, and organizing files into folders (e.g., working, completed, archived) helps efficiently manage storage and avoid clutter.
Reset Photoshop Preferences to Resolve Scratch Disk Issues (Optional)
Sometimes, despite freeing up space and adjusting settings, Photoshop continues to show “Scratch Disk Full” errors. This can happen if the Photoshop preferences file becomes corrupted, often due to sudden crashes or system issues. Resetting preferences restores Photoshop to default settings and can fix persistent scratch disk errors.
Step 1: Backup Your Preferences
Before resetting, it’s wise to backup your custom preferences, including brushes, actions, and workspace layouts. This ensures you don’t lose any important customization. Save these files to an external drive or cloud storage for easy restoration.
Step 2: Reset Preferences on Startup
To reset preferences, close Photoshop and press Shift + Ctrl + Alt on Windows or Shift + Command + Option on Mac while launching the application. A dialog box will appear asking if you want to delete the Adobe Photoshop Settings file. Click Yes to confirm.
Step 3: Reconfigure Scratch Disk Preferences
After resetting, open Preferences → Performance to reassign your scratch disk, optimize RAM allocation, and adjust history states. This ensures Photoshop runs efficiently with the newly cleared scratch disk and default settings.
Resetting preferences is optional but often resolves stubborn errors that don’t respond to standard troubleshooting. Combining this with disk cleanup, cache purges, and RAM optimization ensures Photoshop performs smoothly.
Choosing Between SSD vs HDD for Photoshop Scratch Disk
Selecting the right storage drive for your scratch disk can make a significant difference in Photoshop’s performance. While both SSDs and HDDs can be used, understanding their speed, reliability, and storage capacity is crucial.
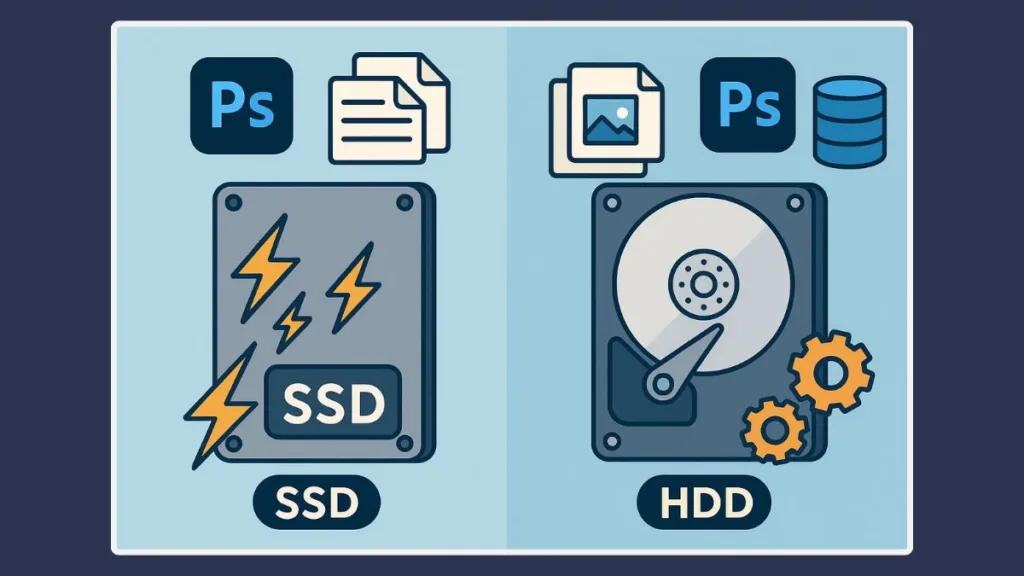
Why SSDs are Ideal for Scratch Disks
Solid-State Drives (SSD) are faster than traditional HDDs because they have no moving parts. This speed is especially noticeable when handling large files, multiple layers, or complex projects, as Photoshop can read and write temporary files almost instantly. Using an SSD as a scratch disk reduces lag, freezes, and scratch disk errors, providing a smoother editing experience.
HDDs for Scratch Disks
Hard Disk Drives (HDD) offer higher storage capacity at a lower cost, but they are slower due to mechanical read/write operations. HDDs can be used as scratch disks, but they may cause delays when accessing temporary files during heavy editing sessions. For casual or lightweight Photoshop use, an HDD might suffice, but for professional work, SSDs are highly recommended.
Optimal Scratch Disk Setup
For best performance, assign your primary scratch disk to a fast SSD and consider a secondary HDD for overflow storage. Ensure that the drive has ample free space (at least 50 GB recommended), and avoid filling it with unnecessary files. Regularly monitor disk usage to prevent errors and maintain consistent workflow efficiency.
Conclusion: Maintaining an Efficient Photoshop Workspace
The “Scratch Disk Full” error can be frustrating, but it’s often preventable with proper disk management, RAM allocation, cache clearing, and preferences maintenance. Understanding what a scratch disk is and how Photoshop uses it for temporary storage is the first step toward avoiding interruptions.
By regularly freeing up space, optimizing performance settings, and using fast SSDs, you ensure Photoshop runs efficiently, even with large, high-resolution projects. Additional practices like resetting preferences, managing file sizes, and correctly setting document units help maintain a stable workspace.
With these steps, you can reduce errors, speed up your workflow, and keep your creative projects flowing smoothly without being interrupted by scratch disk issues. Maintaining your Photoshop environment isn’t just about fixing problems—it’s about preventing them proactively for a more productive and frustration-free editing experience.
Useful Resources for Scratch Disk Full Photoshop Error
Official Adobe Resources
- Adobe Help: Scratch Disks – Official guide on understanding and managing Photoshop scratch disks.
- Adobe Photoshop System Requirements – Learn the recommended disk space, RAM, and storage setup for optimal performance.
- Adobe Community Forums – Ask questions or read discussions on common scratch disk issues and solutions.
Mac-Specific Resources
- How to Free Up Storage Space on Mac – Steps to clean up storage and manage disks effectively.
- Disk Utility on Mac – Guide to manage and format APFS or macOS Extended (Journaled) drives.
Windows-Specific Resources
- Free Up Drive Space in Windows 10/11 – Learn how to delete temporary files and manage storage.
- Defragment and Optimize Drives in Windows – Improve drive efficiency for better Photoshop performance.
Visit Our Post Page: Blog Page