
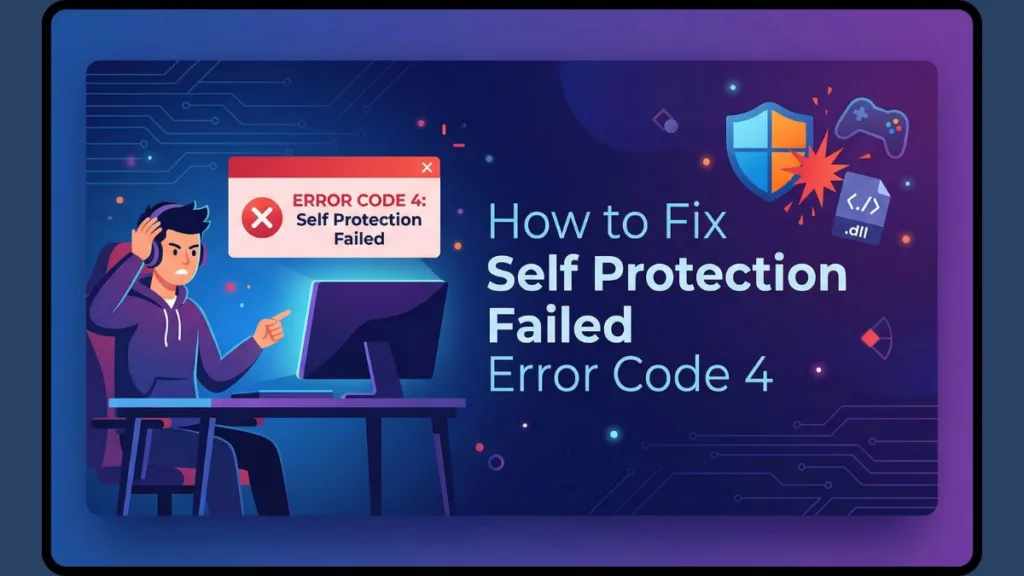
Are you getting an unexpected crash while trying to launch a game? Learn how to fix Self Protection Failed Error Code 4 quickly with these step-by-step solutions.
If you are currently trying to launch a game and suddenly encounter a roadblock, you are certainly not alone. Many users report seeing the specific, frustrating message below:
“Self protection failed error code 4”
This specific error code 4 self protection failed issue often strikes without warning. It can appear even when your PC is running perfectly normal and other games load without issue.
While it disrupts your gaming session, the good news is that this issue is usually temporary. Furthermore, it rarely results from user error, so you haven’t broken anything.
In this comprehensive guide, we will walk you through exactly what this error means, why it happens, and the specific steps you must take to fix self protection failed PC quickly.
To understand the scope of the problem, it is helpful to look at the modern landscape of PC gaming. Today, nearly all major multiplayer titles—such as Elden Ring, Apex Legends, Rust, Palworld, and Fortnite—rely on robust, kernel-level anti-cheat software.
Programs like EasyAntiCheat (EAC), BattlEye, and Riot Vanguard operate at the deepest layers of your Windows operating system (Ring 0) to monitor system memory and prevent malicious code injection.
However, this deep system integration is a double-edged sword. When these anti-cheat services fail to initialize correctly, or when they detect an unexpected file modification, they trigger the application self protection protocol to shut the game down immediately. This is the exact mechanism that generates the error code on your screen.
What Causes the “Self Protection Failed Error Code 4”?
To better understand the problem, we must first define what the error actually signals.
This message means your system’s security or the game’s anti-cheat was unable to process the launch request at that exact moment. It does not automatically indicate a severe malware infection or a permanent hardware failure.
Based on real usage patterns and technical analysis, this error usually stems from one of the specific reasons below:
- Scenario A (Legitimate Games): For games using official software, the error is usually caused by corrupted anti-cheat self protection (like EasyAntiCheat or BattlEye), leftover mod files, or software conflicts (such as the Corsair iCUE error code 4).
- Scenario B (Multiplayer Bypasses): If you are playing cracked games or using an online fix, Windows Defender or a third-party antivirus is likely treating your multiplayer bypass as a threat, blocking the install, or actively deleting crucial files like
custom.dlloronlinefix.ini.
Diving deeper into Scenario B, it is crucial to understand why third-party antivirus software like Bitdefender, Malwarebytes, or Norton 360 behaves this way.
Modern antivirus programs do not just scan for known virus signatures; they use “Heuristic Analysis” to monitor how files behave. Steam multiplayer bypasses (often hosted on platforms like Online-Fix.me) work by injecting code into your Steam client to mask the cracked game as a free-to-play app, usually Spacewar (Steam AppID 480).
Because this code injection mimics the exact behavior of Trojan horses and malware, your antivirus heuristic engine immediately flags files like UnityCrashHandler64.exe as malicious.
This results in the antivirus aggressively quarantining the files in the background, severing the game’s connection to the bypass, and instantly throwing the self-protection failed error on your desktop.
How to Fix Error Code 4 for Official Games
To resolve this efficiently, follow these steps in order. We strongly recommend that you do not skip ahead, as the simpler fixes often work best.
Before jumping into a complete reinstallation, you should utilize the built-in repair tools provided by major gaming clients. These tools verify the integrity of your game files, scanning your local directory against the official server files to redownload any missing or corrupted anti-cheat modules.
- For Steam Users: Right-click the game in your library, select Properties, go to the Installed Files tab, and click Verify integrity of game files.
- For Epic Games Store Users: Click the three dots next to the game title in your library, select Manage, and then click Verify.
- For EA App Users: Select the game in your collection, click the Manage button, and choose Repair.
If the built-in repair does not work, you can try repairing the EasyAntiCheat service directly. Navigate to your game’s installation folder, open the EasyAntiCheat folder, right-click EasyAntiCheat_Setup.exe, and run it as an administrator. Select your game from the drop-down menu and click Repair Service.
If you are getting a self protection failed schedule 1 or self protection failed error code 4 elden ring issue, a standard Steam uninstall will not fix it. Steam often leaves behind corrupted registry keys or old mod files that trigger the anti‑tamper error.
Step 1: Uninstall the game Remove the game directly through your Steam library to clear the primary files.
Step 2: Manually delete the game folder Navigate to your Steam library directory (Steam\steamapps\common) and delete the leftover game extraction folder. This ensures no stray mod files remain to confuse the server.
Step 3: Wipe the Anti-Cheat folders Navigate to C:\Program Files (x86) and manually delete both the Easy Anti Cheat and Easy Anti Cheat EOS folders. This eliminates corrupted session data that causes the issue.
Step 4: Registry Cleanup (Optional but Recommended) Open Windows Search, type REGEDIT, and hit Enter. Press Ctrl + F, search for EasyAntiCheat_EOS, and delete any lingering keys associated with it to resolve system file corruption error 4.
Step 5: Reinstall Download and install the game fresh via Steam. The anti-cheat self protection will install cleanly alongside it.
How to Fix Error Code 4 for Online-Fix & Cracked Games
If you are dealing with the online fix self protection failed error, your system security is actively blocking your game’s Steam multiplayer bypass. In these cases, your PC keeps sending “confused” data to the game launcher, which it consistently rejects.
Step 1: Set Up a Windows Defender exclusion: To stop Windows security blocking the install, you need to whitelist the game folder. Go to Settings > Privacy and security > Windows Security > Virus & threat protection > Manage settings. Scroll down to Exclusions, click Add or remove exclusions, and select your entire game extraction folder.
While Windows Defender is the default security app, many users rely on premium third-party antivirus suites. If you use one of these, you must apply the folder exclusion within their specific interfaces:
- Bitdefender: Open the dashboard, go to Protection, select Antivirus Settings, and click on the Exceptions tab. Add the exact path to your game’s extraction folder here. Be sure to also check the Advanced Threat Defense (ATD) exceptions, as ATD is notorious for blocking multiplayer
.dllfiles. - Malwarebytes: Open the app, click the small gear icon for Settings, navigate to the Allow List, and select Add. Choose Allow a file or folder and direct it to your game directory.
- Norton 360: Open the classic interface, click Settings, go to Antivirus, and select the Scans and Risks tab. Scroll down to Exclusions / Low Risks and add your game folder to the “Items to Exclude from Scans” and “Items to Exclude from Auto-Protect” lists.
Step 2: Restore Quarantined Files: Check your Antivirus protection history. If your antivirus already deleted UnityCrashHandler64.exe or flagged a custom.dll error, select the file and click Restore.
Step 3: Replace the Configuration File: If the onlinefix.ini self protection failed error persists, open the original .zip or .rar archive you downloaded. Extract a fresh copy of the onlinefix.ini file and replace the broken one in your game directory.
Step 4: Run as Administrator Right-click your game’s executable file and select Run as administrator.
This ensures the application self protection has the necessary permissions to execute.
Advanced System Solution (Windows 11 & Driver Conflicts)
If you have tried the steps above and the game won’t start error 4 still appears, you should run through this diagnostic checklist of advanced system fixes to save time.
- Run SFC and DISM: You can fix underlying Windows system file corruption by running built-in repair tools. Open Command Prompt as an administrator and type
sfc /scannow. Once that finishes, typeDISM /Online /Cleanup-Image /RestoreHealthand press Enter. - Check for Background App Conflicts: Deep-system apps can cause a security driver conflict error 4. Try temporarily closing software like Corsair iCUE, RGB controllers, or heavy overlays before launching the game.
To systematically test for these background app conflicts, you can perform a “Clean Boot.” This starts Windows with a minimal set of drivers and startup programs, allowing you to isolate exactly which software is clashing with your game’s anti-cheat.
- Press the Windows Key + R, type
msconfig, and press Enter. - Navigate to the Services tab.
- Check the box that says Hide all Microsoft services. (This step is critical to ensure you do not disable essential Windows functions).
- Click Disable all.
- Go to the Startup tab and click Open Task Manager. Disable all startup items here as well.
- Restart your PC and attempt to launch the game. If it works, you know a background application (like Razer Synapse or Asus Armoury Crate) was the culprit.
- Temporarily Disable Self Protection: As a quick test, temporarily disable your antivirus real-time protection just long enough to launch the game. If it works, you know for certain that you need to adjust your network or antivirus exceptions.
In rare instances, outdated motherboard BIOS versions or obsolete chipset drivers can trigger a security driver conflict error 4. Anti-cheat software expects your hardware communication layers to be secure and up-to-date.
Visit your motherboard manufacturer’s official support website (such as MSI, Gigabyte, or ASUS), download the latest chipset drivers for your specific model, and install them to ensure your hardware is fully compatible with kernel-level security requirements.
How to Prevent This Error in the Future
While you cannot prevent all system-side issues, you can significantly reduce the chances of seeing this error again by maintaining good “PC hygiene.” To keep your gaming environment stable:
- Keep Your Exclusions Updated: Whenever you move a game to a new hard drive or SSD, remember that your antivirus folder exclusions do not move with it. You must manually update the file paths in your security settings.
- Manage Your Mods Carefully: If you frequently use mods (like the popular Seamless Coop mod for Elden Ring), keep them in a separate, organized folder. Always remove them entirely before attempting to connect to official game servers to prevent triggering anti‑tamper errors.
- Avoid Overlapping Security Software: Running two active antivirus programs (e.g., leaving Windows Defender active while running McAfee) is a recipe for disaster.
They will constantly fight for control over file permissions, inevitably leading to system file corruption error 4. Keep only one primary security suite active at a time.
These proactive steps help maintain a clean, stable system environment and prevent the “something went wrong” errors from interrupting your gaming sessions.
FAQ
What causes Self Protection Failed Error Code 4?
It is caused by a tamper protection conflict. Your system’s antivirus is actively blocking game files, or your official anti-cheat software is corrupted by leftover mod files.
Is Error Code 4 a virus?
No, error code 4 is not a virus. It is typically a false positive triggered by aggressive antivirus software, or a temporary driver conflict.
Can antivirus cause Error Code 4?
Yes. Antivirus blocking game files is the leading cause of this error for multiplayer bypasses, as security software frequently quarantines modified .dll or .ini files.
How do I disable self protection temporarily?
To temporarily disable self protection in Windows, open Windows Security, go to Virus & threat protection, click Manage settings, and toggle off Real-time protection. If you use a third-party antivirus, you will usually find a similar toggle by right-clicking the antivirus icon in your system tray (near the clock) and selecting “Pause Protection.”
Will reinstalling the app fix Error Code 4? Reinstalling the app will only fix Error Code 4 if you manually delete the leftover game folders and anti-cheat folders before downloading it again. Otherwise, the corrupted files remain on your drive and the fresh install will immediately fail.
How to run SFC and DISM for Error Code 4?
Open Command Prompt as an administrator, run sfc /scannow, wait for it to finish, and then run DISM /Online /Cleanup-Image /RestoreHealth. These commands force Windows to check its core architecture and download healthy replacement files directly from Microsoft’s update servers.
Why does the error persist even after adding a Windows Defender exclusion?
If the error persists after adding an exclusion, it means the crucial files were already deleted or quarantined before the exclusion was made. You must go into your protection history, restore the quarantined items (like custom.dll), and then try launching the game again. Alternatively, extracting the files fresh from the downloaded archive will also solve this.
Can a VPN trigger the self protection failed error?
While less common than antivirus conflicts, highly restrictive VPN protocols can occasionally interfere with the backend authentication process of EasyAntiCheat or Epic Online Services (EOS). If your anti-cheat cannot communicate with its master server to verify your session, it may shut down and trigger an error. Try disabling your VPN temporarily to see if it resolves the issue.
Official Error Code 4 Support Guides
Add a Windows Security exclusion: Official Microsoft steps for safely whitelisting your game folders without turning off your antivirus completely.
EasyAntiCheat Support: The official portal for resolving game connection issues, handling error codes, and repairing the EAC service directly.
Using System File Checker in Windows: Step-by-step Microsoft support instructions for running safe, built-in repair commands like SFC and DISM.
Verify Integrity of Game Files: Official Steam walkthrough for checking and repairing missing or corrupted game cache files through the Steam client.
Exclude detections in Malwarebytes: Official documentation for allowing specific files and folders to bypass scans in third-party antivirus software.
Visit Our Post Page: Blog Page