
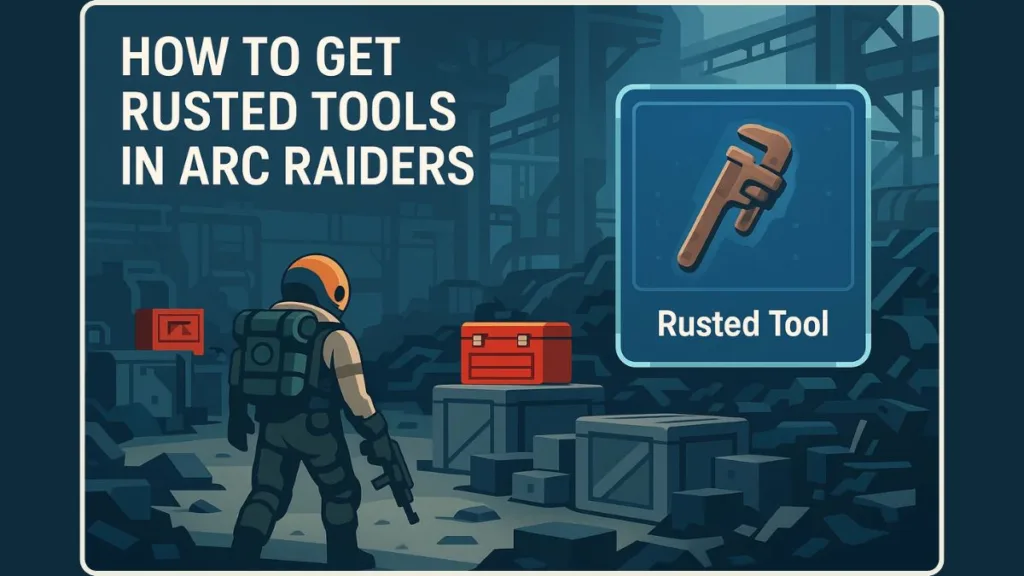
Struggling to get Rusted Tools in ARC Raiders? Learn the fastest ways to farm Rusted Tools and gather everything needed for the Gunsmith 2 upgrade with efficient, beginner-friendly methods.
This complete guide breaks down the best Dam Battlegrounds farming spots, solo routes, mechanical zones, drop rates, and high-yield containers.
What Are Rusted Tools in ARC Raiders? Why They Matter for the Gunsmith 2 Upgrade
If you’ve been roaming the world of ARC Raiders and wondering what those odd-looking Rusted Tools in loot crates actually are, you’re in the right place. Rusted Tools are not just filler junk; they’re a valuable, rare mechanical resource that plays a key role in progression.
These items sit inside the game’s Mechanical and Industrial loot pools, making them much more limited than standard materials you pick up during a run.
What Are Rusted Tools
Rusted Tools are classified as a Recyclable / Mechanical loot type found only in mechanical or industrial-themed zones.
They weigh 2 kg each, with a stack size of three, meaning a full stack takes up 6 kg in your backpack.
You’ll usually spot them inside red tool boxes, crates, storage containers, or mechanical-themed loot spots. They don’t appear in every container, which is why they often feel scarce during early progression.
Because of the weight and limited stacking, finding Rusted Tools becomes a small inventory challenge — and that’s intentional. The rarity ensures each one feels meaningful.
Why They’re Important: Gunsmith 2 Upgrade
Rusted Tools unlock a crucial part of your crafting progression — the Gunsmith Level 2 upgrade. Without this, you’re stuck with basic weapon capabilities.
The upgrade requires:
- 3 Rusted Tools
- 5 Mechanical Components
- 8 Wasp Drivers
These three Rusted Tools act as a gatekeeper for improved crafting, better weapon modifications, and higher-tier upgrades. Until you collect them, your progression slows down significantly.
This is why players often consider Rusted Tools a bottleneck — and why farming them becomes a priority early in the game.
Secondary Value: Recycling or Selling
After upgrading your Gunsmith, extra Rusted Tools still have value.
You can recycle them into Metal Parts and a Steel Spring, valuable materials for other crafting recipes.
Or you can sell them for a sizeable coin return if you need quick currency.
However, it’s strongly recommended not to recycle or sell them too early. Without keeping at least three for the Gunsmith 2 upgrade, you may end up doing unnecessary extra farming runs later.
Rusted Tools may look simple, but they’re one of the most important early-game items for unlocking stronger weapons and smoother crafting progression. They’re small, rare, and easy to overlook — but once you understand their value, they become top-priority loot.
Where to Find Rusted Tools in ARC Raiders (Mechanical & Industrial Loot Zones Explained)
If you want to reliably find Rusted Tools in ARC Raiders, it helps a lot to know exactly where — and how — the game spawns them. This isn’t guesswork: Rusted Tools live in the game’s Mechanical and Industrial loot pools. Think of those zones as the “workshop areas” of the map: factories, warehouses, maintenance bays — that kind of vibe.
Understanding Loot Zones & Why They Matter
- Every map is split into zone types — and when your HUD shows Mechanical or Industrial, that means this is a valid area where Rusted Tools can spawn.
- Loot outside these zones (electrical labs, residential zones, “old-world” ruins, etc.) rarely carries mechanical resources — so if you’re hunting Rusted Tools, those areas are mostly a dead end.
- Because Rusted Tools are part of a rarer loot pool, knowing to target these zones makes your scavenging way more efficient: fewer wasted searches, more focused runs.
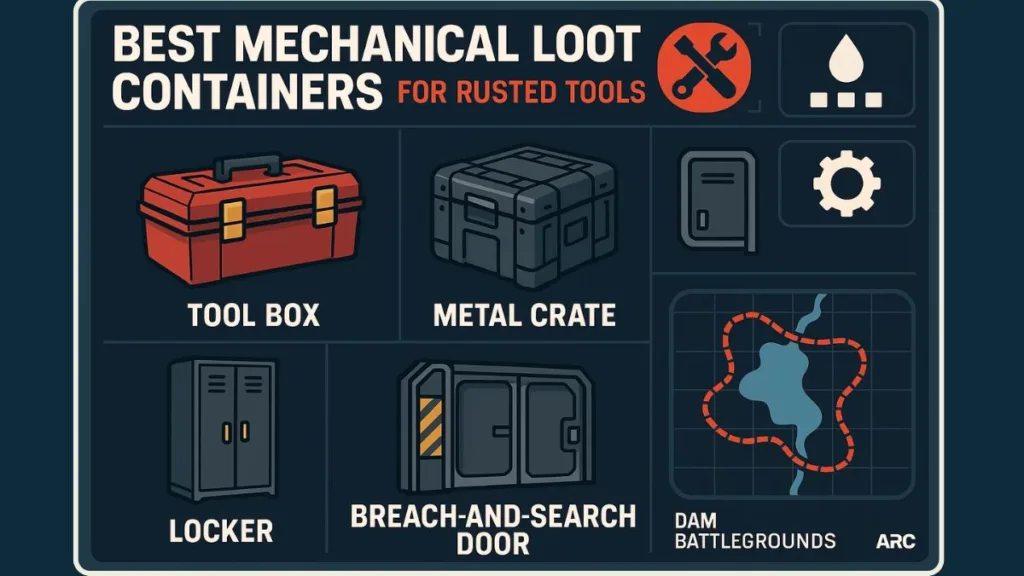
What Containers & Spots Give the Best Chance
Even inside mechanical/industrial zones, not every container is equal. Some give a much better shot at Rusted Tools:
- Red tool boxes and metal storage crates — often found in garages, maintenance rooms, warehouses.
- Lockers, supply bins, shelves, industrial containers inside facility-type buildings.
- Areas that allow “Breach & Search” — sometimes these yield rare mechanical loot more reliably than standard crates.
Pro tip: treat every storage container in a mechanical zone as a potential Rusted Tools source — even see-through shelves or less-obvious cabinets. The loot tables are randomized, but mechanical zones + right containers = highest odds.
Example Zones Where It’s Worth Hunting
Reliable loot-zone guides and player data point to a few maps and spots as being especially good for Rusted Tools.
- On maps like Dam Battlegrounds: maintenance bays, garages, warehouses, or other industrial-style buildings often host loot containers tagged as mechanical.
- Facility-style zones: Anywhere that feels like a workshop, repair shop, or storage depot is worth checking, especially if it’s marked industrial or mechanical on your map legend.
- Even if a map has mixed zones, focusing on the right zone-tags and loot-pool logic will give you a better shot than random roaming.
Why This Loot-Zone Logic Works Better Than Random Looting
Because loot in ARC Raiders is randomized but constrained by zone and container type, smart targeting gives you far better odds of success than brute-forcing every building.
Rather than chasing vague “loot hotspots,” you’re using in-game metadata — zone tags + container type + map legend — to drive your looting runs.
This makes finding Rusted Tools less about luck and more about strategy.
ARC Raiders Rusted Tools Locations by Map (Best Spots & Drop Rates)
When you know which maps and specific zones to hit in ARC Raiders, hunting for Rusted Tools gets way less random — and a lot more productive. Below is a detailed, map-by-map breakdown of where players report the highest success rates, plus deeper context on loot density and drop logic to help you plan smarter runs.
Dam Battlegrounds — The Top Rusted Tools Map
Dam Battlegrounds stands out as the most reliable map for Rusted Tools. The layout combines multiple mechanical/industrial zones, dense loot container clusters, and convenient extraction points, making efficient farming runs easier for both new and experienced players.
High-yield locations on Dam Battlegrounds:
- Scrap Yard — Among the best spots in the game. Packed with abandoned vehicles, cars, and buses. Lootable crates near these wrecks tend to fall under the mechanical loot pool, giving high chances for Rusted Tools.
- Water Treatment Control — Especially the lower floors, where containers and crates often spawn mechanical loot. Many players consistently find Rusted Tools here if they thoroughly search.
- Primary Facility (Loading Bay / Warehouses) — Offers a high concentration of crates, metal containers, and boxes. If you loop Scrap Yard → Water Treatment → Primary Facility in one run, you maximize your chances.
- Optional / Secondary Zones — While less dense, areas like Water Tower, Electrical Substation, Formicai Outpost, or Raider Outpost East can still yield Rusted Tools sometimes — but they’re better used as backup loot zones rather than primary farming spots.
Why Dam works so well:
- High container density near clustered mechanical zones
- Multiple potential extraction points around loot hotspots
- Good balance between loot opportunity and manageable risk
If you’re starting out or want a steady supply of Rusted Tools without diving into high-risk maps, Dam Battlegrounds should be your go-to.
Spaceport — Riskier, But High Reward Potential
The Spaceport map is riskier than Dam, thanks to more frequent enemy patrols and higher player traffic — but it compensates with strong mechanical loot potential. If you’re confident in combat or sneaky extraction, the payoff can be worth it.
Notable loot zones on Spaceport:
- Vehicle Maintenance warehouses — Large facility with dense container counts; it’s among the best places here to find mechanical loot including Rusted Tools.
- Container Storage & Shipping Warehouse — Additional loot-heavy spots with a chance of mechanical spawns. However, their position sometimes means more risk and longer extraction paths.
- Fuel Control — A bit safer compared to Vehicle Maintenance. Lower loot yield than warehouses, but potentially easier to loot-and-extract if you prefer lower risk runs.
When Spaceport makes sense: Players who enjoy mid-to-high risk runs, are equipped with ARC-penetrating weapons (or even shields), and don’t mind occasional firefights. Good for looters who value quantity over safety — especially when you’ve already hit the easier maps.
Blue Gate — Balanced Loot with Moderate Risk
Blue Gate strikes a middle ground. It offers a solid number of mechanical or industrial zones without the intense danger of Spaceport. This balance makes it a nice fallback when Dam Battlegrounds gets crowded or predictable.
Go-to spots on Blue Gate:
- Warehouse Complex — Often listed as one of the more dependable mechanical loot zones here. Plenty of crates, lockers, and storage rooms to check.
- Adorned Wreckage & Checkpoint — Smaller loot zones, but given the lower competition compared to Spaceport, they can yield Rusted Tools if you’re thorough.
Blue Gate is a great mid-game option: loot is reasonably stable, the environment isn’t overly hostile, and you can often sneak in a “quiet loot run” without massive risk.
Buried City — Low Density, Low Guarantee, But Sometimes Worth a Shot
Buried City isn’t a go-to map for consistent Rusted Tools — it has fewer mechanical zones and lower container density compared to other maps. That said, one zone in particular remains somewhat promising:
- Parking Garage — According to some community sources, this area can spawn mechanical loot including Rusted Tools. It’s more of a “bonus run” location than a main farm spot.
If you’re already cycling through popular maps and need one last hopeful stop before extraction — Parking Garage in Buried City might surprise you. Just don’t bank on it for heavy farming.
Drop Rate Reality: Expect RNG — But Maximize Odds
Even in prime zones, Rusted Tools remain rare. The game’s loot system randomizes the drops based on loot pool, container type, and zone classification — so don’t expect consistent per-run yields.
That said:
- Running 3–4 mechanical zones in a single loop — especially on maps like Dam Battlegrounds — gives you a statistically better chance of grabbing at least one Rusted Tool.
- Repeated runs improve your odds: persistence + correct routing often beats pure luck.
- Using safe extraction routes helps retain loot, especially when farming high-value items like Rusted Tools.
Fastest Way to Get Rusted Tools in ARC Raiders (Solo Farming Route Guide)
If you’re aiming to farm Rusted Tools efficiently and consistently in ARC Raiders as a solo player, the following detailed route plan — backed by recent community data and game-mechanics — will give you your best shot.
Think of it as your personal loot-farming blueprint: maximize container checks, minimize risk, and leave with useful materials (or better — your Gunsmith upgrade).
Step 1: Spawn + Confirm Zone Tag — Always Start in a Mechanical/Industrial Zone
Before you even begin looting, check your HUD: you want to begin in a zone tagged Mechanical or Industrial. This ensures any container you open has a chance to drop Rusted Tools.
Spawning into the right zone gives you a head start: you waste no time crossing into irrelevant loot zones. Instead, you start collecting right away.
Step 2: Hit 2–3 High-Yield Areas in One Run (Lean, Focused Looting)
Rather than wandering all over, plan a tight loop through 2–3 of the most reliable loot zones per run. A good example path:
- First stop: a dense container area (like a warehouse or scrap zone)
- Second stop: an industrial workshop or storage area with crates, lockers or tool-boxes
- Third stop: a secondary facility or another container-rich area before heading to extraction
For example, on the popular Dam Battlegrounds map — people report good success when they loot Scrap Yard > Water Treatment Control > Primary Facility (Loading Bay / warehouse zone) in a single run.
This method gives you multiple “rolls” at Rusted Tools per raid, improving odds without needing long excursions.
Step 3: Prioritize the Right Containers — Skip Irrelevant Loot
Not all loot is equal. For the best chances at Rusted Tools, focus on containers tied to the mechanical loot pool:
- Red tool boxes
- Metal crates and supply crates
- Lockers or storage cabinets in industrial rooms
- Breachable supply bins or metal containers
Checking only relevant containers improves efficiency — you’re not wasting time on chests with zero chance of mechanical loot.
Step 4: Move Fast, Stay Light, and Avoid Unnecessary Combat
Because looting and movement make noise, staying stealthy is often smarter than picking fights. Here are some good habits:
- Crouch-walk when going through indoors or near likely enemy positions
- Holster weapons to move faster between loot zones
- Slide or sprint + crouch to reposition quickly and dodge patrols
- Avoid fighting ARC machines or enemy players unless absolutely necessary — combat draws attention and wastes time
The goal is scavenger speed, not firefight loot — especially for solo farming runs.
Step 5: Use Safe Pockets (If Available) — Secure Your Finds
If you run a custom loadout with Safe Pockets, immediately store any Rusted Tools you find. That way, even if you get taken out before extraction, those tools stay safe. Several guides highlight this as a top tip for solo looters.
If you don’t have Safe Pockets (e.g. free loadout), focus on mobility and speed — loot fast, extract fast.
Step 6: Extract Smart — Plan Your Exit as Part of the Route
Your route should end near an extraction point to avoid backtracking. Always plan your final loot zone with extraction in mind.
- On Dam Battlegrounds, loop through mechanical zones that end near accessible exit points.
- If you’re carrying rare items like Rusted Tools, silent exits (if you have a key) are ideal. If not — make sure the path to extraction is clear, safe and doesn’t involve re-entering risky zones.
Planning your exit as part of the loot route often separates a successful extraction from losing everything.
Step 7: Repeat & Adapt — Farming Is About Routes + Consistency, Not Luck
Because Rusted Tools are rare loot, even the best route won’t guarantee one every run. But repeating optimized loops increases your odds significantly.
Tips for long-term efficiency:
- Memorize several mechanical zones per map. If one spawn changes, fall back to the next zone.
- Combine Rusted Tools farming with loot for other materials (Mechanical Components, Wasp Drivers, etc.) — so each run is maximally productive.
- Switch between maps when loot seems dry — sometimes changing spawn environments resets luck.
- Track and adapt to loot-pool updates after patches; what works now may shift after future updates.
This approach turns Rusted Tools farming from hoping for RNG into controlled, strategic loops. You’ll likely still miss sometimes — but over 5–10 runs, you’ll stack enough Rusted Tools to hit that Gunsmith 2 upgrade without wasting countless hours.
Containers That Drop Rusted Tools: Red Tool Boxes, Crates, Lockers & Breach-and-Search Spots
When you’re hunting Rusted Tools in ARC Raiders, knowing which containers to open is just as important as knowing where you are on the map.
Your success rate jumps when you focus only on containers tied to the mechanical loot pool. Let’s dig into the most reliable container types and how to loot them efficiently.
Red Tool Boxes — Top Spot for Rusted Tools
Red tool boxes are widely regarded as the most reliable source for mechanical loot — including Rusted Tools.
- These boxes are strongly associated with the mechanical / industrial loot category.
- You’ll often find them in garages, repair bays, workshops, and vehicle maintenance areas — basically the classic “workshop” vibe locations.
- Because they’re compact and easy to spot, red tool boxes make great “first-checks” when you enter a mechanical zone.
In short: if you see a red tool box, treat it as high priority. Don’t just pass by.
Metal Crates & Supply Containers — High-Capacity Loot Sources
Large metal crates or supply containers are another good bet when looting. These containers often appear in warehouses, loading bays, storage rooms, or industrial plants.
- They tend to hold more loot rolls per crate compared to small lockers, improving your chance of finding rare items.
- Because of their size and loot-pool logic, they sometimes yield multiple useful items — not just Rusted Tools, but also other mechanical components, making them valuable even if you don’t get a “win.”
When you enter a building with big containers or supply crates — especially near machines, vehicles, or industrial gear — consider them as your “loot jackpot” zones.
Lockers, Cabinets & Industrial Shelves — Secondary but Worth Checking
Smaller containers like lockers, metal cabinets, and industrial shelving units have a lower drop rate than crates or tool boxes, but they’re still worth checking — especially when you’re already inside a mechanical or industrial area.
- These often turn up in maintenance rooms, control centers, and utility corridors where bigger crates aren’t always present.
- Because they’re smaller, they’re easier to loot and don’t take much time — ideal for quick, low-risk raids.
They aren’t your “main prize,” but when speed or stealth is a priority, they help you catch small rewards without drawing much attention.
Breach-and-Search Containers — High Risk / High Reward Loot
Some containers are behind locked doors or require breaching — these are labeled as Breach-and-Search spots. They often yield higher-tier loot than regular loot tables.
- In high-density loot zones (warehouses, large industrial structures), breachable rooms or lockers have a noticeable chance at rare mechanical items.
- Though these spots often come with increased danger (more enemies, louder noise, longer loot animations), the potential payoff — including Rusted Tools — is often worth the risk.
If you find a locked door or sealed container in a mechanical area, it’s usually smart to breach it — especially when you’re after rare materials.
Effective Looting Strategy — Maximize Every Run
To get the most from each raid when farming Rusted Tools, here’s a refined container-focused looting plan:
- Scan for red tool boxes first — highest probability of Rusted Tools
- Then check metal crates / supply containers — good multi-loot potential
- After larger containers, hit lockers or cabinets if you want quick, stealthy grabs
- If you spot any locked or breachable containers, prioritize them — they often contain rare mechanical loot
- Always stay in or route through Mechanical / Industrial zones — containers outside those zones won’t drop Rusted Tools
Combining zone-based routing with focused container checks turns every raid from a gamble into a calculated farming run.
Best Loadouts for Rusted Tools Farming (Free Loadout vs Custom With Safe Pockets)
Picking the right loadout when you go out to farm Rusted Tools in ARC Raiders can really change how productive — and safe — your run ends up.
Below is a deeper, more accurate breakdown of how Free Loadout and Custom Loadout (with Safe Pockets) compare — and when you should prefer one over the other.
Free Loadout – Risk-Free Runs When You’re Going for Speed
Using a Free Loadout makes sense if your goal is to run fast, light, and as often as you want without putting your main stash at risk.
Key aspects of the Free Loadout:
- You get a basic set: a common weapon (Ferro I, Stitcher I, or Kettle I), some ammo, a light shield, a few consumables (bandages, maybe grenades, shield-recharger).
- Inventory space and weight limit are restricted: this setup gives you minimal carry capacity.
- No Safe Pocket. That means if you die before extraction, everything you found — including rare items like Rusted Tools — is lost.
Because there’s no financial or resource risk, Free Loadout is perfect for:
- quick loot-and-scoot runs to explore mechanical zones
- practicing map routes or testing loot spots without risking gear
- when you’re low on resources or gear and don’t want to lose what you already have
In other words: Free Loadout = fast, stress-free loops — but you gamble on your loot surviving extraction.
Custom Loadout + Safe Pockets – Stability and Loot Protection
For a more reliable approach — especially when you’re hunting rare items like Rusted Tools — a Custom Loadout with Safe Pockets gives you a lot more control and security.
Here’s why this setup is often superior:
- With a proper augment, you get Safe Pockets: dedicated inventory slots that protect items even if you die mid-raid.
- You have more flexibility in what you carry — better shields, stronger weapons, and room for loot and crafting materials.
- You can stash rare items like Rusted Tools — or any valuable loot — safely, drastically reducing the risk of losing hard-earned resources during extraction.
Because of this, Custom Loadout + Safe Pockets is ideal when:
- you want to focus on rare loot runs where losing out hurts
- you plan to run multiple zones and want to secure every potential find
- you’re doing high-risk maps or expect enemy contact
A Custom Loadout lets you treat farming like a strategic operation — minimizing loss, maximizing gain.
Free Loadout vs Custom Loadout — Which Should You Use and When?
| Situation | Recommended Loadout | Why It Works |
|---|---|---|
| You’re broke / gear-less / testing zones | Free Loadout | Zero risk: you lose nothing if you die, good for exploration & learning |
| You want consistent progress, especially toward upgrades | Custom + Safe Pockets | Loot protection ensures Rusted Tools (or other rare items) are kept even on death |
| You’re farming mechanical zones casually or repeatedly | Free Loadout occasionally, but switch to Custom when you hit good zones | Balances speed and security |
| You plan high-risk raids or expect PvP / high enemy activity | Custom + Safe Pockets | Security and better gear mitigate risk of losing everything |
Pro Tips: How to Maximize Each Loadout’s Strengths
- If you run a Free Loadout, treat each raid like a fast loot sprint — prioritize movement and quick loot checks over fights.
- When using Custom Loadout, stash first rare finds immediately in Safe Pockets — especially if they are critical items like Rusted Tools or key components.
- Don’t overload your inventory: even with a Custom Loadout, carrying too much reduces mobility and increases risk.
- Be unpredictable: mix Free Loadout runs and Custom Loadout runs. That way, you avoid patterns, lower the chance of running into other aggressive players, and optimize loot throughput.
How to Extract With Rusted Tools Safely (Raider Hatch vs Loud Exit Strategy)
Getting out with your loot — especially precious items like Rusted Tools — can be the trickiest part of a run in ARC Raiders. A bad exit strategy could erase all your hard work.
That’s why balancing speed, stealth, and foresight matters. Below are updated, more detailed tips based on how extraction works now, so you can get home with your gear intact.
Understanding Extraction Points: The Stakes and the Mechanics
In ARC Raiders, every raid ends with an extraction. Extraction points vary by map: elevators, train-stations (on certain maps), air-shafts, or special emergency exits called Raider Hatches.
If you fail to extract (due to enemy ambush, delay, or time running out), you lose all the loot you gathered — including rare items like Rusted Tools. This means extraction is not just the final step, but often the most dangerous.
Because of that risk, choosing the right extraction method is critical — especially when you’re carrying high-value loot.
Raider Hatch: The Most Reliable Exit for Loot Safety
When you have a Raider Hatch Key, using a Raider Hatch becomes the safest and quietest way to extract.
What makes Raider Hatch so good:
- No loud alarm — extraction stays silent, reducing the chance of alerting nearby players or ARC patrols.
- Instant extraction — once you use the key, the hatch opens and you can slide out quickly; no long countdown or delays.
- Works even late in the match — since hatches don’t have a timer like elevators do.
How to use it properly:
- Keep at least one Raider Hatch Key on you (ideally in a Safe Pocket).
- Check the map for hatch icons (downward arrow + half-circle symbol).
- Walk to the hatch location, interact with the terminal to consume the key, and exit.
- Slide down and you’re out — no alarms, no danger, just extraction.
When to use a Raider Hatch:
- You’ve collected rare loot (Rusted Tools, valuable components, etc.)
- Extraction zones are crowded or you suspect other players camping exits
- You want a stress-free, low-risk exit from raids
Because of these advantages, many experienced Raiders consider the hatch system the “premium exit” — especially on high-risk maps or loot-heavy runs.
Loud Exits (Elevators, Air-Shafts, Train Stations): Riskier but Always Available
When you don’t have a Raider Hatch Key — or it’s already used — you have to resort to a standard extraction point (elevator, air shaft, or train station), often referred to as a “loud exit.”
What happens when you use a loud exit:
- Triggering the console sets off a loud alarm — effectively broadcasting to all nearby ARC bots and other Raiders that someone’s about to extract.
- The extraction point becomes a hotspot — many players converge there, often leading to fights over loot or kills on downed players.
- It takes time: you must wait for the elevator (or train/shaft) to arrive, get inside, and activate extraction — all while vulnerable.
Because of these dangers, loud exits are often chaotic and risky — especially if you’re carrying valuable loot.
How to improve your odds at a loud exit:
- Clear nearby enemies (ARC bots or players) before calling extraction. This reduces the chance of being attacked mid-extraction.
- Use cover or concealment — vehicles, debris, or internal corners near the exit are your friends while waiting for the countdown or doors.
- Avoid known camp zones — some exits tend to be heavily contested; if possible, wait until traffic clears or try to time extraction when fewer players are nearby.
- If downed, try to crawl in — ARC Raiders allows extraction even if you’re downed (but still intact inside the escape vehicle/elevator) — though this is risky and uncertain.
Choosing Your Exit: Decision Matrix
Here’s a rough guideline to help you decide which extraction method to use — based on what you’re carrying, your gear, and the situation:
| Condition | Best Extraction Method | Why |
|---|---|---|
| You found Rusted Tools or rare loot | Raider Hatch | Silent exit, no alarms — loot stays safe |
| No Hatch Key, loot not valuable | Loud Exit | It’s available anytime, avoids consuming keys |
| Loot + some gear, high-player traffic | Raider Hatch (if key available) | Reduced risk from other Raiders |
| Low gear & loot, just exploring | Free Loadout + Loud Exit | Minimal loss if things go wrong |
| Near end of raid, extraction zones timer running low | Hatch if possible, else Loud | Better to escape than risk loss |
Smart Extraction Habits for Every Run
- Keep at least one Raider Hatch Key ready in inventory or Safe Pockets if you expect valuable loot.
- Know hatch locations on each map before you start looting — that way you can divert early if you score big.
- Avoid noisy looting and combat near extraction zones — extra sound attracts attention.
- If using loud exits: clear a path, wait for enemies to move on, then call extraction — don’t just rush in.
- Treat extraction as part of the raid’s challenge: looting is just the first half, exiting safely is the second.
When you treat extraction with the same care as looting, your chances of securing Rusted Tools, gear and rare materials go way up.
Rusted Tools Uses Explained: Gunsmith 2 Upgrade, Recycling, Selling & Salvaging
Once you bring Rusted Tools home from a successful run, you’ve got several good options — and knowing the right choice for the moment makes a huge difference.
These little mechanical items are valuable in more ways than one. Here’s a deeper, up-to-date look at what you can do with Rusted Tools in ARC Raiders, and when each option makes sense.
Gunsmith 2 Upgrade — Why Rusted Tools Are a Game-Changer
The primary and most impactful use of Rusted Tools is for upgrading your workshop’s Gunsmith bench to Level 2. This upgrade is arguably one of the biggest early milestones for any Raider who wants stronger weapons and better gear options.
To craft Gunsmith 2 you require:
- 3 × Rusted Tools
- 5 × Mechanical Components
- 8 × Wasp Drivers
Once unlocked, this upgrade opens access to better weapons, improved gun mods, and higher-tier gear upgrades — making future raids easier, more efficient, and more rewarding.
Pro tip: Always save your first 3 Rusted Tools until you’ve unlocked Gunsmith 2. It’s the most efficient use and ensures you can progress without unnecessary extra runs.
Recycling — Best Long-Term Value for Crafting Resources
If you have extra Rusted Tools beyond what you need for the upgrade, recycling is often the smartest choice for long-term gains. At your base, recycling a Rusted Tool turns it into:
- 8 × Metal Parts
- 1 × Steel Spring
That recycling result gives you materials that feed directly into other crafting recipes — often ones that help you upgrade weapons, build attachments, or craft ammo and gear parts. Given these become building blocks for many recipes, recycling yields strong value over selling.
If you’re aiming for long-term progression and want to make every rare loot drop count, recycling is usually your best bet once your key upgrades are covered.
Selling — Quick Cash When You Need It
Sometimes resources are tight, or you need coins fast for stash expansions, hatch keys, or vendor purchases — and Rusted Tools can help with that. Each Rusted Tool sells for 1,000 coins.
Selling provides instant currency at the cost of long-term material value. Use this option when money is the bottleneck and you don’t need raw crafting components immediately. It’s a valid fallback — just make sure it’s a deliberate trade-off, not a default choice.
Salvaging Mid-Raid — Emergency Space and Quick Material Grab
If you’re mid-raid and hit inventory space issues or need quick materials for a last-minute craft or upgrade, salvaging a Rusted Tool can be helpful. It converts the tool into 7 Metal Parts, freeing up its 2 kg weight.
Use salvaging when:
- Your inventory is full
- You need immediate crafting materials (for on-the-fly repairs or ammo)
- You’re near extraction and want to maximize space for fresh loot
Just be aware: salvaging brings smaller returns than recycling — but it can save your run when space is tight or you’re forced into an emergency exit.
Which Option to Use — Decision Flow
| Situation / Goal | Best Use of Rusted Tools |
|---|---|
| You haven’t upgraded Gunsmith yet | Save 3 Rusted Tools ➜ Gunsmith 2 Upgrade |
| You have extra Rusted Tools and need crafting mats | Recycle them at base for components |
| You need quick cash for upgrades, stash, or keys | Sell some tools for coins |
| You’re mid-raid, overloaded, or need quick resources | Salvage to get Metal Parts and free space |
💡 Final Thoughts — Treat Rusted Tools as Strategic Currency
Rusted Tools aren’t just loot — they’re a strategic resource. How you use them can shape your progress far more than the number you hold. Early on, they’re key to unlocking Gunsmith 2. Later, extras become valuable crafting materials or emergency resources. A thoughtful approach gives you flexibility: from building powerful weapons to maintaining your gear economy, Rusted Tools help you stay ready for tougher raids.
Gunsmith 2 Upgrade Requirements (Rusted Tools, Mechanical Components, Wasp Driver)
Upgrading the Gunsmith bench to Level 2 in ARC Raiders is a major power spike for your builds — one that dramatically expands your crafting and weapon-mod options.
Knowing exactly what materials you need and how to gather them efficiently can save you a lot of time and frustration.
What Does Gunsmith 2 Require?
To upgrade from Gunsmith 1 > Gunsmith 2, you need:
- 3 × Rusted Tools
- 5 × Mechanical Components
- 8 × Wasp Drivers
Once you turn in these materials, your Gunsmith unlocks new blueprints, upgraded weapon attachments, and access to stronger firearms — giving you a big edge on top-side raids.
Where and How to Get Each Material
Rusted Tools
- These are rare items tied to the Mechanical/Industrial loot pool. They appear mostly in mechanical zones — inside toolboxes, crates, and industrial containers.
- Because they’re rare and don’t drop from all containers, plan your runs around zones with high container density (e.g. workshops, warehouses, garages).
Mechanical Components
- Less rare than Rusted Tools and fairly common in mechanical-themed areas.
- You can also craft them at your base using common materials (like Metal Parts and Rubber Parts) — this is a smart fallback if you’re low on mechanical loot.
- Because of their relative abundance, you don’t typically need to dedicate entire farming runs to them — they come naturally as you loot for Rusted Tools.
Wasp Drivers
- These come from defeating or looting flying ARC enemies (Wasps), or from loot containers that have ARC-related drops.
- Since Wasp encounters are fairly common, you’ll often pick up Wasp Drivers during regular raids — especially if you sweep through open zones or ARC patrol areas.
Why Unlocking Gunsmith 2 Is So Important
Upgrading to Gunsmith 2 isn’t just cosmetic — it vastly improves your capability to craft and upgrade weapons. You open up:
- New weapons and attachments — giving you more firepower and flexibility for different raid situations.
- Access to higher-tier upgrades, which means better damage, more reliable loot runs, and improved survivability.
In short: Gunsmith 2 often unlocks the “real game” — once you have it, you’re much better equipped to handle tougher zones, ambitious loot routes, and harder ARC enemies.
Smart Strategy: How to Collect All Materials Efficiently
Because the three materials can drop from overlapping sources, you can optimize your farming by:
- Prioritizing mechanical zones — this maximizes your chances of finding both Rusted Tools and Mechanical Components in the same runs.
- Killing ARC Wasps whenever you encounter them — that keeps Wasp Drivers trickling into your stash without extra effort.
- Using crafting for Mechanical Components when needed — especially if you’re short just a few.
- Extracting safely — since Rusted Tools are rare, make sure your loot gets home intact (use safe pockets or smooth extraction).
By combining loot drops and crafting, you can often complete the Gunsmith 2 requirements in far fewer runs than if you tried to gather each resource separately.
Rusted Tools FAQ (Short & Accurate)
Where do Rusted Tools spawn in ARC Raiders?
They spawn only in Mechanical or Industrial zones — i.e. loot containers inside warehouses, workshops, garages, and industrial buildings.
What are Rusted Tools used for?
Their main use is for upgrading your workshop’s Gunsmith bench to Level 2. Extra ones can be recycled for components, sold for coins, or salvaged mid-raid.
How do you upgrade the Gunsmith Bench to Level 2?
You need 3 × Rusted Tools, 5 × Mechanical Components, and 8 × Wasp Drivers.
Can you craft Rusted Tools?
No — Rusted Tools cannot be crafted. They’re a loot-only item and must be found in mechanical or industrial containers.
Which maps give the best chances for Rusted Tools?
Top picks are:
- Dam Battlegrounds (areas like Scrap Yard, Water Treatment Control, Primary Facility)
- Spaceport (warehouse zones such as Vehicle Maintenance, Container Storage)
These maps combine mechanical zones with good container density.
Why am I looting mechanical zones but still not getting Rusted Tools?
Because loot is randomized — even in the right zone and container type, Rusted Tools are rare. You need luck + repeated runs.
Do enemies drop Rusted Tools?
No — Rusted Tools only come from containers, not enemy drops.
Do Rusted Tools retain weight or stack size?
Yes — each Rusted Tool weighs 2 kg, and they stack 3 per inventory slot.
Can I lose Rusted Tools if I’m killed before extraction?
Yes — unless you store them in Safe Pockets (available only in custom loadouts), you’ll lose everything on death.
Final Tips for Consistent Rusted Tools Farming (Avoiding RNG, Improving Drop Rates, Safer Routes)
Here are refined strategies and smart habits you can use to maximize your chances of getting Rusted Tools in ARC Raiders, while minimizing risk and wasted time. These blend proven mechanics, player reports, and loot-system logic to help make your runs more consistent and rewarding.
Stick Strictly to Mechanical & Industrial Zones
Because Rusted Tools belong to the Mechanical / Industrial loot pool, your chances improve significantly if you only loot within those zone types. Checking your HUD zone-tag before entering rooms or buildings keeps you focused on high-yield locations.
Avoid jumping between unrelated zones (like residential, electrical, or “old world” areas). That reduces wasted time on containers that can’t drop Rusted Tools.
Build Short, Efficient Loot Loops Over Long Wanders
Instead of exploring entire maps, create compact loops that connect 2–4 high-potential zones. For example:
- A quick run in Dam Battlegrounds hitting Scrap Yard > Water Treatment Control > Primary Facility Loading Bay, then extract.
- On riskier maps like Spaceport, keep loops tight: target only a couple of warehouses or maintenance zones, then head out before patrols catch up.
Short loops reduce travel time, improve container-per-minute efficiency, and increase overall loot yield per hour.
Prioritize Stealth & Speed Over Combat — Loot First, Fight Only If Needed
Combat slows you down, burns resources, and can draw unwanted attention. For farming Rusted Tools, fighting is usually a distraction rather than a benefit. According to player-shared tactics:
- Crouch-walk when traversing indoor zones to avoid drone or player detection.
- Holster weapons when moving between zones — this speeds up movement and reduces noise.
- Slide or sprint + crouch when repositioning for faster escapes or rotations.
This approach keeps you light, quick, and less vulnerable — ideal for container-focused farming.
Be Smart With Inventory — Manage Weight and Use Safe Pockets
Each Rusted Tool weighs 2 kg and stacks three per slot. If you pick up too much junk or heavy gear, you might slow down or run out of space.
Tips for better inventory management:
- Keep only what’s necessary — don’t hoard low-value junk during a farming run.
- Use Safe Pockets (when on custom loadout) to stash Rusted Tools ASAP — this protects them even if you die before extraction.
- If your bag is full but you spot a high-loot zone, consider salvaging or dropping low-value items to make space for better loot.
Treat Rusted Tools Farming as a Numbers Game — More Runs = Better Odds
Because loot is randomized (even in the right zones), a single run might not drop anything. Consistency beats “one perfect run.”
Aim to:
- Run 3–5 short loops per session
- Target multiple mechanical zones per session
- Extract safely and repeat
Over time, your odds of collecting the 3 Rusted Tools you need for upgrades go up significantly.
Don’t Farm Just Tools — Combine with Other Mechanical Loot
While you hunt Rusted Tools, you’ll often find related items like Mechanical Components or Wasp Drivers — the other materials you need for upgrades.
This synergy means you don’t need separate farming runs for each material. A well-structured mechanical-zone run can satisfy multiple resource needs at once, making your time more efficient.
Adapt Your Strategy Based on Player Traffic and Map Risk
Maps like Spaceport or high-traffic zones tend to draw more players and ARC patrols — which increases danger and competition. In those cases:
- Opt for quieter mechanical zones, even if loot density is slightly lower
- Use Raider Hatch extraction (with a key) to avoid drama at exits
- Run Free Loadouts when you don’t want to risk valuable loot — prioritize stability over gear risk
Flexibility helps you stay effective even when the game’s population or loot distribution shifts.
The Long-Term Mindset: Farming Discipline Over Lucky Hits
Success in Rusted Tools farming comes from being consistent, strategic, and aware. Treat it like a resource-gathering job: identify zones, run efficient loops, extract safely, and manage loot wisely.
If you make these tips part of every raid — instead of chasing “rare drop luck” — you’re far more likely to reach consistent progress.
Visit Our Post Page: Blog Page