
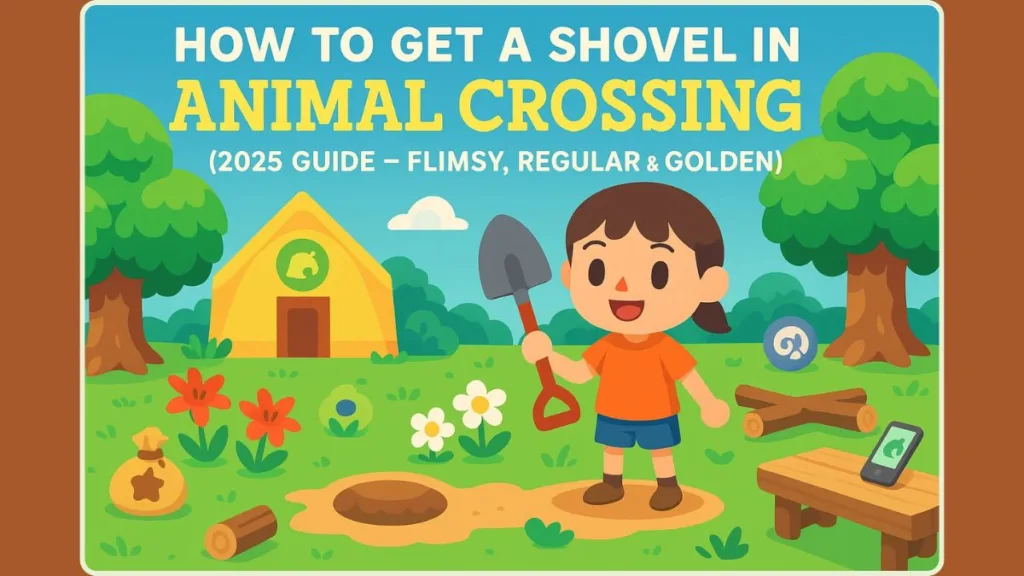
Want to unlock the Flimsy, Regular, and Golden Shovels in Animal Crossing: New Horizons (2025)? Learn how to get a shovel in Animal Crossing, craft each one, upgrade your tools faster, dig fossils, collect resources, and shape your dream island with this complete step-by-step shovel guide!
If you’ve just begun your island adventure in Animal Crossing: New Horizons, you might be wondering why you don’t have a shovel right away. It’s one of the most essential tools in the game, yet it’s not available at the start!
Don’t worry — this guide will help you understand exactly how to get, craft, and upgrade your shovel, so you can dig up fossils, plant trees, and uncover treasures in no time.
Grab your NookPhone, gather your materials, and let’s get digging!
Why You Need a Shovel in Animal Crossing: New Horizons
The shovel is a true multitasker — it’s practically your island’s Swiss Army knife. You’ll use it to:
- Dig up fossils and buried treasures hidden across your island.
- Plant trees and flowers to shape your island exactly the way you want it.
- Hit rocks to collect Iron Nuggets, Clay, and Gold Nuggets, all of which are essential crafting materials.
- Transplant shrubs and move plants, helping you perfect your landscape design.
It’s hard to progress far in the game without one. So getting your first shovel quickly will make every other part of your island life smoother.
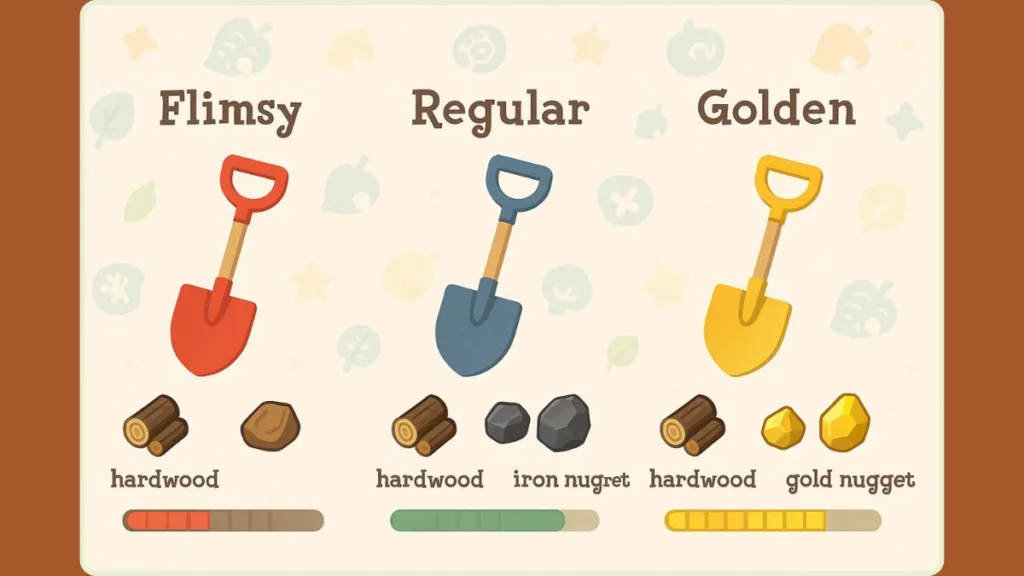
All Shovel Types in Animal Crossing: New Horizons (Flimsy, Regular & Golden)
There are three kinds of shovels in New Horizons, and each one gets a little stronger and lasts a little longer than the last. Here’s a quick breakdown so you know what’s ahead:
| Shovel Type | How to Unlock | Materials Needed | Durability | Sell Price |
|---|---|---|---|---|
| Flimsy Shovel | Talk to Blathers after donating 5 fish or bugs to Tom Nook | 5 Hardwood | ~40 uses | 200 Bells |
| Regular Shovel | Buy Pretty-Good Tools Recipe Pack (3,000 Nook Miles) | 1 Flimsy Shovel + 1 Iron Nugget | ~100 uses | 600 Bells |
| Golden Shovel | Help Gulliver 30 times | 1 Regular Shovel + 1 Gold Nugget | ~200 uses | 625 Bells |
Pro Tip: Even the Golden Shovel can break, but it lasts significantly longer than the others — and it looks amazing!
Step 1: How to Get the Flimsy Shovel in Animal Crossing New Horizons
Getting your first shovel is a little bit of a process, but it’s also your first big step toward independence on your island. Here’s exactly how to do it.
1. Donate 5 Bugs or Fish to Tom Nook to Unlock Blathers
After your first night on the island, visit Tom Nook in Resident Services. He’ll invite you to participate in a short DIY Workshop to learn how crafting works.
Once you’ve built your first tools, Tom Nook will mention that he’s curious about the local fauna. That’s your cue to start catching!
Catch five unique bugs or fish and donate them to Tom Nook. When you do, he’ll receive a call from Blathers, the museum curator, who’s eager to move to your island.
2. Place Blathers’ Tent and Prepare for His Arrival
Tom Nook will hand you Blathers’ Tent Kit and ask you to choose a location for it. Pick a spot you love — it will later become your island’s museum. Once the tent is placed, you’ll just need to wait.
3. Wait Until the Next Real-World Day for Blathers to Arrive
Patience is part of island life! Blathers will arrive the next morning at 5 AM, ready to meet you.
If you’re eager to move things along, you can always time travel by adjusting your console’s date — but if not, take the day to gather hardwood and explore your island.
4. Talk to Blathers to Get the Flimsy Shovel DIY Recipe
Once Blathers moves in, pay him a visit. He’ll tell you that he needs your help collecting fossils and will provide you with two essential DIY recipes:
- Flimsy Shovel
- Vaulting Pole (for crossing rivers)
5. Craft the Flimsy Shovel Using Hardwood
Head over to your DIY workbench and use:
- 5 pieces of Hardwood
You can get hardwood by hitting trees with your axe (just be careful not to cut them down). Once crafted, your Flimsy Shovel will last about 40 uses before breaking.
Don’t worry — you’ll soon be able to craft better versions!
Step 2: How to Upgrade the Flimsy Shovel to a Regular Shovel in ACNH
Once your Flimsy Shovel starts to wear out, it’s time to upgrade to a sturdier version. Here’s how to make it happen.
1. Buy the Pretty-Good Tools Recipe Pack from the Nook Stop
Head to the Nook Stop kiosk in Resident Services.
Choose “Redeem Nook Miles” > “Pretty-Good Tools Recipes.”
It costs 3,000 Nook Miles, which you can earn by completing tasks like fishing, catching bugs, or talking to your neighbors. Once purchased, you’ll unlock recipes for improved tools — including the Regular Shovel.
2. Craft the Regular Shovel Using Iron Nuggets
Go to your crafting bench and select the shovel recipe. You’ll need:
- 1 Flimsy Shovel
- 1 Iron Nugget
This upgraded shovel lasts roughly 100 uses, making it far more reliable than your first one. You can gather iron nuggets by hitting rocks with a shovel or axe.
3. Buy Shovel Variants from Nook’s Cranny
After Nook’s Cranny upgrades and Mabel visits your island, you’ll unlock the option to buy shovel designs. Choose from Outdoorsy, Colorful, or Printed variants, each costing 2,500 Bells.
These versions work the same as the regular shovel but let you express your island style!
Step 3: How to Get the Golden Shovel in Animal Crossing New Horizons
The Golden Shovel is the pinnacle of shovel crafting — both prestigious and practical. It’s not easy to earn, but it’s worth it.
1. Help Gulliver 30 Times to Unlock the Golden Shovel Recipe
From time to time, you’ll spot Gulliver, a sleepy seagull, washed up on your beach. Wake him up by talking to him several times. He’ll ask you to find 5 Communicator Parts so he can contact his crew.
Use your shovel to dig up the small water spurts on the beach — that’s where the parts are hiding! Return them to him, and he’ll send you a thank-you gift the next day.
Do this 30 times, and Gulliver will finally send you the Golden Shovel DIY recipe.
2. Receive the Golden Shovel DIY Recipe from Gulliver
Once you’ve completed all 30 rescues, check your mailbox the next morning. Inside, you’ll find the Golden Shovel recipe — your reward for helping Gulliver so many times.
3. Craft the Golden Shovel Using a Gold Nugget
Head to your crafting bench and use:
- 1 Regular Shovel
- 1 Gold Nugget
Your new Golden Shovel can last up to 200 uses — that’s double the Regular Shovel! Just remember, even golden tools can eventually break, so use it wisely.
Bonus Tips for Unlocking and Using Shovels in ACNH
- Collect resources early: Stock up on hardwood, iron, and gold nuggets while waiting for Blathers to arrive.
- Visit Mystery Islands: These trips can help you find materials or even buy tools early if you’re lucky.
- Only the Island Representative can invite Blathers: If you share your island, only the main player can unlock the museum.
- Save gold nuggets: Don’t rush to craft multiple golden tools — they’re rare!
- Hit rocks strategically: Stand behind a hole before striking rocks to maximize the materials you collect.
- Durability tip: Shovels lose durability only when digging up fossils or items, not when digging empty holes or refilling them.
Frequently Asked Questions About Shovels in Animal Crossing: New Horizons
Q: How do I get the shovel in Animal Crossing: New Horizons?
Donate five fish or bugs to Tom Nook, wait for Blathers to arrive, then talk to him for the Flimsy Shovel recipe.
Q: When does Blathers arrive on my island?
He’ll arrive the next real-world day after you place his tent.
Q: How do I upgrade my Flimsy Shovel?
Buy the Pretty-Good Tools Recipe Pack for 3,000 Nook Miles, then craft the Regular Shovel using an Iron Nugget.
Q: What do I need to craft the Flimsy Shovel?
You’ll need five pieces of hardwood gathered from trees.
Q: How do I get the Golden Shovel in ACNH?
Help Gulliver 30 times, then craft it using one Regular Shovel and one Gold Nugget.
Q: Can I buy a shovel instead of crafting it?
Yes! Once Nook’s Cranny has upgraded, you can buy shovel variants for 2,500 Bells.
Final Thoughts on Unlocking the Shovel in Animal Crossing: New Horizons
Earning your first shovel is one of the most satisfying milestones in Animal Crossing: New Horizons. It unlocks a whole new layer of gameplay — from unearthing fossils to perfecting your landscaping.
While it might take a little patience (especially waiting for Blathers), every step brings you closer to shaping your dream island. Whether you’re crafting your first Flimsy Shovel or proudly wielding your Golden Shovel, remember: progress in Animal Crossing is meant to be savored.
Keep exploring, keep digging, and enjoy every moment — because every hole you dig brings your island to life!
Useful Resources for Getting a Shovel in Animal Crossing: New Horizons
Here are some reliable resources to help you dive deeper into getting and upgrading shovels in Animal Crossing: New Horizons:
- Nookipedia – Shovel Guide: Complete breakdown of shovel types, durability, and crafting materials.
- Animal Crossing Fandom – Tools Overview: Covers tool crafting, durability details, and shovel mechanics.
- Nintendo Life – Shovel Unlock & Upgrade Guide: Step-by-step instructions for unlocking and upgrading all shovels.
Visit Our Post Page: Blog Page