
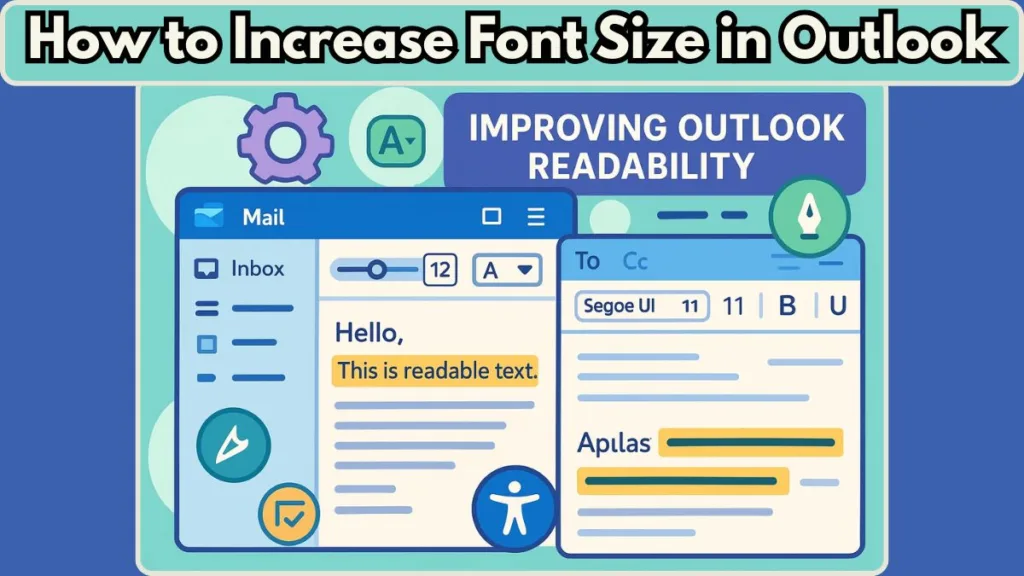
Struggling with small text in Outlook and want to change the default font size? Learn how to adjust and increase font size in outlook emails. Either in the Reading Pane, and message lists for better readability, comfort, and productivity. Step-by-step guidance for Classic Outlook, New Outlook, and Outlook Web App included.
Why You Should Increase Font Size in Outlook
Reading emails should never feel like a strain on your eyes. Whether you’re working through a crowded inbox, replying to important messages, or just trying to stay organized, the default font size in Outlook might not always be comfortable. Small text can lead to eye fatigue, slower reading, and even mistakes when scanning subject lines. That’s where adjusting your font comes in—making your text larger, clearer, and easier to read can transform your email experience.
Outlook offers a surprising amount of flexibility. You can increase text size, adjust fonts for individual messages, tweak the appearance of your message list, and even change how emails appear in the Reading Pane. These adjustments aren’t just about comfort—they’re about efficiency and accessibility, helping you navigate your inbox faster and work more confidently.
It’s also important to note that not all Outlook versions are identical. Classic Outlook, the New Outlook, and Outlook Web App (OWA) have slightly different menus and settings.
But no matter which version you’re using, there are simple, clear ways to make your text more readable. From temporary zoom options to permanent font changes, Outlook lets you customize your experience to match your needs.
How to Check Your Outlook Version Before Adjusting Font
Before diving into font adjustments, it’s important to know which version of Outlook you’re using. The menus, options, and customization paths differ slightly between Classic Outlook, the New Outlook, and Outlook Web App (OWA). Knowing your version ensures you’re following the right steps and prevents unnecessary confusion.
Here’s a simple way to check:
- Classic Outlook (Desktop App): Look for the familiar ribbon at the top and the File tab in the upper-left corner. If you see the traditional menus and toolbars, you’re in Classic Outlook.
- New Outlook: This version has a sleeker design with a more modern interface. You’ll notice a simplified ribbon, and the toggle for switching between classic and new might appear near your profile picture.
- Outlook Web App (OWA): If you’re accessing your email in a web browser, such as Outlook.com or Microsoft 365 online, you’re using the web version. The layout is streamlined, and all settings are accessed via the gear icon in the top-right corner.
Knowing your version is not just a formality—it helps you quickly locate settings for adjusting font sizes in your emails, Reading Pane, and message list. It also allows you to take advantage of features unique to your version, like Zoom sliders in Classic Outlook or account-level settings in the New Outlook and web app.
Once you’ve identified your Outlook version, you’ll be ready to customize fonts, increase text size, and create a more comfortable reading environment. This step ensures that every adjustment you make will apply correctly, saving time and avoiding frustration.
How to Increase Font Size When Composing Emails in Outlook
Writing emails comfortably is essential for productivity and reducing eye strain. Outlook allows you to customize the font size and style for every email you compose, reply to, or forward.
By adjusting these settings, you can make your text larger, clearer, and easier to read, which can improve both your speed and accuracy when sending messages.
Increase Font Size in Classic Outlook for New Emails, Replies, and Forwards
If you’re using the Classic Outlook desktop application, here’s how to make your font adjustments:
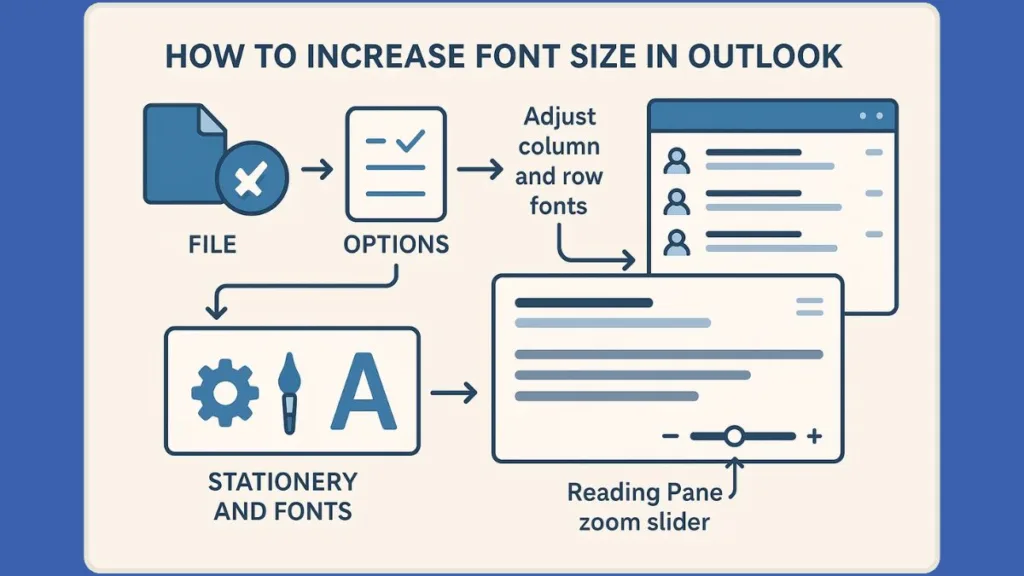
- Open Outlook and click the File tab in the upper-left corner.
- Select Options from the menu. This opens the Outlook Options window.
- In the left-hand panel, choose Mail, then click Stationery and Fonts.
- In the Personal Stationery tab, you’ll see three sections:
- New mail messages – controls the default font for all new emails you create.
- Replying or forwarding messages – lets you set a different font for responses or forwards.
- Composing and reading plain text messages – adjusts fonts for emails that are plain text only.
- Click Font under each section you want to adjust. Choose a font style, size, color, and any embellishments that make reading more comfortable.
- Click OK in each dialog box to save your settings.
By doing this, every email you compose or reply to will automatically use your preferred larger, more readable font. This setup is perfect if you find the default Calibri size too small for extended reading or typing.
Change Default Font Size in New Outlook or Outlook Web
In the New Outlook or Outlook Web App (OWA), the process is slightly different but equally simple:
- Click the Settings gear in the top-right corner.
- Select Mail from the left-hand panel, then go to Compose and reply.
- Under Message format, choose the font style and size that works best for you.
- Click Save to apply your changes.
Remember, if you manage multiple email accounts, you may need to repeat these steps for each account to ensure consistency.
Once saved, these settings apply to all new emails, replies, and forwards, giving you a uniform and comfortable reading and writing experience.
Tips for Choosing the Right Font
- If the default text feels small, start with a moderately larger size—you can always adjust later.
- Consider readability first: simple, clean fonts are easier on the eyes than decorative ones.
- Keep in mind that recipients may not have the same font installed. Using widely available fonts ensures that your emails look consistent across devices.
- Bold important headings or key points in your message to improve scanning and clarity without increasing the overall font size.
By taking a few minutes to adjust your composition fonts, you’re setting up a workspace where emails are not only easier to read but also more visually organized, reducing strain and improving workflow.
This small change can make a noticeable difference in your daily email routine.
How to Adjust Font Size for Specific Emails in Outlook
Sometimes you don’t want to change your default font settings but still need a particular email to be larger and easier to read. Outlook makes it simple to adjust the font size for individual messages, giving you flexibility without altering your global settings. This is especially useful when reading long reports, forwarding important information, or composing messages that require extra clarity.
Adjusting Fonts While Composing a Single Email
- Open the email you want to write or edit.
- Go to the Message tab in the ribbon—this is your main hub for formatting options.
- Highlight the text you want to adjust, or place your cursor where you will begin typing.
- Use the Font dropdown to choose a style that is clear and readable. You can pick classic fonts like Calibri or Times New Roman or any font installed on your system.
- Adjust the Font Size dropdown to increase or decrease text size. If you need a specific size not listed, you can type the number directly into the box.
- Apply bold, italics, or color highlights if you want certain parts of your message to stand out.
This approach allows you to make important messages instantly readable without affecting how other emails appear in your inbox or replies.
Version-Specific Notes
Classic Outlook and Desktop Applications: All adjustments you make here are applied immediately to that email and will not carry over to future messages.
New Outlook and Web App (OWA): Font adjustments in a single message behave the same way—they are temporary and only affect the current email.
Practical Tips for Single-Message Adjustments
- If you’re sharing information with colleagues or clients who may have different display settings, stick to widely available fonts to ensure readability.
- Highlight headings or key points with a slightly larger size than your main body text to guide readers’ attention.
- Use these adjustments in combination with bold or color formatting to emphasize critical details without overwhelming the reader.
By using this feature, you can quickly adapt any email for better readability, ensuring that your messages are clear, professional, and accessible—even for long threads or detailed instructions. It’s a small step that can significantly enhance how others perceive and understand your communication.
How to Increase Font Size in the Reading Pane in Outlook
The Reading Pane is where you spend a lot of time reviewing your emails, and small text can quickly become tiring. Fortunately, Outlook allows you to adjust the font size in the Reading Pane, giving you a more comfortable and productive reading experience.
You can make changes temporarily for one email or set a permanent zoom level that applies to all messages you preview.
Temporary Zoom for Single Emails in Classic Outlook
In the Classic Outlook desktop application, you can quickly enlarge the text for a single email without affecting others:
- Open the message you want to read in the Reading Pane.
- Look for the Zoom slider in the lower-right corner of the pane.
- Drag the slider to the right to make text larger or to the left to shrink it.
- The change takes effect immediately, allowing you to quickly adjust readability.
This is perfect for long emails or messages with detailed content where small text can slow you down.
Set a Permanent Zoom Level in Classic Outlook Reading Pane
If you want your chosen font size to apply consistently to every message in the Reading Pane:
- Click the percentage (%) displayed next to the Zoom slider.
- In the Zoom window, select a preset zoom level or type a custom percentage.
- Check the box labeled “Remember my preference.”
- Click OK to save your settings.
Now, every email you preview in the Reading Pane will automatically use your preferred zoom, making your inbox more comfortable to navigate.
Adjusting Zoom in New Outlook and Outlook Web App (OWA)
In the New Outlook or Outlook Web (OWA), zoom works slightly differently but is just as easy:
- Open the message you want to read.
- Switch to the View tab in the ribbon.
- Click Zoom.
- Use the plus (+) button to enlarge the text or the minus (–) button to decrease it.
- To reset to default size (100%), click Reset.
Unlike Classic Outlook, the New Outlook and web app remember your zoom settings, so the next time you open an email, it will display at your preferred size automatically.
Quick Keyboard and Mouse Shortcut for Reading Pane Zoom
For fast adjustments across all Outlook versions:
Hold down the Ctrl key and scroll your mouse wheel up to enlarge the text or down to make it smaller.
- In Classic Outlook, this affects only the email you’re currently viewing.
- In the New Outlook or web app, your preference will persist for future messages, saving time and keeping your inbox consistently readable.
Tips for Optimal Comfort in Outlook Reading Pane
- Experiment with moderate zoom levels; excessively large text can make it harder to see the full message at once.
- Combine zoom adjustments with bolded headings or clear spacing to improve clarity.
- Remember that temporary zoom is great for one-off messages, while permanent settings are better if you consistently struggle with small text.
By taking advantage of these options, you can transform your Reading Pane into a space that’s easy on the eyes and supports longer periods of email review without fatigue. It’s a simple adjustment that can make a noticeable difference in daily email productivity.
How to Adjust Font Size in the Message List (Inbox, Drafts, Sent Items) in Outlook
The message list—where your emails are displayed in the Inbox, Drafts, Sent Items, and other folders—is one of the areas where text size can significantly affect productivity. Small fonts can make it hard to scan subject lines, identify senders, and preview messages quickly.
Fortunately, Outlook gives you options to customize the font and size so you can see everything clearly at a glance.
Customize Message List Fonts in Classic Outlook
If you’re using the Classic Outlook desktop application, you have granular control over how your message list appears:
- Open the folder you want to customize, such as Inbox.
- Go to the View tab in the ribbon and select View Settings.
- Click Other Settings in the dialog box that appears.
- Here you can make changes to:
- Column Font – adjusts the font for column headers like From, Subject, and Received.
- Row Font – changes the font for email subject lines in your message list.
- Message Preview – modifies the font and size of the snippet text that appears under the subject.
- Click OK to save changes and again OK to close the dialog.
These adjustments allow you to scan your emails faster, identify important messages, and reduce eye strain. If you want the same font settings in other folders, you can either repeat these steps for each folder or apply the current view to all mail folders using the Change View > Apply Current View to Other Mail Folders option.
Adjusting Message List Fonts in New Outlook and Web App
In the New Outlook or Outlook Web App (OWA), the process is simplified:
- Click the Settings gear in the top-right corner.
- Navigate to Mail > Layout.
- Under Text size and spacing, choose the size that works best: Small, Medium, or Large.
- Click Save to apply your changes.
Remember that in the new Outlook, these text size settings are applied per account, so if you manage multiple email addresses, you’ll need to adjust each one individually for a consistent experience.
Tips for Optimizing Your Message List
- Increasing the Row Font makes subject lines stand out, which is helpful if you quickly scan for urgent emails.
- Adjusting the Column Font improves clarity for sender names and timestamps.
- Combine font size changes with Message Preview adjustments to get a balanced view that shows more content without overwhelming your screen.
- Test different sizes to find a setup that reduces scrolling and lets you quickly process emails while keeping everything visible.
By customizing your message list font and size, you can turn a crowded inbox into a more manageable, eye-friendly workspace. These changes make it easier to prioritize emails, locate important messages, and maintain a smoother workflow throughout the day.
How to Set a Font in Outlook 365 for a Comfortable Email Experience
Outlook 365 gives you flexibility to personalize your emails by choosing the font style and size that works best for you. Setting a consistent font can make your messages easier to read, more professional, and reduce strain when writing multiple emails throughout the day.
Step-by-Step Guide to Set a Font in Outlook 365
- Open Outlook 365 on your desktop or web app.
- Click the File tab in the upper-left corner and select Options.
- In the Options window, go to the Mail category on the left-hand panel.
- Click the Stationery and Fonts button. This opens the settings where you can customize your default fonts.
- In the Personal Stationery tab, you’ll see three main options:
- New mail messages – set the default font for every new email you compose.
- Replying or forwarding messages – choose a different font if you prefer for responses or forwards.
- Composing and reading plain text messages – adjust fonts for plain text emails that may appear differently on recipients’ devices.
- Click Font under the section you want to adjust. Choose your preferred font, size, style, and color.
- Click OK in the Font window, then OK again in the Signatures and Stationery window, and finally OK in Outlook Options to save your changes.
Tips for Choosing the Right Font in Outlook 365
- Opt for clear, widely available fonts like Calibri, Arial, or Times New Roman to ensure recipients see your emails as intended.
- A slightly larger font size improves readability and reduces eye strain, especially during long email sessions.
- Use formatting like bold headings or subtle color highlights to emphasize important information without overwhelming the reader.
- If you manage multiple accounts in Outlook 365, repeat the steps for each account to maintain a consistent email appearance.
By taking a few minutes to set your preferred font in Outlook 365, you’re creating a comfortable, professional, and visually appealing email environment.
Practical Tips & Best Practices for Making Outlook Font Bigger
Adjusting fonts in Outlook isn’t just about aesthetics—it’s about creating a more comfortable and efficient email environment. Whether you’re reading long threads, scanning multiple messages, or composing detailed emails, a few thoughtful changes can make your inbox much easier on the eyes.
Start with Moderate Font Size Adjustments for Comfort
When increasing font size, it’s best to start moderately. Drastic changes can make messages harder to fit on your screen or create excessive scrolling. Begin with slightly larger fonts and adjust gradually until you find the right balance between readability and layout.
Combine Reading Pane and Message List Font Settings for Better Visibility
For maximum comfort:
- Reading Pane: Set a zoom level that lets you read emails without straining your eyes. Temporary zoom is great for single messages, while permanent zoom keeps all messages consistently readable.
- Message List: Adjust column and row fonts so that senders and subjects are easily distinguishable. Include message previews to see snippets without opening every email.
This combination allows you to quickly scan, read, and prioritize emails without constantly adjusting your view.
Optimize Email Composition Fonts for Clear Communication
- Make sure your default font size for new messages, replies, and forwards is comfortable.
- Use bold headings or colored text sparingly to emphasize key points without overwhelming your recipient.
- If your emails include long blocks of text, a slightly larger font can improve readability and make your messages appear more professional and organized.
Use Shortcuts and Quick Tools for Fast Font Adjustments
- Ctrl + scroll wheel works across all versions for instant zoom adjustments.
- The Zoom slider in Classic Outlook provides precise control for Reading Pane adjustments.
- Keyboard and mouse shortcuts save time when you need temporary increases in text size for specific emails.
Account for Multiple Email Accounts When Adjusting Fonts
In the New Outlook and Web App, font and zoom settings are applied per account. If you manage several addresses, make sure to adjust each account individually for a consistent, eye-friendly setup across all your messages.
Balance Readability and Screen Space for Efficient Inbox Navigation
While larger fonts improve comfort, they also take up more space. Pay attention to your screen layout:
- Avoid excessively large fonts that require constant scrolling.
- Adjust message preview lines in the message list to maintain a clear overview.
- Combine font increases with smart folder organization to make your inbox navigable without visual clutter.
By following these practical tips, you can transform Outlook into a workspace that’s easy on your eyes, more efficient, and tailored to your workflow. These adjustments ensure that every message you read or compose is clear, comfortable, and quick to process.
Conclusion: Improve Readability and Productivity by Increasing Font Size in Outlook
Making Outlook more readable is about more than just changing fonts—it’s about creating an environment where you can work efficiently, reduce eye strain, and stay organized. Small text can slow you down, make it harder to scan emails, and even lead to mistakes. By adjusting font sizes across composing emails, the Reading Pane, and your message list, you’re taking control of your inbox and improving your daily workflow.
Throughout this guide, we’ve explored how to:
- Customize email composition fonts for new messages, replies, and forwards so every email you write is clear and legible.
- Adjust the Reading Pane with temporary and permanent zoom settings, giving you comfort while reviewing messages.
- Change message list fonts to make senders, subjects, and previews easier to scan at a glance.
- Use shortcuts and quick tools like the Ctrl + scroll wheel and Zoom sliders for instant readability adjustments.
- Apply consistent settings across multiple accounts in New Outlook and Outlook Web to maintain a uniform experience.
Taking the time to fine-tune your font and text settings can make a noticeable difference in how you interact with your emails every day. It’s not just about seeing the words more clearly—it’s about working smarter, navigating your inbox efficiently, and protecting your eyes during long periods of reading or composing.
By implementing these adjustments, your Outlook experience becomes more comfortable, accessible, and productive, allowing you to focus on what matters most—communicating effectively and managing your emails with ease.
Useful Resources
- Change the Font Size in Your New Outlook Message List – Step-by-step instructions for adjusting message list fonts and spacing.
- Change the Default Font or Text Color for Email Messages – How to set default fonts and sizes for new emails, replies, and forwards.
- Classic Outlook for Windows 11 Download: A comprehensive guide on downloading, installing, and reverting to the classic Outlook interface on Windows 11.
Visit Our Post Page: Blog Page