
Want to create a QR code for a Google Form and share it instantly? Learn how to generate, customize, and use a Google Form QR code step-by-step for easy access, better responses, and seamless sharing.
Quick Answer: How to Create a QR Code for a Google Form Instantly
You can create a QR code for a Google Form by copying your form’s link, pasting it into a free QR code generator, and downloading the code. Just make sure your form is publicly accessible so anyone who scans it can open and respond without issues.
In most cases, the entire process takes less than five minutes and doesn’t require any technical skills. Once generated, your QR code can be reused across multiple platforms—both online and offline—making it one of the simplest ways to distribute forms efficiently.
What Is a Google Form QR Code and How Does It Work?
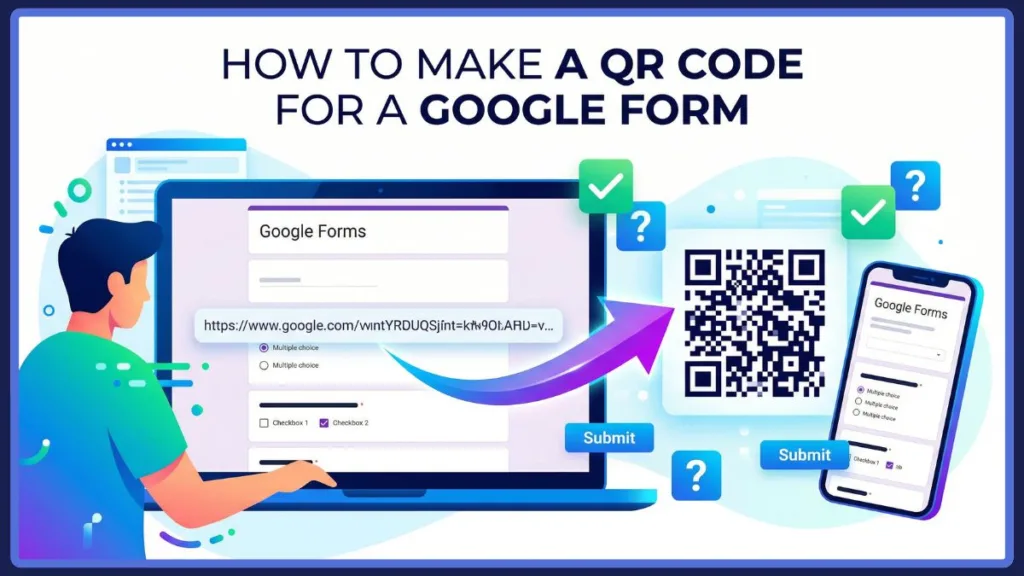
A Google Form QR code is a scannable code that instantly opens your form on a smartphone or tablet. Instead of sharing long URLs, users simply scan the code and land directly on your form.
At a technical level, a QR (Quick Response) code is a two-dimensional barcode capable of storing data—in this case, the unique hyperlink directing to your specific Google Form.
This makes access faster, reduces errors, and improves the overall user experience—especially in situations where typing a link isn’t practical.
In simple terms, it acts as a bridge between physical and digital interaction. Whether printed on paper or displayed on a screen, the QR code eliminates unnecessary steps and allows users to interact with your form instantly.
Why Use a QR Code for Google Forms to Increase Responses
QR codes make sharing your form effortless. Whether you’re collecting feedback, running an event, or managing registrations, they remove friction and help people respond quickly.
They work seamlessly across both physical and digital platforms. You can place them on posters, flyers, presentations, emails, or social media—making your form accessible anywhere. From restaurant tables collecting customer feedback to presentation slides capturing audience Q&A submissions, the applications are practically endless.
Quick insight: QR codes only improve response rates when they open instantly. Broken links or restricted access can stop users before they even begin.
Another major advantage is accessibility. People are far more likely to scan a code than manually type a long URL, especially on mobile devices. This convenience directly impacts response rates and engagement.
How to Make a QR Code for a Google Form: Step-by-Step
Step 1 – Create or Open Your Google Form
Start by creating a new form or opening an existing one. Make sure everything is finalized—questions, settings, and layout—before moving forward.
Take a moment to review your form carefully. Check for spelling errors, confirm all required questions are set correctly, and ensure the flow of questions makes sense for users. It is also highly recommended to test your form’s logic if you are using conditional branching (where a user’s answer directs them to a specific section).
Step 2 – Get the Shareable Link
Click the “Send” button in the top-right corner and select the link icon. Copy the form URL.
Important: Always copy the actual form link. Using preview or edit links can cause your QR code to open the wrong page.
You can also shorten the link using the built-in option provided in Google Forms. While this step is optional, it can make your URL cleaner before converting it into a QR code. Shorter URLs actually result in a less complex, less dense QR code pattern, which is generally easier for older smartphone cameras to scan quickly.
Step 3 – Set Proper Permissions (Critical Step)
Before generating your QR code, ensure your form is accessible.
Go to Settings and ensure “Limit to 1 response” is unchecked. If you are using a work or school account, you must also uncheck “Restrict to users in [Organization].” This ensures anyone with the link can respond without hitting a roadblock.
Why this matters: If these settings are restricted, users scanning the QR code may be redirected to a sign-in page instead of your form.
Additionally, double-check your form requirements based on your needs to avoid access issues later.
Step 4 – Generate the QR Code
Go to a free QR code generator and paste your Google Form link into the URL field. Click generate. Popular, highly reliable free tools include QRCode Monkey (excellent for free, high-resolution static codes with logos), QR Code Generator by Bitly, and even Canva (if you want to design a flyer around the code simultaneously).
Within seconds, your QR code will be ready.
Tip: Stick with simple generators. Some tools add unnecessary redirects that can lead to broken or outdated links later.
At this stage, you can also choose between static and dynamic QR codes depending on whether you need tracking or future edits.
Step 5 – Customize (Optional)
You can personalize your QR code by adding colors or a logo. Tools like QRCode Monkey or Flowcode allow you to embed a tiny Google Forms icon or your own company logo right in the center of the code.
Keep it simple: Over-designing your QR code can reduce scan accuracy. High contrast and clean design always perform best. Black modules on a white background remain the most universally scannable color combination.
If you’re using the QR code for branding purposes, subtle customization—like matching brand colors—can improve visual appeal without affecting usability. Also, ensure you do not crowd the “Quiet Zone,” which is the blank white margin surrounding the QR code; scanners need this empty space to process the code correctly.
Step 6 – Download and Save
Download your QR code in a high-quality format like PNG or SVG.
Pro tip: Low-resolution images often fail to scan properly, especially when printed.
Store your QR code in an easily accessible location so you can reuse it across different materials without regenerating it each time. As a general rule, use PNG for digital displays (screens, emails, social media) and vector formats like SVG or EPS for print materials (flyers, banners, posters) so the image doesn’t pixelate when scaled up.
Alternative Methods to Create QR Code for Google Forms

Method 1 – Using Google Chrome
Some browsers offer a built-in QR code feature. You can generate a QR code directly from your form link without using external tools. Just right-click anywhere on the page and select “Create QR code for this page,” or click the Share icon in the address bar. Microsoft Edge offers a nearly identical built-in feature, and on iOS devices, you can generate a QR code directly from the Safari share sheet.
This method is quick and convenient, especially if you want a basic QR code without additional customization. The Chrome generator famously features a small dinosaur icon in the center of the code.
Method 2 – Using Add-ons
You can install QR code add-ons within Google Forms to generate codes instantly. Some popular choices available in the Google Workspace Marketplace include “QR Code Maker” and “QR Code Generator.”
However, many of these come with limitations such as trial periods, restricted downloads, or branding.
Reminder: Always test the output—some add-ons may not generate clean or reliable QR codes.
Add-ons are useful if you frequently create QR codes and prefer working within the same environment.
How to Test Your QR Code Before Sharing
Testing is one of the most important steps—and often the most overlooked.
Start by scanning your QR code using different devices and apps. Check if it opens the correct form and loads without errors. It is best to test using both iOS (which has a built-in scanner in the native Camera app) and Android (using Google Lens) to ensure universal compatibility.
If you plan to print the code, test it physically as well. Make sure it’s large enough and clearly visible.
Watch out for this: Small size, low contrast, or blurry images are the most common reasons QR codes fail to scan.
You should also test the QR code multiple times to ensure consistency. A code that works once but fails occasionally can still create a poor user experience.
Static vs Dynamic QR Code for Google Forms: Which One to Choose?
Understanding the type of QR code you’re using can make a big difference.
A static QR code contains a fixed link. Once created, it cannot be changed and doesn’t provide scan data. Because the destination URL is hardcoded into the graphic itself, static codes are free and will never expire.
A dynamic QR code, on the other hand, allows you to update the destination link and track scan activity. They work by directing the scanner to a short “redirect” URL that then sends them to your Google Form. This means you can track metrics like the number of scans, location of scans, and the type of device used.
Key takeaway: If you need analytics or flexibility, go for dynamic QR codes (often provided through premium services like Bitly or QR Code Generator Pro). Static ones are best for simple, one-time use.
Dynamic QR codes are particularly useful for long-term campaigns where you may need to update the form link later without reprinting physical materials.
Best Practices for Using Google Form QR Codes Effectively
To get the best results, keep your QR code simple and user-friendly.
Use a clean design with strong contrast so it scans easily. Add a short instruction like “Scan to fill the form” or a direct call to action like “Scan to RSVP” so users know exactly what to expect.
Place your QR code where it’s easy to see and access. Whether it’s a poster, email, or presentation, visibility matters.
Always test before sharing: Many issues—like incorrect links or access restrictions—can be caught early with a quick scan.
Also, avoid resizing your QR code disproportionately, as stretching or compressing it can make it unreadable.
Size matters: A good rule of thumb for printed QR codes is a minimum size of 0.8 x 0.8 inches (2 x 2 cm) to ensure smartphone cameras can easily focus on it from a normal distance.
Best Use Cases for Google Form QR Codes (Events, Surveys, Business)
QR codes for Google Forms can be used in a variety of real-world situations.
They work perfectly for event registrations, surveys, and feedback collection. They’re also widely used for attendance tracking, lead generation, and contactless data collection.
Businesses can use them for customer feedback on receipts or product packaging, educators for classroom quizzes and attendance, and event organizers for quick sign-ups or digital waivers—making them highly versatile.
FAQ About Google Form QR Code Creation and Sharing
- Can Google Forms generate a QR code? No, Google Forms does not have a native, built-in QR code generator button. You need to use external tools, add-ons, or browser features like Google Chrome’s built-in generator.
- How do I share a Google Form with a QR code? Copy your form link, generate a QR code using a free tool (like QRCode Monkey), download the image file, and share it digitally or embed it in print materials.
- Why does my QR code ask for sign-in? This usually happens when your form permissions are restricted. Ensure settings like “Limit to 1 response” or organization restrictions are unchecked in the Google Forms Settings tab to fix the issue.
- Can I edit the form after creating the QR code? Yes, you can update your Google Form’s questions and theme anytime. Because the URL remains the same, the existing QR code will still direct users to the updated version of your form.
- How do I track QR code scans? You’ll need a dynamic QR code generator that offers analytics, or you can attach UTM parameters to your Google Form link if you are using advanced tracking tools. Standard static QR codes do not track scans natively.
Conclusion: Create and Share Google Form QR Codes Easily
Creating a QR code for your Google Form is a simple yet powerful way to improve accessibility and increase responses. With just a few steps, you can turn a long link into a quick, scannable experience.
When you combine proper permissions, clean design, and thorough testing, your QR code becomes a reliable tool for sharing forms anywhere.
Start using it for your next survey, event, or feedback form—and make access effortless for everyone.
Visit Our Post Page: Blog Page