
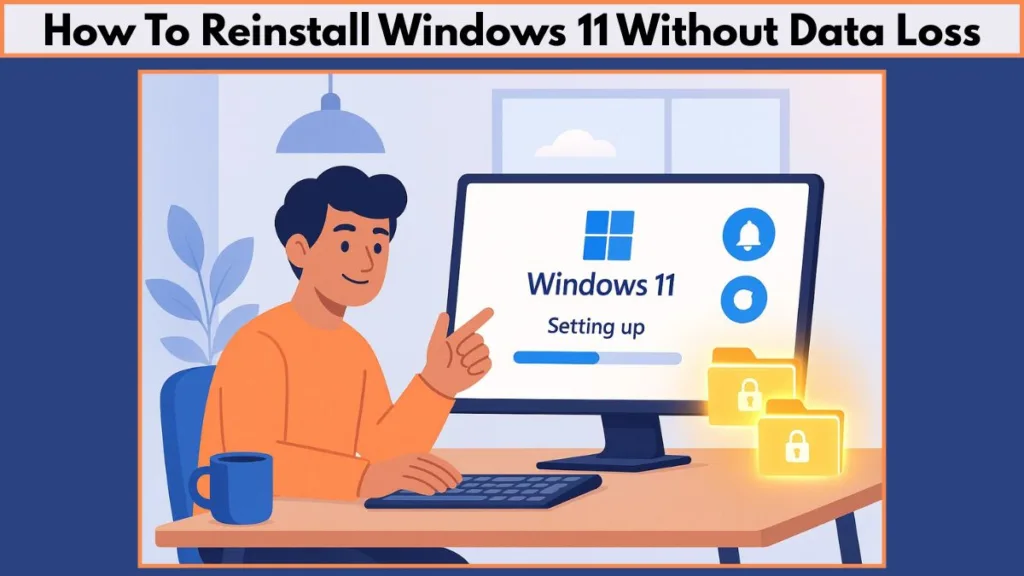
Want to reset Windows without losing files, apps, and settings? Let’s learn how to safely reinstall Windows 11 without any data loss while keeping all your data intact.
Reinstalling Windows 11 doesn’t have to be stressful. If your PC is running slow, encountering errors, or you just want a fresh start, you can reinstall Windows 11 without losing files, apps, or settings.
In this guide, we’ll walk you through safe, step-by-step methods to refresh your system, fix issues, and keep all your important data intact.
Why You Might Need to Reinstall Windows 11 Without Losing Files
Reinstalling Windows 11 can feel intimidating, especially when you consider the risk of losing your personal files, documents, photos, or installed applications. The good news is that Windows 11 offers several ways to refresh or repair your system without deleting your data, making it possible to restore stability while keeping everything intact. Understanding the reasons for a non-destructive reinstall helps you choose the method best suited to your PC’s condition.
Repairing a Corrupted or Unstable Windows 11 System
If your PC frequently experiences system crashes, slowdowns, or blue screen errors (BSOD), it may indicate corrupted system files, driver conflicts, or software issues. A sluggish PC that struggles to open applications, freezes randomly, or shows unexpected glitches can hinder productivity and make your device frustrating to use.
Reinstalling Windows 11 without losing files is a reliable solution for these deep-rooted issues. This method ensures that your documents, pictures, and applications remain safe while replacing damaged or corrupted system components. It’s like giving your computer a fresh start without losing your personal belongings, allowing it to run more smoothly and efficiently.
Performing an In-Place Upgrade or Refresh for Stability
Sometimes, a full clean install isn’t necessary. Users often look for a way to refresh their Windows installation to fix minor glitches or improve system stability. An in-place upgrade or repair reinstall achieves exactly that, allowing you to reinstall Windows 11 while preserving all installed apps, personal files, and system settings.
This approach is particularly helpful when upgrading from Windows 10 to Windows 11, or when your current installation is experiencing performance issues. By replacing only the core system files, your PC receives a stable environment without affecting your personal data. This method saves time, prevents the hassle of manually backing up and restoring files, and ensures a smoother transition to a fully functional system.
Recovering from Failed Updates or Installation Errors
Failed updates or interrupted installations can leave Windows 11 in an unstable or unusable state. In such scenarios, a non-destructive reinstall allows you to restore your system to a working condition without deleting your personal files.
Documents, photos, and other important data remain untouched, making it easier to recover from major update failures or installation errors. This method is particularly useful after feature upgrades or large updates, where a failed installation can otherwise compromise the stability of your system. A safe reinstall ensures that your PC is back to normal quickly, avoiding the stress of manual file restoration.
Eliminating Malware and Security Threats Safely
Even the best antivirus software sometimes struggles with stubborn malware, ransomware, or rootkits that can survive scans. Reinstalling Windows 11 with the “Keep My Files” option provides a clean system environment while safeguarding your personal files.
This approach isn’t a replacement for regular security practices, but it’s an effective way to eliminate persistent threats that cannot be removed by standard antivirus tools. Your PC receives a fresh start, with system stability restored, while your important documents, apps, and settings remain intact.
Understanding the Difference Between Clean Install and Keep My Files Options
A common source of confusion is the difference between a clean install and a reinstall that keeps your files. A clean install completely wipes the drive, removing everything, including apps, system settings, and personal data.
On the other hand, the “Keep My Files” option allows you to reinstall Windows 11 while preserving your documents, photos, and even installed applications in some cases. Knowing this difference helps users choose a reinstall method that solves system issues without risking their valuable data, making the process much less intimidating.
Practical Benefits of Reinstalling Windows 11 Without Losing Data
Reinstalling Windows 11 without deleting files comes with multiple advantages. It saves time, reduces the risk of accidental data loss, and minimizes disruption by keeping your apps and settings intact. Users also gain peace of mind, knowing that they can restore stability, remove corruption, or fix errors without starting over from scratch.
By understanding the reasons for a non-destructive reinstall and the benefits it offers, you can confidently choose the method that fits your situation. Your PC will be stable, functional, and ready to handle daily tasks without jeopardizing your personal files or installed applications.
Methods to Reinstall Windows 11 Without Losing Data
Reinstalling Windows 11 without losing your files can be accomplished in multiple ways, depending on your specific needs and the condition of your PC. Whether you’re facing system crashes, failed updates, malware infections, or simply want a fresh start, these methods allow you to refresh or repair your operating system while keeping your personal files, documents, and installed applications safe.
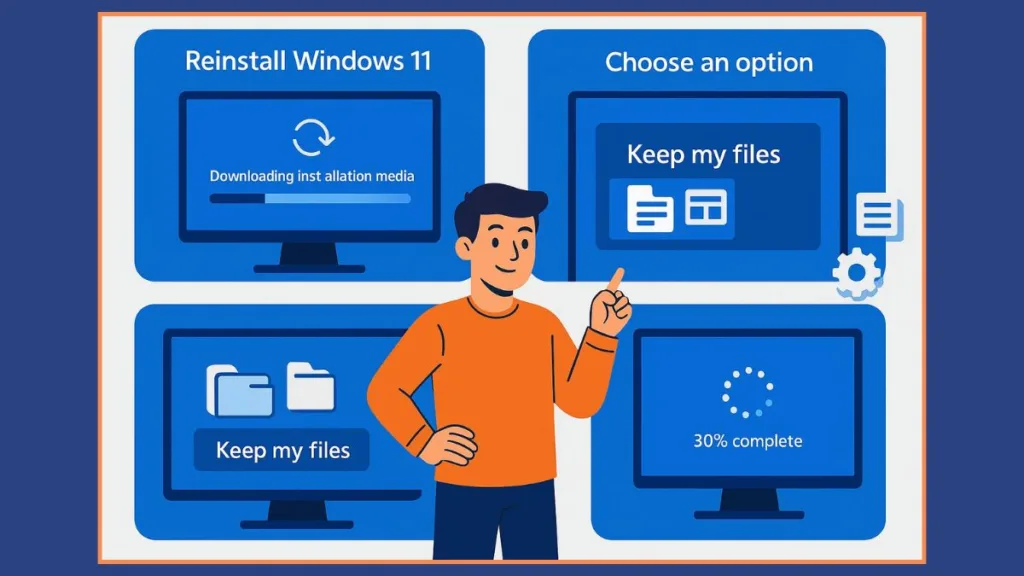
By understanding each method and following the steps carefully, you can choose the approach that best suits your situation and ensure a smooth reinstall process.
Repair Install Using Windows 11 Installation Media
A repair install using the Windows 11 Installation Media is one of the most reliable ways to fix system issues without affecting your personal files. This method is designed to replace corrupted or missing system files while retaining your apps, documents, pictures, and other personal data, providing a stable and fully functional operating system.
Steps to follow:
- Download the official Windows 11 Installation Media tool from Microsoft’s website. Ensure you are using the latest version to avoid compatibility issues.
- Run the tool and select the option to upgrade this PC now, which initiates the repair installation process.
- During the setup, make sure to select Keep personal files and apps, which guarantees that your data and installed applications remain untouched.
- Follow the on-screen instructions carefully. The installation tool will handle everything from file verification to system file replacement.
- Your PC may restart multiple times as part of the process. Once the installation is complete, you will have a refreshed Windows 11 environment, fully functional and stable, without losing any files or applications.
This method is particularly helpful for fixing system instability, repairing corrupted files, or resolving performance issues that cannot be solved through standard troubleshooting.
Reinstall Windows 11 via Settings and Recovery
For users who prefer not to create installation media or bootable drives, Windows 11’s built-in Recovery options offer a convenient solution. This method uses the Windows Update service to reinstall the operating system safely.
Steps to follow:
- Open Settings → System → Recovery.
- Click the Reinstall now button under the section “Fix problems using Windows Update.” This action triggers Windows to download the necessary installation files directly from Microsoft’s servers.
- Confirm to start the download. While the files are downloading, you can continue using your PC, which makes this method less disruptive than traditional reinstall methods.
- Once the installation files are ready, Windows will automatically begin the reinstallation process in the background. Your PC may restart multiple times during this phase.
- After signing back in, it’s recommended to check Settings → Windows Update to ensure no updates are pending. This step ensures that your system is fully up-to-date and optimized.
This approach is ideal for users who want a simple, low-risk reinstall without handling installation media or bootable drives.
Using Windows 11 Installation Assistant
The Windows 11 Installation Assistant is an official Microsoft tool that simplifies upgrading or reinstalling Windows 11 without losing personal data. It is particularly useful for users who want to move to the latest version of Windows 11 or perform a repair install on an unstable system.
Steps to follow:
- Download the Installation Assistant from Microsoft’s official website. Ensure you download the correct version matching your PC’s architecture (64-bit).
- Run the tool and follow the on-screen prompts. It will check your PC for compatibility and available updates.
- When prompted, choose Keep personal files only. Some versions may also allow you to retain apps and settings.
- The tool will automatically download the required files and install Windows 11 while preserving your personal data.
- Depending on your system and internet speed, the process may take 30–60 minutes, with multiple restarts.
This method is highly recommended for users who need a clean but non-destructive reinstall and want a reliable Microsoft-supported tool to ensure stability.
Reset This PC Feature in Windows 11
Windows 11’s Reset this PC feature offers a convenient way to perform a fresh installation without losing your files. It is particularly useful if you want a clean operating system environment while keeping your personal documents intact.
Steps to follow:
- Open Settings → System → Recovery → Reset this PC.
- Select the Keep my files option. This ensures that personal documents, photos, and files remain untouched, while the system is refreshed.
- Choose the Local reinstall option for faster installation, as it uses files already present on your PC.
- Confirm your selections and click Reset to begin the process.
- Your PC will restart automatically and perform the reinstall. The process may take 30–60 minutes, depending on your hardware. After completion, all personal files remain, but applications and drivers need to be reinstalled.
This method is perfect for users looking for a fresh Windows installation without going through the hassle of manually backing up and restoring files.
Reinstalling Windows 11 Using ISO or USB Media
For advanced users or PCs that cannot boot normally, reinstalling via an ISO file or bootable USB drive provides maximum flexibility and control. This method allows you to repair or reinstall Windows 11 without touching personal files.
Steps to follow:
- Download the ISO file from Microsoft or create a bootable USB drive using the Media Creation Tool.
- Boot your PC from the USB drive or mount the ISO directly in Windows.
- During installation, select Upgrade this PC now or ensure Keep personal files and apps is checked.
- Follow the on-screen prompts to complete the installation.
- After installation, your personal files remain safe, and the system is refreshed and stable.
This method is especially useful when dealing with multiple drives or SSDs, giving you control over where Windows 11 is installed while ensuring data safety.
Key Considerations When Choosing a Reinstall Method
Before starting any reinstall, ensure a stable internet connection and reliable power source. Interruptions can compromise the installation process. Disconnect unnecessary peripherals to avoid conflicts, and keep software licenses handy for applications that may require reactivation.
Even with non-destructive methods, it is always a good idea to perform a quick backup of critical files, just as an added precaution. Each method—repair install, recovery reinstall, Installation Assistant, Reset this PC, or ISO/USB reinstall—offers a safe, non-destructive solution to restore stability, fix system errors, and refresh Windows 11, all while keeping important files and settings intact.
Advanced Options for Reinstalling Windows 11: ISO, Media Creation Tool, and Cloud vs Local
For users who want more control and flexibility over the Windows 11 reinstall process, advanced options such as using an ISO file, the Media Creation Tool, or selecting between Cloud and Local reinstall methods provide powerful alternatives. These options are particularly valuable for users who face complex system issues, need to install Windows on multiple drives, or prefer to manage installation files manually.
Reinstall Windows 11 Using an ISO File
An ISO file is a complete image of the Windows 11 installation media, which allows you to perform a repair install or clean install while keeping your files. This method gives users the ability to manually mount the ISO or create a bootable USB drive for installation.
Steps to follow:
- Download the official Windows 11 ISO file from Microsoft’s website. Make sure you select the version that matches your current build to avoid activation issues.
- Once downloaded, you can mount the ISO file in Windows by right-clicking it and selecting “Mount,” or create a bootable USB drive using tools like the Media Creation Tool.
- Open the mounted ISO or boot from the USB drive, then run setup.exe.
- During installation, select the Upgrade this PC now option or ensure Keep personal files and apps is checked.
- Follow the on-screen instructions. Your PC may restart several times, but all personal files and applications will remain intact.
Using an ISO file is particularly useful for users who want to reinstall Windows on multiple PCs, or when troubleshooting a system that cannot boot normally from the operating system itself.
Reinstall Windows 11 Using Media Creation Tool
The Media Creation Tool is a Microsoft-supported utility that simplifies the process of creating bootable USB drives or upgrading your current Windows installation. This method is ideal for users who want a flexible reinstall option without relying solely on the Recovery menu.
Steps to follow:
- Download the Windows 11 Media Creation Tool from the official Microsoft website.
- Run the tool and choose either Create installation media for another PC or Upgrade this PC now.
- If creating installation media, select your language, edition, and architecture (64-bit recommended).
- Create a bootable USB drive following the tool’s instructions.
- Boot your PC from the USB drive and run setup.exe. During setup, select Keep personal files and apps to ensure no data is lost.
- Follow the prompts until the installation is complete, allowing your PC to restart as necessary.
The Media Creation Tool is highly versatile and is perfect for repairing PCs that are unstable, performing upgrades, or reinstalling Windows 11 on a second SSD without affecting your main drive.
Cloud Download vs Local Reinstall in Windows 11
Windows 11 offers two installation methods during the reinstall process: Cloud Download and Local Reinstall. Understanding the difference between these options helps you choose the best approach for your system.
The Cloud Download option downloads the latest version of Windows 11 directly from Microsoft’s servers. This ensures you get the most recent updates, security patches, and feature improvements. It is useful if your system files are heavily corrupted or if you want a fully up-to-date installation.
The Local Reinstall option uses the existing files on your PC to reinstall Windows 11. This method is faster and does not rely on a high-speed internet connection. However, it may reinstall an older version of Windows 11, which will require updates after installation.
Steps to follow:
- When prompted during the reinstall process, select either Cloud Download or Local Reinstall based on your preference.
- If using Cloud Download, ensure a stable and fast internet connection to avoid interruptions.
- If using Local Reinstall, verify that your current installation files are intact to prevent installation errors.
- Proceed with the installation while selecting Keep personal files and apps to preserve your data.
- Allow your PC to complete the process, restarting as required.
Choosing between Cloud and Local reinstall depends on your priorities: speed and offline convenience versus downloading the latest version of Windows 11 for optimal performance and security.
Practical Tips for Advanced Reinstall Methods
Before performing any advanced reinstall, it is crucial to back up critical files as a precaution, even though these methods are designed to keep your data safe. Ensure your PC is connected to a reliable power source to avoid interruptions. Disconnect unnecessary peripherals to prevent conflicts, and have software licenses and product keys ready for applications that may need reactivation after reinstall.
Advanced methods provide more control and flexibility, but they require careful attention to detail. Whether you choose ISO files, the Media Creation Tool, or Cloud vs Local reinstall, you gain the ability to repair or refresh your system with confidence, knowing that your personal files, apps, and system settings will remain intact.
Tips for a Safe Reinstallation of Windows 11
Reinstalling Windows 11 without losing your files is a straightforward process when done carefully, but taking the right precautions ensures a smooth and trouble-free experience. Following best practices not only protects your personal data and applications but also helps maintain system stability and performance after the reinstall. Here are the essential tips to keep in mind.
Always Back Up Your Critical Files
Even when using non-destructive reinstall methods, it’s wise to perform a backup of your essential documents, photos, and other important data. You can use cloud storage services, an external hard drive, or a network location to secure your files. Backing up your data acts as a safety net, protecting you in case of unexpected interruptions, such as power outages, corrupted installation files, or hardware failures.
Backing up also ensures peace of mind, knowing that your personal and work files remain safe no matter what happens during the reinstallation process.
Ensure a Stable Power Source
During a Windows 11 reinstall, your PC may restart multiple times. A sudden loss of power in the middle of installation can corrupt system files, potentially causing your PC to become unstable or unbootable. To prevent this, make sure your device is connected to a reliable power source.
For laptops, keep them plugged in to avoid battery-related interruptions. For desktop PCs, ensure your UPS (uninterruptible power supply) is functional if you live in an area with frequent power fluctuations. Power stability is often overlooked but is one of the most critical factors for a safe reinstall.
Disconnect Unnecessary Peripherals
Before beginning the reinstall process, it is recommended to disconnect non-essential devices such as printers, external drives, USB hubs, and secondary monitors. Peripheral devices can sometimes conflict with the installation process, causing errors or delays.
Keeping only the primary keyboard, mouse, and display connected ensures that the reinstall focuses solely on the system drive. After installation is complete, you can reconnect your peripherals without any risk of interference during setup.
Check for System Updates and Drivers
Even after a non-destructive reinstall, it’s important to check for Windows updates and driver updates immediately after the installation is complete. This ensures that your system is running the latest security patches, stability improvements, and hardware drivers.
Navigate to Settings → Windows Update → Check for updates to download and install all pending updates. Additionally, verify that key device drivers, such as graphics cards, network adapters, and storage controllers, are up to date. This step helps prevent potential performance issues or hardware incompatibility problems.
Keep Software Licenses and Product Keys Ready
Some applications may require reactivation after a reinstall, even if your files are intact. Before starting the process, make sure you have software licenses, subscription details, or product keys available for essential applications.
This preparation ensures a smooth post-installation experience, allowing you to continue using your productivity tools, creative software, or business applications without unnecessary delays.
Understand the Installation Options
Windows 11 offers multiple reinstall options, such as Keep My Files, Cloud Download, Local Reinstall, and Repair Install. Understanding the difference between these options is essential to avoid accidental data loss.
The Keep My Files option preserves your personal files and, in many cases, installed applications. Cloud Download provides the latest version of Windows, while Local Reinstall is faster but uses existing installation files. Choosing the right method based on your system condition and preferences ensures a safe and efficient reinstall.
Be Patient During the Installation Process
Reinstalling Windows 11 is not instantaneous. Depending on your hardware, internet speed, and chosen method, the process can take anywhere from 30 minutes to several hours. Your PC will likely restart multiple times, and the progress may appear slow at times.
It’s important to avoid interrupting the installation. Patience ensures that Windows 11 is installed correctly and your files remain intact, providing a stable and fully functional operating system once complete.
Optional: Create a Restore Point Before Starting
Although modern reinstall methods are designed to preserve your data, creating a system restore point provides an additional layer of safety. A restore point allows you to revert your PC to its previous state in case any unexpected issues occur during the reinstall.
To create a restore point, go to Control Panel → System → System Protection → Create Restore Point, then follow the prompts. This precaution gives you confidence that your data and system configuration are protected throughout the process.
By following these tips, you can reinstall Windows 11 confidently without losing personal files, documents, or applications. Backing up critical files, maintaining a stable power supply, disconnecting unnecessary peripherals, updating drivers, keeping software keys ready, and understanding installation options are all essential steps for a smooth experience.
A careful, well-prepared approach ensures that your PC emerges from the reinstall process stable, efficient, and fully functional, with all your important data safely preserved.
Frequently Asked Questions About Reinstalling Windows 11 Without Losing Data
Reinstalling Windows 11 while keeping your personal files and apps intact often raises several common questions. Understanding these concerns can help you choose the right method, avoid mistakes, and ensure a smooth installation. Below, we address the most frequently asked questions with clear, practical answers.
Can I Reinstall Windows 11 Without Losing Any Data?
Yes, it is entirely possible to reinstall Windows 11 without losing personal files or installed applications. By performing a repair install, using the Keep My Files option, or running the Windows 11 Installation Assistant, you can refresh your system while preserving all your documents, photos, and software.
It’s important to follow the steps carefully and confirm that you have selected the correct options during installation. While these methods are non-destructive, creating a backup of your critical files is always recommended as an extra precaution.
Will Reinstalling Windows 11 Remove My Installed Programs?
The answer depends on the method you choose. If you select Keep My Files or Keep Personal Files and Apps, most applications will remain installed. However, some system-level drivers or custom software may need to be reinstalled or reactivated.
In contrast, using the Reset This PC feature with Keep My Files will preserve personal files but remove all applications, requiring you to reinstall them afterward. Understanding the differences between repair install, in-place upgrade, and reset options ensures you choose a method that aligns with your needs.
Do I Need a USB Drive or ISO File for Reinstallation?
Not always. Windows 11 provides built-in recovery and reinstall options that allow you to reinstall the operating system without creating a USB drive or downloading an ISO file. Using Settings → System → Recovery or the Windows 11 Installation Assistant is sufficient for most users.
However, creating a bootable USB or using an ISO file can be useful for advanced scenarios, such as reinstalling Windows on multiple PCs, repairing a system that won’t boot, or installing Windows on a second SSD. These options offer more control but require a bit of technical know-how.
How Long Does the Reinstallation Process Take?
The duration of a reinstall varies depending on several factors, including your hardware specifications, internet speed, chosen installation method, and system condition. Generally, non-destructive methods like the Windows 11 Installation Assistant or Repair Install take between 30 minutes to 1 hour.
Cloud Download methods or ISO-based installations may take longer, especially on slower internet connections. Patience is key, as interrupting the process can cause installation errors or file corruption.
Will I Lose Settings and Personal Customizations?
Most reinstall methods that preserve personal files also retain system settings and customizations. Options like Keep My Files or in-place upgrades ensure that your desktop layout, personalization preferences, and other settings remain unchanged.
However, methods such as Reset This PC with Keep My Files will retain only your personal files, and applications or some advanced settings may be reset. Always review the installation prompts to understand what will be preserved before proceeding.
What If I Encounter Errors During Reinstallation?
While Windows 11 reinstall methods are generally reliable, errors can occasionally occur due to corrupted system files, incompatible drivers, or interruptions during installation. If this happens, you can try retrying the installation, using a different method (such as switching from Local Reinstall to Cloud Download), or using ISO/bootable media.
For persistent issues, consider contacting Microsoft Support or consulting professional technicians. Keeping a backup of your files and licenses ensures you are prepared for troubleshooting without risking data loss.
Is It Necessary to Reactivate Windows 11 After Reinstallation?
In most cases, Windows 11 automatically reactivates after a non-destructive reinstall, especially if your device was already activated. Microsoft’s digital license system recognizes your hardware and restores activation without requiring a product key.
However, if you are installing Windows on a new SSD or replacing critical hardware, you may need to enter your product key or reactivate through the Microsoft account linked to your device.
Can Reinstalling Windows 11 Help Fix Performance Issues or System Errors?
Absolutely. Reinstalling Windows 11 without losing files is one of the most effective ways to resolve deep-seated system issues, including sluggish performance, recurring crashes, unexplained errors, or malware infections. Methods like repair install or in-place upgrades refresh system files and repair corruption, while preserving your personal data and applications.
This approach is often preferable to performing a full clean install, as it minimizes downtime and avoids the hassle of manually restoring files.
Conclusion and Final Recommendations for Reinstalling Windows 11 Safely
Reinstalling Windows 11 without losing your files is no longer a daunting task. With the right approach, preparation, and understanding of available tools, you can refresh your operating system, resolve performance issues, and maintain a stable, secure PC—all while keeping your personal files, documents, photos, and installed applications intact.
By now, you’ve explored multiple methods for performing a fresh install of Windows 11 without losing data, including repair installs with Windows 11 Installation Media, in-place upgrades via Recovery settings, using the Windows 11 Installation Assistant, leveraging the Reset This PC feature, and advanced options like ISO files or Media Creation Tool installations. Each method offers a non-destructive way to reinstall Windows, catering to different user needs, hardware setups, and technical skill levels.
Key Takeaways for a Safe Reinstallation
Before starting, it’s essential to follow a few critical best practices. Always backup your critical files, even if the reinstall method is designed to keep them intact. This precaution protects against unexpected interruptions, such as power outages or corrupted installation files. Ensuring a stable power source and disconnecting unnecessary peripherals reduces the risk of installation errors.
Understanding the installation options—such as Keep My Files, Cloud Download, or Local Reinstall—helps you select the method that aligns with your goals. Whether your priority is speed, the latest version, or maximum control, making an informed choice ensures your files, apps, and settings remain safe throughout the process.
Benefits of Reinstalling Windows 11 Without Losing Data
A non-destructive reinstall provides multiple advantages. It allows you to repair corrupted system files, resolve system instability, and eliminate malware or stubborn errors without the hassle of manually restoring backups. It also preserves your applications, personalization settings, and user preferences, making it easier to resume work immediately after installation.
Furthermore, advanced options like ISO-based or Media Creation Tool reinstalls enable you to manage installations across multiple drives or devices, providing flexibility for dual-boot systems, second SSDs, or hardware upgrades.
Final Recommendations
For most users, the Windows 11 Installation Assistant or Recovery options via Settings offer the safest, most convenient approach to reinstall Windows 11 while keeping data intact. If you are comfortable with advanced tools, using an ISO file or Media Creation Tool provides additional control and versatility.
After reinstalling, always check for pending Windows updates and driver updates, reconnect peripherals, and verify that all essential applications are functioning correctly. Keeping software licenses, product keys, and backups ready ensures a smooth post-installation experience.
By taking these steps, you can enjoy a stable, efficient, and refreshed Windows 11 system without the fear of losing important files or disrupting your workflow. This approach gives your PC a clean, optimized environment, addressing performance issues, errors, and glitches while maintaining the integrity of your personal data.
Closing Thought
Reinstalling Windows 11 without losing files is a powerful tool for maintaining a healthy, responsive, and secure PC. With careful preparation, understanding of available methods, and attention to detail, you can give your system a fresh start without sacrificing the data that matters most.
Whether you are troubleshooting, upgrading, or simply refreshing your system, these strategies ensure that your Windows 11 experience remains seamless, efficient, and worry-free.
Visit Our Post Page: Blog Page