
Are you looking for quick ways to take screenshots on your Dell devices? Learn how to screenshot on a Dell laptop with ease.
Discover methods for full-screen, active window, and custom captures on all Dell laptops, including Windows 10, 11, and tablets.
Quick Ways to Capture Your Screen on a Dell Laptop
Knowing how to screenshot on a Dell laptop is one of those small yet essential skills that make your daily computing easier. Whether you’re capturing an error message, saving an online receipt, or creating a step-by-step tutorial, screenshots help you document and share what’s on your screen instantly.
The great news is that Dell laptops—whether running Windows 10, Windows 11, or even older versions like Windows 7—come equipped with multiple built-in ways to capture your screen. You can take a quick full-screen shot, grab only your active window, or use tools like Snipping Tool and Snip & Sketch for more control.
These built-in options eliminate the need for extra apps or software. You can use simple keyboard shortcuts, such as PrtSc, Alt + PrtSc, or Windows + Shift + S, to take screenshots in seconds. And for gamers or tutorial creators, the Xbox Game Bar (Windows + G) offers another seamless way to capture and save visuals.
In this guide, we’ll explore six proven methods to take screenshots across different Windows versions and Dell devices, including laptops, desktops, and tablets. By the end, you’ll know exactly which shortcut fits your setup, where screenshots are stored, and how to capture your screen effortlessly—no matter which Dell model or Windows version you use.
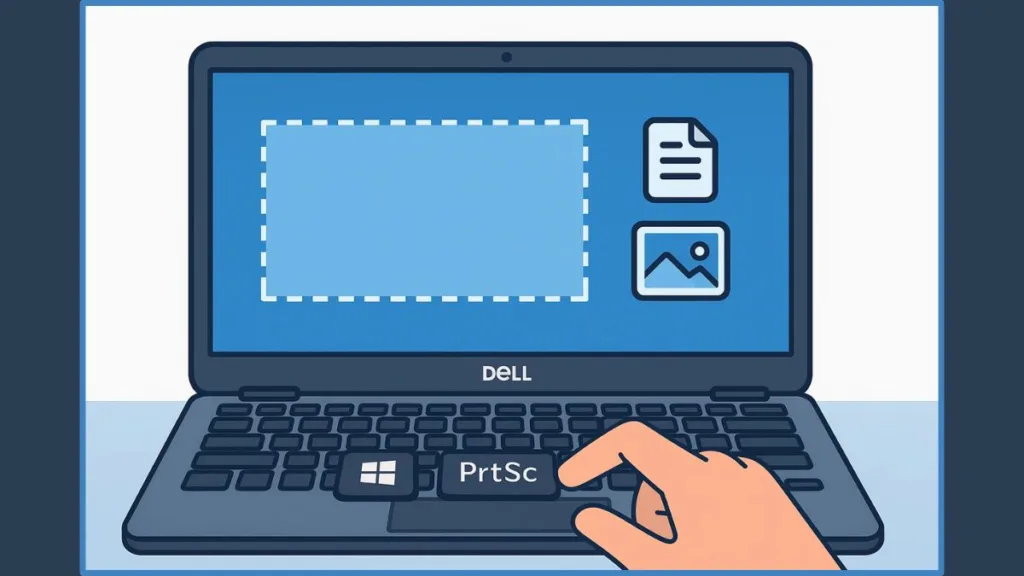
1. Capture Your Entire Screen Quickly with Windows + PrtSc Shortcut
One of the simplest and most reliable ways to capture your screen on a Dell laptop is the Windows + PrtSc shortcut. This method is ideal if you want to take a full-screen screenshot and have it automatically saved without any extra steps. It works seamlessly across Windows 10 and Windows 11, making it a go-to option for most users.
Here’s how it works:
- Locate the keys: Find the Windows key (usually at the bottom-left corner of your keyboard) and the Print Screen (PrtSc) key (typically on the top-right row). On some Dell laptops, the PrtSc key might share a function key, like F10, in which case you’ll need to hold the Fn key while pressing the combination.
- Press Windows + PrtSc simultaneously: Your screen will briefly dim to indicate that a screenshot has been taken. This small visual cue ensures you know the capture was successful.
- Access your screenshot: The image is automatically saved in the Pictures > Screenshots folder. You don’t need to open any application or paste it somewhere manually, which makes this method extremely convenient when you need to take multiple screenshots quickly.
Why this method stands out:
- It captures the entire screen, including the taskbar, open windows, and any desktop icons, so nothing is left out.
- Automatic saving eliminates the risk of losing a screenshot or forgetting to paste it somewhere.
- Works consistently on most Dell laptops, regardless of whether you’re using a traditional laptop, a 2-in-1 model, or a tablet with a keyboard attached.
Tips for best use:
- If you’re working with multiple monitors, Windows + PrtSc captures all screens in a single image. You can later crop the screenshot using Paint or Snip & Sketch if you only need a specific monitor.
- For Dell tablets or hybrid devices without a standard keyboard, you can achieve the same effect using the Windows button + Volume Down combination.
This method is especially useful for users who need quick, full-screen captures for documentation, tutorials, or saving content from multiple applications at once. It’s straightforward, efficient, and minimizes the steps required, making it a perfect starting point for anyone learning how to screenshot on their Dell laptop.
2. Use the Print Screen (PrtSc) Key to Copy Screenshots to Clipboard
Another classic and versatile method for capturing your screen on a Dell laptop is the Print Screen (PrtSc) key.
Difference Between Windows + PrtSc and PrtSc Key
Unlike the Windows + PrtSc shortcut, which saves your screenshot automatically, this method copies the entire screen directly to your clipboard, giving you the flexibility to edit, annotate, or paste it wherever you need.
Here’s how to use it effectively:
- Locate the PrtSc key: On most Dell laptops, the Print Screen key is positioned on the top-right corner of the keyboard. Some models might label it differently, such as PrtScn, PrntScr, or PrtSc, and in certain cases, it shares a function key (like F10). If that’s the case, simply hold down the Fn key while pressing PrtSc.
- Capture the screen: Press the PrtSc key once. Unlike Windows + PrtSc, the screen won’t flash or dim — the screenshot is quietly stored in the clipboard, ready to be used.
- Paste and edit: Open any application that supports images, like Microsoft Paint, Word, or Photoshop, and press Ctrl + V to paste the screenshot. From there, you can crop, annotate, highlight, or save the image in your preferred format.
Why this method is useful:
- It allows you to choose where to save your screenshot, giving you more control over naming conventions and file locations.
- Perfect for situations where you need to edit or combine multiple screenshots before saving.
- Works across all Windows versions, including Windows 7, 8, 10, and 11, making it a universal option for any Dell device.
Tips for a smoother experience:
- For active window captures, combine it with Alt + PrtSc to copy only the window you’re working in, rather than the full desktop.
- If your Dell laptop lacks a dedicated PrtSc key (common in some compact keyboards or wireless models), you can use Fn + Insert to perform the same function.
This method gives you flexibility and control, making it ideal for users who want to edit or manage their screenshots before saving, rather than relying on automatic storage. It’s a foundational skill that pairs well with more advanced tools like Snipping Tool or Game Bar.
3. Take a Screenshot of the Active Window with Alt + PrtSc
Sometimes, you don’t need a full-screen screenshot — perhaps you only want to capture a single application window without including your desktop, taskbar, or other open apps. That’s where the Alt + PrtSc shortcut becomes invaluable. This method is specifically designed to grab only the active window, making your screenshots cleaner and more focused.
Here’s how to make the most of it on your Dell laptop:
- Select the window: Click on the window you want to capture so it’s active. This could be a browser, a document, or any program you’re working in. The shortcut captures whatever window is in focus at that moment.
- Press Alt + PrtSc: Hold down the Alt key and press PrtSc simultaneously. Unlike the Windows + PrtSc method, the screenshot is copied to the clipboard rather than being automatically saved. You won’t see the screen dim; the capture happens quietly in the background.
- Paste into an application: Open an app that supports image pasting — Paint, Word, or even an email client — and press Ctrl + V to insert the screenshot. From here, you can edit, annotate, crop, or save the image wherever you like.
Why use Alt + PrtSc:
- Captures only the active window, avoiding unnecessary clutter from the desktop or other apps.
- Ideal for documenting error messages, application interfaces, or forms without extra distractions.
- Works consistently across different Windows versions (Windows 7 through Windows 11) and on virtually all Dell laptops.
Tips for better results:
- If your PrtSc key shares a function with another key, like F10, you might need to press Fn + Alt + PrtSc to trigger the screenshot.
- Combine this method with Paint or Snipping Tool for further editing, such as adding arrows, highlights, or notes.
- For multi-monitor setups, this method captures only the active window on the current screen, which is perfect if you don’t want a snapshot of all displays at once.
The Alt + PrtSc shortcut is a lightweight, precise, and efficient way to capture exactly what you need. It’s especially useful for professionals or students who want clean, focused screenshots for reports, tutorials, or presentations.
By mastering this method, you can ensure your screenshots are always relevant and visually organized.
4. Customize Your Screenshot Using Snipping Tool or Snip & Sketch (Windows 10 & 11)
For users who want more control and flexibility over their screenshots, the Snipping Tool (or Snip & Sketch in newer Windows versions) is a fantastic option. Unlike traditional keyboard shortcuts that capture the full screen or an active window, this tool lets you select exactly what you want to capture — whether it’s a small section, a single window, or the entire screen. It’s perfect for creating tutorials, presentations, or detailed guides.
Here’s how to use it effectively on a Dell laptop running Windows 10 or Windows 11:
- Open the tool: Press Windows + Shift + S. This opens the snipping overlay, dimming your screen slightly and giving you immediate access to the capture options.
- Choose a snip type: At the top of the screen, select one of the four options:
- Rectangular snip: Draw a rectangle around the area you want to capture.
- Free-form snip: Draw any custom shape for a more creative or precise capture.
- Window snip: Click a specific window to capture it alone.
- Full-screen snip: Take a screenshot of the entire display, similar to the traditional PrtSc method.
- Capture and edit: Once the area is selected, the screenshot is copied to your clipboard. You’ll often see a small notification in the corner — click it to open the screenshot in Snip & Sketch for editing. Here, you can annotate, crop, highlight, or add notes before saving.
- Save your screenshot: Use the Save As option to store your image in your preferred location. You can choose formats like PNG, JPEG, or GIF depending on your needs.
Why this method is useful:
- Offers precision, letting you capture exactly what you need without extra clutter.
- Ideal for detailed work, such as highlighting specific areas in a document or creating visual guides.
- Provides built-in editing tools, so you don’t need a separate image editor for basic adjustments.
Tips for a smoother experience:
- Practice using keyboard shortcuts within the Snipping Tool, like Alt + M to quickly switch modes.
- If you frequently take screenshots, pin Snip & Sketch to your taskbar for faster access.
- Combine this method with Alt + PrtSc for a mix of targeted captures and active window shots.
Using Snipping Tool or Snip & Sketch gives you full control over your screenshots, making it an indispensable method for anyone who wants accuracy, flexibility, and editing capability on a Dell laptop.
5. Capture Gaming Screens or Tutorials with Xbox Game Bar (Windows + G)
For those who want to take screenshots while gaming, creating tutorials, or recording software demonstrations, the Xbox Game Bar offers a robust and convenient solution. Unlike traditional methods that focus solely on static screen captures, the Game Bar is designed to seamlessly integrate with Windows 10 and 11, providing both screenshot and screen recording functionality in one tool.
Here’s how to make the most of it on your Dell laptop:
- Open the Game Bar: Press Windows + G to launch the Game Bar overlay. A set of widgets will appear, including performance metrics, audio controls, and capture options. This overlay works even when you’re in full-screen mode, which makes it ideal for gaming or video tutorials.
- Take a screenshot: Click the camera icon in the Capture widget to snap a screenshot instantly. Alternatively, you can use the shortcut Windows + Alt + PrtSc to capture your screen without opening the overlay manually.
- Access your captures: Screenshots and recorded clips are automatically saved under Videos > Captures. This default folder keeps all media organized and easy to access. You can also change the storage location in Game Bar settings if you prefer a custom folder.
- Annotate or edit: While the Game Bar itself doesn’t provide advanced editing tools, you can open the saved images in apps like Paint, Paint 3D, or Photoshop for annotation, cropping, or highlighting. This makes it a flexible option for both casual and professional use.
Why this method stands out:
- Perfect for gamers or anyone creating instructional videos, as it works seamlessly with full-screen apps.
- Allows both screenshots and video recording from the same interface, making content creation more streamlined.
- Provides quick access to recent captures and organizes them automatically, so you don’t have to worry about losing your files.
Tips for better use:
- Enable the background recording feature if you want to capture spontaneous moments in games without manually starting a recording.
- Customize shortcuts in the Game Bar settings for faster access to screenshot, record, and mic controls.
- Use this method in combination with Snipping Tool for highly precise or annotated images when necessary.
The Xbox Game Bar is more than just a gaming tool — it’s a powerful, all-in-one capture solution for Dell users who want both speed and flexibility. Whether you’re documenting gameplay, preparing tutorials, or capturing software demonstrations, this method ensures your screenshots are high-quality, organized, and ready for use immediately.
6. Using Windows Button + Volume Down (For Dell Tablets)
For Dell users with tablet or 2-in-1 devices, capturing screenshots requires a slightly different approach than traditional laptops. The Windows button + Volume Down combination provides a quick and intuitive way to snap your screen without needing a keyboard. This method is especially useful when you’re using your device in tablet mode, away from a desk, or on the go.
Here’s a step-by-step guide:
- Locate the buttons: On most Dell tablets or hybrid devices, you’ll find the Windows logo button at the front or side of the tablet. The volume buttons are typically on the edge of the device. Make sure you can press both simultaneously.
- Press Windows + Volume Down: Hold both buttons together briefly. You’ll notice the screen flash or dim momentarily, indicating that a screenshot has been captured. This instant visual feedback confirms that the action was successful.
- Find your screenshot: Unlike the standard Print Screen key, this method automatically saves the image to your Pictures > Screenshots folder. From here, you can open it, edit it, or share it directly without any additional steps.
- Edit or annotate if needed: Open the screenshot in built-in apps like Photos or Paint 3D to crop, highlight, or annotate the image. This makes it perfect for quickly capturing and sharing information, whether it’s a form, an error message, or a webpage.
Why this method works well for tablet users:
- It’s fast and effortless, requiring only two buttons.
- No need for an external keyboard or extra software, making it ideal for mobility.
- Works consistently across Dell 2-in-1 devices and touch-screen tablets running Windows 10 or 11.
Additional tips for tablet captures:
- If you’re holding the device with one hand, make sure your grip doesn’t press other buttons accidentally, as this can alter the screen or trigger other functions.
- For longer or scrolling content, consider taking multiple screenshots and stitching them together in editing apps.
- Combine this method with apps like Snip & Sketch for more precise or custom-area captures when needed.
Using Windows + Volume Down makes screenshotting on Dell tablets simple, immediate, and reliable. Whether you’re working remotely, attending online classes, or capturing quick reference materials, this method ensures your screenshots are saved automatically and ready for use without any extra steps.
What To do When Screenshot Isn’t Working on Dell Laptop
Even though Dell laptops offer a variety of built-in screenshot methods, sometimes things don’t go as planned. If your screenshot isn’t working, it can be frustrating, especially when you need to capture something urgently. Fortunately, most issues are easy to identify and fix with a few practical steps.
Here’s a detailed troubleshooting guide:
- Check the Print Screen key: On many Dell laptops, the PrtSc key may share a function with another key, like F10, or might require the Fn key to work. Try pressing Fn + PrtSc or Alt + Fn + PrtSc depending on the shortcut you’re using.
- Verify clipboard functionality: When using methods like PrtSc or Alt + PrtSc, the screenshot is copied to the clipboard. Open an application like Paint or Word, and press Ctrl + V to see if the image appears. If nothing pastes, your clipboard may not be functioning correctly. Restarting your laptop can often resolve temporary clipboard issues.
- Update keyboard drivers: Outdated or missing drivers can prevent certain keys from working. Go to Device Manager > Keyboards, right-click your keyboard, and select Update driver. This ensures your PrtSc and function keys operate correctly.
- Check Windows settings: Some Windows settings, like Game Mode or keyboard shortcuts conflicts, can interfere with screenshots. Make sure that Windows shortcuts are enabled and that no other apps are overriding your key combinations.
- Use alternative tools: If the built-in shortcuts still don’t work, try Snipping Tool (Windows + Shift + S) or Xbox Game Bar (Windows + G). These tools bypass the PrtSc key entirely and offer reliable capture options.
- Consider third-party applications: Apps like Snagit, Lightshot, or Markup Hero provide additional features, such as delayed captures, annotation, and cloud saving. They are especially useful if you frequently run into screenshot issues or need advanced editing tools.
- Tablet-specific issues: For Dell tablets, make sure you’re pressing Windows + Volume Down correctly. Holding the buttons too long or pressing at slightly different times can prevent the screenshot from registering.
Pro Tips for Smooth Screenshot Experience:
- Always check which key combinations your Dell model requires, especially if you have a 2-in-1 or wireless keyboard.
- If using multiple monitors, ensure you’re capturing the active screen or using full-screen shortcuts for all displays.
- Restarting the laptop after updates can resolve hidden conflicts that block screenshot functionality.
By following these steps, most users can quickly identify and fix the problem, ensuring that capturing screenshots on a Dell laptop or tablet becomes effortless and reliable again.
Where Are Screenshots Saved on Dell Laptop? File Locations and Tips
Once you’ve captured a screenshot, the next question is often: where did it go? Understanding where screenshots are saved on your Dell laptop makes it easier to access, edit, and share them without hunting through folders.
Here’s how it works depending on the method you used:
- Windows + PrtSc (Auto-Save Full Screen): Screenshots taken with Windows + PrtSc are automatically saved in the Pictures > Screenshots folder. This ensures that every image is organized in one place, making it easy to find and manage.
- PrtSc or Alt + PrtSc (Clipboard-Based Capture): Screenshots captured with PrtSc or Alt + PrtSc aren’t saved automatically. Instead, they are copied to your clipboard. To save them:
- Open an application like Paint, Word, or Photoshop
- Press Ctrl + V to paste the screenshot
- Use Save As to store the image in your preferred location
- Snipping Tool / Snip & Sketch: When using Windows + Shift + S, your screenshot is initially copied to the clipboard, and a small preview notification may appear. Click it to open the screenshot in Snip & Sketch, where you can annotate, crop, or save to any folder on your device.
- Xbox Game Bar (Windows + G): Screenshots taken with the Game Bar are automatically saved under Videos > Captures. This keeps all screenshots and recorded clips together for easy access.
- Dell Tablets (Windows + Volume Down): Screenshots captured on Dell tablets are automatically stored in the Pictures > Screenshots folder, similar to the Windows + PrtSc method. You can open them directly from the Photos app or file explorer.
Tips for managing your screenshots:
- Rename files immediately after saving to make them easy to locate later.
- Create a dedicated Screenshots folder if you take a lot of captures.
- For frequent editing, open screenshots in Paint 3D or Snip & Sketch to annotate before saving.
Knowing where your screenshots are stored saves time and ensures that all your captures are organized, accessible, and ready for use — whether for work, tutorials, or sharing with others.
FAQ: Common Questions About Screenshots on Dell Laptops
Q1: How do you take a screenshot on a Dell laptop without the Print Screen button?
You can use Snipping Tool (Windows + Shift + S), Xbox Game Bar (Windows + G), or, on tablets, Windows + Volume Down. These methods work even if your keyboard lacks a dedicated PrtSc key.
Q2: What is the shortcut key for a screenshot on a Dell laptop?
- Full screen: Windows + PrtSc
- Active window: Alt + PrtSc
- Custom area: Windows + Shift + S (Snip & Sketch)
Q3: Where are screenshots saved on Dell laptops?
- Windows + PrtSc or tablet capture: Pictures > Screenshots
- Clipboard captures (PrtSc/Alt + PrtSc): Paste into Paint, Word, or another app and save manually
- Xbox Game Bar: Videos > Captures
Q4: How do I use the Snipping Tool on a Dell laptop?
Press Windows + Shift + S, choose a snip type (rectangular, free-form, window, or full screen), capture your selection, then edit or save in Snip & Sketch.
Q5: Why is my screenshot not working on a Dell laptop?
Common issues include needing the Fn key for PrtSc, clipboard errors, outdated keyboard drivers, or conflicts with other software. Restarting your device or using Snip & Sketch often resolves the problem.
Conclusion: Choose the Screenshot Method That Fits Your Need
Capturing your screen on a Dell laptop or tablet has never been easier, thanks to the variety of built-in tools and shortcuts available. Whether you need a quick full-screen capture, a focused active window, or a custom area for detailed tutorials, there’s a method to match every scenario.
- Use Windows + PrtSc for automatic full-screen captures that save instantly.
- Rely on PrtSc or Alt + PrtSc when you want control over where and how to save your screenshot.
- Turn to Snipping Tool or Snip & Sketch for precision and editing capabilities.
- Gamers and tutorial creators can benefit from Xbox Game Bar, which combines screenshots and video recording seamlessly.
- Tablet users can capture the screen effortlessly with Windows + Volume Down, ensuring portability doesn’t limit functionality.
By understanding the strengths of each method, you can choose the right approach based on your workflow. For everyday tasks, a simple keyboard shortcut may be all you need. For detailed guides, tutorials, or annotated captures, tools like Snip & Sketch or Game Bar offer greater flexibility.
The key takeaway is this: your Dell device already has everything you need to capture your screen efficiently. Experiment with these options, find the ones that feel most comfortable, and you’ll always be ready to capture, edit, and share exactly what’s on your screen — quickly, cleanly, and confidently.
Screenshots are more than just images; they’re a powerful tool to communicate, document, and create, and mastering these methods ensures you can leverage your Dell laptop or tablet to its fullest potential.
Visit Our Post Page: Blog Page