
Wondering how to start scheduling text messages on iPhone? Let’s walk through how to send a scheduled text on iPhone using Apple’s latest Send Later feature.
What Is a Scheduled Text on iPhone? (Understanding iPhone Text Scheduling)
Ever wished you could send a message later — not right away, but at exactly the right time — without having to stay awake, set reminders, or risk forgetting? That’s exactly what a scheduled text on iPhone is all about.
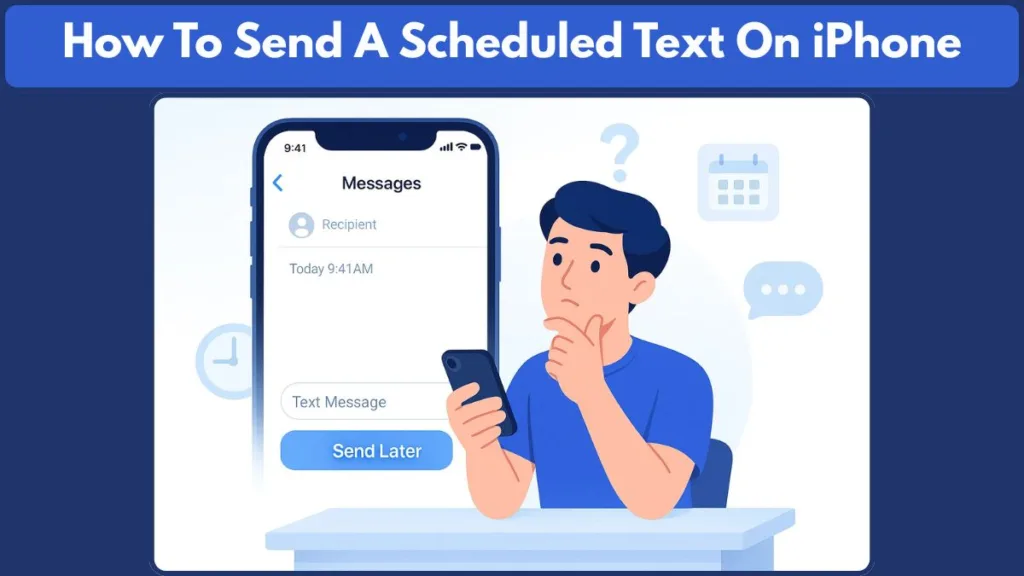
Thanks to iOS 18, Apple has finally added native message scheduling inside the built-in Messages app. No need for third-party apps or complicated workarounds.
What “Scheduled Text” Means on iPhone
A scheduled text is simply a message you write now — but instruct your iPhone to send at a specific date and time in the future. It’s perfect if you want to:
- Send birthday or anniversary wishes at midnight.
- Remind someone later without forgetting.
- Send work messages during office hours even if you write them now.
- Avoid late-night messages but still schedule them.
With the new scheduling option, you draft the message now, pick the time later, and your iPhone handles it automatically.
Why It Matters (and What Changed with iOS 18)
The scheduling feature was long overdue, especially for people who use messaging not just casually but for planning, reminders, or time-sensitive communication. Here’s what changed with iOS 18:
- The feature is built directly into Messages — no extra apps needed.
- You can schedule up to 14 days ahead.
- Once scheduled, the message is stored securely on Apple servers (encrypted), so you don’t need your iPhone turned on or connected at the delivery moment.
- Your recipient doesn’t need anything special — they’ll receive it like any normal message. They won’t see that it was scheduled.
Behind the Scenes: iMessage, Encryption, and Delivery
When your iPhone schedules a message, it doesn’t rely on your device being active at the send time. Instead:
- The message is encrypted and saved on Apple’s servers until it’s due.
- When the time arrives, Apple handles the delivery, so even if your phone is off or without signal, the message will still be sent.
- This makes scheduling reliable, secure, and hassle-free, unlike third-party methods that require your phone to be online.
Because it uses iMessage, Apple’s encrypted messaging system, the entire process remains smooth, private, and dependable.
iPhone Scheduled Text Limitations: What You Can and Can’t Do
Before you get too excited about the convenience of scheduled texting, it’s smart to understand what the feature handles well — and where it simply doesn’t work.
Knowing these iPhone scheduled text limitations helps set the right expectations.
What You Can Do with iPhone Scheduled Messages
Using the built-in scheduling option gives you a lot of advantages that make messaging more flexible and stress-free:
- You can schedule a message to be sent at a future date and time, up to 14 days ahead.
- Once scheduled, the message is securely stored on Apple’s servers, encrypted until delivery — meaning your text is safe while it waits.
- The delivery doesn’t depend on your phone being active at the send time. Even if your iPhone is off or offline, the message will still send when the scheduled time arrives.
- Scheduled messages work within both personal chats and group conversations, as long as it’s through iMessage.
These features make scheduling ideal for planned reminders, thoughtful messages, birthday wishes, and more — without worrying about staying awake or remembering to manually send.
What You Can’t Do with iPhone Scheduled Messages
Even though Apple has added the feature natively, there are still a few things that the iPhone scheduled text system doesn’t support yet:
- The scheduling function works only with iMessage (blue bubbles). It doesn’t support SMS or MMS — so if your recipient is using a non-Apple device, the Send Later option won’t appear.
- You can only schedule messages up to 14 days in advance. That means it’s not a solution for long-term planning or messages set months ahead.
- There’s no native option for recurring scheduled messages — you can’t set a text to go out daily, weekly, or monthly automatically.
- While standard text and basic media attachments work, certain advanced features such as audio messages, location sharing, or safety check-ins cannot be scheduled.
These limitations don’t make the feature unusable — instead, they help you understand when it’s the right tool for the job. For quick, timely, or thoughtful messages, scheduled texts work beautifully. For more advanced needs, other tools may be better suited.
Why These Limitations Exist
Apple’s design choices around scheduled texts are shaped by security, privacy, and infrastructure considerations:
- Scheduling relies on Apple’s encrypted iMessage system, which does not extend to carrier-based SMS/MMS.
- The 14-day limit keeps scheduled messages stored only temporarily on Apple servers, aligning with privacy and data-retention practices.
- Restrictions on recurring schedules and certain message types help prevent misuse and ensure predictable system behavior.
How to Schedule a Text on iPhone (iOS 18 and Later)
With iOS 18, Apple finally made it easy to schedule a text on iPhone without relying on extra apps or complicated shortcuts. Everything lives inside the Messages app, and the process is straightforward enough that you can set up a scheduled message in just a few taps.
Whether you’re planning ahead for a birthday greeting, sending a reminder at the perfect moment, or avoiding late-night texts, the built-in Send Later tool gives you full control over the timing of your message.
Step-by-Step Guide to Send a Scheduled Text on iPhone
Here’s how the scheduling flow works on devices running iOS 18 or later:
- Open the Messages app on your iPhone.
- Pick an existing chat or tap the compose button to start a new one.
- Write your message, then open the scheduling menu. Depending on your interface, you can either tap the plus (+) symbol or press and hold the send arrow to reveal Send Later.
- When the time picker appears, choose the exact date and time you want your message delivered (up to 14 days ahead).
- Tap Send to confirm your scheduled text.
Once you complete these steps, your iPhone takes over — holding the message securely and sending it exactly when you asked. This gives you a smooth, built-in way to use iPhone text scheduling without needing to be online or available at the scheduled moment.
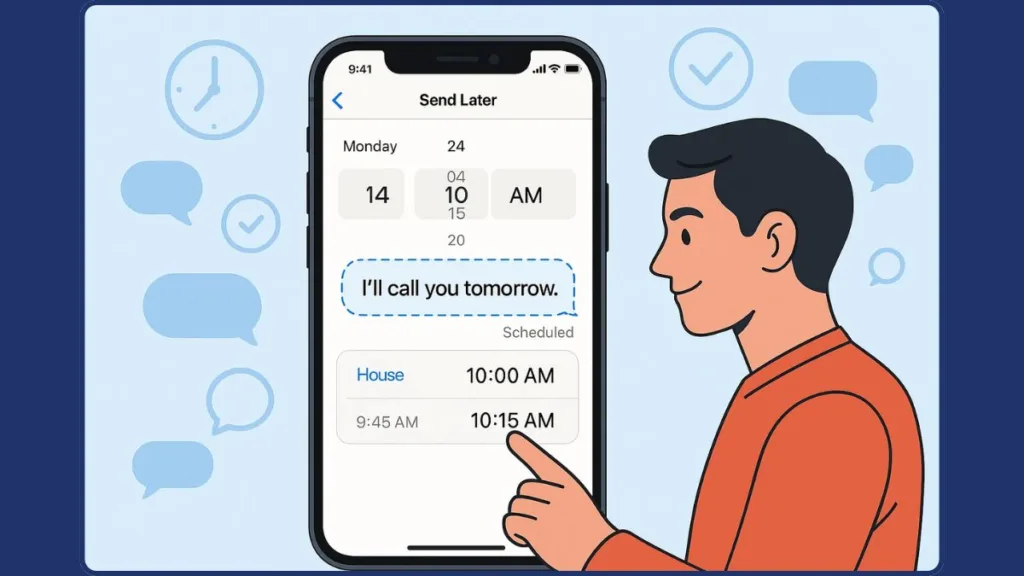
How Scheduled iMessages Look Before Sending
Before the delivery time arrives, scheduled messages display a few visual cues to help you stay organized:
- The message appears with a dashed outline, separating it from regular sent messages.
- A small timestamp sits above the bubble, showing when the message will go out.
- If you decide to add more messages afterward, the compose field may show a subtle indicator reminding you that you’re currently in scheduled message mode.
These design elements make it easy to spot future messages in your conversation and double-check that everything is set up correctly.
Important Tips for Using the iOS 18 Scheduler
- The Send Later feature only appears when your device is running iOS 18 or higher, so updating your phone is essential if you don’t see the option.
- Scheduled messages are delivered through Apple’s servers, ensuring they send even if your iPhone is offline or powered off at the scheduled moment.
- This feature works in both one-on-one chats and group conversations, as long as the conversation uses iMessage.
- If your plans change, you can still edit, reschedule, or delete a scheduled message before its send time, giving you complete control over your communication.
How to Edit, Change, or Delete a Scheduled Text Message on iPhone
Once you’ve scheduled a message using the built-in scheduling feature on iPhone, you don’t lose control — you can still tweak the plan before the message is sent. If you want to change the timing, modify the message content, or cancel it altogether, the tools in iOS 18 let you manage all that easily.
Here’s exactly how to handle those adjustments in the Messages app, step by step.
How to Reschedule a Scheduled Text on iPhone
If your plans change and you need the message to go out at a different time, you can update it before it delivers:
- Open Messages and go to the conversation that contains your scheduled message. Scheduled texts often appear at the bottom of the thread under previous messages.
- Find the scheduled message — look for a timestamp or Send Later note above the dashed message bubble.
- Tap Edit, then select Edit Time.
- Choose the new date and time using the picker, then tap outside the picker to save the update.
- If you prefer to send the message immediately, you can tap Send Message instead.
This rescheduling option makes sure you can adjust your plans flexibly without having to rewrite the message.
How to Edit a Scheduled iMessage Before It Sends
If you want to change the text itself — maybe correct a typo, refine your wording, or add last-minute details — editing is quick and simple:
- Open the conversation with the scheduled message.
- Press and hold the scheduled message bubble, then choose Edit from the menu.
- Update your text.
- Tap Send Edit to confirm, or choose Cancel Edit to keep your original version.
This feature is especially helpful when you remember something important after scheduling or want to personalize the message further.
How to Delete a Scheduled Text on iPhone
If the message is no longer needed or you decide not to send it, you can remove it before it goes out:
- Open the conversation and locate the scheduled bubble. If you don’t see it immediately, scroll down, as scheduled texts may appear beneath earlier messages.
- Press and hold the scheduled bubble to bring up the menu.
- Tap Delete. The message is canceled instantly and will not be delivered.
This gives you complete control if circumstances change or the message becomes unnecessary.
Why These Editing Tools Matter
The ability to reschedule, edit, or delete a scheduled text ensures that iPhone text scheduling adapts to your needs. Instead of locking you into a plan, these tools keep the feature flexible and practical for real-life scenarios:
- Need to fine-tune your wording? Use Edit.
- Timing changed? Select Edit Time.
- Message no longer relevant? Tap Delete.
With these controls, sending a scheduled text on iPhone becomes both convenient and confidently adjustable — right up until the moment it’s delivered.
How to Schedule a Text on iPhone Without iOS 18 (Shortcuts Method)
If your iPhone isn’t running iOS 18 yet — or you want to send a scheduled text to someone who doesn’t use iMessage — the Shortcuts app offers a helpful workaround. With Shortcuts, you can automate sending a text at a specific time, including to Android users, and even set up recurring schedules if needed.
Think of this method as creating a small automation: you tell your iPhone when to send, what to say, and who to send it to — and it handles the rest. If configured correctly, it works reliably regardless of whether the built-in Send Later feature is available.
How to Schedule Text Messages on iPhone Using Shortcuts (iOS 13–17)
- Open the Shortcuts app on your iPhone.
- Go to the Automation tab at the bottom.
- Tap New Automation or the plus (+) icon to start a new workflow.
- Select Time of Day as your trigger, then set the exact date and time. You can run it one time or choose daily, weekly, or monthly repetition.
- Tap Next, then choose Add Action → Send Message.
- Enter your message text and set the recipient.
- Turn off options like Ask Before Running so the automation sends your message automatically.
- Tap Done to save the automation.
Once saved, your iPhone will send the message automatically at the time you selected. This is the simplest way to schedule a text on older versions of iOS.
Why the Shortcuts Method Helps iPhone Users
Using Shortcuts gives you several advantages that the built-in scheduler doesn’t offer:
- You can send scheduled messages to Android recipients through SMS, not just iMessage.
- You can create recurring scheduled messages, perfect for reminders or ongoing communication.
- You aren’t limited by the built-in 14-day scheduling window.
- You can use this method on devices running iOS 13 through iOS 17, making it widely accessible.
These features make the Shortcuts method a dependable and flexible option when native scheduling isn’t available.
Important Considerations and Limitations of Shortcuts Scheduling
While Shortcuts expands what you can do, there are a few things to keep in mind:
- The automation sends texts via your device, so you need a cellular connection at the exact scheduled time.
- Recurring automations will continue to send until you manually delete or disable them.
- If Ask Before Running is enabled, your iPhone will not send the message automatically.
- Shortcuts scheduling works best for plain text messages — media attachments, voice notes, or advanced features may not send properly.
When to Use Shortcuts Over Built-In Scheduling
The Shortcuts method is the ideal choice when:
- You need to schedule SMS messages to non-iMessage contacts.
- You want repeated or recurring messages.
- Your iPhone is running an older version of iOS that doesn’t support native scheduling.
- You prefer granular control over automated message timing.
Shortcuts gives you a powerful alternative for iPhone text scheduling, especially when your device or your message type falls outside the boundaries of iOS 18’s built-in tools.
How to Use the Reminders App to “Schedule” a Text Manually
If you want a simple, no-automation way to prepare a message and remember to send it at the right moment, the Reminders app on iPhone is a surprisingly useful fallback. It doesn’t send the message itself — but it helps you remember exactly when to send a text, serving as a manual scheduling tool when native scheduling or automation isn’t the right fit.
Here’s how using Reminders for a manual scheduled text works, and why it still matters.
Using Reminders to Prepare Your Message Ahead
The Reminders app is built to help you manage tasks and notifications. You can combine that with message preparation to ensure you never forget to send an important text.
Here’s the step-by-step flow:
- Open Reminders on your iPhone.
- Tap New Reminder.
- In the reminder’s title or notes field, type out the full text message you plan to send later.
- Set a due date and time for when you want the reminder to alert you.
- (Optional) Add a label or specify which contact it’s for so you know exactly who the message is meant for.
- When the reminder alert arrives, open the reminder, copy the prepared text, open the Messages app, paste the text, and send manually.
Why This Manual “Schedule-Then-Send” Method Still Helps
Even though it’s not automatic, using Reminders this way offers several benefits:
- It works on any iPhone version, regardless of whether you have iOS 18 or automation tools available.
- You receive a time-based alert, so you don’t need to rely on memory alone.
- You have complete control over the final message, allowing last-minute edits or personalization.
- It’s compatible with all recipients, including iMessage, SMS, and Android contacts.
- It requires no automation, no Shortcuts setup, and no additional apps — just a simple built-in tool doing what it does best.
Because Reminders is lightweight and universally available on iPhone, this method is perfect for quick, reliable planning without needing to dive into more complex scheduling features.
When the Reminders Trick Makes the Most Sense
The Reminders-based method is especially helpful when:
- You want to review or edit your message before sending.
- You’re texting someone who does not use iMessage, and built-in scheduling can’t be used.
- Your device is running an older version of iOS or you prefer to avoid automation tools.
- You simply want an easy way to remember time-sensitive texts, such as event reminders, birthday messages, or follow-ups.
This approach keeps things manual yet structured — ensuring you stay organized and never miss sending an important message.
Troubleshooting Scheduled Texts on iPhone (Common Fixes)
Even though iPhone text scheduling works well most of the time, sometimes things don’t go as planned. Whether the schedule fails, the option disappears, or automation acts up — knowing what to check can save you time and frustration. Here’s a detailed look at common issues and how to fix them.
Common Issue: Scheduled Text Didn’t Send on Time
If your scheduled message didn’t deliver at the target time — or never showed up at all — try these checks:
- Confirm the chat was using iMessage (blue bubbles). The built-in scheduling feature works only with iMessage and doesn’t support SMS or MMS.
- Check whether the message still had its scheduled timestamp and dashed-bubble indicator before the send time. If these visual markers disappear, the schedule is no longer active.
- Ensure your iPhone had a stable internet connection when you first scheduled the message, as some scheduling issues can occur if connectivity is poor during setup.
- If using a Shortcuts automation, confirm your device had cellular service at the scheduled moment, since SMS requires carrier signal.
- Look for a “Not Delivered” warning next to the message, which may include a retry or resend option.
If the message still didn’t go out, scheduling it again is often the quickest fix.
Issue: “Send Later” Option Not Appearing in Messages
If the Send Later button is missing when trying to schedule a text, check the following:
- Make sure your iPhone is updated to iOS 18 or later, since older versions do not support built-in scheduling.
- Verify that the conversation is using iMessage — the option won’t appear for green-bubble SMS threads.
- Restart the Messages app or your iPhone to resolve minor glitches that can hide menu options.
- Confirm that iMessage is enabled and properly activated in Settings.
These checks usually restore the Send Later option when it should be available.
Issue: Scheduled Message Sent at the Wrong Time
If your message went out earlier or later than expected:
- Double-check your iPhone’s date and time settings, especially after traveling between time zones.
- Review the scheduled time to ensure the correct day, hour, and AM/PM were selected.
- For automations, confirm you didn’t choose a recurring schedule when you intended a one-time send.
A quick review of the time settings often resolves these issues.
Issue: Automation (Shortcuts) Keeps Sending Repeated Messages
If Shortcuts keeps sending your scheduled text repeatedly:
- Go to Shortcuts > Automation and check whether the schedule is set to daily, weekly, or monthly. Disable or delete the automation if it was meant to run only once.
- Make sure Ask Before Running is turned off; otherwise, prompts may occur or the automation may behave unexpectedly.
- Delete the automation after its first run to avoid unintended repeats.
Managing automations carefully helps prevent repeated or unintended messages.
Issue: Scheduled Message Bubble or Timestamp Disappeared Early
If the dashed bubble or timestamp vanishes before the planned send time:
- The message may have been sent early if Send Now was tapped accidentally.
- Editing the message incorrectly can cancel the schedule.
- System refreshes or message thread updates (such as after a system restart) may clear the scheduled indicator.
If this happens, recreate the scheduled message to restore it.
General Good Practices to Avoid Scheduling Issues
- Schedule messages when you have a stable internet connection to ensure they sync correctly.
- Use blue-bubble iMessage threads for native scheduling.
- Review date and time selections before finalizing.
- Remove Shortcuts automations after one-time sends.
- Keep your iPhone updated to the latest iOS version to benefit from bug fixes and stability improvements.
Following these guidelines will help ensure your scheduled text messages on iPhone deliver smoothly and reliably.
Conclusion: Mastering iPhone Text Scheduling for Better Communication
Getting comfortable with iPhone text scheduling transforms how you manage your messages — it’s more than just a convenience; it helps you communicate smarter and more thoughtfully. With iOS 18 bringing the Send Later feature directly into the Messages app, scheduling texts has never been easier or more reliable.
Why iPhone Scheduling Elevates Your Messaging Game
- You can plan ahead: scheduling lets you write a message now and have it delivered at exactly the right moment — whether it’s a birthday wish, a reminder, or a timely follow-up.
- It’s reliable: scheduled messages are securely stored on Apple’s servers until delivery. That means even if your iPhone is offline or switched off when the time comes, the message still goes out.
- You stay flexible: built-in scheduling works with iMessage, automation tools (like Shortcuts) offer options like recurring messages or SMS, and even a simple note in Reminders can help you stay on track — giving you a full suite of choices depending on what you need.
Picking the Right Tool — Based on the Situation
- Use the native Send Later in Messages when working within iMessage and you want a quick, clean schedule.
- Use Shortcuts automation when you need to message non-iPhone contacts (SMS) or want recurring sends.
- Use Reminders when you prefer a manual, controlled approach — good when you want to draft ahead but still review before sending.
Scheduling = More Thoughtful, Less Stressful Communication
With these scheduling tools, you’re not rushing last-minute messages. You’re able to:
- Avoid late-night texts that might disturb someone
- Respect different time zones when messaging friends or colleagues abroad
- Make sure important reminders and follow-ups land on time — even if you’re busy
In short: setting up a scheduled message turns texting from a reactive task into a planned, intentional act.
Helpful Resources: Scheduling Text Messages on iPhone
Apple Support – Official Guide to “Send Later”: Apple’s step-by-step documentation walks you through the built-in Send Later feature in iOS 18, how scheduled messages behave, and what limitations you should expect.
Edit or Unsend Messages on iPhone (Supports Scheduled Edits):T his page covers Apple’s official instructions for editing messages, which also applies when you’re updating a scheduled message before it sends.
Apple Support – Using the Shortcuts App: For users scheduling messages on older iPhones, this official page helps you understand how automations and Shortcuts work
Visit Our Post Page: Blog Page