
Want to set up Apple Pay on your iPhone quickly? Our step-by-step guide for iOS 26 shows you how to add cards, link banks, and enable secure payments in under 2 minutes.
If you want a faster, safer way to pay without carrying physical cards, setting up Apple Pay on your iPhone is the best solution. It turns your device into a secure contactless payment tool that works in stores, apps, and online.
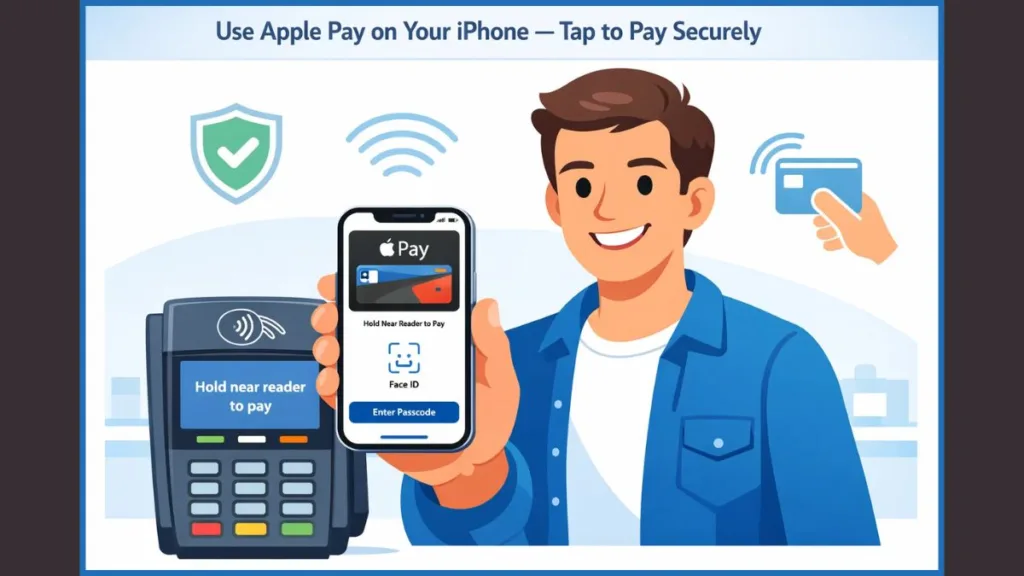
Once set up, paying with your phone is effortless. You can use it while buying groceries, booking cabs, or paying utility bills without typing card details repeatedly. More importantly, because Apple Pay uses tokenization (protecting your real card number) and the dedicated Secure Enclave chip, it is significantly safer than swiping a physical card.
This guide walks you through everything—from understanding the underlying technology to configuring it on iOS 26, managing your cards, viewing transaction history, and fixing specific setup errors.
What Is Apple Pay and How Does Contactless Payment Work?
Apple Pay is a digital payment system that replaces your physical debit or credit card with a digital token stored on your iPhone. It operates through the Apple Wallet app and uses Near Field Communication (NFC) to transmit payment data wirelessly.
The Security Behind the Tap: Tokenization and Biometrics
When you pay with Apple Pay, the security is multilayered:
- Tokenization: Your real card number is never stored on the device or shared with merchants. Instead, Apple assigns a unique “Device Account Number” to your phone.
- Dynamic Security Codes: Unlike a physical card’s static CVV code, every Apple Pay transaction generates a unique, one-time dynamic security code.
- Biometric Authentication: You must authorize every payment with Face ID, Touch ID, or your device passcode. This means even if your phone is stolen, the thief cannot use your wallet.
Apple Pay works in everyday locations—supermarkets, pharmacies, petrol stations, and cafés—anywhere you see the contactless payment symbol or the Apple Pay logo.
How to Configure and Enable Apple Pay on iPhone (iOS 26)
Setting up Apple Pay on an iPhone running iOS 26 is straightforward. The new operating system uses advanced machine learning to make card recognition faster than ever.
Prerequisites: Essential Requirements Before You Start Apple Pay Setup
Ensure you have the following ready to avoid setup failures:
- An iPhone (iPhone 12 or newer) updated to iOS 26.
- An active Apple ID (iCloud) signed in on your device.
- A supported debit, credit, or prepaid card from a participating issuer.
- Face ID or Passcode enabled (Apple Pay requires a secured device to function).
- A stable internet connection (Wi-Fi or Cellular) for the initial bank verification.
Note: On the new iPhone 17 and iPhone Air, the setup process utilizes the improved Neural Engine for instant card verification.

Method 1: Adding a Credit or Debit Card via the Apple Wallet App
This is the standard method for most users and takes less than two minutes.
- Open the App: Launch the Wallet app on your iPhone.
- Start Setup: Tap the plus (+) icon in the top-right corner of the screen.
- Select Card Type: Choose Debit or Credit Card.
- Scan Your Card: Position your plastic card in the camera frame.
- New in iOS 26: The Visual Intelligence feature will instantly recognize the card number, name, and expiration date, even in low-light conditions or at an angle.
- Manual Option: If the card is worn out and won’t scan, tap Enter Card Details Manually at the bottom.
- Confirm Details: Review the name and card number. Tap Continue.
- Terms & Conditions: Read and accept your bank’s terms of service.
Once added, your card appears inside Wallet. You can now use it to tap-and-pay instantly.
Method 2: Setting Up Apple Pay Directly via Your Banking App Integration
Many major banks (such as Chase, Wells Fargo, Citi, HDFC, and others) allow you to add cards directly from their official app. We highly recommend this method because it often bypasses the need for SMS verification.
- Open your banking app and log in.
- Navigate to “Card Management,” “Account Services,” or “Digital Wallets.”
- Look for a button labeled “Add to Apple Wallet” or “Set up Apple Pay.”
- Tap it and follow the on-screen prompts.
- The app will securely pass your card data to the Wallet app without you needing to type any numbers.
Verifying Your Card: SMS, Email, and Bank Approval Methods
For security, your bank must verify that you are the true owner of the card before enabling it. This typically happens via one of three methods:
- SMS OTP (One-Time Password): The bank sends a code to the mobile number on file. Enter this code in the Wallet app.
- Email Confirmation: You receive a verification link in your registered email.
- Call to Bank: For high-value cards or flagged accounts, the bank may require you to call their support line to verbally verify your identity.
Verification usually takes just a few minutes. If the screen hangs on “Activating,” wait 5 minutes or restart the app.
Managing Your Wallet Settings: Defaults, History, and Updates
Once setup is complete, you can customize your experience to suit your habits.
How to Change Your Default Payment Card for Faster Checkouts
If you have multiple cards added (e.g., a personal debit card and a business credit card), Apple Pay uses your “Default Card” automatically. To change it:
- Open the Wallet app.
- Touch and hold the card you want to be the default.
- Drag it to the front of the card stack.
- A haptic vibration will confirm the change. The card at the front is now your default.
How to View Transaction History and Spending Details
Apple Pay provides a convenient list of your recent spending for each card.
- Tap on your card in the Wallet app.
- You will see a list of Latest Transactions.
- Tap a transaction to see details like the merchant name, location, time, and amount.
Note: For some banks, this history might only show transactions made with that specific device, not your physical card history.
How to Remove or Update Card Details in Apple Wallet
- Open Wallet and tap the card you want to manage.
- Tap the three-dot menu (…) or the “i” info icon at the top right.
- Scroll to the bottom and select Remove This Card.
Note: This only removes the digital token from your iPhone. Your physical card remains active. You should do this before selling or trading in your iPhone.
Troubleshooting Apple Pay: Why Can’t I Add My Card on iPhone?
If setup fails, check these detailed common issues:
Outdated iOS: Ensure you are on the latest iOS 26 build. Go to Settings > General > Software Update.
Region Lock: Some cards do not support Apple Pay in specific countries. Check Settings > General > Language & Region to ensure your region is set correctly.
“Issuer Does Not Support Apple Pay”: This error means your bank has not yet partnered with Apple. You must contact them directly to ask for a timeline.
“Could Not Add Card”: This is a generic system error. Try Signing Out and Back In to your Apple ID, or reset your connection settings via Settings > General > Transfer or Reset iPhone > Reset > Reset Network Settings.
Cloud Status: Ensure iCloud is not undergoing maintenance by checking the Apple System Status page online.
FAQ About Apple Pay Security and Usage
Why can’t I add my card to Apple Pay?
Check three things: Is your region supported? Is your Date & Time set to “Set Automatically”? Do you have a Passcode set? Apple Pay requires device-level security (Passcode/Face ID) to function; if you turn off your passcode, all Apple Pay cards are removed for safety.
Is Apple Pay free to set up?
Yes. Apple charges no fees to the user. You only pay your standard bank transaction fees or credit card interest rates. Merchants, however, pay a small fee to accept payments, just like they do for credit cards.
Do I need a data connection to use Apple Pay?
For setup, yes—you need internet to verify the card with your bank. For paying in stores, no. Apple Pay uses the offline NFC chip, so it works perfectly even if your phone is in Airplane Mode or has zero signal.
Why is my card being declined during setup?
This block comes from your bank, not Apple. It is often due to automated fraud protection algorithms flagging the setup as “unusual activity.” Call your bank’s fraud support line and ask them to “authorize a digital wallet addition.”
Can I use Apple Pay on the new iPhone Air?
Yes, the iPhone Air fully supports Apple Pay and includes the new dedicated Secure Enclave for faster processing and the “Liquid Glass” UI for a seamless payment experience.
Official Apple Support Resources (Recommended)
For the most accurate and trusted information, we recommend you refer to Apple’s official support guides. These resources come directly from Apple and explain setup, security, and verification in detail.
- Apple Support – Set Up Apple Pay in Wallet on iPhone: Apple’s official step-by-step guide for adding cards and completing bank verification in the Wallet app.
- Apple Pay Support Overview: The central Apple Pay help hub covering setup, card management, transactions, supported regions, and privacy controls.
- Apple Pay Security & Privacy Overview: Explains how Apple Pay protects your data using encryption, Face ID, Touch ID, and device-specific security.
- Apple Pay Card Provisioning Security: Details how card information is tokenized and securely stored when you add a card to Apple Pay.
- Payment Authorization with Apple Pay: Explains how Apple confirms your identity and authorizes payments using secure hardware and biometrics.
Using these official Apple resources alongside this guide helps you follow verified steps, understand security clearly, and troubleshoot issues with confidence.
Visit Our Post Page: Blog Page