
Do you want to block junk mails in Outlook? Let’s learn how to stop spam emails in outlook effectively, manage filters, and keep your inbox clean and secure.
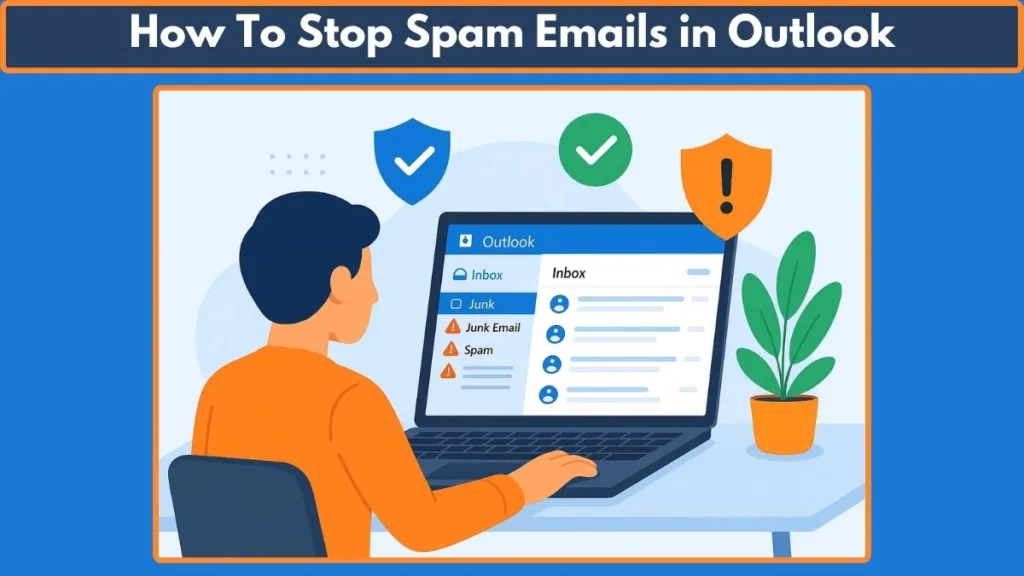
Managing your inbox can be overwhelming when spam emails keep piling up. From junk mail to phishing attempts, unwanted messages not only clutter your Outlook inbox but also pose security risks. This guide will show you how to stop spam emails in Outlook, block unwanted senders, and maintain a clean, productive, and secure inbox—step by step.
The Everyday Struggle with Spam Emails
Spam emails in Outlook can feel like an endless wave crashing into your inbox every single day. One moment you’re searching for that important project update, and the next you’re scrolling through dozens of unwanted messages — fake offers, lottery scams, and promotions you never signed up for. This constant flood not only clutters your inbox but also wastes valuable time.
Why Spam Is More Than Just Annoying
The problem isn’t only about clutter. Many spam emails are designed with harmful intent:
Phishing scams disguised as official emails.
Malware links hidden in attachments.
Data theft attempts that try to trick you into sharing personal information.
Ignoring spam is more than a nuisance — it’s a serious security risk.
The Good News: Outlook Has Tools to Help
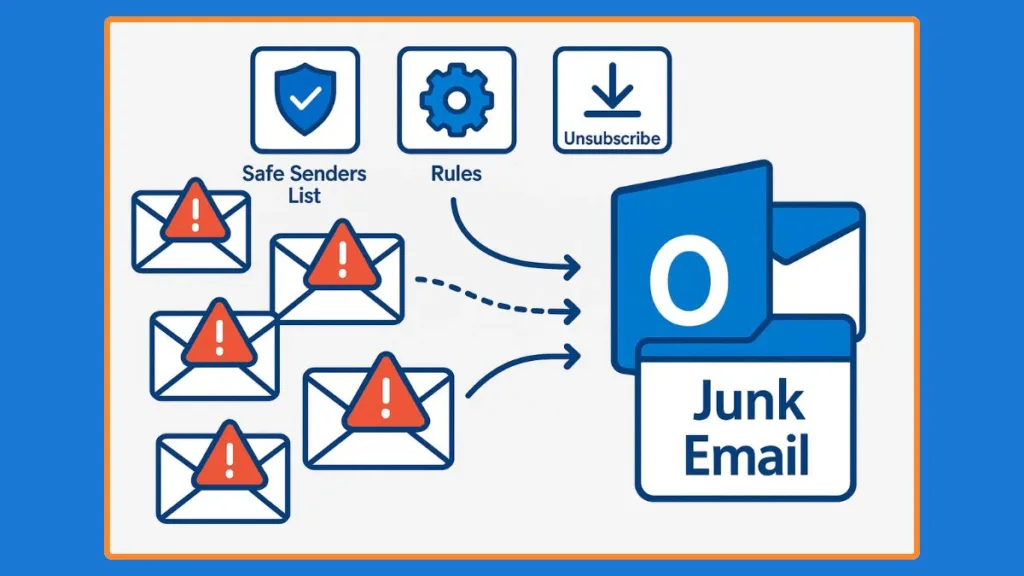
The good news is that Microsoft Outlook comes with built-in tools to help you stop spam in its tracks. By customizing junk mail settings, managing blocked and safe senders lists, and using rules for advanced filtering, you can build multiple layers of defense.
No matter if you’re on the desktop app, web app, or mobile app, Outlook offers features that can help you stay organized and protected.
What You’ll Learn in This Guide
By the end of this blog, you’ll know how to:
- Stop junk email in Outlook by blocking unwanted senders and domains.
- Adjust the Outlook spam filter for stronger protection.
- Use the safe senders list to keep important emails safe.
- Create rules to block emails with specific keywords.
- Report phishing attempts and unsubscribe from newsletters.
Why Am I Getting So Much Spam in Outlook?
Spam Is Everywhere – And It’s Growing
If it feels like spam emails are increasing, you’re not imagining it. According to a 2025 cybersecurity report by Statista, spam still makes up over 45% of global email traffic. That means nearly 1 out of every 2 emails worldwide is spam. Outlook users are no exception — even with filters in place, spam senders are constantly evolving their tactics to slip through.
Common Reasons You’re Receiving Spam in Outlook
- Your Email Address Was Exposed
- If your email was part of a data breach or leaked on a public website, spammers can easily harvest it.
- Tools like Have I Been Pwned can help you check if your email has been compromised.
- You Subscribed to Too Many Lists
- Signing up for free trials, newsletters, or online services often means your email ends up in marketing databases.
- Over time, these lists may be shared or sold, which explains sudden increases in promotional spam.
- Phishing Campaigns Are Targeting You
- Cybercriminals send phishing attempts disguised as trusted services (banks, delivery companies, even Microsoft).
- These emails are designed to trick you into clicking malicious links or entering sensitive information.
- Outlook Spam Filter Settings Are Too Low
- By default, Outlook sets its junk filter protection to “No Automatic Filtering”, which is not aggressive enough for heavy spam.
- If you haven’t customized your Outlook junk mail settings, you’re likely letting more junk into your inbox.
- Spammers Use Randomized Addresses
- Blocking one spam sender doesn’t always solve the issue. Spammers often change email addresses or domains frequently, making them harder to filter out without stronger rules in place.
- You Haven’t Updated Your Safe/Blocked Senders List
- Outlook relies on your safe senders list and blocked senders list to separate good from bad.
- If these lists aren’t updated, you may keep seeing the same types of spam slip through.
Why Outlook Users Feel It More
Because Outlook is widely used for personal, business, and enterprise email, it’s a major target. Microsoft’s spam filters catch billions of emails daily, but given the sheer volume, some inevitably land in inboxes.
The reason you’re seeing so much spam isn’t just Outlook’s fault. It’s a combination of global spam growth, exposed emails, low filter settings, and evolving cybercriminal tactics. The good news? Outlook provides tools to fight back and minimize spam effectively — and we’ll cover those in the next sections.
How Outlook’s Junk Email Filter Works
Outlook’s First Line of Defense
Microsoft Outlook comes with a built-in Junk Email Filter that acts like a gatekeeper for your inbox. Every time a new email arrives, Outlook evaluates it to decide whether it belongs in your Inbox or should be redirected to the Junk Email folder. This evaluation isn’t random — it’s based on a combination of rules, patterns, reputation checks, and artificial intelligence models that Microsoft updates regularly.
In fact, according to Microsoft’s 2025 Transparency Report, Outlook filters block over 3.5 billion spam and phishing attempts every day across Microsoft accounts. That’s a huge number, but it also shows just how aggressive and persistent spammers are.
What Happens When Outlook Flags an Email as Junk
When Outlook suspects an email is spam:
- It moves the message to the Junk Email folder automatically, separating it from your important mail.
- Any malicious code, suspicious attachments, or harmful links are disabled by default so they cannot run on your device.
- Messages remain in the Junk folder for 30 days before being automatically deleted. After that, they’re permanently gone and cannot be restored.
This process ensures that spam doesn’t clutter your inbox, but also gives you a grace period to double-check your Junk folder for legitimate messages that might have been misclassified.
How Outlook Identifies Spam
Outlook uses multiple layers of filtering — think of it as several locks on your front door instead of just one. Here’s how it works:
- Content Analysis
- Outlook scans the text, subject line, and attachments of each email.
- It looks for spam trigger words (like “win now,” “urgent action required,” or “lottery”) and suspicious formatting such as excessive links or images.
- Sender Reputation
- Outlook checks whether the sender’s domain has a history of sending spam.
- Domains and IP addresses reported by many users worldwide are flagged as high risk.
- User Preferences
- Your Blocked Senders List overrides default rules — any email from these senders goes straight to Junk.
- Your Safe Senders List ensures trusted contacts always reach your inbox, even if the system suspects them.
- Machine Learning Models
- Microsoft’s AI systems continuously learn from billions of emails.
- They adapt to new spamming techniques such as randomized addresses, spoofed domains, or phishing emails disguised as “official” communications.
Junk Email Folder vs. Deleted Items Folder
A common mistake many Outlook users make is confusing these two folders:
- Junk Email Folder: This is where suspected spam goes. Items stay here for 30 days and then get auto-deleted. You can review and rescue any legitimate messages before they disappear.
- Deleted Items Folder: This is where emails you delete manually go. They remain there until you empty the folder.
Understanding this difference helps you avoid accidentally losing important emails that were misclassified as junk.
Why You Should Review Your Junk Folder Regularly
Even though Outlook’s spam filter is powerful, it isn’t perfect. Sometimes, legitimate messages — such as newsletters, invoices, or personal emails from new contacts — may end up in Junk. These are known as false positives.
Checking your Junk folder once in a while ensures you don’t miss anything important. If you find a message that doesn’t belong there, you can:
- Mark it as “Not Junk”, which automatically moves it back to your Inbox.
- Add the sender to your Safe Senders List to prevent it from happening again.
Think of the Outlook Junk Email Filter as your inbox’s security guard. It automatically separates suspicious messages, disables dangerous content, and deletes junk after 30 days. However, it works best when you customize your junk mail settings, keep your safe and blocked senders lists updated, and occasionally review your Junk folder to catch false positives.
By understanding how the filter works, you’ll be better prepared to tweak its settings and make it even more effective — which we’ll cover in the upcoming sections.
How to Block Emails in Outlook (Step-by-Step)
Spam emails are not just an annoyance — they’re a serious problem. According to Statista (2025), spam accounts for over 45% of all email traffic worldwide. In fact, Microsoft reported that its Outlook and Exchange services block more than 3.3 billion spam and phishing emails daily.
This highlights why blocking unwanted senders in Outlook isn’t just about decluttering your inbox — it’s also about protecting your digital security. Let’s break down exactly how you can block spam effectively.
How to Block a Sender in Outlook
Blocking a sender ensures their future emails go directly to the Junk Email folder, bypassing your inbox. This is often the first step users take against spam.
On Outlook Web (Outlook.com / Office 365):
- Sign in at outlook.com.
- Click the Settings gear icon (top right).
- Go to Mail > Junk Email.
- Under Blocked senders and domains, click Add.
- Enter the spammer’s email address (e.g., spammer@example.com).
- Hit Save.
Outlook Desktop App (Windows/Mac):
- Open Outlook and right-click the spam email.
- Select Junk > Block Sender.
- Outlook adds them to your Blocked Senders List automatically.
On Outlook Mobile App:
- Blocking isn’t fully supported on mobile. Instead, use the Report Junk option or manage blocked senders via Outlook Web.
Pro Tip: If a spammer uses a slightly different email address each time, blocking one sender may not be enough. That’s where domain blocking (next section) comes in.
How to Block a Domain in Outlook
Spammers often use multiple addresses under the same domain (e.g., offers@randomspam.com, info@randomspam.com). Instead of blocking one address at a time, you can block the entire domain.
On Outlook Web:
- Go to Settings > Mail > Junk Email.
- Under Blocked senders and domains, click Add.
- Type the domain (e.g.,
@randomspam.com). - Save changes.
On Outlook Desktop App:
- Navigate to Home > Junk > Junk E-mail Options.
- Switch to the Blocked Senders tab.
- Click Add, enter the domain (e.g.,
@randomspam.com), and confirm.
Why it matters: Cisco’s 2024 Cybersecurity Report revealed that domain-based spam campaigns account for nearly 30% of phishing attacks. Blocking entire domains is a time-saving shield against repeat offenders.
Managing the Outlook Blocked Senders List
Blocking is only effective if you manage your list over time. Accidentally blocking an important contact can cause you to miss critical emails (for example, a job recruiter’s email might get misclassified).
On Outlook Web:
- Open Settings > Mail > Junk Email.
- Scroll to see your Blocked senders and domains list.
- Select any entry you don’t want blocked → click Remove.
On Outlook Desktop App:
- Go to Home > Junk > Junk E-mail Options.
- Select the Blocked Senders tab.
- Highlight an address/domain and click Remove.
Best Practice: Review your blocked senders once a month to avoid missing important messages.
Extra Best Practices for Blocking in Outlook
- Use the “Report” Feature, Not Just Block: When you select Report as Junk or Report as Phishing, you’re not just protecting yourself — you’re also helping Microsoft improve its global spam filters.
- Set Up Rules for Precision Blocking: If you often get spam with the same keywords (e.g., “crypto investment” or “lottery win”), you can use Outlook’s rules feature to auto-delete those.
- Sync Across Devices: Blocking a sender on Outlook Web applies across all devices (desktop and mobile). This ensures consistency.
- Be Aware of Overblocking: Some marketing or subscription emails may use the same domain as legitimate transactional emails. For example, blocking
@paypal.comwould block both spammy newsletters and important payment alerts. Always double-check before blocking domains.
Blocking in Outlook is more than just a quick fix — it’s part of a long-term email hygiene strategy. By blocking both individual senders and entire domains, you significantly cut down on spam, free up inbox space, and improve productivity.
With spam making up almost half of global email traffic, keeping your Outlook Blocked Senders List updated is one of the most effective defenses against digital clutter and cyber risks.
How to Use the Outlook Safe Senders List
When it comes to managing spam in Outlook, many people only focus on blocking unwanted emails. But equally important is making sure that the emails you want don’t get stuck in the Junk Email folder. That’s where the Safe Senders List comes in.
According to Microsoft’s 2024 transparency report, Outlook’s spam filters process over 30 billion email threats daily across Outlook.com, Office 365, and Exchange. While the filters are highly accurate, no system is perfect. That’s why Safe Senders is your personal whitelist to ensure critical emails always reach your inbox.
What Exactly is the Safe Senders List?
The Safe Senders List is like a VIP pass for your email. Any address or domain you add to it will always bypass spam filters. Even if Outlook’s filter thinks an email looks suspicious, it will still land safely in your inbox if the sender is on your list. You can add both individual email addresses such as client@company.com and entire domains such as @company.com.
For example, a student who keeps missing university announcements because automated system emails often end up in Junk can solve the problem by adding @university.edu to the Safe Senders List. This ensures that all campus alerts arrive in the inbox. Similarly, a small business owner who invoices clients via @invoicingplatform.com can whitelist that domain so no payment reminder goes unnoticed.
Step-by-Step Tutorial: Adding a Safe Sender in Outlook
If you are using Outlook Web (Outlook.com or Microsoft 365 online), start by logging into Outlook.com from your browser. Then, click the ⚙️ Settings gear icon in the top-right corner, scroll down, and select View all Outlook settings. From there, go to Mail > Junk email, and under Safe senders and domains, click + Add. Type the email address, such as newsletter@example.com, or a domain like @example.com. Finally, press Enter and save the changes at the bottom.
For those using the Outlook Desktop App (Windows or Mac), open Outlook and click the Home tab. In the ribbon, select Junk > Junk E-mail Options and navigate to the Safe Senders tab. Click Add, enter the trusted email or domain, and then hit OK. To confirm, click Apply. You can also tick the option “Also trust email from my Contacts” so Outlook automatically treats your saved contacts as safe.
On the Outlook Mobile App (iOS or Android), the process is slightly different since the app doesn’t have full Junk settings. Instead, open the Outlook app, find the email that was incorrectly placed in Junk, and tap the three dots (…) menu. From there, select Move to Inbox and then choose Always move messages from this sender. This tells Outlook mobile to treat that sender as safe.
How to Manage Your Safe Senders List
Over time, your Safe Senders List may become long, so it’s important to review and update it periodically. Outdated addresses should be removed, especially if you’ve unsubscribed from a service. You should also only keep trusted domains and avoid adding large public domains like @gmail.com, because that would make Outlook treat all Gmail senders as safe — including potential spammers.
To remove a Safe Sender, go to Outlook Web and navigate through Settings > Mail > Junk email > Safe senders and domains, then select the address and remove it. On Outlook Desktop, open Junk E-mail Options, go to the Safe Senders tab, highlight the entry, click Remove, and confirm with OK.
Why Safe Senders is a Must-Use Feature
The Safe Senders List is a must-have because it prevents false positives, ensuring that important emails don’t land in Junk. It also saves time, since you won’t need to constantly scan your Junk folder for missed messages. For professionals, it enhances business reliability by reducing the risk of missing client leads, invoices, or contracts. On top of that, it builds trust, as customers and contacts receive quicker responses when their emails aren’t delayed in Junk.
A McKinsey study found that workers spend 28% of their workweek managing emails. If even 5% of legitimate emails end up in Junk, this could mean hours of wasted time every month. The Safe Senders feature significantly reduces this risk and improves productivity.
The Safe Senders List is your insurance policy against lost emails. Think of it as creating a trusted inner circle that ensures your clients, school, workplace, or services never get filtered out by mistake. By actively adding and maintaining your Safe Senders List, you strike the right balance between security and productivity: blocking spam while ensuring your important contacts always get through.
Adjusting Outlook Junk Mail Settings & Spam Filter Levels
While the Safe Senders List ensures trusted emails always reach your inbox, sometimes you need to take more control over how Outlook filters unwanted messages. Outlook provides a built-in Junk Email Filter with different protection levels. By adjusting these settings, you can decide how strict Outlook should be when handling suspicious emails.
According to Statista, spam accounted for 45.6% of all email traffic worldwide in 2024, and phishing attempts disguised as harmless promotions are on the rise. That’s why Outlook gives users flexibility: you can keep filtering at a low level if you rarely get spam, or tighten things up if your inbox is constantly flooded.
Where to Find Junk Email Options
Whether you use Outlook Desktop or Outlook Web, accessing the Junk Email filter is simple.
- On Outlook Desktop App: Open Outlook, go to the Home tab, click on Junk, and select Junk E-mail Options.
- On Outlook Web (Outlook.com / Office 365): Click the ⚙️ Settings gear, choose View all Outlook settings, then navigate to Mail > Junk email.
This is the control panel where you can tweak your filter levels and decide whether Outlook should delete, move, or relax its filtering rules.
Outlook Junk Email Filter Levels Explained
Outlook offers four levels of protection, each tailored to different inbox needs:
1. No Automatic Filtering – This option disables Outlook’s automatic Junk Email Filter. However, emails are still filtered using your Blocked Senders List. If you want almost no interference from Outlook’s spam filter, this is the setting to use.
2. Low Protection – Best for people who don’t get much spam. Outlook will only catch the most obvious junk (like phishing attempts or mass spam campaigns). This way, your inbox stays clean without being too aggressive.
3. High Protection – Ideal for people who receive lots of spam daily. Outlook will apply stricter filtering rules, moving more suspicious messages into the Junk Email folder. However, you should check your Junk folder regularly to ensure legitimate emails aren’t being misclassified.
4. Safe Lists Only – The most restrictive level. Outlook will only allow emails from addresses on your Safe Senders List or Safe Recipients List. Everything else is treated as junk. This is useful for business inboxes, school accounts, or situations where you only want emails from known contacts.
How to Permanently Delete Junk Emails
For those who want a clutter-free inbox and don’t want to review spam manually, Outlook offers an option to permanently delete suspected junk emails instead of moving them to the Junk folder.
To enable this:
- On the Outlook Desktop App, go to Home > Junk > Junk E-mail Options, then open the Options tab.
- Select the checkbox “Permanently delete suspected junk email instead of moving it to the Junk E-mail folder”.
Be cautious with this setting — once deleted, emails can’t be recovered. While it ensures your inbox stays clean, you risk missing false positives (legitimate emails flagged as spam).
Tips for Choosing the Right Filter Level
- If you’re a casual Outlook user and don’t get much spam, Low protection is usually enough.
- If you’re receiving marketing blasts or phishing emails daily, High protection will save you a lot of cleanup.
- If you’re managing a sensitive account (like finance, healthcare, or education), Safe Lists Only ensures you never miss important contacts but keeps out everything else.
Microsoft’s research shows that 99.9% of spam and phishing attempts are blocked across Outlook services, but adjusting your filter levels helps personalize protection to match your inbox habits.
Adjusting Outlook’s Junk Mail settings and filter levels gives you more control over your inbox. By choosing the right protection level — whether it’s Low for casual users, High for heavy spam receivers, or Safe Lists Only for sensitive accounts — you can strike the perfect balance between security and convenience.
Create Rules in Outlook to Block Emails by Keyword or Criteria
While Outlook’s Junk Email Filter and Safe Senders/Blocked Senders lists handle a lot of spam, sometimes you need customized filtering. That’s where Outlook Rules come in. Rules let you create personalized conditions to catch spam that slips through the cracks.
For example, if you keep getting emails with subject lines like “You’ve Won a Prize!” or from addresses that include strange words, you can set a rule that automatically blocks or moves them. This gives you fine-tuned control over your inbox.
According to the Anti-Phishing Working Group (APWG), in 2024 there were over 4.7 million phishing attacks reported globally, making rules an effective extra layer of defense.
What Are Outlook Rules?
Rules in Outlook are automated actions that Outlook applies to incoming (or outgoing) messages based on conditions you define. Think of them as custom filters that let you decide what happens to an email if it meets certain criteria.
You can set rules to:
- Move emails with specific keywords (like “Congratulations” or “Free Gift”) to the Junk folder.
- Delete emails automatically if they come from a certain domain.
- Forward messages that meet work-related keywords to another folder or team member.
- Flag suspicious emails for follow-up instead of letting them mix with genuine messages.
How to Create a Rule in Outlook (Step-by-Step)
Here’s how you can set up a spam-blocking rule in Outlook Desktop:
- Open Outlook and go to the Home tab.
- Click on Rules in the “Move” group, then select Manage Rules & Alerts.
- In the dialog box, choose New Rule.
- Under “Start from a blank rule,” select Apply rule on messages I receive, then click Next.
- Now you’ll see a list of conditions. Choose criteria such as:
- Emails containing specific words in the subject or body.
- Emails sent from people or public groups.
- Emails sent through a specific domain (like
@promooffers.com).
- Add the keywords, addresses, or domains you want to block.
- Choose an action, such as move it to the Junk folder or delete it permanently.
- Click Finish, then Apply the rule.
For Outlook Web (Outlook.com/Office 365):
- Go to Settings (⚙️) > View all Outlook settings > Mail > Rules.
- Click Add new rule, give it a name, then set your conditions (keywords, sender domains, etc.) and actions (delete, move, flag).
- Save the rule, and Outlook will apply it automatically.
Best Practices for Spam Rules
While rules are powerful, it’s important not to go overboard. Here are a few tips:
- Keep rules simple: Use common spam keywords like “free trial”, “click here”, or “act now”.
- Update rules regularly: Spammers often change tactics, so refresh your blocked keywords when you notice new spam trends.
- Use domain blocking wisely: Blocking entire domains is effective, but avoid blocking broad domains like
@gmail.com— it could stop legitimate messages. - Combine with Safe Senders: Keep your trusted contacts on the Safe Senders list to prevent accidental filtering.
Outlook Rules give you personalized spam protection by letting you block emails based on keywords, sender domains, or custom conditions. This extra layer of defense ensures your inbox stays organized, clutter-free, and safe from persistent spam tactics.
Unsubscribe from Unwanted Emails in Outlook
Not all unwanted emails are spam—sometimes they’re from newsletters, promotions, or mailing lists you once signed up for but no longer want. These are technically legitimate emails, but they still clutter your inbox and distract you from important messages. Instead of marking them as spam, the best practice is to unsubscribe directly.
According to a Statista survey in 2024, the average user receives over 120 emails per day, and nearly 45% of those are marketing or promotional messages. No wonder inboxes feel overwhelming!
The good news? Outlook makes unsubscribing simple, both on desktop and mobile.
Report Junk Email in Outlook (Phishing & Spam)
Blocking spam is one side of the story, but reporting it is just as important. When you report junk or phishing emails in Outlook, you’re not only protecting yourself but also helping Microsoft improve its global spam filters. Every report strengthens the system and makes it harder for spammers to target millions of other users.
According to Microsoft’s Digital Defense Report 2024, over 70% of cyberattacks begin with phishing emails. This shows why reporting suspicious messages instead of just deleting them is crucial.
Difference Between Spam and Phishing
Before reporting, it helps to understand the difference between spam and phishing emails. Spam or junk emails are unwanted advertising, promotional content, or newsletters you never subscribed to. They are annoying but not always dangerous. On the other hand, phishing emails are malicious messages designed to steal sensitive information like passwords, credit card details, or login credentials. Phishing emails often pretend to be from trusted companies such as banks, delivery services, or even Microsoft itself.
How to Report Spam in Outlook
If you receive an email that is clearly spam, Outlook provides simple ways to report it. In the Outlook Desktop App, select the message, go to the Home tab, click Junk, and then select Report Junk. On Outlook Web (Outlook.com/Office 365), you can right-click the message and choose Mark as junk. This moves the message to your Junk folder and simultaneously sends a signal to Microsoft to update its spam filters.
How to Report Phishing in Outlook
If the email looks like a phishing attempt, Outlook allows you to flag it separately. In Outlook Desktop, select the suspicious message, navigate to Home > Junk, and choose Report Phishing. On Outlook Web, right-click the email and select Report > Phishing. The email is immediately flagged, removed from your inbox, and forwarded to Microsoft’s phishing analysis team for investigation. It’s important to never click links or download attachments from suspicious emails before reporting them.
Outlook Mobile App Reporting
On the Outlook Mobile App for iOS or Android, reporting spam or phishing is also straightforward. Open the suspicious message, tap the three dots (⋮) in the top-right corner, and then choose either Report Junk or Report Phishing depending on the type of email. This ensures that even on mobile devices, your reports contribute to improving Outlook’s spam detection system.
Why Reporting Matters
Reporting junk and phishing emails is more than just a personal safety measure. It strengthens Outlook’s filters, as each report helps Microsoft detect and block similar threats in the future. Reporting also protects your account by ensuring malicious senders are flagged before they can cause harm. Finally, it helps the wider community, since millions of Outlook users benefit when spam and phishing networks are disrupted.
Don’t just delete junk emails — make sure to report them. Outlook makes it easy to flag both spam and phishing attempts, ensuring your inbox stays clean while also protecting the wider email community.
When to Unsubscribe Instead of Marking as Spam
It’s important to know when to use the unsubscribe option instead of flagging an email as spam. If you recognize the sender but no longer want their content, such as retail stores, blogs, or newsletters, then unsubscribing is the right move. Similarly, when the email comes from a legitimate business but feels irrelevant to you now, it is better to unsubscribe rather than report it. This approach also helps keep Outlook’s spam filter focused on true malicious content instead of legitimate senders.
How to Unsubscribe in Outlook Desktop
When you open a marketing or newsletter email in Outlook Desktop, you may see an Unsubscribe link at the top near the sender’s information. To use it, simply open the unwanted email and look for the Unsubscribe link displayed by Outlook above the message body. Once you click Unsubscribe, Outlook automatically removes you from that sender’s mailing list. If the link isn’t shown, scroll to the bottom of the email body—legitimate senders are legally required under laws like the CAN-SPAM Act and GDPR to include an unsubscribe option.
How to Unsubscribe in Outlook Web (Outlook.com / Office 365)
On the Outlook web app, the process is just as simple. Open the unwanted email and look for the Unsubscribe link at the top near the sender details. Once you click it, Outlook will confirm your removal from the mailing list, instantly reducing the chance of those emails coming back into your inbox.
How to Unsubscribe in Outlook Mobile App
For Outlook Mobile (iOS/Android), you can also manage subscriptions with ease. After opening the email, tap the three dots (⋮) in the upper-right corner and look for the Unsubscribe option if it is supported by the sender. Once tapped, you’ll be removed from the mailing list. If the option doesn’t appear, you can still scroll to the bottom of the email and use the unsubscribe link provided by the sender to achieve the same result.
Why This Matters
Unsubscribing from legitimate emails has a direct impact on your inbox. It creates a cleaner inbox, reducing unnecessary email noise and making it easier for important messages to stand out. It also improves your focus, since you won’t be distracted by irrelevant newsletters and promotions. Finally, it allows Outlook’s spam filter to concentrate on malicious senders rather than cluttering its data with legitimate businesses you no longer wish to hear from.
When dealing with unwanted but legitimate emails, the right approach is to unsubscribe, not block or report them as spam. Outlook’s built-in Unsubscribe feature works across desktop, web, and mobile, making it quick and painless to regain control of your inbox.
Best Practices to Prevent Future Spam
While Outlook’s Junk Email Filter, Safe Senders List, and block features do a lot of heavy lifting, stopping spam isn’t just about filtering—it’s also about prevention. By following a few smart habits, you can significantly reduce the number of junk emails that land in your inbox.
Be Careful Where You Share Your Email Address
One of the main reasons people receive high volumes of spam is because their email address gets exposed online. Spammers often use bots to scrape websites, forums, and social media for publicly visible email addresses. To prevent this, avoid posting your email address openly on websites or comment sections. If you must share it, consider disguising it (for example, writing name [at] example [dot] com instead of the actual format).
Use a Secondary Email for Sign-ups
A simple but powerful method is to maintain a separate email address for things like online shopping, newsletters, and sign-ups. This way, your primary Outlook email remains protected and clutter-free. According to a 2024 survey by DataProt, nearly 60% of users manage spam better by using a secondary email for non-essential purposes.
Don’t Click Suspicious Links or Attachments
Phishing attempts often disguise themselves as legitimate emails, but the giveaway is usually a suspicious link or file. Clicking these links not only confirms to spammers that your email is active but can also expose you to malware or identity theft. Always hover over a link to preview its actual URL before clicking. If something feels off, trust your instinct and delete the message.
Mark Spam Instead of Just Deleting It
When you delete spam emails without marking them as junk, Outlook doesn’t get the chance to learn and adapt its filters. By properly marking suspicious emails as junk or phishing, you help train Outlook’s system to recognize similar threats in the future. This small action can dramatically improve your long-term email protection.
Regularly Review Your Junk Folder
Outlook sometimes makes mistakes by flagging legitimate messages as spam. By checking your Junk Email folder occasionally, you can move important emails back to your inbox and teach Outlook that these senders are safe. This balances protection with accuracy, ensuring you don’t miss critical messages.
Keep Your Outlook and Security Software Updated
Spam filters and phishing detection tools are constantly evolving. By keeping your Outlook client updated along with your antivirus or anti-malware software, you ensure the latest protection mechanisms are in place. Microsoft frequently rolls out updates to improve spam filtering, so staying up-to-date is key.
Be Wary of Unsubscribe Links in Unknown Emails
While unsubscribing is the right approach for legitimate senders, it’s dangerous to click unsubscribe links in emails from unknown or shady sources. Many spammers use fake unsubscribe buttons to confirm your email is active, which results in even more junk mail. If you don’t recognize the sender, it’s safer to block or report the message as junk instead.
Preventing spam isn’t just about fixing it once—it’s about adopting smart email habits that protect your Outlook inbox long-term. By being mindful of where your email is shared, separating personal from promotional use, and staying alert for suspicious activity, you can keep spam under control and enjoy a much cleaner, safer inbox.
Troubleshooting: Why Am I Still Getting Spam After Blocking?
Even after blocking senders and setting up filters in Outlook, many users still notice spam emails flooding their inboxes. This isn’t unusual—spam accounts for a massive portion of global email traffic, and spammers are constantly evolving to outsmart filters. According to Statista (2024), spam made up nearly 46% of all email traffic worldwide, showing that this problem is far from disappearing.
Understanding why spam slips through and how you can tackle it is the key to building a cleaner inbox.
Spammers Change Email Addresses Frequently
The number one reason spam persists is because spammers rotate addresses and domains. They often use botnets and automated systems to generate thousands of disposable emails. A 2024 Kaspersky Lab report revealed that over 70% of spam campaigns used addresses that lasted less than 48 hours before being abandoned.
Solution: Instead of blocking individual addresses, block by domain or filter using keywords in the subject or body. For example, terms like “free gift,” “lottery,” or “limited offer” are classic spam triggers. Outlook’s Rules feature lets you automate this filtering.
Spam Masquerading as Legitimate Senders (Spoofing)
Email spoofing is one of the most dangerous tricks. The sender appears to be someone you know or a trusted company, but behind the scenes, the domain is fake. According to Proofpoint’s 2024 Email Security Report, nearly 71% of phishing attacks relied on spoofing tactics.
Solution: Always check the email header in Outlook to verify the real sender. If you see something like support@micros0ft-support.com instead of the official @microsoft.com, it’s spoofed. Block the domain, and report it as phishing.
Outlook’s Junk Filter Level Is Too Low
By default, Outlook doesn’t aggressively block emails. Its Junk Email Filter is often set to No Automatic Filtering or Low to avoid catching legitimate emails. While this helps prevent false positives, it also means more spam sneaks through.
Solution: Increase the filter level to High or Safe Lists Only under Home > Junk > Junk Email Options. Research from Symantec 2023 showed that higher junk filter levels cut spam by 65%, though you may need to check the Junk folder regularly for real messages marked by mistake.
Safe Senders List May Contain Compromised Addresses
Sometimes spam bypasses the filter because the sender is already in your Safe Senders List. If a contact or mailing list you trusted is hacked, their address may start sending malicious content straight to your inbox.
Solution: Periodically review your Safe Senders List in Outlook. If you see addresses or domains you no longer trust (like newsletters you stopped reading), remove them immediately.
Outlook Rules May Conflict
If you’ve created multiple rules to manage your inbox, one of them might accidentally let spam through. For example, a rule that moves all emails with “Invoice” in the subject into a folder could include fake invoices from spammers.
Solution: Audit your rules in Home > Rules > Manage Rules & Alerts. Reorder them so that spam rules take priority. Also, refine conditions (e.g., include domain checks, not just keywords).
11.6 Some Spam Isn’t Really Spam
Not every unwanted email is classified as spam. Promotional emails, newsletters, and product updates from companies you interacted with legally bypass spam filters because they are “legitimate marketing.”
Solution: For these, use the Unsubscribe option in Outlook (available for most verified senders) or create a rule to automatically move such messages into a separate folder. Microsoft confirms that clicking “Unsubscribe” within Outlook is safe for trusted senders, as it uses a secure mechanism to process requests.
Spammers Exploit Timing and Volume
Another overlooked reason is that spammers send in huge bursts at off-peak hours. They rely on the fact that spam filters may take time to catch up with new patterns. A Cisco Talos (2024) report noted that major spam campaigns often peak between 2 a.m. and 6 a.m. local time, when fewer users are reporting suspicious emails.
Solution: Don’t rely only on automatic filtering. Take a few moments to manually report spam when you see it, which helps Microsoft update its filter database faster.
Even after blocking, spam persists because it evolves constantly—spammers rotate addresses, spoof domains, and exploit Outlook’s default low filter settings. By combining strategies like raising filter levels, reviewing your Safe Senders List, fine-tuning rules, and reporting spam, you can dramatically reduce unwanted messages.
Frequently Asked Questions (FAQs)
Can I use multiple Outlook accounts to manage spam separately?
Yes! Using multiple Outlook accounts is a practical way to separate personal, work, and sign-up emails. For example, you can reserve one account for trusted contacts and another for newsletters or online registrations. This strategy helps reduce clutter and makes spam easier to manage.
Does using a third-party spam filter replace Outlook’s built-in filters?
Not entirely. Third-party spam filters enhance Outlook’s protection but don’t replace its built-in Junk Email Filter. They can provide additional layers of security, such as AI-based phishing detection or blocking known spam networks, while Outlook continues to handle basic filtering and Safe/Blocked Senders management.
How often should I review my Junk Email folder?
It’s recommended to check your Junk Email folder at least once a week. Occasionally, legitimate messages might be flagged as junk. Reviewing the folder ensures you recover important emails while maintaining overall spam protection.
Can mobile notifications be affected by spam?
Yes. If your Outlook mobile app receives spam that isn’t filtered, you might get unnecessary push notifications, which can be distracting. Setting high Junk Email Filter levels and creating rules will reduce these interruptions and improve your mobile email experience.
Is it safe to click unsubscribe links in every email?
Not always. Only click unsubscribe links from trusted senders. Spammers sometimes use fake unsubscribe links to confirm your email is active, which can increase spam volume. For unknown senders, it’s safer to block the sender or report the email instead.
Can I set Outlook to automatically delete spam without reviewing it?
Yes, Outlook allows you to permanently delete suspected junk emails instead of moving them to the Junk Email folder. However, this can risk losing legitimate emails that were mistakenly flagged, so it’s recommended to use this option only if you receive very high spam volume and are confident in your filter settings.
Do email authentication protocols like SPF, DKIM, or DMARC affect spam in Outlook?
Absolutely. Outlook uses email authentication signals like SPF, DKIM, and DMARC to detect potentially fraudulent emails. Emails failing these checks are more likely to be flagged as junk, helping protect your inbox from phishing and spoofing attacks.
Can Outlook filters handle spam in different languages?
Yes, Outlook’s spam filters can detect suspicious patterns in multiple languages, especially common spam phrases and keywords. For non-English spam, using custom rules with keywords in that language can improve filtering accuracy.
Conclusion
Dealing with spam emails in Outlook can feel overwhelming, but with the right strategies, it’s entirely manageable. Throughout this guide, we explored a variety of tools, settings, and best practices designed to give you full control over your inbox.
From understanding why spam appears, to using Outlook’s Junk Email Filter, Safe Senders List, and custom rules, each method helps you tackle unwanted emails effectively. We also covered reporting phishing attempts, unsubscribing from newsletters, and adopting best practices to prevent spam from reaching your inbox in the first place.
Remember, spam isn’t just an annoyance—it’s also a security risk. Phishing attempts, malware, and fraudulent emails are common, and taking proactive measures protects both your personal information and digital wellbeing.
By combining Outlook’s built-in features with thoughtful habits like reviewing your Safe Senders List, unsubscribing from unnecessary emails, and reporting suspicious messages, you can maintain a clean, organized, and secure inbox.
Finally, don’t forget that Outlook’s filters are most effective when you actively engage with them—report spam, refine rules, and adjust protection levels to match your needs. Over time, these small actions will lead to a significant reduction in unwanted emails, giving you peace of mind and productivity.
Key Takeaways
- Adjust Junk Email Filter levels to suit your inbox activity.
- Use Safe Senders and Blocked Senders lists to manage trusted and unwanted contacts.
- Create rules to filter emails by keywords or domains for personalized protection.
- Report spam and phishing to help Outlook improve its filters.
- Unsubscribe from legitimate newsletters to keep your inbox clutter-free.
- Follow best practices to prevent future spam, including cautious sharing of your email and using secondary addresses for sign-ups.
By consistently applying these strategies, you can enjoy an Outlook inbox that is organized, secure, and almost spam-free—making email management a breeze instead of a headache.