
Running out of space? Learn how to transfer photos from iCloud to Google Photos without losing metadata using 3 safe ways to free up storage.
Why You Need to Move Photos from iCloud to Google Photos Now
If you want to transfer iCloud photos to Google Photos, you are likely dealing with limited iCloud storage, preparing to switch devices from iPhone to Android, or simply looking for a more flexible, long-term photo backup solution. While Apple and Google are the two dominant players in cloud storage, they do not sync seamlessly. However, we guarantee you can move your photos safely if you choose the right method.
If you see on your iPhone that you hit the 5 GB iCloud free limit very quickly—especially after years of accumulating high-resolution images, Live Photos, and 4K videos—you aren’t alone. You are likely looking for a reliable way to move photos from iCloud to Google Photos to free up space on your Apple devices without losing your cherished memories.
Based on real user experiences and proven workflows, this comprehensive guide shows you the best ways to move photos from iCloud to Google Photos, exactly what can go wrong during the process, and how you can avoid losing critical metadata, albums, or image quality.
You might be anxiously asking whether this process deletes photos from iCloud. The answer is no.
Note: The official transfer process makes a copy of your photos rather than deleting them from iCloud. This distinction matters because it allows you to verify your Google Photos backup completely before making any changes to your Apple ID or deleting files from your iCloud Photo Library to save space.
The Hidden Challenges of Moving iCloud Photos to Google Photos
Before you start an iCloud to Google Photos transfer, it is crucial to understand why this process isn’t straightforward.
- Separate Ecosystems: iCloud and Google Photos are separate cloud ecosystems designed to keep you locked within their specific walled gardens.
- Messy Albums: Consequently, albums don’t map cleanly between the platforms.
- Metadata Risks: Metadata (like EXIF data, dates, GPS locations, and device info) can be altered or lost during the move if the file transfer protocol isn’t perfect.
Furthermore, if you have an extremely large library (20,000+ items), you increase the risk of failed, stalled, or partial transfers. You also face significant file format challenges; specifically, the conversion from Apple’s efficient HEIC format to the more universal JPG format can affect image resolution and file size if handled incorrectly.
Additionally, Apple Photos uses sophisticated system-level features like Smart Albums (which update automatically based on criteria), Shared Albums, and Live Photos (which combine video and still images). In contrast, Google Photos relies heavily on AI-based grouping and duplicate detection. Because of this fundamental difference in how they organize data, even a successful migration can look disorganized at first.
For example, Apple’s official transfer tool does not transfer Smart Albums, Shared Albums, or Photo Stream content. Live Photos may not move as expected—sometimes arriving as static images or separate video files. This often surprises you if you rely heavily on curated albums for events, travel, or work projects.
You might also discover that metadata — such as the original capture date or camera information — behaves differently depending on whether the transfer occurs via cloud-to-cloud sync, app-based backup, or manual upload. Therefore, understanding the underlying process helps you choose the safest method to preserve your digital history.
3 Best Methods to Transfer iCloud Photos to Google Photos Safely
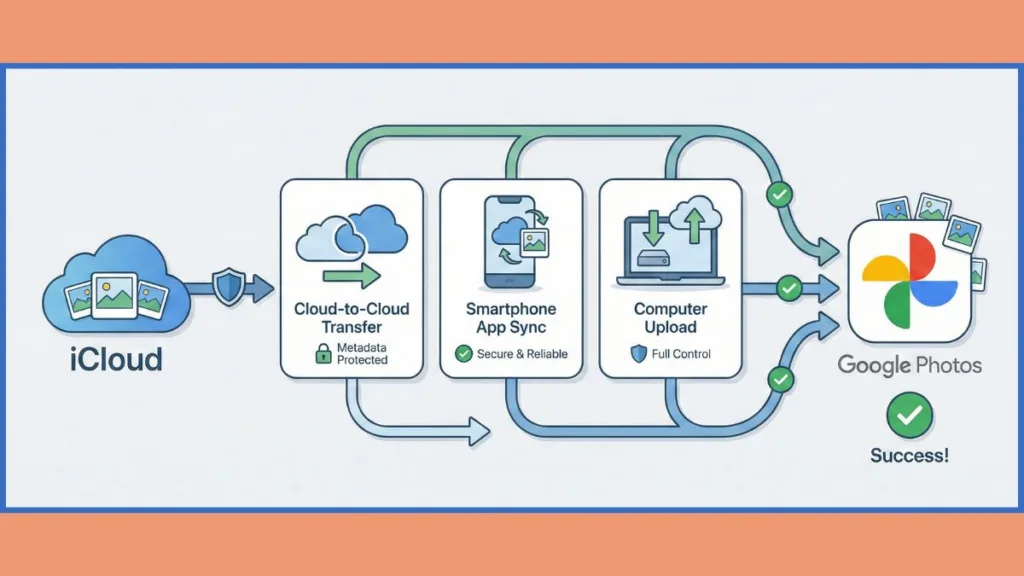
Method 1: Use Apple’s Official iCloud to Google Photos Transfer Tool
Apple provides a designated cloud-to-cloud transfer option through its Data and Privacy system. This method lets you request a direct transfer without downloading files manually to a computer, and it exists as part of broader data portability initiatives required by regulations.
In practical terms, this option appeals to you if you don’t want to keep your phone plugged in for days or manage local storage manually. It is the “set it and forget it” approach.
How it works
The process is relatively simple but requires patience:
- Submit a formal request using your Apple ID at privacy.apple.com.
- Once initiated, Apple sends copies of your photos and videos directly to Google Photos.
- The transfer runs over several days, and you will receive email notifications from Apple confirming the start and end of the process.
During this period, Apple verifies your identity, packages eligible photos and videos, and sends them in batches to your Google account. As a result, photos may appear gradually in Google Photos rather than all at once.
Pros and Cons
The biggest advantage is automation. There is no manual downloading or uploading, and because it happens entirely in the cloud, there is no device storage required. It attempts to move your entire library (photos and videos) autonomously.
However, there are significant downsides. The process can take 3–7+ days for large libraries. Often, only the “most recent edit” of a photo is transferred, meaning original versions (pre-edit) might not be preserved. Albums may not be perfectly preserved, and Shared Albums or some RAW formats are not transferred at all.
Real-world example: If you have thousands of photos, you might find yourself waiting multiple days before Google Photos shows all transferred content — sometimes with album names changed to start with “Copy of …”. This behavior is common when album structures don’t translate cleanly between the two different database structures.
Best for: If you want a hands-off option and don’t care about retaining exact album structure or perfect ordering.
Method 2: Sync iCloud to Google Photos via iPhone App (Highest Quality)
This is the method we recommend you use if you want the highest fidelity and fewest surprises.
By installing the Google Photos app on your iPhone and enabling the “Backup” feature, Google Photos will upload your local photo library — including photos that are stored in iCloud but cached on your device. Because the app reads files directly from the Photos library on iOS, it preserves timestamps and EXIF data more consistently than a cloud-server transfer.
Why this method works best
This approach works well because it better preserves metadata such as timestamps, location, and original resolution. It keeps your photo ordering intact and handles Live Photos better, provided Google Photos can process both the image and video components simultaneously. Moreover, this method is ideal if you plan to continue using Google Photos as your primary backup solution going forward, as it sets up the infrastructure for daily backups.
Important limitations
You must have enough local storage on your iPhone for this to work smoothly. Additionally, iCloud’s “Optimize iPhone Storage” setting may prevent full-resolution images from being downloaded locally unless you change settings. Finally, Albums won’t automatically transfer — you may have to recreate them manually within the Google ecosystem.
CRITICAL WARNING: If you use “Optimize iPhone Storage,” your phone only holds small thumbnails (placeholders) while the hi-res data is in the cloud. Google Photos needs the full file to back it up. If your iCloud library is larger than the free space on your iPhone, do not use this method. Your phone storage will fill up as it tries to download originals, and the transfer will fail or crash your device.
Practical tip: Before syncing, go to Settings > Photos > Download and Keep Originals so that your device downloads full-resolution photos from iCloud first. Doing this ensures Google Photos uploads the highest quality versions.
Example experience: We have seen many users on Reddit emphasizing that this method usually retains more metadata than cloud-to-cloud transfer tools, but it may require patience if you have tens of thousands of photos or slow Wi-Fi, as the upload happens in the background.
Method 3: Manually Download iCloud Photos for Perfect Google Photos Uploads
This is a manual method that gives you full control over every photo and video file, which is especially useful for photographers, creators, or users with mixed file formats who want to ensure nothing is compressed or altered. By downloading files yourself, you can verify file names, formats, and folder structures before they ever touch Google’s servers.
Pros and Cons
The primary benefit is strict control: You choose exactly what moves. It offers the best possible metadata control and is good for very large libraries where automated tools might time out.
The trade-off is effort. It is more time-intensive, requires significant local storage (hard drive space) and bandwidth, and you must upload everything manually.
Typical steps
- Start by signing in to your iCloud account via a web browser (iCloud.com) or using Apple’s Photos app on a Mac.
- Select your photos in batches (doing all at once can cause browser timeouts).
- Crucial Step: Instead of just clicking the cloud icon, click and hold the download button (or look for the arrow/options). Choose “Unmodified Original” to keep your metadata and HEIC format intact. If you choose “Most Compatible,” Apple converts them to JPG, which might strip some metadata or lower quality.
- Once downloaded to your computer, sign in to Google Photos on the web and upload your folders.
Real life scenario: You might prefer this method because Google Photos won’t re-upload exact duplicates when you upload the same photo again — it uses file hashing to detect duplicates. This behavior protects your storage quota and keeps your library clean.
Best for: If you want full control and maximum preservation of your data and are comfortable managing files on a computer.
Comparison: Which iCloud to Google Photos Transfer Method is Best?
| Method | Best For | Main Risk |
| Apple Transfer Tool | Hands-off users who don’t want to use their computer. | Messy Albums: Photos often arrive out of order, with generic filenames, or “Copy of” prefixes. |
| Google Photos App | Users who want the highest quality & metadata accuracy. | Storage Crash: Requires enough free space on your iPhone to hold full-res photos, or the process jams. |
| Manual Download | Power users & photographers. | Time Consuming: Requires fast internet, patience, and significant hard drive space. |
Troubleshooting Common iCloud to Google Photos Transfer Errors
Fix: iCloud Photos Appearing Out of Order in Google Photos
This happens most often with automated cloud transfers. You might notice older photos showing up with incorrect timestamps (showing the date of transfer rather than the date of capture). A manual or app-based upload usually fixes this because the original EXIF data remains intact, allowing Google to sort them chronologically.
Solution: iCloud Albums Not Transferring to Google Photos
Apple’s Data and Privacy transfer tool may attach prefixes like “Copy of” to album names, and Shared Albums typically aren’t moved at all. You’ll likely need to recreate albums manually in Google Photos using folders, labels, or AI grouping features.
Warning: How to Avoid Deleting Photos During iCloud Sync
If you delete a photo from iCloud before confirming it’s safely in Google Photos, you could lose it in the sync. Always verify before removing anything, especially when syncing across multiple devices. If you use the Google Photos app (Method 2), deleting a photo from the Google Photos app on your iPhone might prompt to delete it from iCloud too—pay attention to the pop-up warnings.
Essential Safety Tips Before You Transfer iCloud Photos
We strongly recommend you follow these rules to protect your data:
- Never delete iCloud photos until the transfer is fully verified on the Google side.
- Ensure you keep at least one full backup at all times (ideally on a physical hard drive).
- Check Google Photos storage limits before uploading. Google gives 15 GB of free storage shared across Drive, Gmail, and Photos; if you exceed this, uploads will stop or email may be blocked.
- Try to transfer in chunks if you have 30,000+ photos to avoid browser crashes or network timeouts.
Tip: Signing out of iCloud Photos temporarily after backup verification can prevent accidental cross-deletions if you decide to clean up your device storage.
FAQ: iCloud to Google Photos Transfer
Can I transfer photos directly from iCloud to Google Photos?
Yes — using Apple’s Data and Privacy transfer tool at privacy.apple.com.
Does deleting photos from iCloud remove them from Google Photos?
No — once copied, Google Photos stores them independently. However, be careful if you are deleting them through the Google Photos app on an iPhone, as that app has permission to modify your iCloud library.
How long does it take to transfer iCloud photos to Google Photos?
Depending on size, it can take 3–7+ days using Apple’s cloud transfer. It is not instant.
Will my albums stay organized after transferring from iCloud?
Not always. Albums may need manual recreation or reorganization after the move.
Do Live Photos transfer from iCloud to Google Photos?
Often, Live Photos may transfer as still images or separate video files rather than the interactive format you are used to on iPhone.
Is there a limit to how many photos I can transfer?
No official limit, but Google Photos has a 20,000 photos per album limit, which may affect how you organize large collections.
Conclusion: The Safest Way to Migrate Your iCloud Library
If you want the most accurate, safest, and user-tested solution, we recommend using the Google Photos app on iPhone first, with full local backup enabled.
This ensures your metadata stays intact. Otherwise, the official Apple transfer tool is good for an automated cloud copy if you are patient, and the manual download method is ideal for total control over file quality.
Follow the steps carefully, and you can switch from iCloud Photos to Google Photos without losing what matters most — your memories.
Visit Our Post Page: Blog Page