
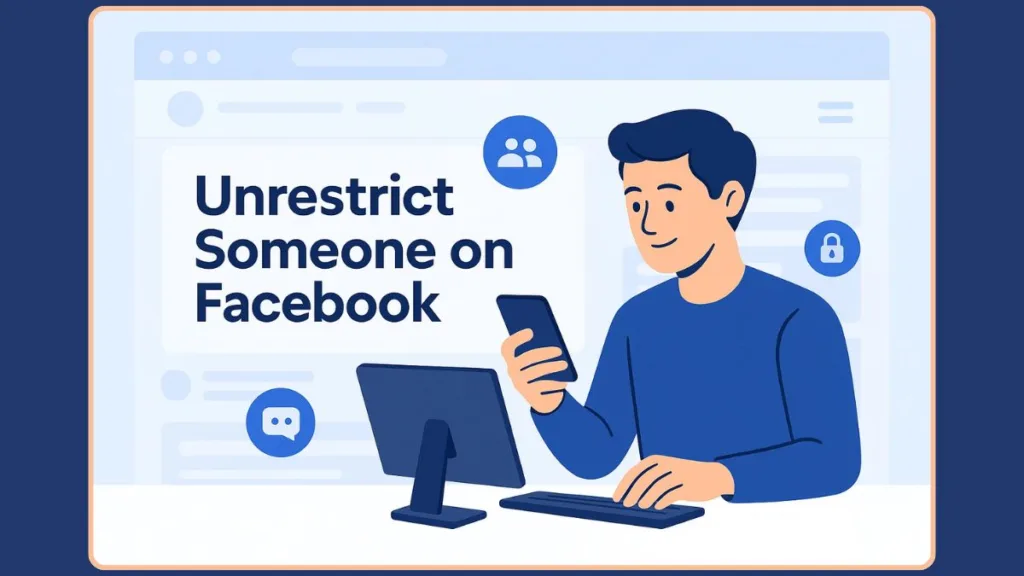
Are you looking for an easy way to unrestrict someone on Facebook in 2025? Discover how to quickly remove a friend from your restricted list and restore full access to your posts and Messenger chats.
Why You Might Need to Unrestrict Someone on Facebook
Navigating social connections on Facebook can sometimes require a delicate balance between staying connected and maintaining privacy. There are moments when you may have restricted a friend—whether to limit their access to your posts or to reduce notification overload on Messenger. Later, you might want to reverse this action, restoring full visibility and communication.
Unrestricting someone on Facebook or Messenger allows normal interaction to resume without the need to unfriend or block. It ensures that the person can once again see posts shared with friends, engage in conversations, and appear in your chat list. This process is straightforward, reversible, and designed to give users control over their digital interactions.
In this guide, we’ll provide a clear, step-by-step approach to unrestrict someone on Facebook and Messenger, covering both desktop and mobile platforms. You’ll learn how to restore access thoughtfully and manage your restricted lists efficiently, making it easier to maintain healthy online relationships.
Understanding Facebook’s Restricted Feature: What It Means and How It Works
Managing your privacy on Facebook is an essential part of controlling your online presence. The Restricted list is a feature designed for situations where you want to stay friends with someone but limit what they can see or interact with.
What Does Restricting Someone on Facebook Do?
When you add a friend to your Restricted list, they remain on your friends list, but their access is limited:
- They can only see public posts and any posts where they are specifically tagged.
- Private posts shared with friends will not be visible to them.
- The friend will not be notified that they have been restricted, making this a discreet way to manage content visibility.
This feature is particularly useful in situations such as:
- Limiting a colleague, boss, or family member from seeing personal posts.
- Temporarily reducing the digital interaction with a friend without blocking them.
Difference Between Restricting and Blocking
Understanding the distinction between restricting and blocking is critical:
| Action | Effect | Reversibility |
|---|---|---|
| Restrict | Limits content visibility and Messenger interactions | Fully reversible |
| Block | Completely removes the person from your Facebook and Messenger interactions | Only reversible by unblocking, which restores contact fully |
Restricting is a moderate approach to controlling who can see your content, while blocking is a permanent or semi-permanent step often reserved for serious conflicts.
How Restricting Works on Messenger
On Messenger, restricting someone affects notifications and conversation visibility:
- Messages from restricted friends do not appear in your main chat list.
- You will not receive notifications for their messages or calls.
- They will not see your Active status or whether you have read their messages.
- Messenger will alert you if you enter a group chat with someone you’ve restricted.
This approach allows you to mute interactions while staying connected, offering a flexible alternative to blocking.
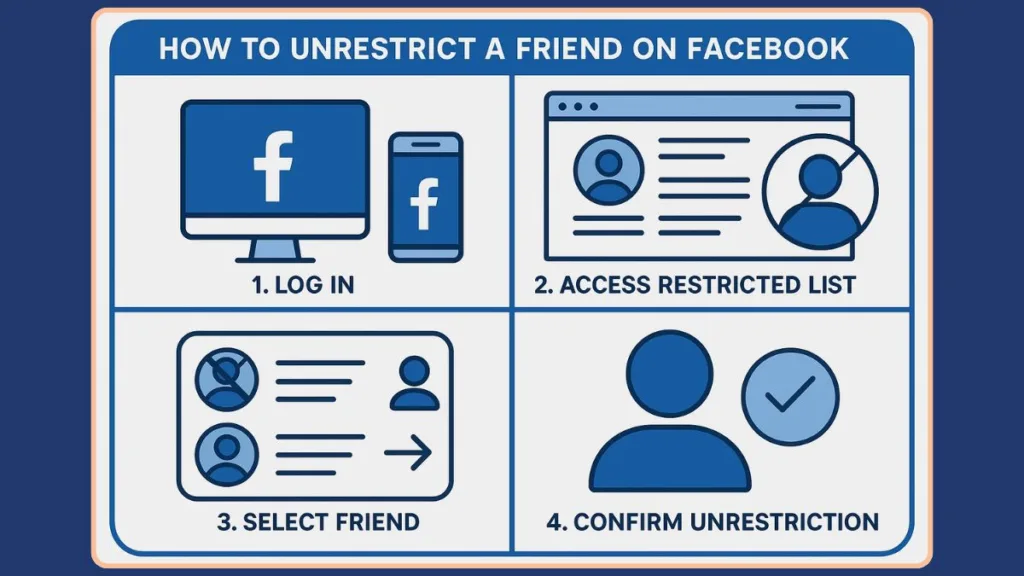
Primary Steps to Unrestrict Someone on Facebook: Restore Full Access Smoothly
Unrestricting a friend on Facebook is a straightforward process that allows them to regain visibility of your private posts and fully engage with your account. The method varies slightly depending on whether you are using a desktop computer or a mobile device, so it’s important to follow the steps for your specific platform. This tutorial provides clear guidance for each step, ensuring that even users unfamiliar with the Restricted list can follow along successfully.
Unrestricting on Desktop: Accessing the Full Restricted List
For a complete overview of your Restricted friends, the desktop version provides the most comprehensive access. Follow these detailed steps:
- Log In to Your Facebook Account: Open Facebook in your preferred web browser. Enter your email or phone number and password, then click Log In. Ensure you are using the account where the friend was restricted.
- Navigate to Friends and Custom Lists: From your News Feed, locate the Friends option in the left-hand menu. If Friends is not immediately visible, scroll down and click See More. Within Friends, click Custom Lists, then select Restricted. This displays the complete list of friends currently restricted on your account.
- Identify and Remove the Restricted Friend: Scroll through the list to locate the person you want to unrestrict. Once found, click the X or Remove option next to their name. A confirmation may appear to verify your choice. Confirm to finalize the change. After removal, the friend can now see posts shared with friends and interact with your content as normal.
Tutorial Tip: Use the search bar within the Restricted list to quickly locate friends if the list is long. This desktop method is ideal for managing multiple restricted accounts at once.
Unrestricting on Mobile Devices: iPhone and Android
If you are using a mobile device, the steps differ slightly because the full restricted list view is not available. Follow this step-by-step tutorial:
- Go to the Friend’s Profile: Open the Facebook app on your iPhone or Android device. Tap the search icon or navigate to the friend’s profile directly.
- Access Friend List Options: At the top of their profile, tap Friends. From the menu, select Edit Friend List. This shows all list options including Restricted.
- Unselect Restricted: Tap Restricted to remove the checkmark or selection. Tap Done to save your changes. Once complete, the friend can now view posts shared with friends and resume normal interaction.
Tutorial Tip: Mobile users cannot view a complete Restricted list, so this method works only if you remember which friends were restricted. Use this approach for quick adjustments or if you are unrestricting a specific friend on the go.
Key Tips for a Smooth Process
Double-check the profile to ensure you are unrestricting the correct person, which helps avoid accidental exposure of private posts. While managing restrictions, review your audience settings to confirm that only intended posts are visible to friends. On desktop, the search bar can help locate friends quickly within a long Restricted list. Finally, refresh your News Feed after unrestricting to verify that content is visible to the previously restricted friend.
How to Unrestrict Someone on Messenger: Regain Chat Access Effectively
Restricting someone on Messenger temporarily limits notifications and conversation visibility, allowing you to mute interactions without severing connections. Unrestricting reverses these restrictions, enabling the person to appear in your Chats list, receive notifications, and view your Active status again. The process is only available on mobile devices (iPhone or Android), but changes apply across all platforms, including desktop Messenger.
Understanding the Effects of Restriction on Messenger
When a friend is restricted on Messenger, their messages do not appear in your main chat list, and your device does not notify you of incoming messages or calls. They also cannot see your Active status or whether you have read their messages, and you won’t be alerted about these statuses either. Messenger will notify you if you enter a group chat that includes someone you have restricted. These features ensure that restricting a contact is discreet and reversible, providing control over interruptions while maintaining the connection.
Step-by-Step Guide to Unrestricting on Mobile
- Open Messenger and Access Settings: Launch the Messenger app on your iPhone or Android device. Log in if you haven’t already. Tap the three horizontal bars in the top-left corner to access the menu, then tap the gear icon to open Settings.
- Navigate to Restricted Accounts: Within Settings, select Privacy & Safety, then locate Restricted Accounts under the “Who Can Reach You” section. This list shows all contacts you currently have restricted on Messenger.
- Select the Profile and Unrestrict: Tap the profile of the person you want to unrestrict. You will be redirected to your chat with them. At the bottom of the chat screen, tap the Unrestrict button. Once completed, messages from this contact will reappear in your main Chats list, notifications will resume, and they will be able to see your Active status again.
Practical Tips for Managing Messenger Restrictions
Unrestricting on Messenger is immediate and applies across all devices, including desktop. If you restricted someone accidentally, this method allows a quick reversal. Always confirm that you are selecting the correct profile to avoid unintended changes. While unrestricting restores full interaction, consider reviewing your notification settings and Activity Status to ensure your privacy preferences remain intact.
Troubleshooting Common Issues When Unrestricting on Facebook and Messenger
Even with clear steps, users sometimes encounter difficulties when attempting to unrestrict someone on Facebook or Messenger. Understanding the most common issues and their solutions ensures a smoother experience and avoids frustration.
How do I remove someone from my restricted list on Facebook if the button is missing?
Occasionally, the Unrestrict button may not appear on mobile or desktop. This can happen if the account is not currently restricted, or due to temporary glitches in the app or browser.
To resolve this, first confirm that the person is actually on your Restricted list. Logging out and restarting the app or refreshing the browser can often fix the problem.
On desktop, you can verify their status by navigating to Friends → Custom Lists → Restricted. Once confirmed, the Unrestrict button should appear next to the person’s name.
Important Note: If the button is still missing after these steps, try clearing your browser cache or updating the app to the latest version, as outdated versions may cause interface issues.
Keyword integration: missing unrestrict button on Facebook, unrestrict button
How do you unrestrict someone I accidentally restricted on Facebook?
Sometimes, a user may have restricted someone unintentionally, especially on Messenger via a tap-and-hold action.
To fix this, open Messenger → Settings → Privacy & Safety → Restricted Accounts. Locate the person and tap Unrestrict immediately.
It is recommended to review your restricted list periodically to prevent similar errors from occurring in the future.
Tip: If you frequently restrict contacts by mistake, consider double-checking before tapping Restrict or using the restricted accounts settings to manage multiple users at once.
Where is the restricted folder on Facebook or Messenger?
Users sometimes cannot find the restricted accounts list either on mobile or desktop.
On desktop, navigate to Feed → Friends → Custom Lists → Restricted. On mobile (Messenger), go to Settings → Privacy & Safety → Restricted Accounts.
If your list is long, using the search bar within Facebook or Messenger can help locate the restricted contact quickly and efficiently.
Important Note: On mobile, the full restricted list is not visible on the Facebook app; in such cases, use the desktop version to manage all restricted friends.
What happens after I unrestrict someone on Messenger if notifications don’t appear?
After unrestricting on Messenger, some users may notice that notifications still do not appear.
To address this, ensure that device notifications are enabled for Messenger. Confirm that the contact is not muted separately in chat settings. Restarting the app can also refresh the settings and restore normal notifications.
Tip: If notifications remain inconsistent, check for Do Not Disturb or Focus modes on your device, which may override Messenger notification settings.
Pro Tips for Smooth Management
Always double-check the profile before unrestricting to avoid mistakes.
Keep your privacy and safety settings updated to prevent confusion. Review the restricted accounts periodically to maintain organization.
Be cautious when restricting or unrestricting multiple contacts at once, and consider the reason for restrictions before making changes to ensure your Facebook and Messenger interactions remain balanced.
Best Practices and Tips for Managing Restricted Accounts on Facebook and Messenger
Effectively managing your Restricted list ensures that your Facebook and Messenger interactions remain organized, private, and stress-free. Following best practices can prevent mistakes, reduce confusion, and make it easier to unrestrict someone when appropriate.
Be Clear About Your Intentions When Restricting
Before adding someone to your Restricted list, consider why you are doing so. Restricting is ideal for situations where you want to limit visibility or temporarily reduce interactions without blocking or unfriending.
Being intentional helps prevent accidental overuse of restrictions and ensures that unrestricting later is a deliberate action rather than an afterthought.
Important Note: Restricting someone should not be a substitute for resolving conflicts. If the relationship requires communication, consider discussing boundaries instead of relying solely on the Restricted list.
Regularly Review Your Restricted List
Your Restricted list can grow over time, especially if you’ve restricted multiple friends. Regularly reviewing the list ensures you know who is restricted and why.
On desktop, you can view all restricted friends under Friends → Custom Lists → Restricted. On mobile, check individual profiles to verify restrictions. This makes unrestricting easier and prevents accidental privacy oversights.
Tip: Use the search function to quickly locate friends in longer restricted lists and avoid scrolling through dozens of profiles.
Be Mindful of Privacy Settings When Unrestricting
When you unrestrict someone, they regain access to all posts shared with friends. Double-check your privacy settings to ensure you are comfortable with the level of access they will have.
Adjust the audience for specific posts if needed, and consider using custom post settings to control visibility without restricting the person again.
Important Note: Unrestricting does not notify the other person. They will simply regain access without awareness of the previous restriction.
Use Messenger Restrictions Strategically
On Messenger, restricting someone mutes notifications and hides conversations, but it does not block messages. Use this feature when you need temporary space, but still want to maintain the ability to communicate if necessary.
Tip: Pair Messenger restrictions with clear notification settings to manage interruptions without severing communication completely.
Document and Track Changes for Consistency
If you manage multiple restrictions across friends or colleagues, it’s useful to keep a personal note of who was restricted and why. This helps you maintain consistency and reduces the likelihood of forgetting someone who needs to remain restricted or remembering incorrectly.
Tip: Consider a simple spreadsheet or digital note to track restricted contacts, particularly if you frequently update privacy settings.
Encourage Balanced Interaction
Ultimately, the goal of using restrictions is to maintain healthy online relationships. Unrestricting should be done thoughtfully, ensuring that interactions are positive, respectful, and aligned with your comfort level on Facebook and Messenger.
Important Note: Restricting and unrestricting is reversible, giving you flexibility. Use it as a tool for balance rather than a permanent solution to conflicts or disagreements.
FAQ About Unrestricting on Facebook and Messenger
How do you unrestrict someone on Messenger?
Open Messenger → Settings → Privacy & Safety → Restricted Accounts, select the contact, and tap Unrestrict. The conversation will return to your main chat list, and notifications will resume.
How do I remove someone from my restricted list on Facebook?
On desktop, go to Friends → Custom Lists → Restricted, find the person, and click Remove. On mobile, visit their profile, tap Friends → Edit Friend List, and unselect Restricted.
Does the person know when you unrestrict them on Facebook?
No, Facebook does not notify users when they are unrestricted. They simply regain access to your posts shared with friends.
What happens after I unrestrict someone on Messenger?
They can now message you normally, appear in your chat list, and receive notifications. Your Active status becomes visible again if enabled.
Where is the ‘Restricted’ option on Facebook?
On desktop, find it under Friends → Custom Lists → Restricted. On mobile, it appears in the Edit Friend List menu on the person’s profile.
Conclusion: Taking Full Control Over Your Facebook and Messenger Connections
Managing your Restricted list on Facebook and Messenger is an essential skill for maintaining both privacy and healthy online interactions. Whether you restricted someone to reduce notifications, limit post visibility, or temporarily step back from a connection, unrestricting allows you to restore full engagement seamlessly.
By following the step-by-step instructions outlined for desktop and mobile platforms, you can efficiently manage restrictions and ensure that friends regain access to your posts and messages without confusion. This process is fully reversible, giving you flexibility to adjust your interactions based on your comfort level and evolving relationships.
Key Takeaways for Effective Unrestricting
- Check the Restricted List Regularly: Periodically reviewing your restricted friends helps you maintain awareness and avoid accidental oversight.
- Use Privacy Settings Thoughtfully: When unrestricting someone, verify that your post audiences and notification preferences reflect your intended visibility.
- Leverage Messenger Restrictions Strategically: Understand that restricting mutes notifications and hides conversations, while unrestricting restores full communication seamlessly.
- Document Changes for Clarity: Keeping track of who was restricted and why can help manage multiple friends and maintain a consistent approach.
- Unrestrict Responsibly: Consider the reason you restricted the person initially. Use this feature to maintain balanced interactions, not as a substitute for communication or conflict resolution.
Final Thoughts
Unrestricting someone on Facebook or Messenger is a simple yet powerful tool to manage your digital relationships. Whether reconnecting with a friend, correcting an accidental restriction, or adjusting privacy boundaries, knowing how to unrestrict someone gives you control over your social interactions without disrupting connections.
By combining privacy awareness, careful management of your restricted accounts, and the actionable steps provided in this guide, you can ensure that your Facebook and Messenger experience remains both secure and engaging.
Important Note: The changes made on mobile or desktop will sync across all platforms. Once someone is unrestricted, they can immediately view posts shared with friends and interact normally, providing a smooth and controlled return to full communication.
Visit Our Post Page: Blog Page