
Learn how to use Snipping Tool in 2026! Discover the best keyboard shortcuts, hidden Windows 11 features, and pro tips to capture and record your screen fast.
If you spend any time working on a computer, you already know that capturing exactly what is on your screen is a daily necessity. We’ve all been there—trying to grab a quick screenshot and having to rely on the clunky old method of hitting “Print Screen” and pasting the whole display into Microsoft Paint just to crop it down.
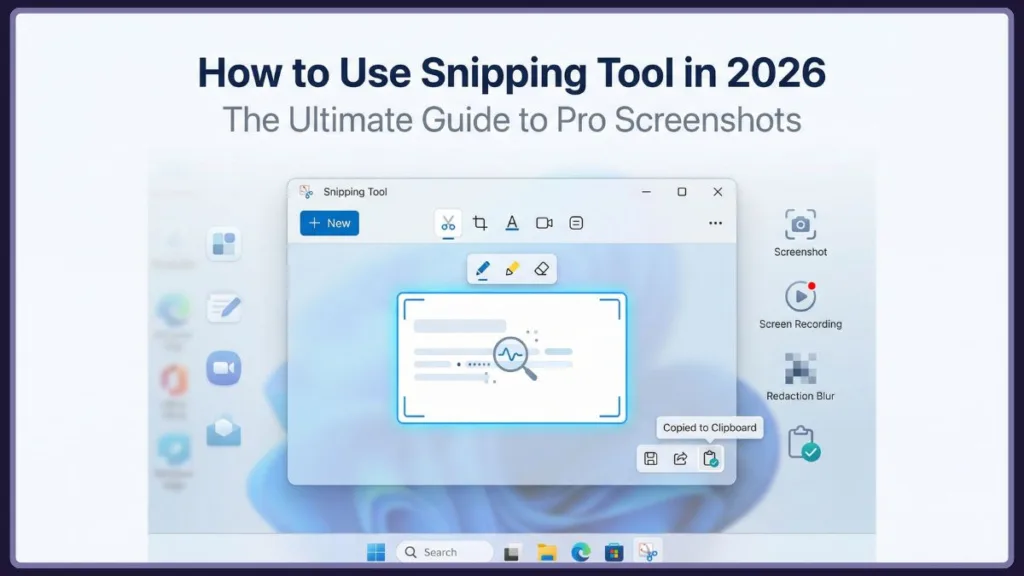
Fortunately, Microsoft gives us a much easier, built-in way to capture, edit, share, and even record our screens. Over the years, this default utility has quietly grown from a basic clipping add-on into a real productivity powerhouse, packed with features like Optical Character Recognition (OCR), audio-enabled screen recording, and seamless clipboard integration.
In this Izoate guide, we are diving into every feature, shortcut, and hidden trick this application has to offer. Whether you’re a student saving research notes, a professional sending a bug report to IT, or a creator putting together a quick tutorial, this guide will show you exactly how to get it done.
What is a Snipping Tool? The Evolution of Screen Capture
Before we jump into the tutorials, let’s answer the basic question: What is a Snipping Tool? Simply put, it’s a default system utility in Windows that lets you grab customized screenshots (called “snips”), mark them up with digital pens and highlighters, extract text from them, and record on-screen video with audio.
To really appreciate the tool you’re using today, it helps to look at where it started:
- The Early Days (Windows XP): The app actually began in 2002 as the “Clipping Tool,” and was only available as an optional download in the Experience Pack for Windows XP Tablet PC Edition.
- The Mainstream Launch (Windows Vista & 7): It was rebranded as the “Snipping Tool” and baked directly into Windows Vista and Windows 7. For a decade, it was everyone’s go-to for basic screen grabs.
- The Snip & Sketch Era (Windows 10): With Windows 10, Microsoft tried to replace the legacy tool with a modern Universal Windows Platform (UWP) app called “Snip & Sketch.” This caused a bit of confusion since both apps ended up existing on many computers at the same time.
- The Unified Modern Tool (Windows 11): Microsoft finally listened to the community. In Windows 11, they took the best parts of the legacy app and Snip & Sketch, merging them into one unified, incredibly fast application simply named “Snipping Tool.”
Today, it is easily one of the most vital utilities in the Windows ecosystem. Let’s look at how to use it effectively.
How to use snipping tool on windows: The Basics
Learning how to use snipping tool on windows is straightforward, and it completely changes how you share information. If you’re totally new to it, let’s start with the absolute basics.
How do I snip a screen?
If you need to capture your display right now, here is a quick snipping tool step by step guide using the manual menu method:
- Open the Start Menu: Click the Windows icon on your taskbar or hit the Windows key.
- Search for the App: Type “Snipping Tool” into the search bar. Look for the app icon (it looks like a pair of scissors cutting a blue rectangle).
- Launch the App: Click to open it. A small, compact window will pop up.
- Initiate a New Snip: Click the + New button in the top left corner of that window.
- Select Your Area: The moment you click “New,” your screen will dim and your cursor will turn into a crosshair. Click, hold, and drag your mouse to draw a box around the exact area you want to capture.
- Capture: Just release the mouse button to take a screenshot using snipping tool.
Your selected area will immediately pop up inside the app window. From there, you can click the floppy disk icon in the top right to save the image to your computer (as a PNG, JPG, or GIF).
Izoate Pro Tip: Find yourself using this constantly? Right-click the app’s icon on your taskbar while it’s open and select “Pin to taskbar.” It saves you from digging through the Start menu every time.
The Clipboard Magic: Sharing Without Saving
How to use snipping tool to copy and paste
The Time-Saving Secret: You rarely need to save your files. When you take a snip, the image is automatically copied to your Windows clipboard (your system’s temporary memory).
Here is how to use this to your advantage:
- Take your screenshot using the steps we just covered.
- Skip the “Save” button entirely. Just minimize or ignore the app window.
- Open up wherever you want the image to go—a Word doc, an email in Gmail or Outlook, a Slack chat, etc.
- Click inside the text field and press Ctrl + V (or right-click and “Paste”).
The image drops right into your message! It keeps your hard drive clean and stops your “Pictures” folder from filling up with files named “Screenshot 1,” “Screenshot 2,” and so on.
Supercharging your screenshot using snipping tool (Windows + V)
Want to make copying and pasting even better? Use the Windows Clipboard History feature.
- Press Windows Key + V.
- If it’s your first time, click “Turn on.” 3. Now, every snip you take is saved to a running history list. You can grab five different snips from a spreadsheet, open your email, press Windows + V, and paste them all in one by one without constantly switching windows.
The Fastest Method: How to use snipping tool shortcut
Opening the app from the Start menu is fine, but learning how to use snipping tool shortcut commands is the real productivity hack here.
The Ultimate Shortcut: Instead of launching the app manually, just press these three keys at the same time: Windows Key + Shift + S
This bypasses the app interface entirely. Your screen dims instantly, and a sleek little overlay menu appears at the top center of your monitor with four capture modes:
- Rectangular Snip: The default. Draw a precise box around your subject. Perfect for grabbing specific paragraphs or error codes.
- Free-form Snip: Draw a custom, irregular shape. It acts like a lasso, which is great if you want to capture an object but skip the background.
- Window Snip: Your cursor turns into a pointer. Hover over any open application window (like your browser or a calculator) and click once. It captures only that window perfectly, ignoring your desktop and taskbar.
- Full-screen Snip: Grabs your entire monitor display (or all your monitors if you have a multi-screen setup) in a single click.
Remapping the Print Screen Key
If a three-key shortcut feels like too much work, you can map the tool to a single key.
- Open Windows Settings (Windows Key + I).
- Go to Accessibility > Keyboard.
- Scroll to the “On-screen keyboard, access keys, and Print screen” section.
- Toggle on the setting labeled “Use the Print screen key to open Snipping Tool.” Now, just tap PrtScn on your keyboard, and the capture tools will instantly appear.
Windows Versions Compared: Features & Interface
Depending on how old your computer is (or how your IT department handles updates), your app might behave a little differently.
How to use Snipping Tool in Windows 10?
In Windows 10, things are slightly fragmented. If you open the classic Snipping Tool, you might see a warning that it’s moving to a new app called “Snip & Sketch.” While the classic app still works in Windows 10, using the Windows Key + Shift + S shortcut automatically brings up the newer Snip & Sketch experience. Snip & Sketch gives you a great interface to mark up your images with digital pens, highlighters, and a ruler before you send them off.
How to use snipping tool windows 11
The Modern Experience: If you are running Windows 11, Microsoft has merged everything into one powerhouse application. It features a modern interface, dark mode support, and an amazing set of advanced features powered by AI and local processing.
Let’s look at what makes the Windows 11 version so capable.
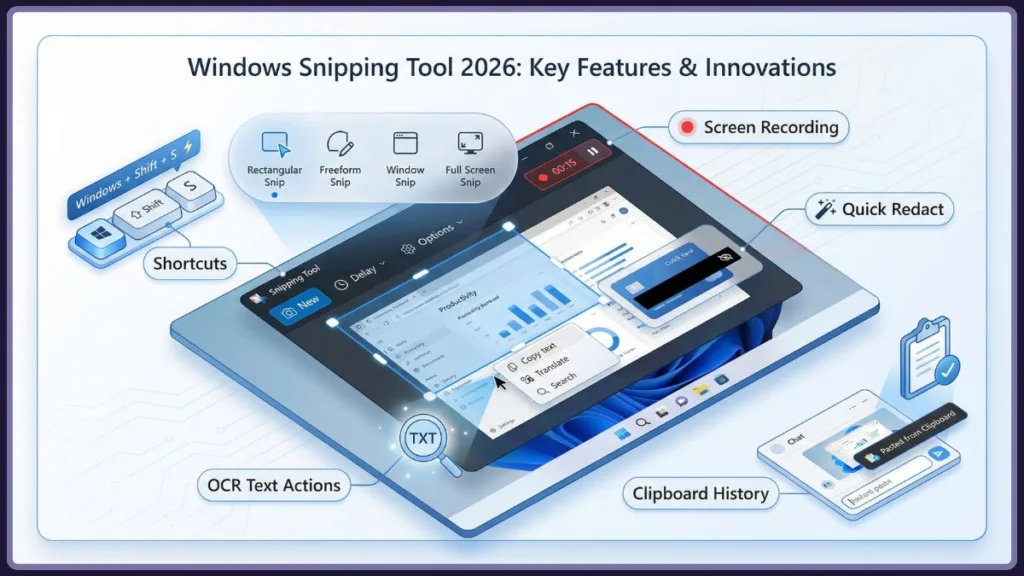
The Windows 11 Advanced Features: OCR, Redaction, and Shapes
Over the last few years, Microsoft has aggressively updated this tool for Windows 11, turning it into a full productivity suite.
Optical Character Recognition (OCR) / “Text Actions”
This is arguably the best update they’ve made. “Text Actions” uses Optical Character Recognition (OCR) to read and extract text straight out of an image.
Say someone sends you a photo of a Wi-Fi password or an error code you can’t highlight.
- Take a snip of the image.
- In the toolbar, click the Text Actions button (the icon looks like a square with text lines and a cursor).
- The app scans the image in seconds. You can now highlight the text inside the picture, right-click, and hit “Copy Text.”
- Paste it into Notepad, Word, or an email as perfectly editable plain text.
The “Quick Redact” Privacy Feature
Right alongside Text Actions is Quick Redact—an absolute lifesaver for privacy. When sharing screenshots of inboxes or portals, you often need to hide sensitive info.
- Click the Text Actions button, then look for the Quick Redact option.
- The tool scans your snip, finds email addresses or phone numbers, and slaps a black redaction block over them automatically.
- You can also manually highlight any text, right-click, and choose “Redact text” to hide names or financial numbers.
Adding Shapes and Emojis
People begged Microsoft for years to add basic shapes so they didn’t have to draw wobbly circles with the pen tool. That feature is finally here. Just click the Shapes icon in the toolbar to overlay perfect red rectangles, green arrows, circles, and even emojis onto your snips to point out details clearly.
Delay Snip for Complex Menus
The Drop-Down Trick: Ever try to screenshot a drop-down menu, but it vanishes the second you press the shortcut keys? The Delay feature is your workaround.
- Open the Snipping Tool app.
- Click the clock icon (Delay Snip) on the toolbar.
- Pick a delay of 3, 5, or 10 seconds.
- Click + New.
- You now have a few seconds to open your drop-down menu and get your mouse in position. When the timer runs out, the screen freezes so you can capture that elusive menu.
Advanced Screen Recording: How to use snipping tool to record video
Did you know this app does video now, too? Learning how to use snipping tool to record video is perfect for making software tutorials or showing tech support exactly what’s going wrong on your screen.
How do I snip a video?
You used to need the Xbox Game Bar or heavy third-party software for this, but now it’s built right in. Here is how to use it:
- Switch Modes: Open the app. On the top toolbar, click the Video Camera icon to switch from photo to screen recording mode.
- Start a New Recording: Click + New.
- Select the Recording Area: Click and drag a box around the part of your screen you want to record (draw it corner-to-corner for full screen).
- Configure Audio: Look at the top center of your screen for the Microphone and System Audio icons.
- Click the Microphone to unmute if you are doing a voiceover.
- Click the System Audio icon (the speaker) if you want to capture the sounds your computer makes, like a video playing.
- Record: Hit the Start button. A three-second countdown will play, and recording begins.
- Stop and Save: Click the Red Square (Stop button) at the top when you are done.
The video opens in the app for you to preview. You can save it as an MP4 or click “Edit in Clipchamp” to trim the footage or add text in Windows’ default video editor.
Troubleshooting: snipping tool not working
Technology glitches happen, and discovering the snipping tool not working when you’re in a hurry is incredibly frustrating. If your shortcut is dead, the app freezes, or captures won’t save, work through these quick fixes:
1. Check the Print Screen Key Setting
If the PrtScn key isn’t doing anything, a Windows update might have toggled it off.
- Go to Windows Settings > Accessibility > Keyboard.
- Make sure “Use the Print screen key to open screen capture” is toggled ON.
2. Check Background App Permissions (Windows 10/11)
Windows sometimes puts background apps to sleep to save battery, which kills your shortcuts.
- Go to Settings > Apps > Installed Apps.
- Search “Snipping Tool,” click the three dots, and select Advanced options.
- Under “Background apps permissions,” set it to “Always” or “Power optimized” (don’t leave it on “Never”).
3. Repair or Reset the Application
If the app opens but crashes instantly, the files might be corrupted. You can fix this easily in settings.
- Go to Settings > Apps > Installed Apps > Snipping Tool > Advanced options.
- Scroll down to the “Reset” section.
- Click Repair first (this tries to fix it without deleting your personal app settings). Test the tool.
- If it still fails, click Reset to reinstall the core files.
4. Enable Notifications
Take a snip but don’t see the pop-up banner in the corner of your screen? Your notifications are likely off.
- Go to Settings > System > Notifications.
- Ensure global notifications are on, then scroll down and verify the specific toggle for the Snipping Tool is switched ON.
5. Check the Registry (Advanced)
Warning: Only do this if you are comfortable editing the registry.
If absolutely nothing else works and Win+Shift+S is totally unresponsive, a registry key might be blocking it.
- Press Windows Key + R, type
regedit, and hit Enter. - Go to:
HKEY_CURRENT_USER\Software\Microsoft\Windows\CurrentVersion\Explorer\Advanced - Look for a DWORD value named
DisabledHotkeys. If you see an “S” in the value data, the shortcut is blocked. Edit the value to remove the “S”.
Snipping Tool vs. Third-Party Alternatives
The native tool handles 95% of what most people need. But if you are a technical writer or developer, you might eventually need more. Here is how Windows stacks up against the heavy hitters.
1. TechSmith Snagit (The Premium Standard)
If creating documentation and training manuals is your actual job, Snagit is the industry standard.
- The Pros: It has scrolling capture (it scrolls down and captures a whole webpage automatically), massive template libraries, pixel-perfect blurring, and great video editing.
- The Cons: It costs money. Unlike the built-in tool, Snagit requires a subscription or a one-time license fee, and it can run a bit heavy on older PCs.
2. ShareX (The Open-Source Powerhouse)
For power users who want premium features without the price tag, ShareX is an incredible open-source option.
- The Pros: It features wild automated workflows. You can set it so that when you screenshot, it instantly resizes the image, slaps your logo on it, uploads it to Google Drive, and copies the URL to your clipboard.
- The Cons: The interface is extremely complex and text-heavy. It’s overkill if you just want to snip a picture of a recipe.
3. Greenshot (The Engineer’s Choice)
Greenshot is a long-time favorite in IT departments.
- The Pros: It is totally free, very lightweight, and has a great “destination menu” that pops up instantly after a capture, asking exactly where you want to route the image.
- The Cons: The interface looks a little dated, it hasn’t had a major stable update in a few years, and it doesn’t do video.
4. Lightshot (Speed and Simplicity)
If you just want pure speed, Lightshot is a popular alternative.
- The Pros: Pressing Print Screen brings up a tiny toolbar right next to your cursor. You can highlight or instantly upload the image to their server to get a shareable link in seconds.
- The Cons: It completely lacks the deeper features like OCR text extraction, redaction, and screen recording.
Verdict: Unless you absolutely need scrolling captures or intense automated cloud uploads, the modern Windows 11 app has bridged the gap. With the addition of Text Actions and Video Recording, most users simply don’t need third-party software anymore.
Conclusion: Master Your Screen
The Snipping Tool has come a long way since its early days as a hidden extra in Windows XP. Today, it is a practical, robust, and essential utility that every Windows user should know how to navigate.
By making a habit of using the Windows + Shift + S shortcut, utilizing clipboard history, extracting text with OCR, and recording quick videos, you will drastically speed up your day and communicate much more effectively with your team.
Now that you know how it all works, try it out! Hit that keyboard shortcut and take a quick snip right now to build the muscle memory.
Useful Resources
If you want to dive even deeper into screen capture and Windows productivity, here are some excellent official guides and tools to check out:
- Official Microsoft Snipping Tool Support: Microsoft’s constantly updated documentation covering the newest features pushed to the Windows 11 tool.
- Comprehensive Windows Keyboard Shortcuts: If you love the Windows + Shift + S trick, check out this official list of every other time-saving shortcut built into the Windows operating system.
- ShareX Official Website: Ready to try the open-source powerhouse mentioned in our alternatives section? You can download ShareX directly from their site.
- TechSmith Snagit: If you need professional-grade, scrolling captures for technical writing, you can explore Snagit’s features and free trial here.
- Microsoft Community Forums: If you are experiencing a completely unique bug that our troubleshooting section didn’t cover, the official forums are the best place to find patch-specific fixes.
Visit Our Post Page: Blog Page