
Discover how to make and set a custom ringtone on iPhone with simple step-by-step methods. Create tones from your music library, use GarageBand, or sync from Mac and Windows effortlessly
Tired of hearing the exact same default alert every time your phone rings? Whether you want to make a song a ringtone on your iPhone, use a viral soundbite, or feature a personal voice recording, deciding to create custom ringtones for iPhone is a fantastic way to personalize your device. If you are looking to create your own personalized ringtone in just a few minutes, or simply want to extract an iPhone ringtone from music library favorites, you are in the right place.
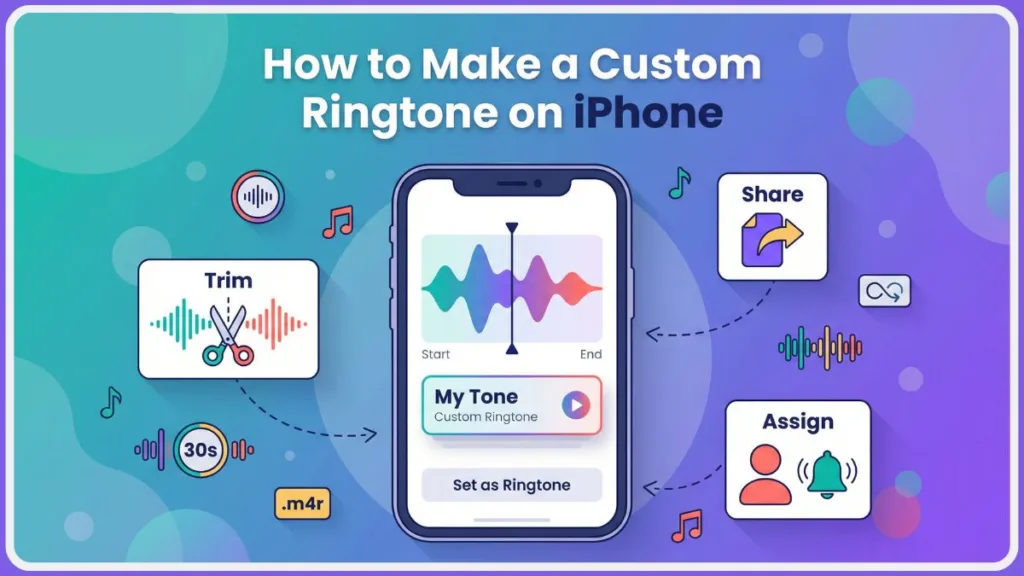
In this complete Izoate guide, you’ll learn exactly how to bypass the defaults and take control of your audio across both older and newer iOS versions. We will cover:
- How to download and set ringtones directly on your iPhone without a computer.
- How to use the free GarageBand app as your ultimate iPhone ringtone maker.
- How to transfer a downloaded track using a Mac or Windows PC.
- How to assign different ringtone on iPhone for specific contacts.
- Quick troubleshooting fixes if your new tone isn’t working.
Let’s dive right in.
iPhone Ringtone Requirements: Read This First
Crucial Setup Step: Before you begin, your audio file must meet a few strict technical rules. Skipping these requirements is the number one reason custom ringtones fail to appear in your settings.
- Ringtone Length Limit: Your file must be 30 seconds or less. Why is this enforced? Apple limits ringtones to optimize memory and ensure smooth looping across the iOS ecosystem. While some desktop tools allow trimming to 40 seconds, iPhone ringtone support remains strictly 30 seconds for full compatibility.
- File Format (.m4r): iPhone ringtones strictly use the .m4r file format. Why .m4r? Essentially, this is just an AAC audio file (
.m4a) that has been renamed. The.m4rextension acts as a system flag that tells your iPhone, “Hey, treat this as a ringtone, not a standard music track.” - No DRM Protection: You cannot directly use DRM-protected songs. Why does DRM block this? Digital Rights Management prevents you from copying or modifying rented files (like those downloaded for offline listening via an active Apple Music subscription). The file must be completely DRM-free and owned locally.
- Local Storage: If you are trying to complete the computer-free methods below, the audio file must be saved locally inside your iPhone’s native Files app.
Before You Choose a Method
Not sure where to start? Here is a quick breakdown to help you pick the best approach for your specific setup:
Want the fastest method? > Direct iOS Method (requires newer iOS)
Don’t have a computer? > GarageBand Method
Mac user? > Finder Method
Windows user? > iTunes Method
If you’re unsure, the GarageBand method works on almost every modern iPhone and doesn’t require a computer.
Method 1: Set a Custom Ringtone Directly – Latest iOS Method
If you want to know how to make a ringtone on iPhone without a computer, and you are on newer iOS versions that support direct ringtone sharing, Apple finally allows you to download and apply alerts directly from the Files app—skipping GarageBand entirely.
Step 1: Prepare Your Audio
Trim your audio file so it is exactly 30 seconds or less using any free online audio cutter. Once trimmed, save the final, shortened file directly to your Files app.
Step 2: Apply the Ringtone
- Open the Files app and locate your saved audio file.
- Long-press the file and tap Share.
- Select the Use as Ringtone option.
- If you don’t see the “Use as Ringtone” option, your iPhone may not yet support this feature — in that case, use the GarageBand method below.
Note: Your new ringtone is applied instantly! You can manage, change, or delete it anytime by navigating to Settings > Sounds & Haptics > Ringtone.
Method 2: Create a Ringtone Using GarageBand – No PC Required
If your iPhone does not show a “Use as Ringtone” option in the Files app, Apple’s free GarageBand application is the absolute best way to handle the process entirely on your phone.
Step 1: Import Your Audio
- Open GarageBand and tap Create New Audio Recording (look for the microphone icon).
- Tap the Tracks icon (the three horizontal lines at the top left).
- Tap the Loop icon (top right) and choose the Files tab to find your saved audio.
- Long-press the audio file and drag it smoothly into the timeline.
Step 2: Trim the Audio
- Tap the audio clip and drag the outer edges to trim it down to 30 seconds or less.
Important: Ensure the clip is pushed all the way to the far left side of the timeline so there is absolutely no dead air before the music starts.
Step 3: Export as Ringtone
- Tap the downward arrow icon (top left) and select My Songs.
- Long-press your newly saved project, tap Share, and choose Ringtone. (Why GarageBand is great: If your file is slightly over 30 seconds, GarageBand will automatically trim it down during this export step!)
- Name your ringtone and tap Export.
- Once the export finishes, select Standard Ringtone to set it immediately.
Method 3: Transfer Using a Mac – Finder Method
If you already manage your music library on a Mac (running macOS Catalina or later), you can easily create and transfer your files using the built-in Music app and Finder.
Step 1: Trim and Convert
- Open the Music app, right-click your chosen song, and click Get Info.
- Under the Options tab, set the Start and Stop times to capture a precise 30-second clip, then click OK.
- With the newly trimmed song selected, go to the top menu bar: File > Convert > Create AAC Version.
Step 2: Rename and Sync
- Right-click the newly created 30-second AAC file and select Show in Finder.
- Change the file extension manually from .m4a to .m4r.
- Connect your iPhone to your Mac via your USB cable.
- Open Finder, select your iPhone from the left sidebar, and drag the .m4r file directly into the main Finder window.
- Your ringtone will automatically sync over to Settings > Sounds & Haptics > Ringtone.
Method 4: Transfer Using a Windows PC – iTunes Method
Windows users will need to rely on iTunes to convert and transfer their files.
Pro-Tip for Windows: It is highly recommended to use the legacy version of iTunes downloaded directly from Apple’s website, rather than the Microsoft Store version, to ensure the smoothest file transfer.
Step 1: Trim and Convert in iTunes
- Drag your chosen audio file into your iTunes Music library.
- Right-click the song, select Song Info, and use the Options tab to set a 30-second Stop time.
- Go to the top menu and click File > Convert > Create AAC Version.
Step 2: Rename and Sync
- Right-click the new short version and select Show in Windows Explorer. (Make sure “File name extensions” is checked under the View tab in Explorer so you can edit it).
- Change the extension carefully from .m4a to .m4r.
- Connect your iPhone to your PC and click the small device icon in iTunes.
- Drag the .m4r file from your computer folder directly into the Tones section of your device on the left sidebar.
- Click Sync.
How to Buy Ringtones on iPhone
If you want to skip the DIY process entirely, you might be wondering how do I find ringtones on my iPhone that are ready to go. The easiest way is to simply purchase a track directly from Apple.
- Open the iTunes Store app.
- Tap More at the bottom, then select Tones.
- Browse the store, preview sounds, and tap the price to purchase.
- Once purchased, the ringtone downloads directly to your iPhone and appears automatically at the top of your ringtone settings list.
How to Change or Adjust Your Ringtone on iPhone
Once your custom file is on your device, you might be wondering how to change your ringtone on iPhone globally or simply adjust ringtone on iPhone volume levels.
Selecting Your New Ringtone
To globally update how to change iPhone ringtone custom settings:
- Go to Settings > Sounds & Haptics.
- Tap on Ringtone.
- Scroll to the top of the list under the “Ringtones” section and tap your newly created .m4r file to make it your active alert.
Adjusting Ringtone Volume
- Stay within Settings > Sounds & Haptics.
- Locate the Ringtone and Alert Volume slider.
- Drag the slider left or right to increase or decrease the volume. If you want to use your physical side buttons to alter this volume dynamically, toggle on Change with Buttons.
How to Assign a Custom Ringtone to a Specific Contact
Want to know exactly who is calling without even glancing at your screen? You can easily assign unique audio alerts to family, friends, and coworkers.
- Open the Contacts app and select a specific person.
- Tap Edit in the top right corner.
- Scroll down the page and tap Ringtone.
- Select your custom ringtone from the list and tap Done.
Troubleshooting: Why Isn’t My Custom Ringtone Working?
Quick Fix: If your new ringtone isn’t showing up in your device settings, double-check these common culprits to solve the issue instantly.
- The file is too long: If the audio exceeds 30 seconds, iOS will likely reject it. While some desktop tools might technically allow you to trim up to 40 seconds, keeping your file strictly to 30 seconds ensures perfect compatibility across all Apple services.
- The format is wrong: Ensure you didn’t rename correctly. Your computer must be set to show file extensions before renaming, otherwise you might accidentally create a hidden file named
ringtone.m4r.m4a. It must strictly end in .m4r. - It’s DRM protected: You cannot use tracks straight from an active Apple Music subscription; you must own the raw, DRM-free file.
- Syncing issues (PC/Mac): Ensure your USB cable supports data transfer (not just battery charging) and that you’ve tapped “Trust This Computer” on your iPhone screen. Make sure you didn’t forget to press Sync in iTunes. Ringtone not showing after sync? Try a quick device restart.
- Ringtone appears but no sound: Check your physical mute switch on the side of your iPhone, or ensure your volume slider in Sounds & Haptics is turned up.
- Text tone vs ringtone confusion: Ringtones can loop for up to 30 seconds, but text tones are meant to be short. If you exported a long clip, use it as a standard ringtone, not a brief text alert.
FAQ
How do I add a custom ringtone to my iPhone?
You can add one directly through the native Files app on newer iOS versions, use the free GarageBand app to create one on-device, or transfer an .m4r file from your Mac (via Finder) or Windows PC (via iTunes).
Can I transfer custom ringtones without iTunes?
Yes! You no longer strictly need iTunes. You can download and apply ringtones directly from the Files app, create them directly via GarageBand, or use Finder if you are on a modern Mac.
How do I find ringtones on my iPhone?
All installed and default ringtones are located by navigating to Settings > Sounds & Haptics > Ringtone. Your custom additions will always appear at the very top of this list.
Should you have a custom ringtone on your iPhone?
Absolutely. Having a custom ringtone helps you instantly identify when your phone is ringing in a crowded room where everyone else is using the exact same default Apple alerts.
How many custom ringtones can I add?
There is no strict official limit; it entirely depends on your iPhone’s available storage space. Since a 30-second .m4r file is less than 1MB, you can practically add hundreds without impacting your storage capacity.
Creating a custom alert puts you fully in control of your device’s personality. Whether you trim a favorite song on your PC or handle everything seamlessly inside the Files app, the whole setup only takes a few minutes. Once you understand the 30-second limit and the .m4r format requirement, the process becomes simple, reliable, and repeatable on any compatible iPhone.
Still stuck? Tell us which method you’re using — GarageBand, Mac, or Windows — and we’ll help you troubleshoot in the comments below.
Visit Our Post Page: Blog Page