
Roomba keeps saying Error 14? Fix the “Reinstall Bin” issue fast with this step-by-step guide for i7, s9, j7 & 600 series models.
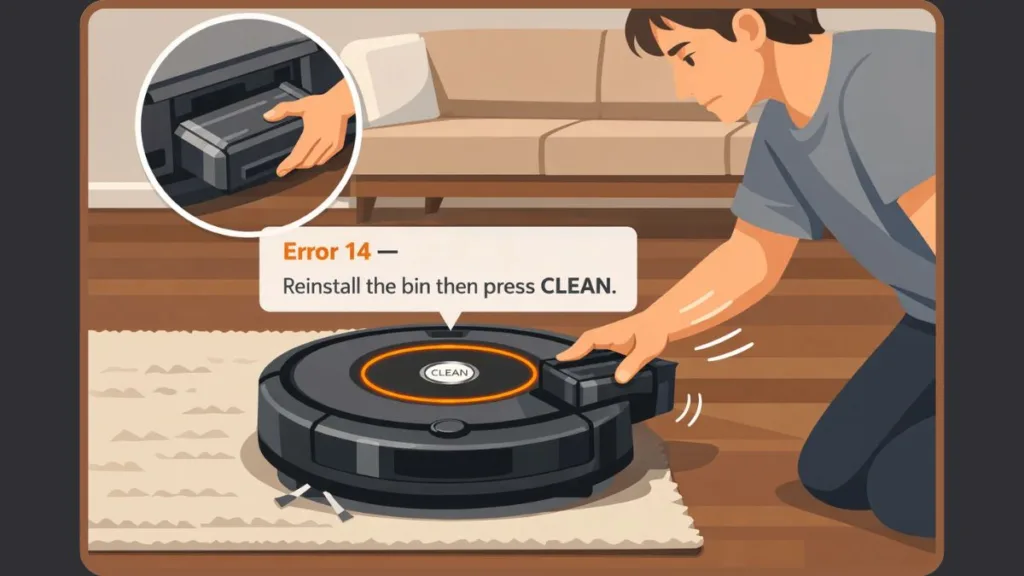
When your Roomba suddenly stops mid-cycle and says “Error 14” or audibly announces “Error one-four”, it does not mean the robot is permanently damaged. In nearly every case, it means your Roomba cannot detect that the dust bin is properly installed.
That distinction matters.
Error 14 is a bin detection failure, not a battery failure, not a charging issue, and not a motor breakdown. The robot simply believes the bin is missing, even when it is physically in place.
If your Error 14 Roomba message keeps repeating after you reinstall the bin, this guide walks you through the complete troubleshooting ladder — starting with a simple 2-minute fix and moving toward deeper inspection only if necessary.
What Does Error 14 Mean on a Roomba? | Roomba Error 14 Not Detecting Bin Explained
Roomba Error 14 means the robot cannot detect the dust bin.
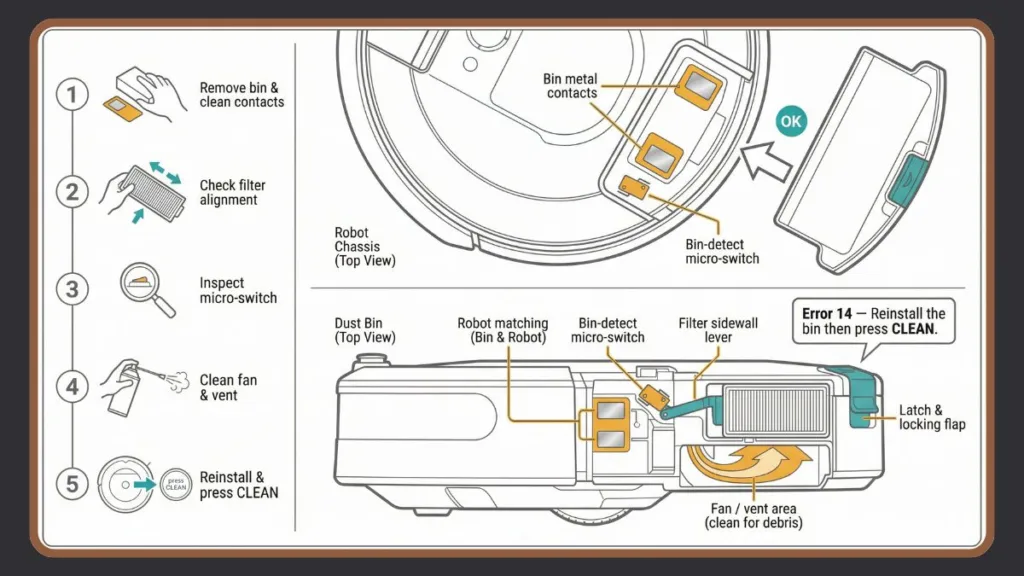
Internally, your iRobot device relies on a small detection circuit. This includes two metal bin contacts on the dust bin, matching contacts inside the robot, a micro-switch, and on some models, a HEPA filter-triggered lever. When the bin slides into position, these components complete a low-voltage electrical circuit. That completed circuit tells the robot: “The bin is installed.”
If anything interrupts that circuit — dust buildup, corrosion, moisture, misalignment, or a worn actuator — the circuit fails to close. The robot interprets that as a missing bin and stops operating.
This is why users commonly report:
“Roomba error 14 not detecting bin”
“Roomba error 14 reinstall bin”
“Roomba keeps saying error 14”
“Roomba error 14 after emptying bin”
The error is especially common after washing a washable bin, using the robot on fine dust surfaces, running it without regular maintenance, or reinserting the bin too loosely.
Understanding this mechanism helps you troubleshoot logically instead of guessing.
Why Roomba Keeps Saying Error 14 After Emptying Bin
Roombas operate in environments filled with fine particulate dust, pet hair, carpet fibers, and micro debris. Over time, these particles accumulate not just inside the bin but also around the metal contacts and switch mechanisms.
Even a thin layer of carbon dust can reduce electrical conductivity enough to prevent the detection signal from completing.
Additionally, vibration during cleaning can slowly loosen plastic tolerances. The bin may still appear to “fit,” but the pressure needed to activate the internal micro-switch may no longer be sufficient.
In washable-bin models, residual moisture is another major factor. Slight corrosion or water film on the contacts creates resistance in the detection circuit.
This is why Error 14 Roomba problems often appear suddenly, even if the robot worked perfectly the day before.
Quick Fix for Roomba Error 14: The 2-Minute Magic Eraser Method
This resolves most Roomba error 14 reinstall bin complaints.
What You’ll Need to Clean Roomba Bin Contacts
You will need a piece of melamine foam (commonly sold as a Magic Eraser), a dry microfiber cloth, and optionally a small amount of rubbing alcohol for stubborn residue.
Melamine foam works because it lightly abrades oxidation and carbon buildup without damaging the metal contacts.
How to Fix Error 14 on Roomba – Step-by-Step
First, power off your Roomba completely and disconnect it from the charging dock. Remove the dust bin carefully.
Locate the two small metal contacts on the dust bin. These are typically positioned on one side of the bin near the electrical interface.
Next, look inside the robot’s bin housing and identify the matching metal contact points.
Gently scrub both the bin contacts and the internal contacts using melamine foam. Apply light pressure only. If residue remains, lightly dampen the foam with rubbing alcohol and repeat.
After cleaning, wipe the contacts dry with a cloth. Allow a minute for full evaporation if alcohol was used.
Reinstall the bin firmly until it clicks securely into place. Then power the robot back on and test.
If your Roomba error 14 keeps repeating, continue below.
Roomba Error 14 Hard Reset and Deep Troubleshooting Steps
If contact cleaning does not solve the issue, the problem may involve mechanical alignment, airflow obstruction, or sensor failure rather than simple surface contamination.
Check Filter Alignment for Roomba Error 14 After Emptying Bin
A surprisingly common cause of Roomba error 14 after emptying bin is improper filter installation.
On many models, the filter’s sidewall presses against a small internal lever. That lever activates a micro-switch which signals that the bin assembly is properly seated.
If the filter is missing, slightly warped, inserted upside down, or not fully pressed into place, the micro-switch may not activate properly.
Remove the filter and inspect it under good lighting. Ensure there are no cracks, swelling from moisture, or deformation. Reinsert it firmly so that it sits flush with the bin housing.
Then reinstall the bin and test the unit again.
Clean the Bin Well and Fan Area to Fix Roomba Error 14
Dust buildup inside the bin chamber can block airflow and interfere with mechanical movement.
Remove the bin and examine the internal cavity of the robot. Use compressed air to clear vents and corners where debris collects. Pay special attention to the rear vent and vacuum intake opening.
Check the fan area within the bin itself. Ensure the fan spins freely and is not obstructed by hair or fine debris. If buildup is present, remove it carefully using compressed air or gentle wiping.
Avoid inserting sharp objects into the fan housing. The fan blades and internal wiring are delicate.
After cleaning, reinstall the bin and test again.
Inspect Bin Detect Switch When Roomba Error 14 Keeps Repeating
Inside the bin housing, there is a small switch that gets pressed when the bin slides into place. This switch completes part of the detection circuit.
Over time, dust or plastic wear can prevent the switch from fully engaging.
With the bin removed, locate this small switch and press it gently with your finger. It should move freely and spring back smoothly. If it sticks or feels loose, debris may be interfering.
Clean around the switch using compressed air. If the plastic actuator tip appears worn down from vibration, the bin may not apply enough pressure to trigger it consistently.
Roomba Error 14 Hard Reset for i7, s9, j7 & 600 Series
Sometimes, Roomba error 14 hard reset searches are justified because firmware can temporarily misread sensor signals.
Hard Reset for i & s Series
Press and hold the Clean button for approximately 20 seconds until the white LED ring spins clockwise. Release the button and allow the robot to reboot.
Hard Reset for 700, 800, 900 Series
Press and hold the Clean button until you hear a tone indicating the reset has started.
Hard Reset for 400, 500, 600 & e Series
Hold the Home and Spot buttons together for around 10 seconds, then press and hold the Clean button for about 9 seconds.
After the reboot completes, reinstall the bin securely and test again.
Model-Specific Roomba Error 14 Solution
Different models handle bin detection differently, so certain patterns appear more frequently in specific units.
Roomba s9 Error 14 – Lid Sensor and Locking Flaps
Roomba s9 and s9+ models include a top lid detection mechanism along with plastic locking flaps positioned above the wheel module.
If the lid is not fully seated or the flaps are damaged, the robot may fail to detect the bin correctly. Ensure the lid closes flush without resistance. Inspect the wheel module’s locking flaps and verify that the bin latch remains intact.
The s9’s square body design means debris can accumulate near lid hinges more easily, so cleaning around the hinge points is important.
Roomba i7 / j7 Error 14 Fix – Washable Bin Sensor Issues
Roomba i7 and Roomba j7 frequently use washable bins.
Moisture-related detection issues are common in these models. After washing the bin, even small droplets left near the contacts can disrupt conductivity. Additionally, repeated washing may cause mild corrosion over time.
Allow the bin to air-dry completely, ideally for up to 24 hours, before reinserting it. Never reinstall a damp bin.
If corrosion is visible, clean gently with alcohol and melamine foam.
Roomba 600 Series Error 14 – “Error One-Four” Voice Issue
Roomba 600 series and older models may audibly announce “Error one-four.”
In these models, vibration wear is a frequent cause. Contact pins gradually lose spring tension. Plastic latch tolerances also loosen over years of use.
If cleaning does not fix the issue and the bin feels slightly loose when installed, replacement may be required.
Why Roomba Says “Reinstall Bin” When It Is Already Installed
The robot does not visually confirm the bin’s presence. It relies purely on electrical continuity.
If the contacts are coated with carbon dust, the latch is slightly misaligned, the filter does not press the internal lever, the switch actuator has worn down, or moisture interferes with conductivity, the circuit remains open.
The robot then repeats the message because, from its perspective, the bin truly is not installed.
Understanding this prevents unnecessary battery replacements or motherboard replacements.
Rare Causes of Persistent Roomba Error 14
While uncommon, persistent Error 14 Roomba issues may indicate deeper hardware problems.
These include internal wiring damage between the bin contacts and motherboard, a failed detection sensor, or firmware corruption following an interrupted update.
If all cleaning and mechanical checks fail, contact customer support before attempting internal disassembly. Opening the unit may void warranty coverage.
When to Replace Dust Bin for Roomba Error 14
Most Error 14 Roomba cases do not require new parts.
However, replacement becomes reasonable if you notice corroded or pitted metal contacts that no longer shine after cleaning, a cracked bin housing, a broken latch mechanism, a worn switch actuator, or a bin that no longer clicks firmly into place.
Before purchasing, confirm the robot is not under warranty. Replacement bins are model-specific, so ensure compatibility with your exact series.
Prevent Roomba Error 14 from Returning
Routine maintenance dramatically reduces recurrence.
Clean the metal contacts every one to two weeks if you run the robot daily. Empty the bin before it overfills. Avoid allowing debris to pack tightly near the rear vent.
If you wash a washable bin, allow complete drying before reinstalling. Periodically inspect the latch and switch mechanism for wear.
Preventive maintenance takes less than five minutes but prevents hours of troubleshooting later.
FAQ: Roomba Error 14
What does Error 14 mean on a Roomba?
It means the robot cannot detect that the dust bin is installed because the detection circuit is not completing.
How do I fix Error 14 on my Roomba?
Start by cleaning the metal bin contacts using melamine foam. Then check filter alignment, inspect the switch mechanism, and perform a reboot if necessary.
Do I need a new bin to fix Error 14?
In most cases, no. Cleaning resolves the issue. Replacement is required only if the bin housing, contacts, or latch are physically damaged.
Where are the bin sensors located?
Two metal contacts are located on the dust bin itself, and two matching contacts are positioned inside the robot’s bin housing. A micro-switch near the bin cavity completes the detection circuit.
Can a full dustbin cause Error 14?
Indirectly, yes. An overfilled bin may prevent proper seating or allow dust to spill onto the contacts, interrupting detection.
Final Thoughts on Fixing Roomba Error 14
If your Roomba keeps saying error 14, remember that the robot is not broken — it simply believes the bin is missing.
In most cases, cleaning the contacts restores proper detection in minutes. Move step-by-step through filter alignment, airflow inspection, and switch testing only if necessary.
Error 14 Roomba issues feel disruptive, but they are rarely serious. With routine maintenance and careful inspection, your Roomba should return to normal operation quickly without costly repairs.
Visit Our Post Page: Blog Page