
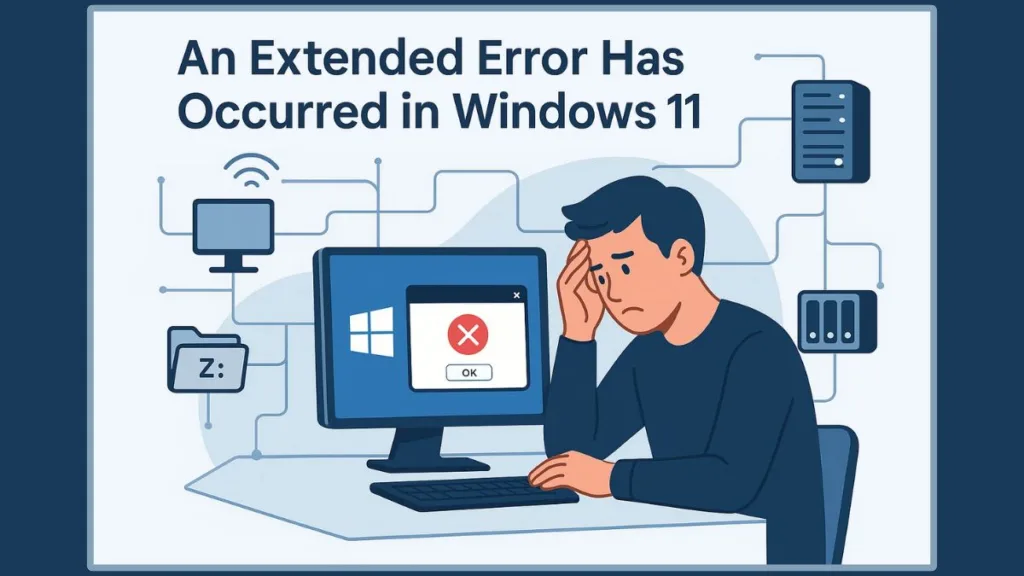
Are you getting ‘An extended error has occurred’ in Windows 11? Let’s learn how to an extended error has occurred Windows 11 fix step by step.
Understanding “An Extended Error Has Occurred” in Windows 11
If you’ve run into the message “An extended error has occurred” on Windows 11, you’re not alone. Many users encounter this frustrating error while trying to map a network drive, access shared folders, or join a domain. What makes it even more confusing is that the error doesn’t explain much—it simply blocks you from reaching the files or servers you need.
This issue has become increasingly common after recent Windows 11 updates (23H2 and 24H2), where Microsoft introduced stricter security defaults for SMB (Server Message Block) connections. While these changes improve security, they can also cause older NAS devices, routers, or loosely configured servers to stop working as expected—surfacing this vague “extended error” message.
The good news? This isn’t a dead end. With the right troubleshooting approach, you can quickly diagnose the root cause and restore access to your network resources. In this guide, we’ll walk you through what the error actually means, why it appears more often in Windows 11, and most importantly, step-by-step solutions to fix it and get back to work without disruption.
What Does “An Extended Error Has Occurred” Mean in Windows 11?
The message “An extended error has occurred” in Windows 11 is one of those vague Windows alerts that leaves users scratching their heads. On the surface, it doesn’t explain the real issue—it simply acts as a catch-all message for network or authentication failures.
In reality, this error is Windows’ way of telling you that something went wrong during a network authentication or SMB (Server Message Block) communication process. It commonly appears when:
- You’re mapping a network drive or reconnecting to a shared folder.
- You’re trying to access a NAS (Network-Attached Storage) or router share.
- You attempt to join a computer to an Active Directory domain.
Instead of giving a clear error code, Windows often masks these issues under the label “extended error”. That’s why understanding the context is so important—whether you’re dealing with a network share, a domain join, or a post-update configuration change will determine the right fix.
With Windows 11 versions 23H2 and 24H2, Microsoft tightened SMB security defaults (enforcing signing and disabling guest fallback). While this enhances protection against attacks, it also makes older or loosely configured devices fail during connection attempts—surfacing as this generic error.
In simple terms, this error doesn’t point to a single cause. It’s a signal that something in your network setup, credentials, or security policies isn’t lining up with Windows 11’s requirements.
Why “An Extended Error Has Occurred” Happens More After Windows 11 23H2/24H2 Updates
If you’ve recently updated to Windows 11 23H2 or 24H2, you may have noticed this extended error popping up more frequently. The reason isn’t a bug—it’s a deliberate security change from Microsoft that affects how your PC communicates over networks.
Stricter SMB Security Defaults
Starting with these updates, Windows 11 enforces stricter SMB (Server Message Block) policies:
- Mandatory SMB signing: All SMB connections now require digital signing. While this improves security, it can prevent older NAS devices, routers, or legacy servers from connecting properly.
- Disabled guest fallback (Pro edition): Windows no longer allows anonymous or guest connections by default, which was common in some home or third-party devices.
These updates aim to reduce the risk of credential relay attacks and unauthorized access. However, if your network devices aren’t fully compatible with SMB2 or SMB3, these security changes will trigger the “An extended error has occurred” network error during drive mapping, UNC access, or domain operations.
Post-Update Configuration Conflicts
Beyond SMB security, updates may also reset or conflict with:
- Saved credentials in Windows Credential Manager
- Mapped drives pointing to older servers
- DNS or domain join settings that worked in earlier versions
These subtle changes make previously functional setups fail, turning into the generic Windows 11 extended error message.
Real-World Impact
Many users report:
- Drive mappings fail after updating to 24H2
- UNC paths work via IP but fail using the hostname
- Domain joins that worked previously now show opaque errors
Understanding that this error often stems from post-update SMB and network security changes is the first step toward fixing it safely without compromising your system’s security.
Step-by-Step Fix for SMB & Network Drive Errors in Windows 11
When it comes to fixing “An extended error has occurred” on Windows 11, many issues stem from SMB (Server Message Block) configurations, mapped drives, or credential conflicts.
By following these step-by-step solutions, you can systematically diagnose and resolve the problem while keeping your network secure.
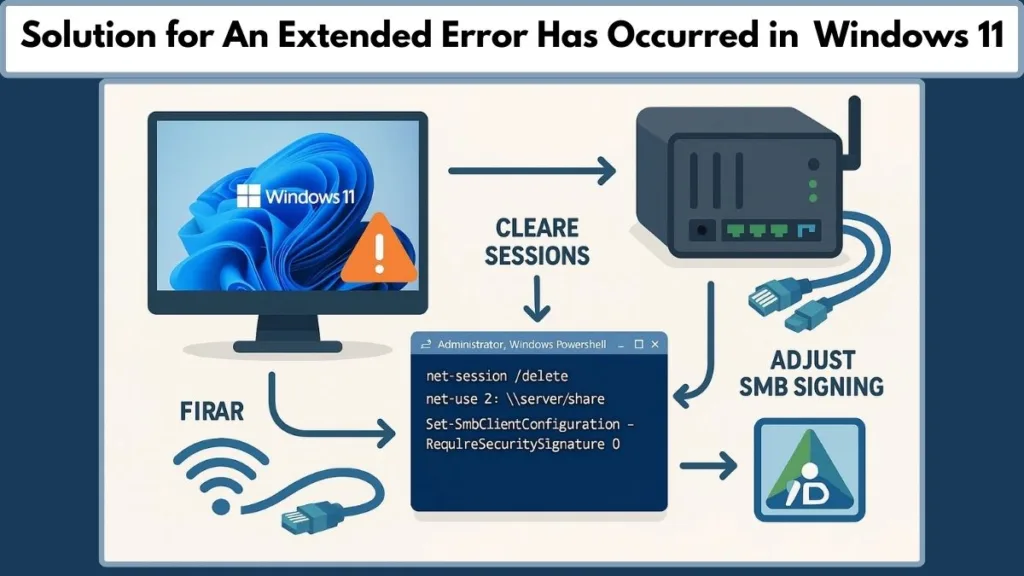
1. Temporarily Adjust SMB Signing on the Client
Windows 11 24H2 enforces mandatory SMB signing, which can block older NAS devices or legacy servers from connecting. As a diagnostic step, you can temporarily disable SMB signing to confirm if it’s causing the extended error:
- Open PowerShell as Administrator.
- Run the following command:
Set-SmbClientConfiguration -RequireSecuritySignature $false - Press Y to confirm changes.
- Retry connecting to your network share or mapped drive.
Note: This step is only for testing purposes. Once you confirm that SMB signing is the cause, re-enable it using:
Set-SmbClientConfiguration -RequireSecuritySignature $true
This ensures your system maintains compliance with security policies while troubleshooting.
2. Clear Existing Network Sessions
Conflicting sessions often prevent successful drive mapping. To clear these:
- Open an elevated Command Prompt.
- Remove all active connections with:
net use * /delete - Remove host-specific sessions if needed:
net use \\server* /delete - Retry connecting to the network share.
Clearing sessions eliminates stale credentials and prevents multiple connections from interfering with SMB authentication.
3. Re-Map Network Drives with Explicit Credentials
Mapping drives incorrectly or using old credentials can trigger the extended error. Follow these steps:
- Open Command Prompt or PowerShell.
- Use the following syntax to map the drive explicitly:
net use Z: \\server\share /user:DOMAIN\User Password - Replace
Z:with your preferred drive letter and enter the correct domain username and password. - Verify the mapping works in File Explorer.
By specifying credentials, Windows avoids conflicts with stored credentials or duplicate connections.
4. Verify NAS or Router SMB Compatibility
If the network target is a NAS device or router share, check its SMB configuration:
- Ensure SMB2 or SMB3 is enabled, and SMB1 is disabled.
- Confirm that guest access or anonymous logins align with Windows 11 security defaults.
- Update the NAS firmware if possible to support modern SMB standards.
Many extended errors occur because Windows 11 Pro now blocks older SMB protocols or guest connections by default. Aligning device settings with Windows 11’s expectations prevents repeated errors.
5. Test Hostname vs IP Access
Sometimes, accessing a share by IP works, but using the hostname fails. To troubleshoot:
- Open File Explorer and try:
\\192.168.x.x\shareversus\\servername\share. - If the IP works but hostname fails, investigate:
- DNS suffixes and records
- LLMNR or NetBIOS conflicts
- Credential Manager entries linked to the hostname
Resolving these discrepancies ensures consistent access to mapped drives and network shares without triggering the extended error.
6. Advanced Diagnostic Options
For persistent issues, you can:
- Use PowerShell to check SMB client configuration:
Get-SmbClientConfiguration | ft RequireSecuritySignature - Verify the target server supports SMB2/3.
- Review Windows Event Viewer logs for SMB or network authentication errors.
These steps help pinpoint whether the problem is client-side, server-side, or a combination of both.
Fixing Domain Join Errors in Windows 11: Step-by-Step Solutions for Active Directory
When attempting to join a Windows 11 PC to an Active Directory (AD) domain, the “An extended error has occurred” message can appear due to configuration issues that aren’t immediately obvious. Understanding the root cause is key to restoring seamless domain connectivity.
1. Verify DNS Settings and Domain Controller Discovery
One of the most common causes of domain join failures is incorrect DNS configuration. Your Windows 11 PC must point to the domain’s DNS server, not a public DNS resolver. To check and verify:
- Open Command Prompt as Administrator.
- Test domain controller discovery with:
nltest /dsgetdc:<yourdomain.com> /force - Confirm that it returns a valid domain controller (DC).
If DNS isn’t correctly pointing to your domain, Windows cannot locate the DC, leading to the extended error during the join process.
2. Review NetSetup.log for Error Codes
Windows logs domain join attempts in:
C:\Windows\Debug\NetSetup.log
Check this file for common status codes:
- 0x216d – Indicates the join quota has been exceeded (default AD allows up to 10 computer accounts per user).
- 0x8bf – Points to service account or OU permission issues, such as expired or locked credentials or incorrect organizational unit delegation.
Resolving the underlying account or permission issue will often clear the extended error.
3. Clear Prior Connections Before Joining
Multiple existing sessions to domain servers can block new connections:
- Restart your PC to remove active sessions.
- Ensure no lingering network connections to the DC.
- Always use the DNS domain name, not NetBIOS, when entering the domain during the join process.
This reduces session conflicts that can manifest as opaque extended errors.
4. Correct Account and OU Permissions
If NetSetup.log indicates service account issues:
- Verify that the account used for joining the domain is not expired, locked, or lacking permissions.
- Ensure the target organizational unit (OU) allows adding computers.
- Adjust join quotas if necessary, either by using a different account or increasing the allowed computer count for the user.
Properly configured accounts prevent Windows from throwing the generic extended error when permissions are insufficient.
5. Reset Network Stack for Reliable Connectivity
Domain joins rely on a healthy network stack. If issues persist:
- Open Command Prompt as Administrator.
- Run:
netsh winsock reset netsh int ip reset ipconfig /flushdns netcfg -d - Restart your PC and retry the domain join.
This ensures that driver conflicts, IP misconfigurations, or DNS cache issues are not causing the extended error.
6. Post-Update Considerations
Windows 11 24H2 introduces stricter SMB and authentication policies. If your environment enforces security baselines:
- Confirm SMB signing and client-server policies align across your network.
- Avoid temporary workarounds that compromise security; instead, resolve DNS, account, or OU issues directly.
These steps help maintain both functional domain joins and a secure network environment.
By systematically verifying DNS, logs, permissions, and network settings, you can resolve domain join failures that surface as “An extended error has occurred” in Windows 11 and restore smooth Active Directory integration.
Network & Service Resets for Persistent “An Extended Error Has Occurred” Issues in Windows 11
Sometimes, even after fixing SMB settings or domain join issues, the “An extended error has occurred” message persists. This often points to deeper network stack or service-level problems. Resetting network components and ensuring key services are running can restore connectivity without compromising your system.
1. Reset the Network Stack
A corrupted network stack can cause intermittent connectivity failures and trigger extended errors. To reset it:
- Open Command Prompt as Administrator.
- Execute the following commands step by step:
netsh winsock reset netsh int ip reset ipconfig /flushdns - Restart your PC to apply changes.
If the issue persists, perform a deeper adapter rebuild using:
netcfg -d
This removes and reinstalls network adapters, clearing lingering driver or configuration problems.
2. Confirm WLAN AutoConfig Service for Wi-Fi Connections
For wireless users, the WLAN AutoConfig service must be running:
- Press Win + R, type
services.msc, and hit Enter. - Locate WLAN AutoConfig.
- Ensure Startup Type is set to Automatic and the service is running.
- Restart the service if necessary.
A stopped or misconfigured service can prevent Wi-Fi connectivity, which may surface as an SMB or domain extended error.
3. Windows Network Reset Workflow
Windows 11 includes a Network Reset feature that restores default network settings:
- Go to Settings → Network & Internet → Advanced network settings → Network Reset.
- Click Reset now and confirm.
- Restart your PC.
This process resets TCP/IP stack, network adapters, and firewall settings to their default state, resolving stubborn network errors that survive standard troubleshooting.
4. Verify Firewall and Security Settings
After resets, ensure that Windows Firewall or third-party firewalls aren’t blocking SMB traffic or domain connectivity:
- Allow SMB ports (TCP 445, 139) through the firewall.
- Verify that any security software isn’t interfering with network authentication.
Proper alignment of firewall rules and services helps prevent recurring extended error messages.
By combining network stack resets, service verification, and firewall checks, most persistent connectivity issues in Windows 11 can be resolved, allowing smooth access to shared drives, NAS devices, and domain resources.
Security vs Compatibility: Should You Disable SMB Signing in Windows 11?
One of the most common dilemmas users face when troubleshooting “An extended error has occurred” is whether to disable SMB signing. While turning it off can restore network connectivity temporarily, it comes with security trade-offs that are important to understand.
1. What SMB Signing Does and Why Windows 11 Enforces It
SMB (Server Message Block) signing ensures that data sent between your PC and a network share or server is authenticated and tamper-proof. In Windows 11 24H2:
- Mandatory SMB signing is enforced on all connections.
- Guest fallback is disabled on Pro editions to prevent anonymous access.
These changes enhance network security, reducing risks of credential relay attacks and unauthorized file access. However, older NAS devices or legacy servers that do not support SMB signing may fail to connect, triggering the extended error.
2. When Disabling SMB Signing Can Be Helpful
Disabling SMB signing is usually a diagnostic or temporary fix rather than a permanent solution. It can help you:
- Test whether SMB signing is the root cause of the extended error.
- Restore access to older NAS or router shares that do not support modern SMB.
- Troubleshoot mapped drives or UNC paths failing after Windows 11 updates.
How to disable temporarily (PowerShell command):
Set-SmbClientConfiguration -RequireSecuritySignature $false
Remember to re-enable it after testing:
Set-SmbClientConfiguration -RequireSecuritySignature $true
3. Server-Side Fixes: The Recommended Approach
Instead of permanently disabling SMB signing on your PC, it’s better to align the server or NAS device with modern security requirements:
- Enable SMB2 or SMB3 on NAS devices or routers.
- Confirm the device supports SMB signing if required by your environment.
- Update firmware on NAS or routers to maintain compatibility with Windows 11.
This approach maintains network security while preventing repeated extended errors.
4. Enterprise Considerations: Aligning Security Baselines
In corporate environments, permanent workarounds on the client side can violate security policies. Recommended practices include:
- Use Group Policy to enforce consistent SMB signing policies across clients and servers.
- Avoid disabling signing unless explicitly approved by IT security.
- Test temporary workarounds only for troubleshooting, then revert to secure settings.
By balancing security and compatibility, you ensure both network access and protection against unauthorized access.
Frequently Asked Questions About “An Extended Error Has Occurred” in Windows 11
How Do I Fix an Extended Error?
Start by clearing stale sessions (net use * /delete), testing UNC paths (\\server\share), and verifying SMB signing settings. For persistent issues, adjust credentials or check network stack and DNS settings.
What Is an Extended Error in Windows?
It’s a generic network or authentication failure in Windows 11, often triggered by mapped drives, NAS shares, or domain join conflicts.
How Do I Fix a Network Error on a Mapped Drive?
Ensure there are no duplicate sessions or outdated credentials, test UNC paths, and re-map the drive using explicit credentials (net use Z: \\server\share /user:DOMAIN\User Password).
Why Can’t I Access My Shared Folder?
This usually stems from DNS misconfigurations, SMB signing mismatches, or credential conflicts. Verify server compatibility and clean stored credentials in Windows Credential Manager.
How Do I Fix a Network Path Not Found?
Check that the hostname resolves correctly via DNS or try connecting using the server IP. Clear conflicting sessions and verify firewall settings if necessary.
Conclusion: Restore Your Network Access and Fix “An Extended Error Has Occurred” in Windows 11
Encountering “An extended error has occurred” in Windows 11 can be frustrating, but the good news is that it’s fixable with a systematic approach. Whether the problem stems from mapped drives, NAS shares, SMB signing settings, or domain join conflicts, the solutions outlined above can help you regain access quickly and safely.
Key Takeaways
- Identify the context: Determine if the error occurs on a network share, mapped drive, or during a domain join.
- Use quick diagnostics first: Test UNC paths, clear stale sessions, and verify credentials in Windows Credential Manager.
- Adjust SMB and network settings carefully: Temporarily toggling SMB signing can help diagnose, but server-side fixes are preferred for long-term security.
- Check domain and DNS settings: Ensure proper DNS resolution, join quotas, and service account permissions for Active Directory scenarios.
- Reset network stack and services if needed: Winsock, IP resets, and WLAN AutoConfig verification often resolve persistent connectivity issues.
By following these steps, you can restore functionality to your network drives, shared folders, and domain connections while maintaining security compliance.
Moving Forward
For a sustainable setup:
- Keep SMB3 enabled and update NAS/router firmware to support modern protocols.
- Maintain consistent group policies and security baselines across your network.
- Monitor Windows updates and plan for post-update adjustments to prevent the extended error from reappearing.
With these measures, you can confidently manage Windows 11 networking and prevent the “extended error” from disrupting your workflow in the future.
Recommended Resources
To help you troubleshoot and prevent the extended error on Windows 11, here are some trusted guides, official documentation, and practical tips you can refer to:
Official Microsoft References
SMB Protocol Overview: Learn how SMB works and why signing matters.
PowerShell Commands for SMB Client: Detailed reference for adjusting SMB settings.
Troubleshooting Domain Join Failures: Step-by-step guidance for Active Directory errors.
Visit Our Post Page: Blog Page