
Stuck in a boot loop, black screen, or startup error? Boot Windows 11 into Safe Mode from power off with proven WinRE and recovery methods.
You press the power button, and instead of your desktop, you get a frozen logo, a black screen, or a PC that restarts itself over and over without ever reaching the login screen. If that’s what brought you here, you’re dealing with one of the most common — and most stressful — Windows 11 problems out there.
You might be facing:
- A boot loop where your PC keeps restarting before it ever finishes loading
- A black or blank screen right after the Windows logo appears
- A blue screen that pops up after a recent update
- A PC that won’t respond to your mouse or keyboard during startup
In situations like these, Safe Mode is usually your best first move. It starts Windows with only the bare minimum of drivers and services running, which strips away whatever third-party software, driver conflict, or background process is causing the crash in the first place.
Here’s the part that trips most people up: if you grew up on Windows 7 or earlier, you probably remember tapping F8 right after powering on to reach Safe Mode. That trick doesn’t reliably work on Windows 11. Between Fast Startup, faster SSD boot times, and UEFI firmware replacing the old BIOS, your PC blows past the moment where F8 used to register before you can even react.
The good news is that you can still boot Windows 11 into Safe Mode starting from a fully powered-off PC — you just need a different approach. Below, you’ll find that method plus five backups for every situation, whether you can reach the sign-in screen, whether Windows Recovery Environment refuses to show up, or whether you want Safe Mode to load automatically every time.
Can You Boot Windows 11 Into Safe Mode From Power Off?
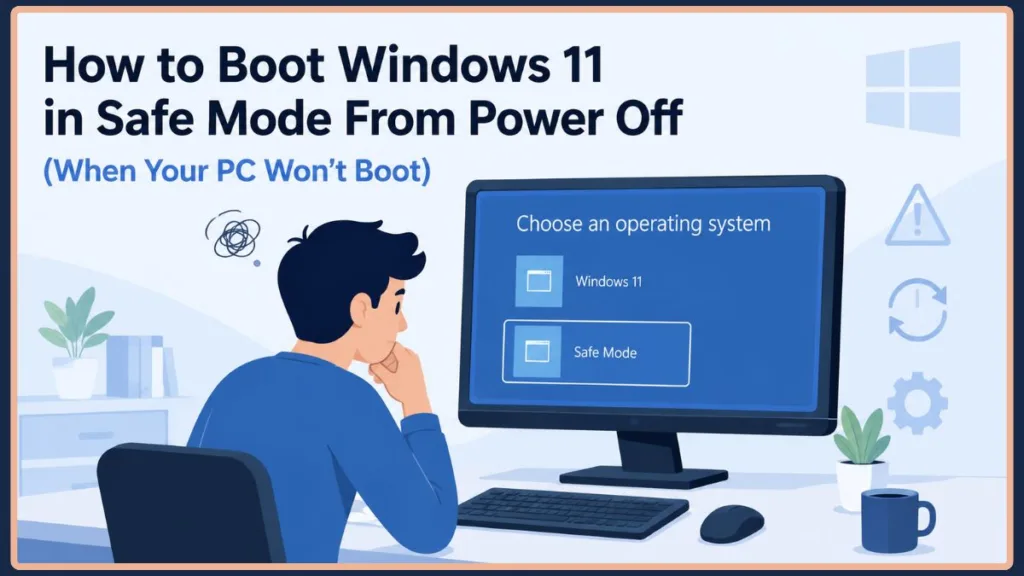
Yes. If Windows 11 won’t start, interrupt the boot process two or three times by holding the power button as the Windows logo appears. This forces the Windows Recovery Environment (WinRE) to open automatically. From there, go to Troubleshoot → Advanced options → Startup Settings → Restart, then press 4, 5, or 6 to enter Safe Mode.
At a Glance
| Situation | Best Method | Difficulty |
|---|---|---|
| Windows won’t boot at all | Force Windows Recovery Environment (WinRE) | Medium |
| Windows reaches the login screen | Shift + Restart | Easy |
| WinRE doesn’t appear | Windows 11 Installation USB | Medium |
| You need Safe Mode every reboot | BCDEdit | Advanced |
| Windows still works normally | MSConfig | Easy |
| You want the old F8 menu back | Enable Legacy Boot Menu | Advanced |
Quick tip: Not sure which row fits you? Work from the top of this table down — it’s ordered from “Windows is in the worst shape” to “Windows is mostly fine.”
What Is Safe Mode in Windows 11?
Safe Mode is a diagnostic startup mode that loads Windows with only the essential drivers and system services it needs to run — nothing else. Your third-party apps, most background processes, and non-essential drivers all stay switched off.
That stripped-down state is exactly what makes it useful. If your PC behaves normally in Safe Mode but crashes the moment you boot normally, you’ve just narrowed the problem down to something that only loads during a regular startup — usually a driver, a startup app, or a piece of malware.
Windows 11 actually gives you three flavors of Safe Mode, and picking the right one matters:
- Safe Mode – The most stripped-down option. No internet access, no networking drivers, just the essentials. Best for isolating driver conflicts and general startup issues.
- Safe Mode with Networking – Everything from standard Safe Mode, plus the network drivers you need to get online. Useful when you need to download a driver, run an online scan, or search for a fix while you’re troubleshooting.
- Safe Mode with Command Prompt – Boots into a command-line interface instead of the usual desktop. Handy for advanced repairs like running
sfc,dism, orchkdskdirectly.
Why Doesn’t F8 Work in Windows 11 Anymore?
This is one of the most common points of confusion for anyone who’s used Windows for a while, so it’s worth explaining properly.
On older PCs, there was a brief window between the BIOS handing off control and Windows actually starting to load — and pressing F8 during that window opened the Advanced Boot Options menu. Modern Windows 11 PCs close that window almost completely. UEFI firmware initializes faster than old-school BIOS, and SSDs load the boot files in a fraction of the time a mechanical hard drive used to take. Add Fast Startup into the mix — a feature that hibernates the kernel session instead of fully shutting it down — and there often isn’t enough time left for your keypress to register at all.
Rather than relying on a timing-sensitive keypress, Microsoft moved Safe Mode access into the Windows Recovery Environment (WinRE) — a shift documented in Microsoft’s own Windows Startup Settings support article — which you reach through menus instead of a split-second key combo. It’s slower to get to, but far more reliable.
Important: On most modern Windows 11 PCs, F8 simply won’t do anything unless you’ve manually re-enabled the legacy boot menu beforehand (covered in Method 6 below). If you’re trying it for the first time during an actual boot problem, skip straight to Method 1.
Before You Start
A few quick precautions can save you a headache partway through any of these methods:
- Plug into AC power, or make sure your battery is well charged: Losing power mid-repair can leave a laptop in a worse state than when you started, so plug in if you can.
- Disconnect unnecessary USB devices and peripherals: External drives, USB hubs, and other accessories can occasionally interfere with the boot process or get mistaken for the boot device. Unplug anything you don’t need for troubleshooting.
- Have your BitLocker recovery key ready, if your device uses encryption: Entering WinRE or changing startup settings can sometimes trigger a recovery key prompt. (More on exactly what to do if that happens later in this guide.)
- Back up anything important, if you can still reach your files: If Windows is currently accessible, even briefly, it’s worth copying critical files to an external drive or cloud storage before you start interrupting the boot process.
None of these are strictly required, but they cut down on surprises — and a BitLocker prompt is a lot less stressful when you already know where to find the key.
Method 1: Boot Windows 11 in Safe Mode From Power Off (Recommended)
This is the method to use when Windows won’t even get you to a login screen, so it’s the one most people searching for this guide actually need.
When should you use this method?
- Windows won’t start at all
- You’re stuck in an infinite boot loop
- You’re staring at a black screen
- You see a blue screen shortly after startup
- Your PC crashes partway through loading, every time
Steps:
- Completely power off the PC. If it’s already stuck in a loop, hold the power button for about 7–10 seconds until the screen goes fully black and everything stops.
- Turn the PC back on as normal.
- Wait until the Windows logo or the spinning loading dots appear on screen, then press and hold the power button until the PC shuts off completely. Powering off too early — before the logo shows up — usually won’t register as a failed boot, so it won’t trigger Windows Recovery Environment.
- Repeat the power-on, interrupt, power-off cycle two or three times in a row.
- On the next boot, Windows should display Preparing Automatic Repair, followed by Diagnosing your PC. These messages mean Windows has recognized the repeated failures and is automatically handing off to the Windows Recovery Environment (WinRE) instead of trying a normal boot again. Once WinRE opens, select Troubleshoot > Advanced options > Startup Settings > Restart.
- Once your PC restarts again, you’ll see a numbered list of startup options. Press the key that matches what you need:
- 4 or F4 → Safe Mode
- 5 or F5 → Safe Mode with Networking
- 6 or F6 → Safe Mode with Command Prompt
Why does this actually work? Windows quietly keeps track of consecutive failed boot attempts. Once it notices the same pattern repeating two or three times in a row, it assumes something is genuinely broken and automatically hands control over to the Windows Recovery Environment instead of attempting a normal boot again. That’s what gives you access to Safe Mode and the other repair tools — no working desktop required.
Important: Only interrupt startup this way if Windows genuinely won’t boot normally. Repeatedly force-shutting down a PC that’s still loading carries a small risk of file or disk corruption, especially on older mechanical hard drives. If your PC is healthy and just running slow, this isn’t the method for you.
If your device uses BitLocker drive encryption, keep your recovery key handy before you start. Some PCs will ask for it once you make changes through the recovery environment.
Method 2: Enter Safe Mode Using Shift + Restart
This method only works if Windows still loads far enough for you to interact with it — either at the sign-in screen or once you’re already logged in. If your PC genuinely won’t boot, skip back to Method 1.
If you’re at the sign-in screen:
- Click the Power icon in the bottom-right corner of the screen.
- Hold down the Shift key on your keyboard, then click Restart. Keep holding Shift until the screen changes.
- Windows reboots into the recovery menu. Select Troubleshoot > Advanced options > Startup Settings > Restart.
- Press 4, 5, or 6 (or the matching F-key) to pick your Safe Mode variant.
If you’re already logged in:
- Open the Start menu.
- Click the Power icon.
- Hold Shift, then click Restart.
- Follow the same Troubleshoot > Advanced options > Startup Settings path once your PC reboots.
This is the fastest route into Safe Mode by far, since it skips the multiple forced shutdowns entirely. It’s worth trying first whenever you can reach a sign-in screen, even if you can’t actually log in.
Method 3: Use a Windows 11 Installation USB
Sometimes WinRE simply doesn’t appear, even after several interrupted boots — this can happen if the recovery partition is damaged, missing, or was never properly configured on your PC. When that happens, a bootable USB drive becomes your way in.
If you don’t already have one, you can create it on a different working PC using Microsoft’s official Media Creation Tool, which downloads Windows 11 and writes it to a USB drive for you. It’s worth having one ready before you need it, since you obviously can’t create it on the PC that won’t boot.
Steps:
- Insert the Windows 11 installation USB and restart the problem PC.
- Press the key for your PC’s boot menu during startup — this is usually F12, F11, or Esc, though it varies by manufacturer (Dell, HP, Lenovo, and ASUS machines all use slightly different keys).
- Select the USB drive, choose your language and keyboard layout, then click Next.
- Instead of clicking Install, click Repair your computer in the bottom-left corner.
- Select Troubleshoot > Advanced options > Startup Settings > Restart.
- Once your PC reboots, press 4, 5, or 6 to choose your Safe Mode option.
This method is also a reliable fallback if your PC’s recovery environment has become corrupted, since the USB carries its own clean copy of the recovery tools.
Method 4: Force Safe Mode Using BCDEdit (Advanced)
If you’re comfortable with Command Prompt, BCDEdit gives you a faster and more precise way to force Safe Mode — useful if you’re already inside a Command Prompt window (through WinRE or a working Windows session) and want to skip the menu-clicking entirely, or if you need Safe Mode to stick around reliably across multiple reboots while you work through a longer repair.
Open an elevated Command Prompt (Run as administrator), then use the commands below.
Enable Safe Mode:
bcdedit /set {current} safeboot minimalEnable Safe Mode with Networking instead:
bcdedit /set {current} safeboot networkDisable it afterward (important — don’t skip this):
bcdedit /deletevalue {current} safebootRestart your PC after running any of these commands for the change to take effect.
Tip: The
{current}identifier refers to whichever Windows installation is actively running, which is exactly what you want when you’re running these commands from inside a working Windows session. If you’re instead running them from WinRE’s Command Prompt because Windows won’t boot at all, use{default}in place of{current}— it tends to resolve more reliably from outside a running OS.
Once you set Safe Mode this way, Windows will keep booting into it on every restart until you run the /deletevalue command. If you forget, it’s an easy fix: just open Command Prompt from within Safe Mode itself and run the disable command from there.
Method 5: Use System Configuration (MSConfig)
If Windows still boots normally and you just want an easy way to drop into Safe Mode for ongoing troubleshooting — say, you’re trying to catch an intermittent driver issue across several reboots — MSConfig is the most convenient option.
Steps:
- Press Windows key + R to open Run.
- Type
msconfigand press Enter. - Switch to the Boot tab.
- Under Boot options, check Safe boot, then choose Minimal (standard Safe Mode) or Network (Safe Mode with Networking).
- Click Apply, then OK, and restart when prompted.
Don’t forget to undo this afterward. Once you’re done troubleshooting, head back into msconfig, uncheck Safe boot, click Apply and OK, then restart. Skipping this step is one of the most common reasons people get stuck wondering why their PC keeps loading into Safe Mode for no apparent reason.
Method 6: Enable the Legacy F8 Boot Menu (Optional)
If you genuinely prefer the old-school F8 method and want it back, you can re-enable it — though it’s worth setting expectations first.
Why F8 disappeared: As covered earlier, Windows 11’s fast UEFI boot and SSD speeds leave essentially no time for a keypress to register before the boot loader takes over. Re-enabling the legacy menu widens that window again, but it does so by slightly slowing down your boot time.
To enable it, open an elevated Command Prompt and run:
bcdedit /set {default} bootmenupolicy legacyAfter restarting, you’ll be able to press F8 during startup to bring up the Advanced Boot Options menu, the same one Windows 7 and 8 used.
To revert back to the standard, faster boot menu:
bcdedit /set {default} bootmenupolicy standardA couple of things worth knowing before you go this route:
- This doesn’t work on every PC. Some newer SSDs and firmware are fast enough that even the legacy menu’s slightly wider window isn’t enough to reliably catch your keypress.
- You need to enable this before Windows becomes unbootable. Since the command itself has to run from a working Command Prompt, it’s a proactive setup step, not something you can reach for in the middle of a crisis — if your PC already won’t boot, you’ll need WinRE (Method 1) or a USB drive (Method 3) instead.
Which Safe Mode Option Should You Choose?
| Option | Best For |
|---|---|
| Safe Mode | Driver issues, general startup problems |
| Safe Mode with Networking | Internet access, downloading drivers or updates |
| Safe Mode with Command Prompt | Advanced repairs — SFC, DISM, CHKDSK |
If you’re not sure which one to pick, standard Safe Mode is the safest default. You can always restart and choose a different option afterward if you find you need internet access or a command line after all.
Safe Mode Not Working? Try These Fixes
Sometimes even Safe Mode itself gives you trouble. Here’s how to work through the most common snags.
WinRE Doesn’t Appear
If three rounds of forced shutdowns haven’t triggered the recovery environment, timing is usually the culprit. Try to power off right as the Windows logo or the loading animation first appears, rather than too early or too late. Give Windows a few extra seconds on each attempt before you cut the power, since interrupting it too early sometimes doesn’t register as a genuine failed boot.
Startup Settings Option Is Missing
If you reach the recovery menu but don’t see Startup Settings as an option, it usually points to one of a few causes: a damaged or missing recovery partition, an OEM customization that altered the standard recovery menu, or corruption in the Windows Recovery Environment itself. The next section walks you through checking for exactly that.
Recovery Environment Disabled
WinRE can sometimes get disabled — by a Windows update, a partition resize, or third-party security software. You can check its status from an elevated Command Prompt:
reagentc /infoLook for the line that says Windows RE status. If it reads Disabled, re-enable it with:
reagentc /enableIf you have BitLocker enabled, it’s worth temporarily suspending it before making recovery-related changes, since BitLocker can sometimes block WinRE from being modified.
Use Startup Repair First
Before you go through the trouble of forcing Safe Mode, it’s worth giving Startup Repair a shot — it’s designed specifically to fix the kind of boot-level problems that prevent Windows from starting, and it occasionally resolves the issue without you needing Safe Mode at all. You’ll find it in the same place: Troubleshoot > Advanced options > Startup Repair.
Frequently Asked Questions
Can I boot Windows 11 into Safe Mode directly from power off?
Not with a single dedicated shortcut, no. There’s no BIOS-level or instant keypress that drops you straight into Safe Mode the way F8 once did. What you’re actually doing in Method 1 is forcing Windows into the Windows Recovery Environment through repeated interrupted boots, then navigating from there into Safe Mode. It takes a few extra steps, but it works reliably even when your PC won’t boot at all.
Why doesn’t F8 work anymore?
Fast Startup, UEFI firmware, and quicker SSD boot times all combine to close the brief window where F8 used to register. Microsoft replaced it with the Windows Recovery Environment instead. If you’d rather have F8 back, Method 6 above shows you how to re-enable it — just know it has to be set up in advance, while Windows is still working.
How many failed boots trigger WinRE?
Typically two to three interrupted startup attempts in a row. Windows tracks consecutive boot failures, and once it sees that pattern, it automatically routes you into the recovery environment on the next attempt instead of trying a normal boot again.
Can BIOS or UEFI boot into Safe Mode?
No — Safe Mode is a Windows feature, not something your BIOS or UEFI firmware controls. Some manufacturers (Dell, HP, Lenovo, and others) build their own recovery tools into the boot menu, but those are separate, manufacturer-specific diagnostics rather than Windows Safe Mode itself.
Is interrupting startup safe?
Generally, yes, when you use it the way it’s intended — as a last resort when Windows genuinely won’t boot. The main risk is repeatedly force-shutting down a PC that’s still loading, which carries a small chance of file or disk corruption over time, particularly on older mechanical drives. Avoid doing it repeatedly on a PC that’s actually booting fine; save it for situations where you’re already stuck.
How do I exit Safe Mode?
In most cases, simply restarting your PC normally is enough, since the methods that get you into Safe Mode through WinRE are one-time actions. The exception is if you enabled Safe Mode using BCDEdit or MSConfig — those settings persist across reboots, so you’ll need to go back and remove them (using the /deletevalue command or unchecking Safe boot in msconfig) before a normal restart will work again.
Final Thoughts
If there’s one method to remember from this guide, it’s Method 1 — forcing the Windows Recovery Environment through repeated interrupted boots is the most dependable way to reach Safe Mode when Windows 11 won’t start from a fully powered-off state. Shift + Restart is the quicker option whenever you can actually reach the sign-in screen, and a Windows 11 installation USB is your reliable fallback if WinRE refuses to show up on its own. For ongoing troubleshooting, BCDEdit, MSConfig, and the legacy F8 boot menu are all useful tools to have in your back pocket, depending on whether you want Safe Mode to persist, toggle easily, or behave the old-fashioned way.
Got a different error message or a setup that didn’t quite match what’s covered here? Drop a comment below with what you’re seeing — between the different PC manufacturers and Windows 11 versions out there, troubleshooting steps can vary just enough that it helps to compare notes.
Visit Our Post Page: Blog Page
Discover more from Izoate
Subscribe to get the latest posts sent to your email.