
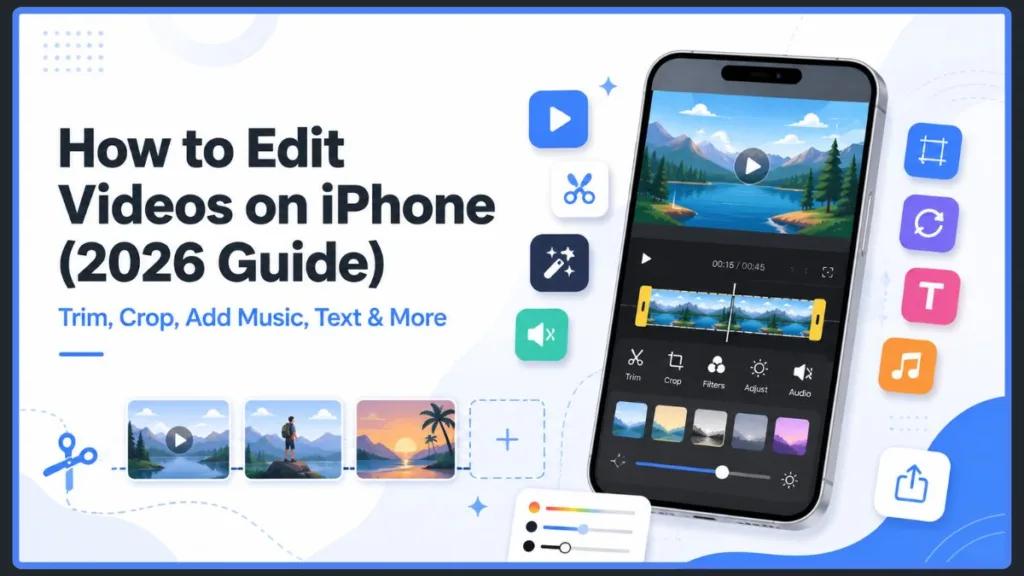
Learn how to edit videos on your iPhone without any expensive software. This beginner-friendly 2026 guide shows you how to trim, crop, and add music in minutes.
Staring at a folder full of raw video clips can feel a little intimidating. This is especially true if you’ve never edited anything before.
Maybe you just recorded a birthday message, a quick vlog, or a clip for social media. Now you’re wondering how to actually fix it before sending it out into the world.
Here’s the good news: you don’t need a laptop, expensive editing software, or a film degree. Your iPhone already has powerful video editing tools built right in.
Once you know where to look, the whole process becomes surprisingly simple. Whether you’re cleaning up a shaky home video, prepping content for Instagram, or building a highlight reel, you’re already carrying everything you need in your pocket.
In this guide, you’ll walk through a complete, beginner-friendly workflow. You’ll start with quick fixes in the Photos app, move into more advanced editing with iMovie, and finish with guidance on when a third-party app is worth downloading.
By the end, you’ll be able to take raw footage and turn it into something you’re proud to share — whether that’s with close friends and family or a wider audience online.
How to Edit Videos on iPhone Using the Built-In Photos App
Before you download anything new, open the Photos app. It’s already on your iPhone, it doesn’t cost a thing, and it handles almost every basic video editing task you’ll run into.
That includes trimming, cropping, lighting adjustments, filters, and audio control. Think of it as your first stop for any clip that just needs a little cleanup rather than a full production.
One of the biggest advantages of starting here is speed. You don’t need to sign up for anything or connect to Wi-Fi.
Everything happens right inside the app you already use to view your photos and videos. That makes it the most convenient option for casual editing on the go, whether you’re on your couch or polishing a clip between errands.
How to Trim and Cut Unwanted Footage
Trimming is usually the first thing your video needs. It’s often the difference between a clip that feels amateur and one that feels intentional.
Maybe there’s a few seconds of dead air before you start talking. Maybe there’s a shaky moment right after you hit record, or an ending that drags on too long. Cleaning this up instantly tightens the pacing and keeps your viewer’s attention where it belongs.
Here’s how to trim a video on your iPhone:
- Open the Photos app and select the video you want to edit.
- Tap Edit in the corner of the screen.
- Look below the video for the timeline — you’ll see yellow handles on either end.
- Drag the left handle inward to cut the beginning, or the right handle inward to shorten the end.
- Tap Done once you’re happy with the new length.
- Choose Save Video to replace the original, or Save Video as New Clip to keep both versions.
If you’re trying to make a really precise cut, try pinching open at the center of the timeline to zoom in. This spreads out the frames so you can land on the exact moment you want, instead of guessing with a tiny scrubber.
Trimming is especially useful when you’ve recorded multiple takes and only want to keep the strongest section. It’s also handy if you’re preparing a clip for a platform with strict length limits, like Instagram Stories or a text message attachment.
It’s worth trimming before uploading to cloud storage like iCloud or Google Photos, too. A shorter file uploads faster, takes up less space, and makes it easier to compress the video later if you ever need to share it somewhere with file size restrictions.
Quick tip: If there’s any chance you’ll want the untouched footage later, always choose Save Video as New Clip. It uses a little extra storage, but you’ll never lose your original recording by accident.
How to Crop, Rotate, and Straighten Your Video
Sometimes the problem with your footage isn’t the length — it’s the framing. A tilted horizon, a cluttered background, or an accidental finger over the lens can all be fixed without reshooting anything.
Here’s how to crop, rotate, or straighten a video:
- Open your video and tap Edit.
- Select the Crop icon.
- Drag the corners or edges of the frame to cut out anything you don’t want in view, or zoom in tighter on your main subject.
- Use the small dial beneath the video to rotate or straighten the shot until the horizon sits level.
- Tap Done to lock in your changes.
If you want to get a little creative, you can also use the tilt controls to warp the angle of the frame slightly, giving an otherwise ordinary clip a more dynamic, dramatic feel. It’s a small touch, but it’s an easy way to make a plain video stand out.
While you’re in here, it’s worth thinking ahead about aspect ratio. Different platforms display video very differently.
- Heading to YouTube or watching on a TV screen? A widescreen 16:9 format usually looks best.
- Posting to your Instagram grid? A square crop keeps everything centered and clean.
- Sharing to short-form platforms like TikTok, Instagram Reels, or YouTube Shorts? Switch to a vertical frame so nothing important gets cut off.
Formatting tip: Decide on your aspect ratio before adding text or effects. Cropping after the fact can accidentally cut off captions or titles you’ve already added.
How to Adjust Lighting and Apply Filters
A video that’s too dark, too flat, or washed out doesn’t have to stay that way. The Adjust tool gives you granular control over exposure, brightness, and contrast.
It’s especially useful for rescuing footage shot indoors, in low light, or against a bright background.
Here’s how to adjust lighting on your iPhone video:
- Tap Edit, then select the Adjust icon.
- Scroll through options like Exposure, Brightness, Contrast, Shadows, Highlights, and Saturation.
- Tap an attribute and drag the slider left or right while watching the live preview.
- Tap Done once your video looks the way you want it to.
If you’d rather skip the manual work, tap the Auto-Enhance wand icon for a one-tap fix. It analyzes your footage and applies a balanced set of corrections automatically.
That said, it’s not foolproof. Sometimes it pushes brightness or saturation a little further than you’d actually want.
Heads up: Always preview your video after using Auto-Enhance before saving it. If the colors look unnaturally vivid or the footage feels overexposed, tap the wand icon again to remove the effect, then adjust manually instead.
For a faster style change, try one of the built-in filters, like Vivid, Dramatic, Mono, or Silvertone. These presets instantly shift the mood of your video.
Go bold and colorful for a travel clip, or subdued and cinematic for a personal story. You can also adjust each filter’s intensity using the slider beneath the preview, so the effect never feels too heavy-handed.
One small piece of advice worth keeping in mind here: less is often more. A subtle filter and a light touch on the Adjust sliders will usually look more natural than stacking several strong effects on top of each other.
How to Mute Unwanted Audio
Wind noise, background chatter, or an accidental comment doesn’t mean you need to reshoot your entire clip. If the audio isn’t adding anything valuable, you can silence the entire track in just a couple of taps.
- Open the video and tap Edit.
- Tap the speaker icon near the top of the screen to mute the clip.
- Tap Done to save the silent version.
Muting audio is especially handy when you’re planning to add your own background music instead. It’s also useful when repurposing a video for a silent slideshow or a caption-driven social media post.
Keep in mind this only works as an all-or-nothing mute. If you only want to remove part of the audio while keeping the rest, you’ll need a more advanced tool, which is exactly where the iMovie section below comes in.
How to Use Audio Mix for Spatial Audio Recordings
If you’re recording on an iPhone 16 or later, you have another audio option worth knowing about, called Audio Mix. It works with clips captured using Spatial Audio and gives you more control than a simple mute.
- Open the video in the Photos app and tap Edit.
- Tap Audio Mix.
- Choose from In-Frame to reduce sounds from outside the shot, Studio to cut background noise and reverb, or Cinematic to push voices to the front while keeping ambient sound in the background.
- Adjust the intensity slider until it sounds right, then tap Done.
This is a great option if you recorded a voice-focused clip in a noisy environment and want to clean it up without muting everything.
How to Edit Videos on iPhone With iMovie for More Advanced Edits
The Photos app is perfect for quick, single-clip touch-ups. But once you want to combine multiple videos, layer in background music, add on-screen text, or record a voiceover, it’s time to bring in iMovie.
Think of iMovie less as a replacement for the Photos app and more as the natural next step. It’s what you reach for once your editing needs grow beyond a single clip.
iMovie is especially useful for anything more structured — a trip recap, a small business promo, a tutorial, or an event highlight reel. It gives you a real project timeline to work with, which makes it much easier to tell a complete story rather than sharing disconnected clips.
How to Combine and Split Multiple Video Clips
If your final video is made up of several separate recordings, iMovie lets you bring them all together into one seamless project.
- Open iMovie and tap Start New Project, then choose Movie.
- Import the clips you want to use directly from your camera roll.
- Arrange them on the timeline in the order you’d like them to play.
Made a mistake in the middle of a clip, or need to remove a section that doesn’t belong — say, a break in conversation, or someone walking through your shot? Use the Split tool to cut the video at that exact point.
Delete the section you don’t need, then reconnect the remaining pieces — all without a separate app. This is one of the most useful workarounds for anyone who’s wished the Photos app could trim from the middle of a clip instead of just the start or end.
For finer control while trimming inside iMovie, pinch open in the middle of the timeline to zoom in for a closer view. Just keep in mind that iMovie won’t let you trim a clip shorter than about 0.3 seconds, so if you can’t drag an edge any further, you’ve likely hit that limit.
How to Add Background Music and Voiceovers to iPhone Videos
Music can completely transform the feel of a video, turning a plain clip into something that feels intentional and polished. iMovie makes this easy without needing any outside apps or subscriptions.
- In your project, tap the + button, then select Audio.
- Choose Soundtracks for royalty-free background music built into the app, or My Music to use a song already saved to your device.
- Tap the + next to your chosen track to add it to the timeline.
- Tap the audio bar if you need to trim, reposition, or adjust the volume.
If your project has multiple clips, you can also adjust the volume of each one individually. This is useful if one clip has louder background noise than the others and needs to be balanced against your music track.
Want to narrate your own video instead of using music? iMovie also lets you record a voiceover directly over your footage. This works especially well for tutorials, storytelling clips, or explainer-style content where your voice needs to line up with what’s happening on screen.
Copyright reminder: If you’re sharing your video publicly on platforms like Instagram, YouTube, or Facebook, stick to royalty-free tracks or iMovie’s built-in soundtrack library. Using copyrighted commercial music can get your video muted, restricted, or taken down after you post it — and even personal-use music should be something you actually have the rights to use.
How to Add Text and Titles to a Video on iPhone
Adding on-screen text is a simple way to give your video extra context. That could be a title card, a caption, a name label, or a short call to action at the end.
- Select the clip where you want your text to appear.
- Tap the Text (T) icon.
- Choose an animated title style and preview how it looks over your footage.
- Type your text and adjust its position on screen.
- Tap Done, then preview the full video to catch any typos or timing issues before saving.
You can technically add text through the Photos app’s Markup tool as well, but it requires logging into iCloud.com to do it, which makes the process a lot more cumbersome. iMovie is the faster, more convenient option if text is a regular part of your editing routine.
Adding captions is worth doing even beyond simple titles. Captions make your videos more accessible for viewers who are deaf or hard of hearing, and they also help anyone scrolling social media in public, at work, or in bed at night without wanting to turn on audio.
Including text on screen ensures your message still comes across even in silence.
Bonus Trick: Live Photo Loops and Bounce Effects
Here’s a small, often-overlooked feature most guides skip entirely. If your clip was captured as a Live Photo, you can turn it into a looping or “boomerang-style” video without opening a single extra app.
- Open the Live Photo and swipe up to reveal the Effects menu.
- Tap Live in the corner, then select Loop to make the clip repeat continuously.
- Or choose Bounce to have it play forward and then instantly reverse.
It’s a subtle detail, but it’s an effortless way to give short clips a little extra personality. This works especially well for social media stories, where a quick, playful loop tends to catch more attention than a static photo or a plain video clip.
Best Third-Party Video Editing Apps for iPhone
Between the Photos app and iMovie, you can genuinely cover most everyday editing needs. You won’t need to pay for anything or download extra software for the basics.
But if you’re creating content regularly — especially for platforms like TikTok, Instagram Reels, or YouTube Shorts — you might eventually want trendier effects, automatic captions, motion tracking, or a more advanced timeline. That’s where a few popular third-party apps come in.
- CapCut — A favorite among creators for TikTok and Instagram Reels, thanks to its huge library of trending templates, auto-captions, and AI-powered effects like motion tracking. Most of the core tools are free, though some advanced features sit behind a Pro subscription.
- Adobe Premiere Rush — A more friendly, simplified version of Adobe’s professional editing tools. It’s great for quick edits and includes text overlays, speed adjustments for audio and video, color tweaks, and a built-in stock media library.
- Videoleap — Known for creative, AI-driven effects. Its AI editor can build effects based on a simple text description of the mood you’re going for, and it can isolate a person from the background without needing an actual green screen. Just be aware that many of its more impressive tools sit behind an ongoing subscription.
If you eventually outgrow all three of these and want something built around text-based editing, color grading, and studio-quality sound, it’s worth looking into desktop tools like Descript as well — though you’ll need to move your footage to a computer first, since it isn’t available directly on iPhone yet.
Each of the mobile apps above has a free version to get started with, so it’s worth experimenting before committing to a paid subscription.
If you’re only editing the occasional video for personal use, you likely won’t need to go beyond the Photos app and iMovie at all. Save the third-party apps for when you’re editing more frequently or chasing a specific social media style.
How to Export and Share Your Edited iPhone Video
Once your edit is finished, your video saves automatically to your Photos library. There’s no separate export step required unless you’re preparing it specifically for a certain platform or device.
Before sharing, keep a few platform-specific details in mind:
- For vertical platforms like TikTok, Instagram Reels, and YouTube Shorts, keep any on-screen text centered so it doesn’t get cut off by interface elements like captions or usernames.
- For YouTube or long-form content, export in the highest resolution your footage supports, especially if you shot in 4K.
- For quick sharing, tap the Share button (the square icon with an upward arrow) to send your video via AirDrop to a nearby Mac on the same Wi-Fi network, upload it directly to Instagram, Facebook, or X, or send it by email.
Watch your file size if the clip is long or high resolution. Large videos can be slow to upload and are sometimes compressed automatically by messaging apps, which lowers the quality of what the other person sees. If you’re regularly sending large, high-quality files, it’s worth looking into a dedicated file-sharing service instead of email.
If you run into storage issues while exporting, check your available space in Settings > General > iPhone Storage. Offloading older clips to iCloud can free up room to keep working.
Tips for Better Video Editing Results
A few small habits can make a bigger difference to your final video than any single editing tool. Keep these in mind as you build your workflow:
- Get good lighting while recording. Natural light or a well-lit room will save you a lot of correction work later in the Adjust tool.
- Keep your edits simple. A clean trim, a subtle filter, and clear audio will usually look more polished than a video stacked with heavy effects.
- Save a copy of the original before editing. Choosing Save Video as New Clip means you can always start over if you change your mind.
- Experiment with different apps. The Photos app and iMovie cover the basics, but trying CapCut, Premiere Rush, or Videoleap can help you find the workflow that feels most natural to you.
- Practice regularly. The more videos you edit, the faster and more intuitive the whole process becomes.
Common Video Editing Problems on iPhone (and How to Fix Them)
Even with a simple workflow, a few small hiccups tend to come up. Here’s how to handle the most common ones:
- Can’t drag the trim handle any further? You’ve likely hit the shortest allowed clip length, or there’s no additional footage beyond that point.
- Video looks over-enhanced or over-filtered? Reopen the edit screen and lower the effect’s intensity, or use Revert to start fresh from the original footage.
- Video won’t revert to the original? If you saved your edit as a new clip rather than overwriting the original, the untouched version still exists separately in your camera roll.
- Running low on storage while editing? Trim unnecessary footage first, and consider backing up older videos to iCloud or another cloud storage service before deleting them from your device.
- Video length feels limited? How long a clip you can comfortably edit usually comes down to your iPhone’s available storage rather than a hard limit set by the app itself.
Frequently Asked Questions About Editing Videos on iPhone
Can I edit 4K videos on my iPhone? Yes. Modern iPhones handle 4K video editing seamlessly in both the Photos app and iMovie, though larger 4K files will use more storage and processing power. Your resolution stays fully intact throughout trimming, filtering, and color adjustments.
How do you cut a section out of the middle of a video? The Photos app can only trim from the start or end of a clip. To remove a middle section, trim the same video into two separate clips and merge them back together using iMovie’s Split tool.
How do I undo an edit if I make a mistake? Open the video, tap Edit, then tap Revert. This restores your video to its original, unedited state — as long as you didn’t already save your edit as a separate new clip.
Will using my own music get my video taken down? It can, especially on public platforms like Instagram, YouTube, or Facebook. To stay safe, use royalty-free audio or iMovie’s built-in soundtrack library instead of commercial, copyrighted songs, and make sure you actually have the rights to any music you add.
How can I edit slow-motion videos? Open a video recorded in Slo-mo mode, tap Edit, then drag the vertical markers along the timeline to control exactly where the slow-motion section begins and ends.
Can I edit videos that were recorded on another device? Yes, as long as the video file is compatible with your iPhone and the editing app you’re using. You can import videos from another phone, a camera, or a computer, then edit them the same way you would footage shot directly on your iPhone.
Final Thoughts on Editing Videos on Your iPhone
Editing videos on your iPhone comes down to following a simple, repeatable workflow. Trim and clean up your footage in the Photos app. Bring in iMovie once you need music, text, or multiple clips stitched together. Reach for a third-party app only once you’re ready for more advanced, trend-driven effects.
The more you practice, the more natural each step becomes. Go ahead and try this workflow on your next video today.
Got a favorite editing trick of your own, or stuck on a specific step? Drop a comment below and let us know — we’re always happy to help you get your videos looking exactly the way you imagined them.
Visit Our Post Page: Blog Page
Discover more from Izoate
Subscribe to get the latest posts sent to your email.