
Minecraft GLFW error 65542 stopping you from playing? Learn how to fix it, avoid unnecessary frustration, and get back to Minecraft without guesswork.
You launch Minecraft, expect to see the title screen, and get “GLFW error 65542: WGL: The driver does not appear to support OpenGL” instead. You update your graphics driver, try again, and the same message appears. Now you’re wondering whether Minecraft is broken, your graphics card is too old, or another tutorial’s DLL workaround is worth trying.
Before you reinstall the game or change more files, find out what your computer is actually failing to do.
Minecraft GLFW error 65542 is a graphics API initialization problem, not proof that your Minecraft installation is damaged. The cause may be a missing graphics driver, an incompatible driver, unsupported graphics hardware, or a configuration problem.
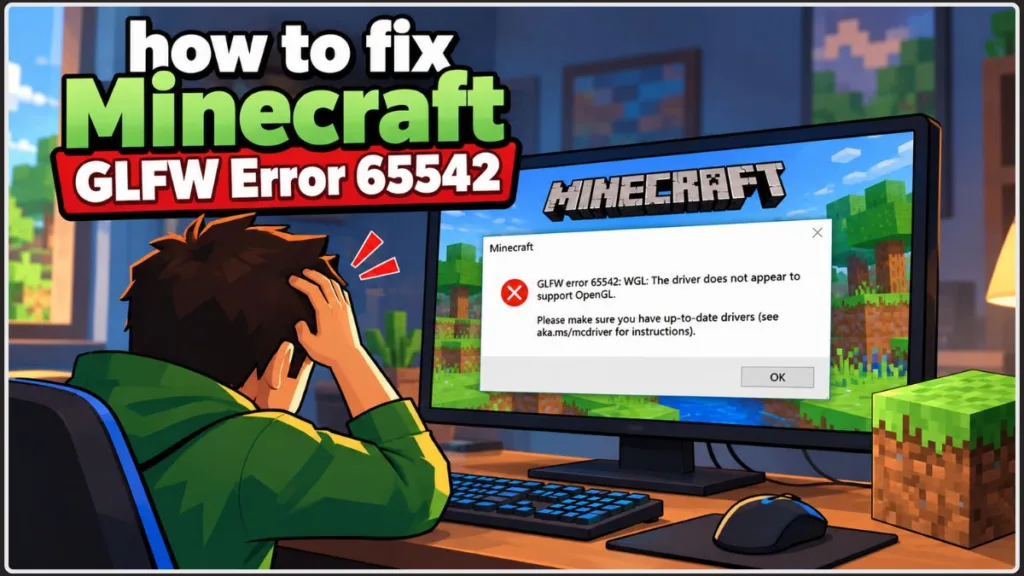
This guide helps you diagnose the cause before choosing a fix. You’ll check what Windows recognizes, compare your GPU with your Minecraft version’s requirements, and use the results to decide what to do next.
Start here: Record your Minecraft version and graphics card before changing anything. Reinstalling the same driver or game repeatedly won’t help if the actual problem is an unsupported graphics feature.
Start Here: Find the Clue That Matches Your Error
You don’t need to try every solution in this guide. Start with the symptom that most closely matches what happened on your computer.
| What you observe | Possible cause | Where to start |
|---|---|---|
| Microsoft Basic Display Adapter appears in Device Manager | The manufacturer’s graphics driver may not be active | Check the graphics driver |
| Minecraft stopped working after a driver update | A driver regression or incompatible installation may be responsible | Investigate the recent update |
| The same error occurs in a clean Minecraft profile | The problem is less likely to be limited to mods | Check the graphics environment |
| Your GPU’s documented OpenGL support is below the game’s requirement | A hardware or graphics API limitation may be involved | Check GPU compatibility |
| Your laptop has Intel graphics and an NVIDIA or AMD GPU | The selected adapter or one of its drivers may be involved | Check which GPU Minecraft uses |
You previously copied opengl32.dll into a Java folder | A manual file change may be interfering with startup | Restore the previous configuration safely |
| Minecraft 26.2 started crashing after you experimented with Vulkan | The selected rendering backend may be involved | Check the Graphics API settings |
These are diagnostic clues rather than confirmed diagnoses. The sections below explain how to verify each possibility and what the results mean.
What GLFW Error 65542 Is Actually Telling You
The number is more useful than it first appears.
GLFW error 65542 corresponds to hexadecimal 0x00010006, the GLFW error GLFW_API_UNAVAILABLE. According to the official GLFW error-code documentation, this error means GLFW could not find support for the requested graphics API on the system.
The message mentions three related components:
- GLFW: A library that helps applications create windows and establish graphics contexts.
- WGL: The Windows interface used to connect applications with OpenGL.
- OpenGL: The graphics API Minecraft uses to render the game in its OpenGL rendering path.
GLFW does not implement OpenGL itself. It depends on the operating system, graphics driver, and supported hardware to provide the necessary functionality. The GLFW FAQ explains this distinction.
That is why reinstalling the Minecraft Launcher is not necessarily the right first step. The launcher may work properly while the Java game fails to establish its graphics context.
What the 65542 Error Code Means
The code tells you that the requested graphics API could not be accessed through the available system configuration. It does not identify the exact component responsible.
For example, Windows might be using a generic display driver, the installed manufacturer driver might have an OpenGL problem, or the graphics hardware might not support the required functionality.
The wording “the driver does not appear to support OpenGL” is therefore a clue, not a complete diagnosis.
A Driver Problem and a Hardware Limit Are Not the Same Thing
A driver problem occurs when compatible hardware may be available, but the installed driver doesn’t provide the graphics functionality the application expects. Installing a compatible driver or reverting a problematic update may resolve it.
A hardware limitation occurs when the GPU or its supported driver cannot provide the required functionality. Reinstalling the same software cannot create graphics capabilities that the hardware doesn’t support.
Key takeaway: The error tells you that graphics API support could not be established. It does not, by itself, tell you whether the driver is broken or the GPU is incompatible. Your next step should establish which situation applies.
Check Whether Windows Is Using the Right Graphics Driver
Start with the information Windows already provides. This is more useful than downloading a new driver before knowing which graphics adapter you have.
Find Your GPU and Record the Installed Driver
- Press
Windows + X. - Open Device Manager.
- Expand Display adapters.
- Record the full name of each adapter listed.
- Double-click the relevant adapter and open the Driver tab.
- Note the driver provider, version, and date.
You can also press Windows + R, enter dxdiag, and inspect its Display tabs for graphics and driver information.
If your computer lists both Intel integrated graphics and an NVIDIA or AMD GPU, record both adapters. Don’t assume that the dedicated GPU is the only one involved.
What should you do with the result?
If you recognize the actual GPU and its manufacturer driver is installed, continue to the compatibility checks below. If the expected adapter or driver isn’t present, investigate that first.
What It Means When Windows Shows Microsoft Basic Display Adapter
Windows can use Microsoft Basic Display Adapter when the manufacturer’s graphics driver is unavailable or not working. Microsoft describes this behavior in its Basic Display Driver documentation.
Seeing this entry is a reason to investigate the driver, but it doesn’t prove that it caused GLFW error 65542.
How to proceed:
- Identify the computer’s actual graphics hardware.
- Visit the official support page for the laptop or PC manufacturer.
- Check the appropriate Intel, NVIDIA, or AMD driver package.
- Install a compatible driver using the manufacturer’s instructions.
- Restart Windows if required, then test Minecraft again.
Official resources include Intel Graphics Support, NVIDIA Driver Downloads, and AMD Drivers and Support.
Pro Tip: If the error persists after installing a driver, record the new driver version and move to the next diagnostic check. Reinstalling the same package repeatedly won’t tell you whether the problem is actually related to GPU compatibility.
If Minecraft Stopped Working After a Driver Update
If Minecraft worked before a graphics driver update and began displaying GLFW error 65542 afterward, investigate that change before reinstalling the game.
A newer driver isn’t automatically better for every application. Occasionally, a specific driver version introduces a compatibility problem that affects graphics APIs.
Compare the Driver Version With When the Error Started
Open Device Manager, select the affected graphics adapter, and inspect the Driver tab. Compare the installation date with when the error first appeared.
The timing alone doesn’t prove the driver is responsible, but it gives you a testable hypothesis.
Intel provides a documented example involving Intel HD Graphics 620. Its support article reports that graphics driver 15.65.3.4944 broke OpenGL support for applications using the API. Intel recommends installing driver 31.0.101.2121 or newer. See Intel’s OpenGL troubleshooting article.
This is evidence that a driver can prevent compatible hardware from exposing the expected functionality. It is not evidence that every Minecraft GLFW error comes from the same cause.
When to Install a Different Driver or Roll Back
If a compatible newer driver is available, follow the manufacturer’s installation guidance.
If the error began immediately after an update and a previous driver worked, you can investigate a rollback:
- Open Device Manager.
- Double-click the affected graphics adapter.
- Select the Driver tab.
- Choose Roll Back Driver, if available.
- Follow the instructions and restart Windows if necessary.
Microsoft explains driver updates and rollback in its Windows driver troubleshooting guide.
Expected result: If the new driver introduced the problem, restoring a compatible version may allow Minecraft to launch.
If rollback is unavailable or makes no difference, don’t keep switching between unverified driver packages. Check the GPU’s graphics API support next.
Check Whether Your GPU Meets Your Minecraft Version’s Graphics Requirements
A driver can be installed correctly while a graphics card still lacks a required feature. This is the point where checking the hardware specification becomes more useful than trying another software fix.
Mojang’s Minecraft Java Edition 1.21.9 release notes state that the game raised its required OpenGL version from 3.2 to OpenGL 3.3. The same developer note clarifies that the published minimum requirement had already been OpenGL 4.0 since 2017.
These statements describe different things: the game’s version-specific change and Mojang’s broader published minimum specification.
Compare Your GPU’s OpenGL Support With the Game’s Requirements
Identify your exact graphics adapter in Device Manager. Then check its supported graphics APIs in the manufacturer’s official documentation.
Intel’s supported graphics API table provides useful examples. The listed capabilities include:
| Intel graphics family | Published OpenGL support | Diagnostic implication |
|---|---|---|
| HD Graphics 2000/3000 | 3.1 | Below the OpenGL 3.3 requirement stated for Java Edition 1.21.9 |
| HD Graphics 2500/4000 | 4.0 | Meets that particular OpenGL version threshold, although other requirements still apply |
| UHD Graphics 610/620/630/P630 | 4.6 | Published OpenGL support is above 3.3; driver and system compatibility still need checking |
Source: Intel — Supported APIs for Intel Graphics.
The third example is useful because it shows the reverse situation: a model with a sufficiently high published OpenGL version may still encounter an error if its installed driver isn’t exposing the API correctly.
What the Intel Graphics Examples Tell You
If you have Intel HD Graphics 2000 or 3000: Intel lists OpenGL 3.1 for these graphics products. That is below the OpenGL 3.3 requirement announced for Java Edition 1.21.9. If your system cannot provide the necessary functionality through supported hardware and drivers, reinstalling Minecraft won’t overcome the limitation.
If you have Intel HD Graphics 2500 or 4000: Intel lists OpenGL 4.0. That clears the particular OpenGL 3.3 threshold, but it does not establish compatibility with every Minecraft version or rendering configuration.
If you have a newer GPU with published OpenGL support above 3.3: An insufficient hardware API version becomes less likely, although a driver issue or configuration problem can still explain the error.
When Another Driver Update Won’t Solve the Problem
If the documented OpenGL capability falls below the requirement for your intended Minecraft version, another driver installation is unlikely to provide the missing functionality.
Check whether a compatible supported game version or a different supported hardware configuration is appropriate for your situation. Don’t assume that every older computer is incompatible, and don’t replace hardware until you’ve verified the exact model and relevant requirements.
Expert insight: Don’t judge compatibility by the age of a graphics card alone. Compare its documented API capabilities with the game’s requirements. A driver problem and a hardware limitation may look similar at startup, but they do not have the same solution.
If Your Laptop Has Two GPUs, Check Which One Minecraft Uses
Some laptops have integrated graphics alongside a dedicated NVIDIA or AMD GPU. In those systems, checking the dedicated GPU alone may not tell you enough about Minecraft’s actual graphics environment.
Set the Graphics Preference for Minecraft’s Java Executable
First, confirm that both adapters have suitable drivers in Device Manager.
Then open Windows Graphics settings:
- Windows 11: Settings > System > Display > Graphics.
- Windows 10: Settings > System > Display > Graphics settings.
Where appropriate, add the Java executable used by your Minecraft installation and test the High performance preference.
Remember that the Minecraft Launcher and the Java process that renders the game aren’t necessarily the same executable. The relevant Java binary may be named javaw.exe, but its location varies by launcher and runtime. Don’t assume that a path copied from another computer matches yours.
What to Check If Changing the GPU Makes No Difference
If the game starts working after you change the graphics preference, the original selection may have contributed to the problem.
If the same error persists, don’t conclude that your GPU is defective. Recheck the driver and supported API, and verify that you changed the preference for the actual Java executable rather than only the launcher.
Once Minecraft launches, the F3 debug overlay can provide additional information about the active rendering backend in Java Edition 26.2. This is useful validation, but it cannot help when the game fails before the overlay becomes available.
Test a Clean Minecraft Profile Before Changing More Files
If you use Forge, Fabric, custom Java settings, or a third-party launcher, a clean Minecraft profile can help determine whether the problem is limited to your usual setup.
The test is designed to narrow the cause, not to assume your mods are responsible.
Compare a Vanilla Launch With Your Usual Setup
- Open the official Minecraft Launcher.
- Create or select a standard, unmodded Java Edition installation.
- Use the launcher’s intended Java runtime for that game version.
- Avoid custom JVM arguments during the test.
- Launch Minecraft and note whether the same error appears.
Back up important worlds before changing game files or configurations. You don’t need to delete existing installations or mod folders to run this test.
What a Successful or Failed Clean Test Tells You
Result A: The clean installation launches.
This makes the custom profile a more useful place to investigate. Review changes to the Java executable, mod configuration, launch arguments, and any additional files. Reintroduce custom components one at a time where practical.
Result B: The clean profile displays the same error.
The modded configuration is less likely to be the sole cause. Return to the driver, GPU selection, and graphics API checks.
A clean profile doesn’t prove the exact root cause, but it tells you whether to spend your next troubleshooting effort on the custom environment or the graphics stack.
If You Copied opengl32.dll, Restore the Previous Configuration Safely
Some troubleshooting guides recommend manually copying opengl32.dll into a Java runtime folder. If you’ve already tried that, don’t keep downloading replacement files simply because Minecraft still won’t launch.
The GLFW FAQ explains that GLFW does not implement OpenGL itself. Copying a DLL from an unknown website is not a universal substitute for the graphics functionality provided by the operating system, driver, and hardware.
Identify the File and Location You Changed
If you manually added opengl32.dll:
- Identify the specific file and folder you changed.
- Determine whether it was added to a Java runtime or another application directory.
- Restore the previous configuration using a trusted backup or appropriate installer.
- Avoid deleting or overwriting Windows system files.
- Test Minecraft again after restoring the configuration.
A Microsoft Q&A discussion dated August 24, 2026, describes a user who had updated graphics drivers and Windows and manually added a DLL without resolving the problem. The response, posted by an Independent Advisor, recommends checking the actual display adapter and intended graphics configuration. This is a support anecdote, not a controlled test demonstrating a universal fix. Read the Microsoft Q&A discussion.
Why a Downloaded DLL Is Not a Substitute for a Working Graphics Driver
An arbitrary DLL can be incompatible or unsafe. Even if the file name matches, it doesn’t guarantee that the correct OpenGL implementation will be available to Minecraft.
Critical warning: Don’t overwrite Windows system DLLs as an experiment. Restore only file changes you can identify, and use official graphics-driver and runtime installers.
Expected result: If the manually added file was interfering with the runtime, restoring the prior configuration may remove that conflict. If GLFW error 65542 remains, return to the graphics driver and hardware checks.
Only Investigate Vulkan if the Problem Began With Minecraft 26.2 Graphics Settings
Minecraft Java Edition 26.2 introduced experimental Vulkan rendering alongside OpenGL. This makes it important to distinguish the original WGL/OpenGL error from a crash that started after changing the rendering backend.
Mojang’s Java Edition 26.2 release notes state that Vulkan is experimental and may be less stable or slower on some systems. The notes specify a current Vulkan backend requirement of Vulkan 1.2 with dynamic rendering and push descriptors. They also describe how the game chooses and falls back between rendering backends.
Separately, Mojang’s July 21, 2026 system-requirements announcement establishes a new minimum target of 1080p at 30 FPS using the Fast preset. That target includes:
- A Vulkan 1.3-capable GPU with at least 2 GB of VRAM.
- A 64-bit system and a four-core processor.
- 8 GB RAM with a discrete GPU or 12 GB with integrated graphics.
The recommended target is 1080p at 60 FPS using the Fancy preset, with 16 GB RAM and a graphics card with 6 GB VRAM. These announced system targets are separate from the specific requirements for the current experimental Vulkan backend.
Tell an OpenGL Startup Error Apart From a Vulkan Crash
If Minecraft displays the WGL/OpenGL error before reaching the menus: Start with the graphics driver and hardware checks earlier in this guide. You cannot rely on changing an in-game setting when the game cannot open.
If Minecraft launches but starts crashing after you selected experimental Vulkan: Investigate the rendering backend. That situation is different from a failure to initialize OpenGL.
Check the Graphics API Setting and F3 System Specifications
If you can reach the menus, open Options > Video Settings > Graphics API and inspect the selected preference.
Java Edition 26.2 documents Default, Prefer Vulkan (Experimental), and Prefer OpenGL. In the release notes reviewed, Default currently behaves like Prefer OpenGL. Prefer Vulkan attempts Vulkan and falls back to OpenGL if it fails; Prefer OpenGL attempts OpenGL and falls back to Vulkan if it fails.
If Minecraft launches, the F3 debug overlay’s system_specs section can show which backend is active. Mojang documents this diagnostic in its 26.2 release notes.
Understand What the 26.2 Graphics Requirements Mean for Your PC
If the problem began after you explicitly selected Vulkan, returning to Default and retesting is a reasonable diagnostic step.
If the original WGL/OpenGL error remains and Minecraft cannot reach its menus, don’t treat a Vulkan setting change as the primary remedy. The evidence should guide you back to the graphics driver, selected adapter, and supported API.
Version-specific insight: The current experimental Vulkan backend requirement and Mojang’s updated minimum hardware target are different specifications. A Vulkan-related crash does not prove that GLFW error 65542 is caused by Vulkan, and the WGL message alone does not prove that the GPU is physically defective.
Use Your Findings to Choose the Next Step
By this point, you should have a clearer picture of your computer’s graphics environment. Use the results you observed instead of starting the troubleshooting process over again.
| What you found | What it suggests | Next action |
|---|---|---|
| Microsoft Basic Display Adapter appears | The expected manufacturer driver may not be active | Install a compatible official driver |
| The error started after a driver update | The driver change may be responsible | Check a compatible version or roll back if appropriate |
| The GPU’s documented OpenGL support is below the game requirement | A graphics API limitation may be involved | Check compatible game versions or hardware options |
| You have multiple GPUs and one has an unsuitable driver | The active adapter may be contributing | Check both drivers and the Java executable’s graphics preference |
| A clean profile launches successfully | A custom runtime or modded configuration may be responsible | Investigate custom components one at a time |
| The error followed a manual DLL change | The modified runtime may be contributing | Restore identifiable changes safely |
| Only Vulkan experimentation causes a crash | The rendering backend may be responsible | Review the Graphics API setting and F3 system specifications |
| The problem occurs only in a remote or virtual setup | The environment may expose different graphics capabilities | Compare against a local launch and investigate the remote graphics configuration |
When to Contact the GPU Manufacturer or Minecraft Support
If none of the checks resolves the problem, collect the following details before requesting further assistance:
- Your Minecraft Java Edition version.
- Your Windows version.
- The exact names of the installed graphics adapters.
- The graphics-driver provider and version.
- The complete error message.
- Whether the issue began after an update or file modification.
- Whether a clean, unmodded installation produces the same error.
- Whether you’re using Remote Desktop, a virtual machine, a USB display adapter, or a custom Java runtime.
This information makes it easier to investigate the actual failure rather than suggesting the same generic fixes again.
Best practice: Change one setting at a time, launch Minecraft, and record the result. This preserves a clear troubleshooting history and makes it easier to identify which change actually mattered.
Frequently Asked Questions
What does GLFW error 65542 mean in Minecraft?
It corresponds to GLFW’s GLFW_API_UNAVAILABLE error. In this context, Minecraft has failed to establish the requested graphics API environment. The error does not identify whether the cause is a driver problem, unsupported hardware, or a configuration issue.
Why does the error persist after updating drivers?
The installed package may not be the correct driver for your GPU, a driver regression may be involved, Minecraft may be using a different adapter, or the hardware may lack the required graphics functionality. Verify the exact GPU and supported API instead of repeatedly installing the same package.
Can an older GPU cause Minecraft GLFW error 65542?
Yes, if the hardware cannot provide the graphics functionality required by your Minecraft version. Intel lists HD Graphics 2000/3000 as supporting OpenGL 3.1, below the OpenGL 3.3 requirement announced for Java Edition 1.21.9. Check your actual GPU and game version before concluding that a replacement is necessary.
Should I download opengl32.dll to fix the error?
Not as a first-line solution. A DLL from an unknown website may be incompatible or unsafe and cannot guarantee that Minecraft will receive the required graphics functionality. Use official driver packages and restore only identifiable manual changes.
How can I check which graphics backend Minecraft uses?
When Java Edition 26.2 launches successfully, press F3 and inspect the system_specs section of the debug overlay. Mojang documents this location for identifying the active rendering backend. If the game fails before that overlay is available, use the error message and driver checks to diagnose the startup issue.
Get Back to Minecraft With a Diagnosis, Not Another Guess
When Minecraft refuses to launch with GLFW error 65542, it’s easy to lose time following fixes that don’t apply to your computer. You shouldn’t have to reinstall everything or download unknown files just to discover what’s wrong.
Start by identifying the graphics adapter, recording the driver version, and checking the hardware’s documented OpenGL support against your Minecraft version. If a driver change preceded the error, investigate that change. If a clean profile works, focus on the custom setup. If the problem began after a Vulkan experiment, check the rendering backend—but don’t confuse that issue with the original WGL error.
The useful outcome is a verified diagnosis, not a long list of attempted fixes. Once you know whether you’re dealing with a driver fault, a compatibility limit, or a configuration problem, you can choose a solution that addresses the cause instead of changing files at random.
Visit Our Post Page: Blog Page
Discover more from Izoate
Subscribe to get the latest posts sent to your email.