
Learn how to install Gemini CLI on Windows, macOS, and Linux in this 2026 step-by-step guide. Set up Node.js, authenticate with Google or an API key, verify your installation, and fix common Gemini CLI errors with ease.
We’ve all been there. You’re right in the middle of writing code, but you need to stop, leave your terminal, open a browser tab, and paste your code into an AI chatbot just to find a missing comma or fix a broken query. This constant shifting back and forth completely breaks your focus and slows you down.
The google gemini command line tool fixes this problem by putting an AI assistant right in your terminal. When you install this tool, you can chat with your codebase, generate terminal commands, and edit files without ever leaving your shell.
In this guide, you’ll learn how to get everything set up so you can start using Gemini CLI in just a few minutes. We’ll cover:
- Installing Gemini CLI on your machine
- Setting it up on Windows, macOS, and Linux
- Authenticating your account safely
- Verifying that everything works properly
- Troubleshooting common installation problems
Let’s get your terminal AI assistant running so you can build a faster, smoother coding environment.
What You’ll Need
- Node.js 20 or later (22 LTS recommended)
- npm, Homebrew, or Docker
- A Google account, Google AI Studio API key, or Vertex AI credentials
- About 5–10 minutes
Quick Start
Install Node.js 22 LTS > Install Gemini CLI > Verify the installation > Sign in with your Google account or API key > Run your first prompt
What Is Gemini CLI?
What Is Google’s Gemini CLI?
Gemini CLI is Google’s official open-source AI assistant made specifically for your terminal. It connects your local code to the Gemini 3 model, giving you a 1-million-token context window right inside your workspace.
Why Use the Google Gemini Command Line Tool?
Running an AI agent directly in your shell means it can work natively with your files and tools. Once you setup gemini terminal agent, it can read your folder structure, create documentation templates, and run testing commands with your permission.
Key Features
- AI-powered terminal assistant: Chat normally with your terminal to write scripts or fix bugs on the fly.
- Interactive & non-interactive mode: Switch between an ongoing chat session or quick single commands.
- Open source: The tool is fully public under the Apache 2.0 license, so you can see exactly how it works.
- Large context window: Pass whole project folders or long logs directly into your prompts.
- Supports coding, debugging, automation, and scripting: Build automated pipelines, fix broken tests, or read through logs easily.
Check Your System Requirements
Before we run any installation commands, let’s make sure your computer has everything it needs to run the tool. This only takes a minute.
Make Sure Node.js Is Installed
Gemini CLI runs on JavaScript, so checking the node.js prerequisite is your very first step. You’ll need Node.js version 20.0.0 or higher installed on your system.
Tip: Install Node.js 22 LTS for the best compatibility. If you’re on Windows, avoid Node.js 24 or 25 for now because a temporary bug can cause an ECOMPROMISED error when installing the package. Node 22 LTS works perfectly.
If you already have Node.js installed, you can skip this step. Otherwise, to check if you have these tools ready, enter this in your terminal or PowerShell:
Bash
node --version
npm --version
Expected Output
Your terminal should show your current version numbers. They’ll look something like this:
Plaintext
v22.x.x
10.x.x
Supported Operating Systems
The tool runs on almost any desktop setup or server:
- Windows: Windows 11 24H2 or newer.
- macOS: macOS 15 Sequoia or newer (works on both Intel and Apple Silicon Macs).
- Linux: Ubuntu 20.04+, Debian 12+, Fedora 42+, or Rocky Linux 10+.
Choose Your Authentication Method
To talk to Google’s AI models, you’ll need a valid credential. You can choose from three different options:
- A personal Google Account (gives you access to the free tier).
- A google ai studio api key from your developer dashboard.
- Cloud credentials using vertex ai application default credentials.
Warning: Keep in mind that Google has transitioned free account access over to the closed-source Antigravity CLI (agy) binary. If you want to keep using the open-source gemini command line tool after June 2026, you just need to use a paid Google AI Studio API key or a Vertex AI token.
Step 1: Install Gemini CLI Using npm
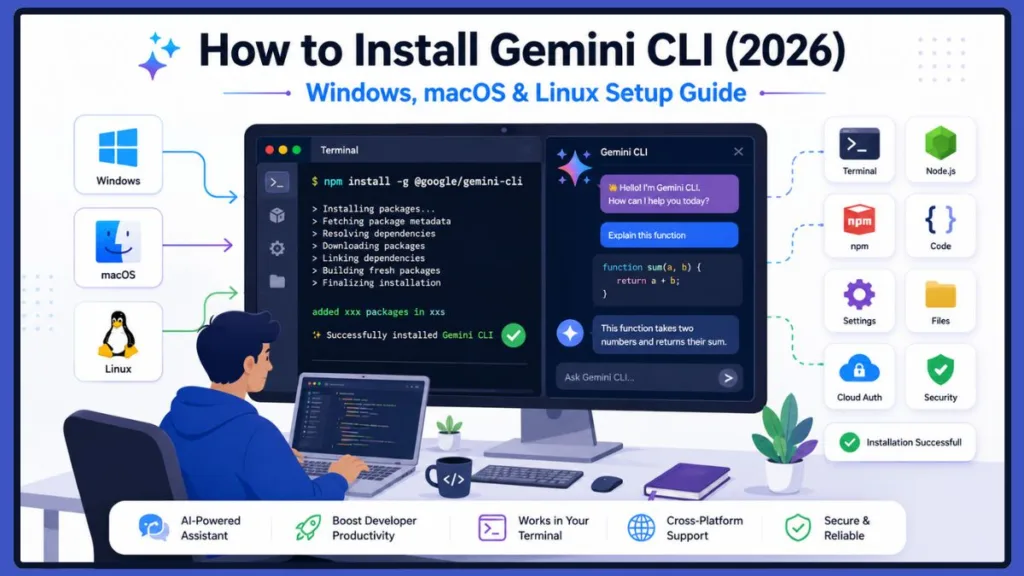
Now that Node.js is ready, we can install the tool. Since it’s available as an npm package, a single command will download the files and add the gemini command to your terminal automatically.
Open your terminal and run the following npm command:
Bash
npm install -g @google/gemini-cli
Expected Output
You’ll see npm download the files and complete the setup:
Plaintext
added xxx packages in xxs
Success! If you see a similar message, the installation worked. Notice the -g flag in the command. It tells npm to install Gemini CLI globally, so you can launch it from any folder instead of only your current project.
If you’re on Windows and see permission errors, don’t worry. Just right-click your PowerShell or Command Prompt and choose Run as Administrator before entering the command.
Alternative Installation Methods
If you don’t want to install Gemini CLI globally, you can use one of these alternatives instead.
Try Gemini CLI Without Installing
If you just want to try the tool without changing your system settings, you can use npx. Running npx @google/gemini-cli downloads a temporary copy to run your prompt, then cleans it up immediately.
Bash
npx @google/gemini-cli
Use Homebrew on macOS
Mac users who prefer Homebrew can skip npm entirely. Execute this command to handle your gemini cli macos homebrew installation:
Bash
brew install gemini-cli
Install on Ubuntu and Other Linux Distros
To install gemini cli ubuntu style or on another Linux server, make sure your package manager is up to date. If your distribution’s default repository has an older version of Node, install Node 20+ from NodeSource first.
For Ubuntu and Debian systems, run these commands:
Bash
sudo apt install -y nodejs npm
sudo npm install -g @google/gemini-cli
For Fedora or Rocky Linux, use dnf:
Bash
sudo dnf install -y nodejs
sudo npm install -g @google/gemini-cli
Docker Installation (Optional)
If you’re working in a restricted corporate environment where you can’t install packages globally, you can run the tool inside an isolated container. Google provides a safe sandbox image so the tool won’t touch your host files.
Bash
docker run --rm -it us-docker.pkg.dev/gemini-code-dev/gemini-cli/sandbox:0.1.1
Verify Your Gemini CLI Installation
Now that the installer is finished, let’s make sure your terminal can find the new command. Checking the version confirms that Gemini CLI was installed correctly.
Next, run:
Bash
gemini --version
Expected Output
Your terminal should print the package name and version number:
Plaintext
@google/gemini-cli/0.xx.x
Success! If you see a version number, Gemini CLI is installed correctly and you’re ready to connect your account. To see all the available options and flags, open up the built-in help menu:
Bash
gemini --help
Expected Output
You should see the help documentation print out:
Plaintext
Usage: gemini [options] [command]

Options:
  -v, --version  output the version number
  -p, --prompt   run a non-interactive prompt
  -h, --help     display help for command
Set Up Your Gemini CLI Authentication
The tool is installed, but we need to give it access to Google’s servers. To help you choose the best setup for your workflow, let’s look at how the authentication methods compare:
| Authentication Method | Best For | Quota Type |
| Google Login (OAuth) | Beginners and local laptops | 60 requests per minute |
| Gemini API Key | Developers and automated scripts | Custom daily API limits |
| Vertex AI | Enterprise teams and cloud networks | Cloud usage billing |
Sign In with Your Google Account
If you’re using a personal account, just type gemini into your terminal. If you haven’t signed in before, Gemini CLI will open your browser so you can sign in with your Google account securely.
Bash
gemini
Expected Output
Your terminal will show a login prompt and then confirm you’re signed in:
Plaintext
Opening browser for Google Sign-In...
Authentication successful! Welcome to Gemini CLI.
Use a Google AI Studio API Key
If you’re working on a server without a browser or setting up an automated script, using a google ai studio api key is the best choice.
If you’re using Windows, open PowerShell and save the key to your session environment variables:
PowerShell
$env:GEMINI_API_KEY="your-key-here"
Expected Output
PowerShell won’t print anything if it succeeds, but you can verify it saved properly by entering:
PowerShell
echo $env:GEMINI_API_KEY
If you’re on a Mac or Linux machine, export the key in your shell terminal:
Bash
export GEMINI_API_KEY="your-key-here"
Expected Output
You can verify the key is active by printing it out:
Bash
echo $GEMINI_API_KEY
Connect via Vertex AI
If you’re working inside a corporate Google Cloud environment, you’ll want to use your cloud credentials. This keeps your system secure by using vertex ai application default credentials instead of hardcoded API keys.
Bash
export GOOGLE_CLOUD_PROJECT="my-gcp-project"
export GOOGLE_CLOUD_LOCATION="us-central1"
gcloud auth application-default login
gemini
Expected Output
The gcloud tool will confirm your cloud login:
Plaintext
Credentials saved to local file.
Gemini CLI connected to Vertex AI project: my-gcp-project
Run Your First Prompt
You’re all set. Your terminal is now connected to Gemini and ready to accept prompts. You can use the tool in two different ways depending on what you need.
Interactive Mode
To open a continuous chat session where the AI remembers your previous questions, just type the command and hit Enter inside your project folder:
Bash
gemini
Non-Interactive Mode
If you just want a quick answer or want to plug a request into a script, run the tool in non-interactive mode. To run gemini cli non-interactive mode, use the -p flag and wrap your question in quotes.
Bash
gemini -p "Explain recursion in three sentences"
Expected Output
The model will print the answer directly to your terminal screen:
Plaintext
Recursion is when a function calls itself to solve a smaller piece of the same problem. Each call adds a new layer to the stack until it hits a base case. Once it reaches the base case, the stack clears and returns the final answer.
Customize Your Gemini CLI Settings
You can change your settings to make the tool match your project style and preferences.
Project Context with GEMINI.md
The gemini.md configuration file acts as a local instruction sheet for your project. If you drop this markdown file into your root folder, the tool reads it every time it boots up. This lets Gemini know your programming languages, styling choices, or rules before you even ask a question.
Global Settings in settings.json
Your global application settings are saved in your home folder under ~/.gemini/settings.json. You can edit this file to pin your favorite model (like gemini-2.5-pro), turn off telemetry, or change your terminal theme. Don’t worry if this looks unfamiliar—you can always tweak it later.
Essential Gemini CLI Commands
| Command | Purpose |
gemini | Opens a continuous chat session inside your terminal. |
gemini --version | Prints the active version of your CLI package. |
gemini --help | Displays the parameters manual and flag options. |
gemini -p "<text>" | Fires off a single-shot headless text prompt. |
gemini skills list | Displays all automation capabilities installed locally. |
gemini mcp list | Enumerates all connected protocol utility servers. |
Explore GitHub Integration and Developer Features
Once you’re comfortable with the basics, you can connect Gemini to your wider development pipeline.
Setting up gemini cli github integration lets you run automated code reviews right inside your repositories using GitHub Actions.
How to Fix Common Installation Error
If you hit a snag during setup, don’t worry. Most of these terminal issues are quick fixes.
gemini Command Not Found
If you see a gemini command not found error, it usually means your terminal can’t find your global npm folder path. This is the most common issue on Windows.
To fix it, check your npm folder path by running npm config get prefix, open your Windows Environment Variables window, and add that folder path to your user “Path” variable.
npm Permission Errors
If you get an EACCES permission error on Mac or Linux, don’t use sudo to force it. Instead, change your settings so npm installs global packages to a folder your user owns. On Windows, just right-click your terminal application and select “Run as Administrator” before running the install command.
PowerShell Execution Policy Blocks
If Windows blocks the script with a security error, your system’s default policy is stopping downloaded scripts from running.
Open PowerShell as an Administrator and execute this command to allow local scripts safely:
PowerShell
Set-ExecutionPolicy -ExecutionPolicy RemoteSigned -Scope CurrentUser
Node Version Compatibility Issues
If you see strange errors or caching bugs during installation, check your Node version. Completely remove older versions and install a clean copy of Node.js 22 LTS. For a step-by-step walkthrough, check out our tutorial on How to Install Node.js on Windows.
Tip: If you’re a Windows developer struggling with path errors, try installing the tool inside the Windows Subsystem for Linux (WSL). Running Gemini CLI inside a WSL Ubuntu setup completely avoids Windows-specific path and script errors.
Proxy and Enterprise Network Blocks
If you’re working behind a strict corporate firewall, the installer might get blocked. Tell npm exactly how to route through your company proxy before running the install command:
Bash
npm config set proxy http://proxy.company.com:8080
npm config set https-proxy http://proxy.company.com:8080
How to Update Gemini CLI
Google updates this tool often. To find out how to update gemini cli npm packages globally, just type this command in your terminal:
Bash
npm update -g @google/gemini-cli
Expected Output
Your terminal will show npm pulling down the latest version:
Plaintext
updated 1 package in 5s
Master Custom Slash Commands
When you’re in an active chat session, you can use gemini cli custom slash commands to control the tool:
- /help: Shows all available commands.
- /auth: Lets you switch between API keys or accounts on the fly.
- /memory: Manages project facts the tool has remembered.
- /compress: Summarizes your chat history to keep your token usage low.
- /tools: Lists your active tools, like file editing and web search.
- /skills: Lets you turn specific automation rules on or off.
Comparing Gemini CLI vs GitHub Copilot CLI
Choosing the right assistant for your terminal depends heavily on your daily coding needs. Let’s look at how the gemini cli vs github copilot cli feature sets compare:
| Comparison Metric | Gemini CLI | GitHub Copilot CLI |
| Pricing | Free entry tier / Paid usage keys | Monthly paid subscription |
| Authentication | Google Accounts, Studio Keys, Vertex AI | GitHub User Profile Login |
| Supported AI Models | Gemini 3, Gemini 2.5 Pro / Flash | OpenAI GPT models, Claude variants |
| Context Window | 1,000,000 Tokens | Context limit varies by IDE |
| Open Source | Yes (Apache 2.0 License) | No (Closed-source proprietary tool) |
| Offline Capability | Requires internet connectivity | Requires internet connectivity |
| GitHub Integration | Supported via external platform Actions | Built directly into the GitHub ecosystem |
| Terminal Features | Multi-turn chat, file editing, MCP servers | Inline command generation and explanations |
| Ecosystem | Model Context Protocol extensible | Native GitHub ecosystem plugin path |
| Learning Curve | Conversational chat interface | Command-oriented architecture |
| Typical Use Cases | Whole-project context and multi-file edits | Quick command reference and shell syntax |
Frequently Asked Questions
How do I install the Gemini CLI using npm?
You can install it globally across your machine by opening your terminal or shell and running the command: npm install -g @google/gemini-cli.
What are the prerequisites for installing Gemini CLI?
Your computer needs an active installation of Node.js version 20.0.0 or higher. For the smoothest experience on any operating system, we highly recommend using Node.js 22 LTS.
Do I need a Google account to use the Gemini CLI?
No, you don’t strictly need a personal Google account. While normal profiles work great for basic testing, you can also connect using a standalone Google AI Studio API key or a Vertex AI cloud credential.
How do I authenticate the Gemini command line tool?
You can set up your authentication by running the gemini command to open a browser login link, by exporting a GEMINI_API_KEY environment variable, or by logging into your Google Cloud SDK.
Is the Gemini CLI free for developers?
Yes, the application connects directly to the gemini 2.5 pro free tier limits, allowing you to run up to 60 queries per minute for free. High-volume enterprise workloads can scale up by switching to paid Vertex AI keys.
What’s Next?
Setting up an AI terminal assistant is one of the best upgrades you can make to your coding environment. Now that you’ve checked your Node.js version, installed the Gemini CLI package, set up your credentials, and verified your paths, you’re ready to start using it.
Don’t wait—open your terminal right now and try a few practical tasks. Ask Gemini to explain a complex piece of code you’re working on, generate a tricky shell command, review your latest Git changes, write a quick script, or help you debug a broken test.
Once you’re comfortable with the basic commands, you can keep learning by exploring advanced workflows like connecting external tools with MCP servers, installing custom Agent Skills, or creating a custom GEMINI.md file for your favorite project repositories. Happy coding!
Visit Our Post Page: Blog Page
Discover more from Izoate
Subscribe to get the latest posts sent to your email.