
Learn how to safely remove yourself as an admin on a Facebook Page in 2025. Follow our step-by-step guide to leave your admin role, transfer ownership, and maintain page security across desktop and mobile.
Stepping Back: Why You Might Want to Leave a Facebook Page as Admin
Being an Admin of a Facebook Page comes with responsibility—from managing content and overseeing a brand to helping set up a community presence. But there are moments when continuing in that role is no longer the right fit. You might be transferring ownership to a new person, leaving a job, completing a short-term project, or simply aiming to separate personal and professional life.
Whatever the reason, removing yourself as an admin is not only about convenience; it’s a matter of security and account control. By stepping down properly, you ensure the page remains well-managed without leaving behind unnecessary access. This decision also provides peace of mind that your profile is no longer tied to the page’s activities once you exit.
In this guide, you’ll find the step-by-step process to leave a Facebook Page as an admin, understand what changes occur afterward, and learn the key considerations to review before confirming your removal.
Understanding Facebook Page Roles in 2025
Managing a Facebook Page effectively begins with a clear understanding of roles and permissions. In 2025, Meta has streamlined Page management through the Professional Dashboard and Page Access settings. This central hub allows admins to assign responsibilities, monitor access, and ensure the page operates smoothly—without confusion or overlap.
The Hierarchy of Roles: Who Can Do What
Facebook divides Page responsibilities into several distinct roles, each with specific levels of access:
Admin – Holds full control. Admins can manage Page settings, assign roles, publish content, respond to messages, view insights, and even remove other admins. This is the only role capable of transferring ownership or removing themselves securely.
Editor – Can create and manage posts, reply to messages, and moderate comments, but cannot alter roles or page settings.
Moderator – Focused on community management, moderators can respond to messages and comments but do not control content creation or admin assignments.
Advertiser – Handles ad creation and management, but has no access to posts, messages, or role changes.
Analyst – A read-only role for monitoring insights and analytics, without the ability to change settings or interact with content.
Why Understanding Roles Matters
Before attempting to remove yourself or transfer admin responsibilities, it’s essential to recognize that only Admins have the authority to adjust roles. Assigning someone incorrectly could disrupt page continuity, limit access, or create security vulnerabilities.
Additionally, Facebook’s New Pages Experience has shifted role management into a single, intuitive dashboard, eliminating the old buried menus. This means you can see who has access, their role, and how to adjust it without hunting through multiple settings.
The Professional Dashboard: Your Control Center
The Professional Dashboard is your command center for managing Page Access. Here you can:
- Review all users with access and their specific roles.
- Add new team members with appropriate privileges.
- Upgrade or downgrade roles based on responsibility changes.
- Safely remove admins while ensuring the page remains properly managed.
By understanding these roles and their boundaries, you gain clarity on who can take action on the Page and ensure that stepping down is done securely and responsibly.
Before You Remove Yourself: Key Considerations
Stepping away from a Facebook Page as an admin is more than a simple click. Proper preparation ensures the page remains secure, well-managed, and avoids interruptions for followers or collaborators. Taking a moment to review essential considerations can prevent accidental access issues or administrative gaps.
Ensure There’s Another Admin
One of the most important precautions is confirming that the Page has at least one other Admin. Facebook enforces this to prevent pages from being left without management, which could compromise content control, community interactions, and overall page security.
- If you are the only Admin, you cannot remove yourself until another person is added as an Admin and accepts the invitation.
- Assigning a trusted colleague or team member helps maintain continuity and ensures the page remains active and responsive.
Consider Page Ownership and Handover
If your departure is part of a transfer of ownership, the proper process involves a three-step handoff:
- Add the new Admin to the Page.
- Have them accept the invite through Facebook notifications or email.
- Remove your own access only after the acceptance is confirmed.
This structured approach avoids accidental loss of access and preserves page continuity.
Evaluate Your Responsibilities
Before leaving, assess your current tasks and ongoing projects on the Page. Consider:
- Scheduled posts that may need reassignment.
- Pending messages or community inquiries that someone else should manage.
- Access to linked tools, such as Meta Business Manager, ad accounts, or analytics dashboards.
Completing these handoffs ensures a smooth transition and prevents gaps in management.
Protect Your Account and Security
Even when stepping away, maintaining account security is critical:
- Remove your admin access only when the new Admin is verified and active.
- Avoid leaving sensitive content or business assets in a state that only you can access.
- If the Page is linked to your personal profile, confirm that removal will not inadvertently affect other connected accounts or services.
Double-Check Platform Differences
Remember that removal steps vary slightly across platforms: Desktop, iPhone, Android, and the New Pages Experience each have their own interface for Page Access. Understanding these differences beforehand prevents confusion during the removal process.
Step-by-Step Guide: How to Step Away from Your Admin Role
Once you’ve reviewed the key considerations, the next stage is the actual process of removing yourself. The steps differ slightly depending on the device or interface you are using, but the principles remain the same: ensure continuity, confirm a replacement admin, and execute the removal securely.
Removing Yourself on Desktop
To start on desktop, first log in and access your Page. Click your profile picture in the top right and select “See all profiles”. Then choose the Page you manage and open it.
Once inside the Page, navigate to Settings by clicking the Page’s profile picture in the top right, selecting Settings and Privacy, and then Settings.
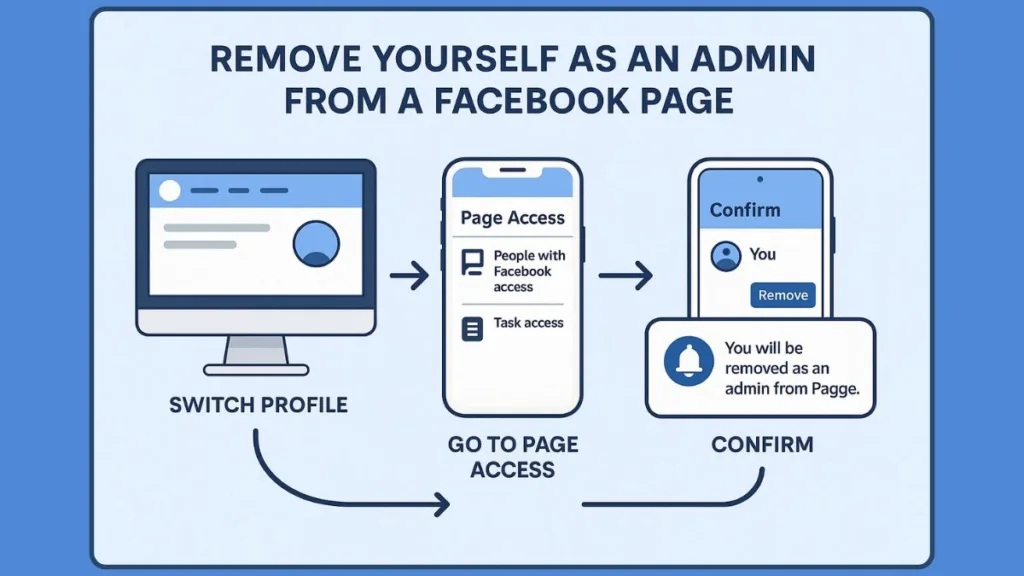
Next, access your Page Roles by going to Page Setup and selecting Page Access. Here, you will see a list of all users with access and their roles.
To remove yourself, locate your name in the People with Facebook Access section, click Options, and select Remove Access. Confirm your action to complete the removal.
It’s important to note that you cannot remove yourself if you are the only Admin. Another Admin must accept the role before the system allows removal.
Removing Yourself on Mobile Devices
iPhone
On an iPhone, tap Menu or your profile picture at the bottom of the app. Then select the Page you want to manage.
Tap Menu in the bottom right corner, followed by Settings and Privacy, then Settings → Page Setup → Page Access. Locate your name, tap Options, and choose Remove from Page.
Android
For Android users, tap Menu or your profile picture at the top of the app. Switch to the desired Page under Options.
Tap Menu, then Settings and Privacy → Settings → Page Setup → Page Access. Next to your name, tap Options and select Remove from Page.
The removed person, in this case you, will receive an email notification confirming the change.
Handling the New Pages Experience
In the New Pages Experience, all role management is centralized under the Professional Dashboard.
To remove yourself, switch to your Page profile, then open the Professional Dashboard and scroll down to Page Access. In People with Facebook Access, click your name, select Remove Access, and confirm the action.
This modern interface ensures real-time updates, and all changes are instantly reflected across desktop and mobile platforms.
Key Tips for a Smooth Removal
Before completing the removal, verify that there is another Admin in place to maintain continuity.
Ensure that any scheduled posts or pending interactions are reassigned to someone else. Confirm that you are using the correct account linked to the Page to avoid errors.
Keep in mind that if you are transferring ownership, acceptance by the new Admin is required before your removal can be finalized.
Understanding the Impact: After You Step Down as Admin
Removing yourself from a Facebook Page is more than a procedural step—it has immediate and lasting effects on both your access and the page’s management. Understanding these outcomes helps ensure a secure transition and prevents unexpected interruptions.
Loss of Access and Control
Once you remove yourself, your admin privileges are immediately revoked. This means you can no longer edit Page settings or manage roles. Access to messages, scheduled posts, and Page insights is removed.
Additionally, any links between the Page and your personal Facebook profile, where applicable, will no longer grant control.
Important Note: Unlike other roles, an Admin’s removal is permanent unless re-invited by another Admin. Plan carefully before executing this step to avoid accidental loss of access.
How the Page Remains Managed
With your exit, the Page continues under the supervision of remaining Admins, ensuring page continuity and preventing gaps in management. Scheduled and ongoing posts remain under the control of active admins, while messages and comments continue to be managed without disruption.
Remaining Admins retain the ability to add, remove, or modify roles as necessary. This safeguards the Page against orphaned management, even if the departing Admin was previously the primary manager.
Tip: Before removing yourself, make sure remaining Admins are fully aware of their responsibilities to maintain smooth operations.
Notifications and Confirmation
Facebook provides clear confirmation notices after removal. The removed Admin (you) receives an email notification confirming the change. Other Admins may also be notified of changes in the admin roster, maintaining transparency.
This ensures that all parties are aware of the transition, reducing the risk of accidental confusion or access conflicts.
Considerations for Ownership Transfer
If your departure is part of transferring ownership, it’s essential to verify that the new Admin has accepted their role before leaving.
If the invite is not accepted, Facebook may block your removal to prevent leaving the Page without an active Admin. Acceptance guarantees that full administrative control passes securely to the new owner, preserving both the Page and associated assets.
Important Note: Always confirm that the new Admin’s account is active and reliable before transferring ownership.
Maintaining Page Security Post-Removal
Even after leaving, there are a few best practices to maintain security and clarity. Confirm that no unexpected accounts have admin access. Ensure your personal Facebook credentials remain private and are not tied to external Page tools.
For business-linked Pages, verify that Meta Business Manager access is updated if applicable. This ensures all assets, ads, and linked accounts are properly managed by authorized personnel.
Tip: Keeping a checklist of all connected tools and linked accounts can prevent accidental access gaps after your departure.
Best Practices for a Smooth Handover
Ensuring a seamless transition when leaving a Facebook Page as an admin requires planning, verification, and thoughtful coordination. A structured handover not only protects the Page but also ensures that your departure does not disrupt ongoing activities or administrative functions.
Verify and Confirm New Admins
Before removing yourself, always verify the identity and activity of any new Admin. Ensure that the account is active, trustworthy, and properly linked to the Page. Confirm that they understand their responsibilities, including content posting, message management, and role adjustments.
Tip: A short meeting or message outlining expectations can prevent confusion and provide clarity on ongoing Page operations.
Maintain Continuity with Backup Admins
Even if a new Admin is assigned, it is wise to retain a backup Admin temporarily, especially for high-traffic or business-critical Pages. This ensures that the Page can continue functioning smoothly if the primary Admin encounters issues or delays in responding to notifications.
Important Note: Never leave the Page with only one Admin until the transition is fully verified and accepted.
Reassign Pending Tasks and Responsibilities
Before leaving, review any scheduled posts, campaigns, or pending messages that require attention. Reassign responsibilities or provide instructions to ensure no interruptions in Page activity. This step is particularly crucial for Pages connected to ad campaigns, events, or ongoing promotions.
Tip: Create a brief handover document summarizing active projects, content schedules, and essential contacts to streamline the transition.
Secure Data and Linked Accounts
Download any critical data, including Page insights, media, or performance reports, before removing yourself. Once access is revoked, these may no longer be retrievable.
For Pages linked to Meta Business Suite or external tools, ensure that administrative rights are updated accordingly. This prevents accidental loss of access to ads, pixels, or commerce assets.
Communicate Clearly with Your Team
A smooth handover involves transparent communication. Notify other admins or team members of your planned exit, provide guidance on new workflows, and confirm that all notifications and access rights are properly aligned.
Important Note: Open communication reduces the risk of operational errors and ensures a professional, secure transition.
Related Scenarios You May Need
While removing yourself as an admin is a common task, there are several related situations that often arise when managing Facebook Pages. Understanding these scenarios helps you handle transitions more effectively and ensures that all aspects of Page management are covered.
Removing Another Admin from a Page
Sometimes, your role may involve adjusting other admins’ access. Whether an admin is leaving the team or no longer requires full control, it is important to follow the proper procedure. Navigate to Page Access under the Professional Dashboard, locate the admin’s name, and select the option to remove or adjust their role.
Tip: Always communicate with the admin beforehand to ensure a smooth transition and avoid accidental disruptions.
Changing Page Admin Roles
Instead of removing someone, you may need to modify their role. This could involve upgrading an Editor to Admin, downgrading an Admin to Moderator, or assigning specialized roles for advertising or analytics purposes. The process is straightforward: within Page Access, locate the person, select Edit Access, and confirm the new role.
Important Note: Role changes take effect immediately and are reflected across all devices. Make sure the new role aligns with the person’s responsibilities.
For a more detailed walkthrough on changing admin roles, you can check our step-by-step guide here: How to Change Admin of Facebook Page in 2025: Step-by-Step Guide.
Deleting a Facebook Page
In some cases, the Page itself may no longer be needed. Deleting a Page is a permanent action and should be approached carefully. Only Admins can initiate deletion, which requires confirmation and a short waiting period. Ensure all content, insights, and assets are backed up before proceeding.
Tip: Consider archiving the Page or transferring content to another platform if historical data is important.
Unlinking a Page from Your Personal Profile
For personal or professional separation, you might want to unlink a Page from your personal account without removing all Admins. This ensures that your profile remains separate while the Page continues to function under the assigned admins. Access these settings through the Page Settings and confirm the unlinking process.
Important Note: Unlinking does not remove your access if you are an Admin; it only separates your personal profile visually from the Page.
Frequently Asked Questions (FAQs)
Can I remove myself as an admin if I’m the only one?
No. Facebook requires at least one active Admin to remain on the Page. If you are the only Admin, you must first add another Admin and ensure they accept the role before you can remove yourself. This prevents pages from being left without management.
How do I remove myself as an admin from my phone?
You can remove yourself on mobile through the Facebook app. Switch to your Page, go to Settings > Page Setup > Page Access, find your name, and select Remove from Page. The process is slightly different between iPhone and Android, but the steps follow the same principles.
What happens to the Page after I remove myself?
Once removed, you lose all admin privileges, including access to Page settings, messages, scheduled posts, and insights. The Page continues to be managed by remaining Admins, who can add, remove, or modify roles as necessary.
Can I remove myself if the new Admin hasn’t accepted yet?
No. If you are transferring ownership, Facebook requires the new Admin to accept the invitation before you can remove yourself. This ensures the Page is never left without an active Admin.
What is the difference between an Admin and an Editor?
Admins have full control, including managing roles, settings, content, and messages. Editors can publish content and moderate messages, but they cannot assign roles or manage administrative settings.
How do I find Page Roles on Facebook?
Page Roles are now managed through the Professional Dashboard under Page Access. Here you can see all users, their roles, and make adjustments. This centralized location is consistent across desktop and mobile, including the New Pages Experience.
Can I remove myself from a Facebook group in the same way?
No. Facebook Pages and Groups are managed differently. Removing yourself from a group involves leaving the group, whereas removing yourself from a Page requires admin-level role management.
What should I do if I want to completely delete the Page?
Only Admins can delete a Page. Ensure you download important content and insights, confirm that all Admins are informed, and then follow the deletion process through Page Settings → Remove Page.
Conclusion: Securely Change Facebook Page Admin in 2025
Removing yourself as an admin from a Facebook Page is a task that requires planning, attention to detail, and responsible execution. By understanding the roles and permissions, verifying other admins, and following the step-by-step removal process, you can ensure that your exit is smooth, secure, and does not disrupt the Page’s ongoing activities.
It’s essential to remember that ownership transfer and role changes should be handled carefully. Inviting a new Admin, confirming their acceptance, and reassigning tasks before removing yourself prevents accidental loss of access and maintains page continuity.
Maintaining communication, documenting responsibilities, and securing linked accounts or business tools further supports a seamless transition. These small but critical steps safeguard both the Page and your personal Facebook profile from potential issues.
Tip: Always double-check notifications and access confirmations to avoid leaving the Page without active administrative oversight.
For readers looking to change or reassign admin roles beyond self-removal, we also have a comprehensive guide detailing each step: How to Change Admin of Facebook Page in 2025: Step-by-Step Guide. This resource provides additional clarity for updating roles safely and effectively.
By following these strategies, you can confidently remove yourself as an admin while ensuring the Page remains secure, well-managed, and fully operational. Whether you are leaving a job, transferring ownership, or simply stepping back from temporary responsibilities, proper planning and execution make all the difference.
Visit Our Post Page: Blog Page