
Learn how to verify your Facebook Business Account in 2026. Follow this step-by-step guide to complete Meta Business verification, submit documents, verify ownership, and unlock business features.
If you’ve ever tried to send a promotional message through WhatsApp Business, increase your ad spending limit, or unlock advanced developer permissions on Meta, you’ve probably run into the same wall: your business needs to be verified first.
It’s a confusing process, mostly because Meta runs two completely different verification systems that sound almost identical but do very different things. One confirms your business is a real, legally registered entity. The other gives you a blue checkmark badge. People mix these up constantly, and that confusion is usually what causes the most frustration.
In this guide, you’ll learn exactly what Facebook Business Verification is, why you might need it, what documents to have ready, and how to complete the entire process step by step. We’ll also clear up the difference between Business Verification, Meta Verified, and the blue badge — so you know exactly which one you actually need.
Quick Answer: To verify your Facebook business account, log in to Meta Business Suite, go to Business Settings > Security Center, click Start Verification, and follow the prompts to enter your legal business details, upload your registration documents, and confirm your contact method. Standard Business Verification is free and usually takes 1–5 business days.
What Is Facebook Business Verification?
Facebook Business Verification (officially called Meta Business Verification) is the process Meta uses to confirm that your business portfolio in Meta Business Suite genuinely belongs to a legitimate, legally registered business.
Your business portfolio is essentially a container that holds all your Meta assets in one place — your Facebook Pages, Instagram accounts, Threads profiles, ad accounts, product catalogs, and more. When you verify your business, you’re proving to Meta that you’re an authorized representative of a real company, not someone trying to impersonate one.
Meta checks two main things during this process:
- That your business is a legal entity. You need to be registered with local authorities, and you’ll need an official phone number or postal address tied to the business.
- That you’re authorized to represent it. You’ll prove this by receiving a verification code at your business phone number or email, or by verifying ownership of your business portfolio’s domain.
Once you’re verified, you may also gain access to additional advertising tools, developer permissions, and billing or spending options that aren’t available to unverified accounts.
Important: Verifying your business in Meta Business Suite is not the same as Meta Verified, and it will not give you a blue checkmark. We’ll break that down properly in the next section, because it trips up almost everyone.
Quick Note on Terminology: You’ll see “Business Manager,” “Business Portfolio,” and “Meta Business Suite” used somewhat interchangeably across Meta’s own help pages and third-party guides. In practice, Business Portfolio is the back-end container where your verification, security, and ownership settings live, while Meta Business Suite is the front-end interface you use day-to-day for posting, messaging, and managing your Page and Instagram account. Verification work always happens in the Business Settings > Security Center area, regardless of which name you see used.
Not every business is required to verify, either. According to Meta’s own documentation, you generally only need to go through this process if you’re trying to access specific tools or APIs that require it, or if Meta has directly emailed or notified you asking you to verify. If neither applies to you yet, your account can keep functioning normally without it.
Business Verification vs. Meta Verified vs. Facebook Page Verification
This is the single biggest source of confusion when people search for how to verify Facebook business pages, so let’s settle it with a side-by-side comparison.
| Feature | Business Verification | Meta Verified |
|---|---|---|
| Purpose | Confirms your business is a real, registered legal entity | Confirms the identity of a page or profile |
| Blue Badge | No | Yes |
| Cost | Free | Paid subscription |
| Required Documents | Business registration documents (license, incorporation certificate, tax registration, etc.) | Government-issued ID |
| Where It’s Managed | Meta Business Suite → Security Center | Meta Verified for Business portal |
| Result | Verified status visible only to business owners and admins | Public blue checkmark visible to all visitors |
| Applies To | Your entire Business Portfolio (Pages, ad accounts, WhatsApp, catalogs) | A single Page or profile at a time |
So if your goal is to unlock WhatsApp Business features, raise your ad spending limits, or get developer access, you want Business Verification. If your goal is the public blue checkmark next to your page name, you’re actually looking for Meta Verified — a separate, paid product entirely.
Worth Knowing: Because Business Verification applies at the portfolio level, completing it once can simplify things if you manage multiple Pages, an Instagram Business account, or a Threads profile under the same Business Portfolio — you won’t need to re-verify the underlying business for each connected asset.
Why Verify Your Facebook Business Account?
Not every business strictly needs to verify, but if you’re using certain Meta features, you won’t have a choice. Here’s where verification actually matters.
Use WhatsApp Business Platform Features
If you want to start business conversations on WhatsApp, send promotional broadcasts, or use the WhatsApp Business Platform at scale, your Facebook Business account needs to be verified first. Meta restricts these messaging features to verified businesses specifically to cut down on spam and impersonation.
Verification also directly affects your WhatsApp messaging limits. Unverified or newly connected numbers are typically capped at a much smaller daily messaging tier, while completing business verification is generally a prerequisite for Meta to review and approve a higher messaging tier for your account. If you’re relying on WhatsApp for customer support or order updates at any real volume, this alone is usually reason enough to verify.
Increase Advertising Trust and Spending Limits
A verified business signals legitimacy to Meta’s systems. Some advertisers find they can increase their daily ad spending limit more quickly once verification is complete, and verified accounts generally face fewer disruptions like sudden ad account restrictions or holds.
There’s also anecdotal evidence from advertisers dealing with unexpected account shutdowns — getting business verification done has, in some cases, helped get flagged ad accounts reactivated. It’s not a guaranteed fix, but Meta does tend to treat verified businesses more favorably than unverified ones.
Pro Tip: Verification isn’t only about documents — it’s part of a broader trust and security review. Before you submit, it’s worth auditing who has access to your Business Portfolio. Remove old team members or agencies who no longer need access, and enable two-factor authentication (2FA) for every admin on the account. A messy permissions list or a portfolio without 2FA enabled can quietly work against you during review, even if your paperwork is perfect.
Access Developer and Business Partner Features
If you’re building on Meta’s platform, verification unlocks Advanced Access for permissions through Meta for Developers. It’s also a requirement if you want your company to become a badged Meta Business Partner. Larger publishers who want their Page listed in the News Page Index need verification too, as do agencies based in China that want to access shared ad accounts.
Other Situations Where Verification Helps
A few additional scenarios worth knowing about:
- Custom audiences and special ad categories. Running ads related to housing, employment, credit, or social issues, elections, and politics often requires verification, along with Page transparency steps that confirm who’s responsible for the Page.
- Selling through Instagram and Facebook Shops. If you’re connecting a shop to your Page through a platform like Shopify, Meta typically requires completed business verification — along with a properly linked payment method — before your shop and product catalog can go live.
- Financial services advertising. If your business operates in lending, insurance, or other financial services, expect additional verification requirements beyond the standard process.
Facebook Business Verification Requirements
Before you start the process, it helps to gather everything in advance. Meta’s review moves much faster when your information is complete and consistent the first time.
Business Information You’ll Need
Have the following ready, and make sure it matches exactly what appears on your official documents:
- Legal business name
- Business address
- Business phone number
- Business website
A quick but important tip here: keep your Name, Address, and Phone number (NAP) consistent across your website, Facebook Page, Google Business Profile, and any directory listings. If your Google listing says “Street” and your Facebook page says “St.”, that small mismatch is enough to trigger a rejection.
Documents Meta May Request
If Meta can’t automatically match your business to a public registry, you’ll need to upload official documentation. Acceptable documents typically include:
- Business license
- Certificate of incorporation
- Tax registration certificate
- Business bank statement
In many countries, documents from your local Chamber of Commerce work especially well, since they clearly show your legal business name alongside your registered address.
Note: Meta only accepts documents in a limited set of supported languages. If your official paperwork is in a language Meta doesn’t support for your region, you’ll need to provide a certified English translation that includes the official stamp of a translation agency — a plain translation without that stamp typically won’t be accepted. Documents also need to be recent (generally within the last 90 days for things like bank or utility statements) and submitted in an accepted file format such as PDF, JPEG, or PNG.
Warning: Don’t submit personal documents in place of business ones. A personal driver’s license, passport, or personal utility bill won’t satisfy business verification requirements — Meta needs documentation that’s issued to or addressed at the business itself, not an individual.
Identity Verification Requirements
In some cases — particularly if you’re appealing a previous account restriction — Meta will also ask for a government-issued photo ID, or two forms of non-photo identification, before letting you continue. You’ll also have the option to verify your business through domain verification instead of a phone or email code, which involves adding a small code snippet to your website.
Pro Tip: Beyond the documents themselves, it’s worth taking a moment to secure your Business Portfolio before you submit. Make sure two-factor authentication (2FA) is switched on for your personal Facebook profile and every admin account tied to the portfolio, and confirm that the business email address listed on your profile actually belongs to your domain rather than a free provider like Gmail or Yahoo. Meta has been tightening these requirements, and a portfolio that looks loosely secured can add friction to an otherwise clean application.
How to Verify Your Facebook Business Account: Step-by-Step
Here’s the complete walkthrough, from opening Meta Business Suite to submitting your final verification request.
Step 1: Open Meta Business Suite
Head to business.facebook.com and log in. Select the business you want to verify from the dropdown in the top-left corner.
Step 2: Go to the Security Center
Click the gear icon to open Business Settings, then scroll down the left sidebar and select Business Info. You’ll see your current verification status listed here — most likely Unverified if this is your first time. Click View Details next to it to land on the Security Center page.
Step 3: Start Business Verification
In the Security Center, look for the section labeled “Verification for [your page name].” Click Get Started (or Continue, if you’ve attempted verification before — both buttons do the same thing). A pop-up will appear; confirm by clicking Get Started again.
Step 4: Enter Your Business Information
Select the country where your business is registered, then fill in your legal business details exactly as they appear on your official paperwork — name, address, phone number, and website.
Pro Tip: Open your registration document and your Business Settings side by side while filling this out. Meta’s review system increasingly relies on automated cross-referencing against public business registries, and even a small formatting difference — “Inc.” versus “Incorporated,” or a missing suite number — can be enough to cause a mismatch flag later in the process.
Step 5: Select Your Business or Upload Documents
Meta will search public business registries to see if it can match your details automatically. If your business shows up, you can simply select it from the list and skip straight to confirming your contact method. If it doesn’t appear, you’ll need to upload one of the accepted documents mentioned earlier.
Step 6: Choose a Verification Method
You’ll be asked to confirm your business through one of the following:
- Phone call
- Text message (SMS)
- Domain verification
Email, phone, and SMS are generally the fastest and easiest routes for most small businesses.
Troubleshooting: If you choose email verification and the confirmation code never arrives, check that you used a business email address tied to your own domain rather than a free provider — Meta requires this for business verification, and some company firewalls or spam filters also block automated emails from Meta. If you suspect that’s the issue, it’s worth asking your IT team to allow emails from Meta’s domains, or simply switching to phone or SMS verification instead.
Step 7: Submit and Wait for Review
After entering your contact method, you’ll receive a confirmation code — type it in and click Next to finish submitting your request. Meta will now review your application.
Review timelines vary quite a bit. Many straightforward submissions are approved within 1 to 5 business days, though more complex business structures, international businesses, or incomplete submissions can take significantly longer. You’ll receive an automatic email once a decision has been made.
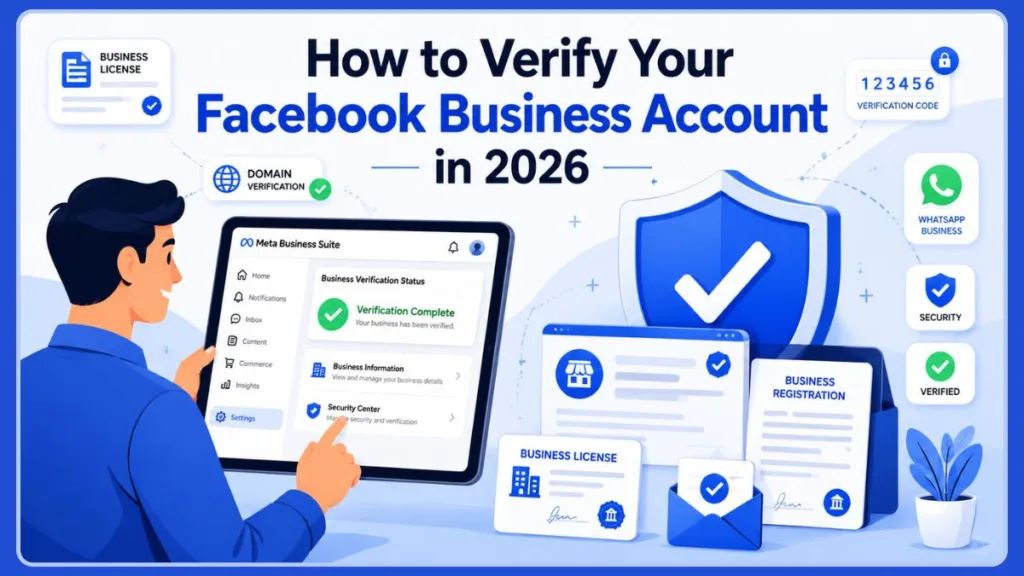
How to Check Your Facebook Business Verification Status
Wondering where your application stands? Here’s how to check it directly inside Meta Business Suite:
- Open Meta Business Suite and log in.
- Go to Business Settings.
- Select Business Info from the left sidebar.
- Look under Business Verification Status to see where you stand.
You’ll typically see one of these three statuses:
- Unverified — Your business hasn’t started or completed the process yet.
- In Review — Meta has received your submission and is actively reviewing it.
- Verified — Your business has been confirmed and verification is complete.
Why Can’t I Verify My Business Page on Facebook?
If you’re stuck, frustrated, or seeing an error, it usually comes down to one of these four issues.
Your Business Is Ineligible for Verification
Not every business has the option to verify, and that’s not necessarily a bad thing. If you see an “Ineligible for verification” message, it generally means you’re not currently using a feature that requires it. For example, if you haven’t connected a WhatsApp Business account to your Page, Facebook won’t prompt you to verify. Once you add a feature that does require it, the option will appear.
Your Business Information Doesn’t Match
This is the most common rejection reason by far. If your legal business name, address, or phone number doesn’t exactly match what’s listed on your submitted documents — even something as small as “Street” versus “St.” — your request can be denied. Standardize your business details across your website, bank records, and registration documents before you submit.
Your Documents Were Rejected
Blurry scans, cropped corners, expired documents, or unsupported file types are common culprits. Meta generally wants documents from within the last 90 days for things like utility bills or bank statements, and files should be clear, complete, and in an accepted format like PDF, JPEG, or PNG.
Make sure you’re uploading high-resolution, full-page scans rather than quick phone photos — a screenshot of an older photo, glare across the page, or a cropped corner can all be enough for an automated reviewer to reject the file even if the document itself is perfectly valid.
Your Website or Domain Can’t Be Verified
If you’re using domain verification as your contact method, Meta needs to confirm you actually own the domain. Broken websites, missing SSL certificates, or sites with no visible business information can all cause this step to fail.
Tip: If you get rejected, don’t just resubmit the same documents — that almost always results in another rejection. Read the specific reason Meta gives you, fix that exact issue, and then try again.
How Many Times Can You Resubmit?
Meta typically allows a limited number of resubmission attempts — generally around three — before you may need to wait longer or reach out to support directly for further help. Because of this, it’s worth treating each resubmission carefully rather than repeatedly uploading the same paperwork hoping for a different result.
If your request is rejected, go back to the Security Center and look for the specific reason listed next to your application. Common rejection messages include unaccepted document types, documents in an unsupported language, unreadable or expired files, or a request for additional documentation that wasn’t fully provided. Address that exact issue before resubmitting, and avoid submitting multiple requests in rapid succession — flooding the system with repeated attempts in a short window can sometimes slow down review rather than speed it up.
Getting Help From Meta Business Support
If you’ve corrected the obvious issues and you’re still stuck, Meta does offer business support channels, though there’s no direct phone line for most accounts. Your best options are:
- The Meta Business Help Center, which has detailed troubleshooting articles for verification-specific issues.
- In-app support inside Meta Business Suite or Ads Manager, which can provide help that’s specific to your account and current verification status.
- Submitting a request through Meta’s Account Quality or Business Support pages, especially if verification is tied to a restricted ad account.
Tip: Keep your communication factual and specific — mention the exact rejection reason shown in your Security Center rather than a general description of the problem. That tends to get you to a useful answer faster.
How Long Does Facebook Business Verification Take?
Most straightforward applications with complete, accurate documentation are reviewed within 1 to 5 business days. That said, timelines can stretch out depending on a few factors:
- How complex your business structure is (multiple entities, franchises, agencies, etc.)
- Whether you’re an international business
- Application volume on Meta’s end at any given time
- Whether additional documentation gets requested mid-review
In some cases, especially when notability or additional documentation is involved, review can take anywhere from a couple of days up to several weeks. If you find yourself stuck in review far longer than expected, avoid making changes to your business information in the meantime — updating details mid-review can actually restart the clock.
Pro Tip: While you wait, resist the urge to message Meta Business Support repeatedly to check on progress. Submitting multiple inquiries in a short window can flag your account for additional review under Meta’s fraud-prevention systems, which tends to slow things down rather than speed them up. One clear support request, followed by patience, generally works better than several.
How to Get a Facebook Page Verification Badge (Blue Checkmark)
This is where things split off from everything we’ve covered so far.
Business Verification Does Not Give You a Blue Badge
This bears repeating because it’s such a common misunderstanding: completing Meta Business Verification confirms your business is legitimate behind the scenes, but it does not put a visible badge on your Page. If your goal is the public blue checkmark, you need to go through a separate process entirely — either traditional Page verification or Meta Verified.
Path 1: Traditional Facebook Page Verification (Free)
This is the original, merit-based path, and it’s still available — though it’s gotten noticeably stricter over the years. To qualify, your Page needs to demonstrate that it’s authentic, complete, and notable.
Here’s what the process looks like:
- Go to Meta Business Suite and look for the “Become a Verified Business” option.
- Choose the Page you want to verify.
- Upload official documentation, such as a business license, tax filing, articles of incorporation, or a utility bill showing your business name and address.
- Provide links to up to five sources that demonstrate public interest in your business — press mentions, established directory listings, or your official website.
“Notability” is intentionally a bit vague on Meta’s end, but a functioning website with SSL, listings in legitimate local directories, and a mention or two in local news or industry publications all help your case. A personal blog post about your own business generally doesn’t count.
If everything checks out, approval can take anywhere from 48 hours to 45 days. If you’re rejected, you can typically reapply after 30 days.
Path 2: How Meta Verified for Business Works
Meta Verified is a paid subscription that gets you the blue badge along with extra perks like impersonation monitoring and direct support access.
Pricing generally starts around $11.99 per month if you subscribe through the web, or slightly more through the mobile app. Higher business tiers exist for larger brands that need protection across multiple employee profiles, with premium plans running several hundred dollars a month.
Meta Verified for Business is typically structured across a few tiers — a Standard tier for a single verified Page at the entry price point, scaling up through mid-tier plans, and a top-tier Max plan (priced significantly higher, often around the $499.99 per month range) aimed at larger companies that need impersonation protection extended across multiple employees, not just the brand Page itself.
Even with a paid subscription, you’ll still need to meet Meta’s eligibility requirements and provide a government-issued ID — paying doesn’t automatically guarantee approval. What it does guarantee is access to actual human support, which on its own can be worth the cost if you’ve ever tried troubleshooting a Meta issue without it. In some regions, Meta may also request a short selfie video as an additional identity-confirmation step.
Note: If you’re verified through Meta Verified, changing your Page username or listed date of birth later on can trigger the entire identity verification process again. It’s worth getting these details finalized and accurate before you start your subscription, rather than adjusting them afterward.
Quick Note on the Old Gray Badge: if you’ve seen older guides reference a separate gray checkmark for local businesses, that system no longer exists. Meta consolidated everything into a single blue badge, available through either the free or paid path.
Facebook Business Verification vs. Meta Verified: Which One Do You Need?
To recap the distinction one more time, since it’s the question most readers land on this article looking for:
- If you need WhatsApp Business features, higher ad spending limits, or developer access → you need Business Verification (free, done through Security Center).
- If you want a public blue checkmark next to your Page name → you need either free Page verification (if your business is notable and well-documented) or a Meta Verified subscription (faster, paid, includes human support).
Many businesses end up doing both at different points — Business Verification to unlock operational features, and Page verification or Meta Verified later on to build public trust with customers.
Frequently Asked Questions
How do I get my Facebook business account verified?
Log in to Meta Business Suite, go to Business Settings, open the Security Center, and click Start Verification. From there, enter your business details, select or upload your verification documents, choose a contact method, and submit your request for review.
How do I verify my Facebook Business Manager account?
The process is the same as verifying any Meta business portfolio: open Business Settings, navigate to the Security Center, and follow the prompts to enter your legal business details, confirm your contact method, and upload any requested documentation.
What documents does Facebook need to verify my business account?
Commonly accepted documents include a business license, certificate of incorporation, tax registration certificate, or a recent business bank statement. Chamber of Commerce documents are also widely accepted and tend to work reliably across most regions.
How much does Facebook business verification cost?
Standard Business Verification through the Security Center is completely free. If you’re referring to the public blue checkmark instead, that’s a separate product — either free through the notability-based Page verification path, or paid through Meta Verified, which starts around $11.99 per month.
Does Facebook business verification give me a blue badge?
No. Business Verification confirms your business is legally registered but doesn’t add any visible badge to your Page. To get the blue checkmark, you need to apply separately through free Page verification or subscribe to Meta Verified.
Can I verify my Facebook business without a website?
It’s possible, but more difficult. A working website helps confirm your notability and gives Meta another data point to verify your business against. Without one, you’ll need to rely more heavily on official registration documents and other public listings.
Why is my Facebook business verification not working?
The most common causes are mismatched business information across your documents, low-quality or expired document uploads, an ineligible account (because you’re not using a feature that requires verification), or technical issues with your website or domain if you’re using domain verification.
If you’ve ruled all of those out and you’re still stuck, double-check that two-factor authentication is enabled on your account and that recent admin or ownership changes haven’t temporarily restricted your portfolio — both can interfere with the verification flow even when your documents are otherwise correct.
What’s the difference between Meta Verified and Facebook Business Verification?
Business Verification confirms your company is a real, legally registered entity and is required for features like WhatsApp Business and higher ad limits — it’s free and doesn’t include a badge. Meta Verified is a paid subscription that confirms the identity of a specific Page or profile and includes the public blue checkmark plus extra support.
How many times can I resubmit my Facebook business verification?
Meta generally allows up to three resubmission attempts. If you’re rejected each time, review the specific reason given in your Security Center, correct that exact issue, and avoid submitting repeated requests in quick succession, since that can slow down review further.
Can I verify my business for WhatsApp Business API specifically?
Yes — and for many businesses, this is the main reason they go through verification in the first place. Once your Facebook Business account is verified through the Security Center, Meta automatically reviews your connected WhatsApp Business Platform numbers for higher messaging limits and display name approval. You’ll typically get a notification within a day or two confirming whether your display name has been approved.
Does updating my business information restart the verification process?
It can. If you change key details like your legal business name, address, or phone number after submitting a verification request — or after you’re already verified — Meta may flag the account for a fresh review to make sure everything still matches. It’s best to finalize your business information before you start the process rather than editing it midway through.
Final Thoughts
Facebook Business Verification doesn’t have to feel overwhelming once you understand that you’re really dealing with two separate systems serving two separate purposes. Business Verification, done through the Security Center, is free and confirms your company is legitimate — it’s what unlocks WhatsApp Business features, higher ad spending limits, and developer access. The blue checkmark badge, on the other hand, comes from an entirely different process: either free notability-based Page verification or a paid Meta Verified subscription.
Before you start either process, take a few minutes to make sure your business name, address, and phone number match exactly across your website, Facebook Page, and official documents. That one step alone prevents the majority of rejections.
Once you’ve submitted your request, check your verification status periodically in Business Settings, and don’t hesitate to reapply with corrected information if you get turned down the first time.
A little preparation goes a long way here. Standardizing your NAP details, securing your Business Portfolio with two-factor authentication, and keeping clean, recent, high-resolution documents on hand will put you ahead of most applicants — Meta’s own data on reapplications suggests that well-prepared resubmissions succeed at a notably higher rate than first attempts that were rushed.
Useful Official Resources for Facebook Business Verification
If you’re preparing to verify your Facebook Business Account or troubleshoot a verification issue, the following official Meta resources can help. These guides cover business verification requirements, accepted documents, Security Center settings, Meta Business Suite management, and common verification problems that may prevent your business from being approved.
1. Standard Meta Business Verification (Free)
If you’re trying to unlock higher ad limits, developer features, or the WhatsApp Business API, you’ll need the standard Security Center verification.
- About Meta Business Verification: Meta’s primary hub explaining what the free verification process is, who needs it, and how it impacts your Business Portfolio.
- Accepted Documents for Business Verification: This is arguably the most important page to bookmark. It provides a country-by-country breakdown of the exact tax, registration, and utility documents Meta accepts.
- Troubleshoot Business Verification Issues: If your “Start Verification” button is grayed out or your documents keep getting rejected, this official troubleshooting guide walks you through the common fixes.
2. Meta Verified for Business (Paid Subscription)
If your primary goal is securing the blue checkmark badge, impersonation protection, and direct account support, you’ll want to explore the Meta Verified subscription.
- About Meta Verified for Businesses: An overview of the paid subscription tiers, the benefits included, and the monthly costs associated with the program.
- Eligibility Requirements for Meta Verified: Before you apply for the blue badge, review this checklist to ensure your Page or profile meets the strict activity and security requirements.
3. WhatsApp Business Specifics
WhatsApp has its own set of rules when it comes to business features and official brand accounts.
- About Verified Business Accounts on WhatsApp: This explains the difference between a standard WhatsApp Business account, a verified account, and how Meta Verified applies specifically to your WhatsApp presence.
- About Meta Verified for Business on WhatsApp: A detailed breakdown of the WhatsApp-specific subscription packages (Business Standard, Plus, Premium, and Max) and how they scale your operations.
Always make sure you are logged into your Meta Business Suite before clicking through to the troubleshooting or submission pages, as the help center will often customize the information based on your account’s current status!
Visit Our Post Page: Blog Page
Discover more from Izoate
Subscribe to get the latest posts sent to your email.