
We compare the DJI Osmo Nano, Insta360 GO Ultra, Xtra Atto, and tougher options like the Osmo Action 6 and GoPro Mission 1, covering battery life, storage, heat, image quality, and value.
Shopping for the best wearable action camera in 2026, and tired of every “review” reading like a spec sheet?
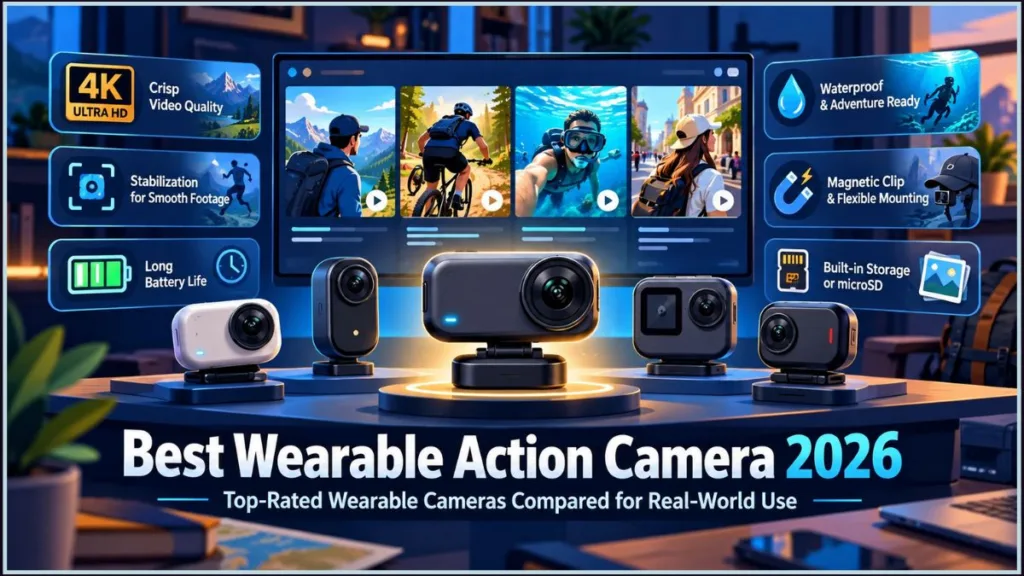
You want something small enough to forget you’re wearing, sharp enough to make the footage worth keeping, and reliable enough that it doesn’t die twenty minutes into a hike, a bike ride, or a night out. And you’d rather not pay premium prices for a gadget that ends up in a drawer.
So, Which Wearable Action Camera Is Best Right Now?
Short version first.
For most people who want a truly wearable camera, the kind you clip on and forget about, the DJI Osmo Nano is the strongest all-around pick. It pairs a capable sensor with a price below its biggest rival’s, and it covers most of what people want from this category without forcing big compromises.
It won’t win a feature-count contest against the GO Ultra. It will get the fundamentals right for the way most people actually wear a camera.
A quick note on scope: by “wearable” we mean the tiny, magnetic, clip-on POV cameras built to sit on a jacket, cap, or bag strap all day. Because some readers need something tougher, we also cover traditional action cameras you can wear with a harness or mount.
The sections below cover who each camera suits and what to watch out for.
The Short Answer: Four Picks for Four Kinds of Shooters
If you only read one recommendation, make it the DJI Osmo Nano.
Nothing else designed for hands-free wear matches its mix of picture quality, runtime, and price.
Our top pick: DJI Osmo Nano — Strong sensor, long battery life with its dock, competitive price
Find an authorized DJI retailer
The Insta360 GO Ultra is the one to buy if creative modes and painless editing matter most to you, and you’re fine paying more for them.
Best for creative flexibility: Insta360 GO Ultra — Bigger screen, faster charging, AI-assisted editing
See the GO Ultra on Insta360’s site
If price decides it, the Xtra Atto offers a spec sheet very close to the Osmo Nano’s for less.
If price rules: Xtra Atto — 1/1.3-inch sensor, 4K60, 54g, lower price
Check Xtra’s official Atto page
For footage that has to survive real mounts, real impacts, and real editorial standards, step up to a traditional worn action camera like the DJI Osmo Action 6 or GoPro’s new Mission 1 line.
Best for demanding shoots: DJI Osmo Action 6 or GoPro Mission 1 — Bigger sensors, tougher builds, pro-grade footage.
Between them, these picks cover most of the ways people actually wear a camera, from a commuter’s lapel to a mountain-bike helmet.
Where Each Wearable Camera Actually Wins and Loses
Spec sheets rarely settle this choice. What settles it is which compromises you can live with day to day, and which you can’t.
The DJI Osmo Nano is the value play. Its camera unit runs about 90 minutes on its own versus roughly 70 for the GO Ultra, and it shoots 10-bit color with a D-Log M profile, so footage grades better straight out of the box. What you give up is a smaller framing screen and fewer built-in creative modes.
The Insta360 GO Ultra sits at the opposite end. Its bigger screen makes framing easy, its 156° field of view is wider, and modes like Starlapse and HDR, plus an effects-heavy, AI-assisted app, make editing fun. The price is higher, video tops out at 8-bit, and there’s no built-in storage, so you’ll need a microSD card.
The Xtra Atto is the wild card, because its published specs read almost line for line like the Osmo Nano’s: a 1/1.3-inch sensor, 143° field of view, 4K/60fps, and a 54-gram camera, with a 10-meter waterproof camera unit and an IPX4-rated dock. In practice, you’re choosing between two very similar cameras, and the difference comes down to price, warranty, and who picks up the phone when something goes wrong.
Traditional worn action cameras still own the demanding end. DJI’s Osmo Action 6 uses a 1/1.1-inch sensor with a variable aperture and 50GB of built-in storage, while GoPro’s Mission 1 series steps up to a 1-inch, 50-megapixel sensor. That extra sensor area pays off in low light and whenever you crop or stabilize heavily in post.
Match the camera to your habits and the rest of the decision gets easy.
What We Look for Before Recommending a Wearable Camera
“4K” and “waterproof” are printed on every tiny-camera box now, which makes them nearly useless as buying criteria. The useful question is what happens after the camera is clipped to a jacket, bouncing on a bike ride, or baking in direct sun.
We start with sensor size and bit depth. An 8-bit and a 10-bit camera can look nearly identical in good light, then diverge sharply when you edit footage from a sunset ride or a dim restaurant. Battery behavior matters just as much, and it’s the runtime of the tiny camera unit that counts, separate from whatever dock or pod it rides in.
Waterproofing is where the marketing gets slippery. The camera unit is often rated for full submersion, while the dock it clips into is usually only splash-resistant, which matters if you plan to swim, surf, or get caught in real weather.
Storage design matters more in this category than in most. Some cameras record to built-in storage, others to a microSD card, and that shapes both what you need to buy and how you plan a long day.
Real-world reliability carries as much weight as any number on paper. A camera that shuts itself down mid-recording isn’t solving the problem you bought it for, so we weigh reported overheating, connectivity drops, and mount security alongside the spec sheet.
Last, and easily the most underrated: comfort. A camera you don’t want to wear is a camera that stays home.
Our Top Pick in Depth: The DJI Osmo Nano
The DJI Osmo Nano wins because it gets right the things you notice within a week of wearing it.
It records 10-bit D-Log M, which gives you far more room to grade, and it pairs with DJI’s own wireless microphones. The camera weighs 52 grams and is waterproof to 10 meters on its own, no housing required. The camera-and-dock combination is only IPX4 splash-resistant. Every figure is on DJI’s official Osmo Nano specs page.
Battery life is respectable for the size. DJI rates the camera at up to 90 minutes alone and up to 200 minutes with the dock, tested at 1080p/24fps. Continuous 4K/60fps in Endurance Mode lasts a little over 50 minutes.
Storage is where the Nano quietly earns its price. You get 64GB (48GB usable) or 128GB (107.6GB usable) built in, so you can record the moment you unbox it.
Important: Footage records to the camera’s built-in storage only. The microSD slot in the dock is for offloading clips to free up space, not for recording to.
What you give up is screen size, mode variety, and some thermal headroom.
The framing screen is about 1.96 inches, noticeably smaller than the GO Ultra’s, and the app favors essential shooting modes over a deep library of filters.
Heat is the one to watch. DJI says it’s normal for the camera to warm up during extended or high-resolution shooting, and some reviewers saw no thermal trouble at all. One independent test, though, recorded a heat shutdown after roughly 28 minutes, and some owner reviews describe warning beeps and shutdowns during 4K/60fps recording indoors or while charging.
It’s manageable, and the fixes are in the troubleshooting section below. Just find out before you buy, not after.
In plain terms: you get strong image quality at a lower price, and you give up some of the GO Ultra’s polish and playfulness. For most people, that’s a fair swap. Outdoors, where there’s airflow, is where it’s easiest to live with.
Already own one? The setup and troubleshooting steps are in the “After You Buy” section near the end of this guide.
DJI Osmo Nano or Insta360 GO Ultra: Which One Should You Actually Buy?
Most shoppers end up choosing between these two.
Go with the Insta360 GO Ultra if you want the most flexible, creator-friendly wearable camera available: a bigger screen for framing and an app built around fast, AI-assisted editing.
Its Action Pod also charges the camera from 0 to 80 percent in about 12 minutes, versus roughly 20 for the Nano, which helps a lot on long days.
Go with the DJI Osmo Nano when color quality and price count for more than mode variety. At European launch pricing the Nano started at €279, while the GO Ultra with its Action Pod cost €429. That makes the Nano about 150 euros, or roughly 35 percent, cheaper. US pricing varies by bundle, so compare the exact bundle you’d buy.
So which is better?
The Nano costs less.
The GO Ultra does more.
See where prices land:
Insta360 GO Ultra — Insta360’s product page
DJI Osmo Nano — DJI’s authorized retailers
The Best Wearable Action Camera Under $300
Want the best wearable action camera under $300? The Xtra Atto is the one to look at.
It launched at $299, roughly $30 under the 128GB Osmo Nano’s US price of about $329, and Xtra’s own store has been running sale pricing, so check the current Atto listing. It ships with 128GB of built-in storage and, on paper, matches the Nano where it counts: a 1/1.3-inch sensor, a 143° field of view, 4K/60fps, and up to 220 minutes of recording with its dock.
It also includes a five-minute pre-recording buffer, so pressing record can pull in footage from up to five minutes earlier. That’s genuinely useful for action you can’t time, though the Osmo Nano offers up to five minutes of pre-recording as well.
Xtra Atto or Osmo Nano: What the Lower Price Really Buys You
With hardware this similar on paper, the choice comes down to price, warranty, and support.
The Atto’s case is simple: comparable specs for less money, plus a two-year US warranty covering hardware defects and battery health. Xtra’s FAQ is upfront that the Atto may generate noticeable heat during high-resolution, high-frame-rate, or extended recording, and that it records to built-in storage instead of directly to microSD, the same architecture as the Nano.
The Nano’s case is just as simple. You get an established company, a mature companion app, optional DJI Care Refresh protection against accidental damage, online repair and device-status tools, and tighter integration if you already own DJI gear such as its wireless microphones.
If this is your first wearable camera and you have no ecosystem loyalty, the Atto is hard to argue with on price. If you already shoot on DJI gear, or want DJI’s support infrastructure behind you, the Nano’s extra cost buys something real. Either way, expect heat to be a factor on both.
Which Wearable Camera Works Best for Travel and Everyday Carry?
Travel days, commutes, walking tours, easy hikes: this is where tiny wearables pull ahead of traditional action cameras.
There’s no harness to fasten and no mount to fuss with. You clip the camera onto a jacket or bag strap in seconds, and nobody gives it a second look, unlike a GoPro on a chest strap.
At the camera level, weight is nearly a tie, about 52 grams each. The complete Nano and dock, though, weighs roughly 124 grams versus about 161 grams for the GO Ultra with its pod. The GO Ultra’s larger screen, meanwhile, makes it easier to check your framing before you head out.
When carrying less and drawing less attention matter most, a traditional action camera can’t match the wearable format.
When You Still Need a “Real” Action Camera
Wearables don’t replace every action camera, and they shouldn’t.
Mountain biking, surfing, skiing, and anything else with real impacts and unpredictable angles still call for a mounted camera.
DJI’s Osmo Action 6, released in late 2025, pairs its 1/1.1-inch sensor and variable aperture with 50GB of built-in storage and waterproofing to about 20 meters without a case. Its manuals and firmware are on the Osmo Action 6 downloads page.
GoPro’s Mission 1 series, launched in May 2026, is the step up for anyone who puts sensor size first. All three models use a 50-megapixel, 1-inch sensor and GoPro’s new GP3 processor. The base MISSION 1 starts at $499 for existing GoPro subscribers ($599 MSRP), while the MISSION 1 Pro, which adds 8K recording at up to 60fps, runs $599 for subscribers ($699 MSRP). Full pricing and bundles are on GoPro’s Mission 1 page. Like the Osmo Action 6, these are larger and heavier than a standard Hero, so they’re cameras you mount, not ones you wear all day. The established HERO13 Black remains GoPro’s more pocketable, more affordable option, and it isn’t being replaced by Mission 1; see both in GoPro’s lineup.
If your footage lives in extreme conditions, shop here instead.
Do You Actually Need 10-Bit Color, a Bigger Sensor, or a Pre-Recording Buffer?
Spec sheets love 10-bit color, D-Log profiles, and long pre-recording buffers. Whether any of them matters depends entirely on what you do with your footage.
If you mostly post clips straight from your phone, 8-bit versus 10-bit will rarely register. If you color-grade, blend clips from several cameras, or upload to platforms that compress hard, you’ll see the difference immediately, because 10-bit footage holds together better through that process.
D-Log M needs a specific note. DJI describes it as a flat, low-contrast profile designed to preserve dynamic range, not a finished look.
Tip: D-Log M footage looks washed-out until you grade it, and that’s normal. If you don’t want to build a grade from scratch, DJI publishes an official Osmo Nano D-Log M to Rec.709 LUT, a color-conversion preset you load into your editing software to get a normal-looking result from your clips.
Pre-recording earns its keep when the moment happens before you think to press record: pets, kids, wildlife. For a planned hike or workout, it’s a nice extra, not a requirement.
Decide which camp you’re in before you pay for any of it.
Charging Docks and What “Wearable” Really Means Day to Day
The dock or pod is half the product, and it quietly decides how you’ll use the camera.
The DJI Osmo Nano, Xtra Atto, and Insta360 GO Ultra all split into a tiny camera unit and a larger dock or pod that the camera clips into for power and extra controls. That dock is what makes a full day of shooting possible instead of a single outing, and on the Nano it’s also where the microSD slot and the screen live.
Storage habits differ too. The Nano and Atto fill built-in space that you clear out between shoots, while the GO Ultra needs a large, fast card bought up front.
Charging speed differs as well. The Nano supports quick charging from a 30W-plus PD 3.0 USB-C charger and, in independent testing, reaches about 80% in around 20 minutes, compared with 12 minutes for the GO Ultra.
None of this is a dealbreaker. It just shapes how the camera fits into an ordinary day, which matters more for a wearable than for almost any other kind of camera.
After You Buy: Setup and Troubleshooting
Everything below is for the day the camera arrives. Nano owners get the full walkthrough and fixes, and GO Ultra owners get their own setup steps.
Setting Up the DJI Osmo Nano
Here’s how to get from box to first recording. DJI also maintains a Beginner’s Guide to the Osmo Nano covering unboxing, setup, and activation, if you want the official version alongside this one.
1. Unbox and check the contents.
You’ll have the camera and the multifunctional Vision Dock. The standard accessories include a magnetic hat clip and a magnetic lanyard. Check everything against the checklist in DJI’s guide before you activate anything.
What to expect: The camera attaches to the dock magnetically, and it can be mounted facing front or rear, which is how you frame a selfie.
2. Charge it.
DJI says the Nano supports fast charging from a USB-C charger that supports PD 3.0 at 30W or higher. Charge only between 5° and 40°C (41° and 104°F), so don’t charge a camera that’s been sitting in a hot car.
What to expect: You can check the camera’s battery from the dock, in the app, or by the yellow indicator light that appears at power-on when the battery drops below 20%.
3. Install the DJI Mimo app.
DJI Mimo is DJI’s official companion app for its handheld cameras, including the Nano. You’ll use it to activate the camera, update firmware, adjust settings, and move footage to your phone. On your phone, get it from DJI’s official Mimo download page, which links to the App Store and Google Play and offers a direct Android package, or scan the QR code shown on the camera’s screen.
What to expect: The app installs like any other; you don’t need to do anything special before the next step.
4. Power on and activate.
With the camera mounted on the dock, press and hold either the camera button or the dock button to power on. Turn on Bluetooth and Wi-Fi on your phone, open Mimo, tap the camera icon, and follow the prompts. Activation is required before first use.
What to expect: Once activated, you’ll get firmware update notifications automatically. Your activation date and warranty status also show up in DJI’s device information lookup.
5. Update the firmware.
Tap the update prompt in Mimo and follow the on-screen instructions.
What to expect: The camera’s indicator blinks red and green alternately during the update, so don’t power it off. If the update fails, follow the numbered fix under “Troubleshooting: Apps, Updates, and Transfers” below.
6. Decide how you’ll offload footage.
Everything records to built-in storage, so plan to move clips off regularly. DJI lists four export routes: download through Mimo, insert a microSD card in the dock and export to it, connect the dock to a computer by cable, or use USB Mode with a USB-C phone (USB Mode requires the latest firmware, so finish step 5 first). If you use a microSD card, DJI’s specs page lists tested cards, including Lexar Silver Plus and Kingston Canvas Go! Plus in U3/A2/V30 ratings, up to 1TB.
What to expect: After pairing the camera with the dock per the on-screen instructions, exported clips appear on the card and can be read with a normal card reader.
7. Pair a wireless microphone (optional).
Power on the camera module, then put the mic into pairing mode by holding its link button until the light flashes green and blue. The Nano works with DJI’s wireless microphones only, not the original first-generation DJI Mic. DJI’s Osmo Nano tutorial videos include a walkthrough of audio capture.
What to expect: Record a few seconds and play them back to confirm the mic’s audio was captured before you rely on it.
8. Do a test recording before you need it.
While the camera is powered off, press and hold the shutter/record button and it starts recording immediately using your SnapShot settings, then powers itself off if idle for three seconds after you stop. Clip it on and record a short walk.
What to expect: Stabilized, wide footage (143° field of view) with usable audio in quiet to moderate environments. Pull it into Mimo to confirm it saved.
Warning: Know the limits going in. The battery is fixed and non-removable, so all-day shooting means keeping the dock within reach. The dock is splash-resistant only, so remove it before getting in water. Live streaming isn’t supported.
Warning: before you go underwater. Make sure the glass lens cover is intact and tightened, keep the dock off, avoid hot springs and unknown or corrosive liquids, air-dry the camera before changing the lens cover to avoid fogging, and rinse with fresh water afterward. DJI also advises against long-term underwater shooting with the camera body alone. Full details are in DJI’s official Nano FAQ.
Setting Up the Insta360 GO Ultra
The GO Ultra follows a similar path, with one big difference: it has no built-in storage.
1. Insert a microSD card.
The GO Ultra records to microSD only, so buy a fast, reputable card first and check the user manual linked from Insta360’s GO Ultra guide for card requirements.
What to expect: The card is where all your footage lives, so pick a large, fast one.
2. Charge the camera in its Action Pod.
Use a proper USB wall charger, and check the manual for the recommended rating.
What to expect: The pod charges the camera, and can bring it to about 80% in roughly 12 minutes.
3. Get the Insta360 app.
Scan the QR code on the camera screen after first power-on, or download the app from Insta360’s official download page. Firmware and the Insta360 Studio desktop editor are listed on the same page.
What to expect: The app installs like any other. Studio is only needed if you want to edit on a computer.
4. Activate the camera.
Turn on Wi-Fi and Bluetooth on your phone, open the app, tap the camera connection icon, and grant the permissions it asks for. Insta360’s activation tutorial walks through it. Activation is required on first use.
What to expect: Once connected, the app manages the camera and shows your footage. If it won’t connect, confirm the camera and app are both updated and that the app has Bluetooth permission.
5. Update the firmware.
Accept the update prompt in the app when it appears.
What to expect: The app walks you through the install. Keep the camera on until it finishes.
Check the GO Ultra product page for phone requirements: iPhones with an A12 chip or newer on iOS 13 or later, and Android phones with Snapdragon 855 or newer chips.
Troubleshooting: Heat and Shutdowns
Owner reports point to 4K/60fps indoors and recording while charging as the situations most likely to cause trouble. Work through DJI’s official guidance in this order:
- Lower the resolution or frame rate if you don’t need the maximum.
- Move somewhere well-ventilated, and unplug the charger while recording.
- Turn on Auto Screen Off so the screen isn’t adding heat.
- Fit the protective case to make the camera more comfortable to hold, and avoid prolonged contact between the metal areas on the bottom and a mount.
- Let the camera cool down, then open Mimo and check for a firmware update.
What to expect: Recording should stay stable at the lower settings. If shutdowns continue after a firmware update, take it to DJI Support instead of working around it.
Warning: The Nano’s operating range is -20° to 45°C. Don’t leave it in direct summer sun or a parked car, and don’t try to charge it when it’s hot.
Troubleshooting: Apps, Updates, and Transfers
The camera won’t connect to Mimo, or a firmware update fails. DJI’s documented fix:
- Make sure Wi-Fi and Bluetooth are on for your phone.
- Restart the camera and the Mimo app.
- Reconnect the camera in Mimo and try the update again.
- If it fails a second time, contact DJI Support. The Osmo Nano user manual covers the full procedure.
What to expect: Once connected, Mimo shows the update prompt again and the indicator blinks red and green during the install.
What the indicator light is telling you. According to the manual, blinking red and green means a firmware update is running. Solid yellow means the internal storage is full, so offload footage using the routes in step 6. Solid red means the camera is pre-charging.
Footage won’t transfer, or the microSD card acts up.
- Try a different export route from step 6, starting with Mimo.
- If the card route keeps failing, swap in a card from DJI’s tested list. One owner review notes the dock can be picky about cards and slower than expected, so a quality card is worth it.
- For USB Mode, confirm the camera is on the latest firmware first.
What to expect: Clips should appear in the Mimo album or on the card. If one route keeps failing while another works, the card or cable is the likeliest culprit.
Video flickers when played on a MacBook. DJI says this is usually a video-player compatibility issue, not a problem with the file.
- Open System Settings (System Preferences on older macOS) and go to Displays.
- Change Refresh Rate from ProMotion to a fixed value.
What to expect: The flicker should stop. On other computers, a low-performance graphics card can cause the same symptom, so try a more capable machine.
Troubleshooting: Mounting, Audio, and Framing
The camera feels like it could pop off its mount. The magnetic quick-release is intentionally easy to detach, which makes it feel less locked-in than a screw mount. For rougher activity, DJI’s Osmo Dual-Direction Quick-Release Foldable Adapter Mount (sold separately) lets you use most third-party action-camera accessories, and DJI’s tutorial videos cover mounting.
Audio sounds muffled when you hold the camera. The microphone is on the front of the camera body, so keep your fingers off it when holding it by hand.
You can’t check your framing while it’s clipped on. Live view and remote control are supported. The camera and dock communicate wirelessly within about 10 meters, and Mimo also shows a live view. Reviewing saved clips directly on the dock’s screen is easiest with the camera reattached.
Frequently Asked Questions Before You Buy
What is the most capable wearable action camera right now?
The Insta360 GO Ultra leads in creative flexibility, screen size, and charging speed. The DJI Osmo Nano is ahead on color depth, built-in storage, and standalone battery life.
Is a wearable action camera as durable as a traditional action camera?
The camera units are rated waterproof to around 10 meters, but the docks are only splash-resistant, so they aren’t built for the same abuse as a fully ruggedized action camera.
Can the DJI Osmo Nano record straight to a microSD card?
No. It records to built-in storage, and the dock’s microSD slot is for exporting footage to free up space. The Insta360 GO Ultra is the opposite: it records to a microSD card only.
Do I need an app to use these cameras?
Yes, for first-time setup. The Osmo Nano must be activated through DJI Mimo, and the GO Ultra through the Insta360 app.
How long does the Osmo Nano’s battery last?
DJI rates it at up to 90 minutes alone and 200 minutes with the dock at 1080p/24fps, and a little over 50 minutes of continuous 4K/60fps in Endurance Mode. Real-world results vary with settings and temperature.
Can I use my existing action camera mounts?
On the Nano, yes for most third-party mounts, using DJI’s Osmo Dual-Direction Quick-Release Foldable Adapter Mount (sold separately).
Does the DJI Osmo Nano overheat?
DJI says warming up during extended shooting is normal, and it lists ways to reduce it. Some owners and at least one independent test report heat shutdowns during 4K/60fps indoors or while charging, while other reviewers saw none. Favor outdoor use and lower settings indoors if it concerns you.
Which wearable camera is the best value for the money?
The Xtra Atto, based on its lower price relative to comparable specs.
Final Recommendation: Match the Camera to Your Day
- Want one camera that does nearly everything well? Get the DJI Osmo Nano, and use the setup steps above to get the most out of it.
- Care most about creative modes and quick edits? Pick the Insta360 GO Ultra, and budget for a good microSD card.
- Watching the price? The Xtra Atto gets you Nano-class hardware for less.
- Filming impacts, extreme conditions, or pro-grade footage? Step up to the DJI Osmo Action 6 or GoPro Mission 1.
The takeaway: wearability is the real spec. A camera you forget you’re carrying will capture far more than one you leave at home.
Visit Our Post Page: Blog Page
Discover more from Izoate
Subscribe to get the latest posts sent to your email.