
Want to enable Secure Boot on Windows 11 without entering BIOS? Learn how to check Secure Boot status, access UEFI firmware settings, and fix Secure Boot disabled error. Secure your PC the right way today.
Introduction
Why You’re Looking for a Way to Turn On Secure Boot Without BIOS
Trying to turn on Secure Boot in Windows 11 without BIOS can quickly become frustrating, especially when you’re upgrading to Windows 11 or launching a game that suddenly tells you Secure Boot is disabled. You search for a quick fix, only to find conflicting advice suggesting Registry edits, PowerShell commands, or other shortcuts that promise to activate Secure Boot without BIOS. Unfortunately, many of those methods are misleading or simply don’t work.
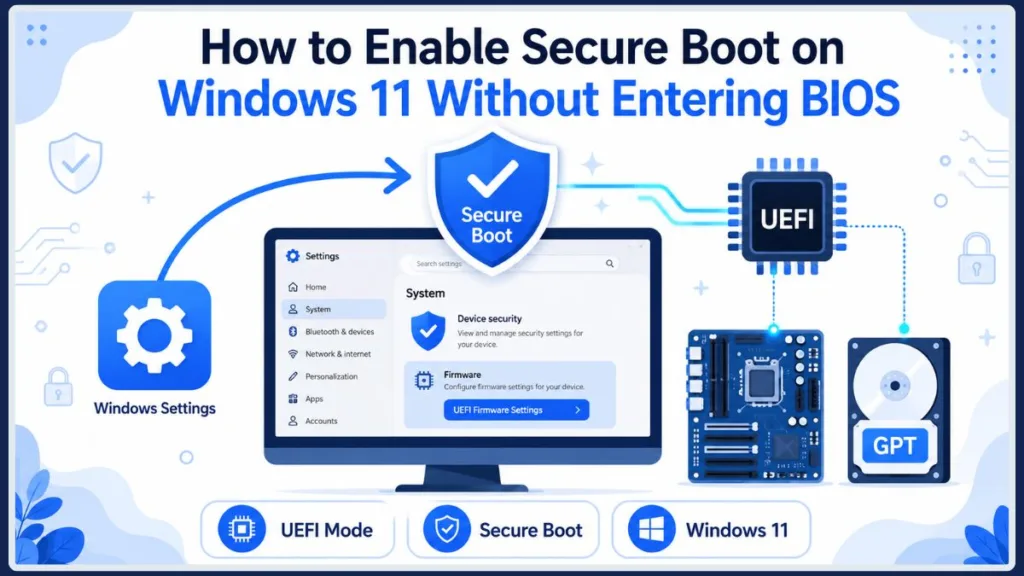
The Truth About Enabling Secure Boot in Windows 11
The truth is that Secure Boot is a security feature built into your computer’s UEFI firmware, not a Windows setting that you can switch on with a single command. However, that doesn’t mean you’re out of options. Even if you can’t access your BIOS the traditional way or don’t know the correct BIOS key, Windows provides several ways to check your Secure Boot status, launch your UEFI firmware settings, and prepare your system so Secure Boot can be enabled correctly.
Whether you’re trying to enable Secure Boot in Windows 11, resolve a Windows 11 Secure Boot disabled message, satisfy the requirements for a Windows 11 upgrade, or meet the security checks required by certain games and applications, understanding how Secure Boot actually works is the first step toward fixing the problem.
Important: There is no universal Windows-only method to enable Secure Boot completely without firmware support. If a guide claims that changing a Registry value or running a PowerShell command will instantly enable Secure Boot, it is likely confusing checking Secure Boot status with actually enabling the feature.
What You’ll Learn in This Guide
In this guide, we’ll explain what Secure Boot is, whether you can enable Secure Boot without BIOS, how to verify if it’s already active, how to access UEFI firmware settings directly from Windows, and what to do if the Secure Boot option is missing, disabled, or grayed out. By the end, you’ll know the safest and most reliable way to enable Secure Boot while avoiding common myths that can waste your time.
What Is Secure Boot and How Does It Work?
Before you try to enable Secure Boot in Windows 11 or troubleshoot why it’s disabled, it’s important to understand what Secure Boot actually does. Knowing how this security feature works will also help you understand why it cannot be turned on like a regular Windows setting.
What Is Secure Boot in Windows 11?
Secure Boot is a security feature built into your computer’s UEFI (Unified Extensible Firmware Interface) firmware. It helps protect your PC during the startup process by ensuring that only trusted, digitally signed software is allowed to load before Windows starts.
In simple terms, Secure Boot acts like a security checkpoint every time your computer powers on. Instead of allowing any bootloader or startup program to run, it verifies that each component has been signed by a trusted authority. If an unauthorized or modified boot component is detected, Secure Boot prevents it from loading, reducing the risk of malware infecting your system before Windows even begins to start.
This protection is one of the reasons Microsoft recommends Secure Boot for Windows 11, alongside other security technologies like TPM 2.0 and Virtualization-Based Security (VBS).
How Does Secure Boot Protect Your PC During Startup?
When you press the power button, your PC doesn’t load Windows immediately. Instead, it follows a secure startup sequence managed by the UEFI firmware.
Here’s what happens during the process:
- UEFI firmware starts first and initializes your computer’s hardware.
- Secure Boot checks the digital signatures of the Windows Boot Manager and other startup components.
- Only trusted and verified bootloaders are allowed to continue the startup process.
- If a boot component has been altered, replaced, or isn’t digitally signed, the firmware blocks it from loading.
- Once every required component passes verification, Windows 11 continues booting normally.
Because these security checks occur before Windows loads, Secure Boot operates independently of the operating system. This is why Windows can report its status but cannot simply switch it on with a Registry change or PowerShell command.
Important: Secure Boot protects the boot process, not your everyday files. Its primary purpose is to stop bootkits, rootkits, and other low-level malware from compromising your system before Windows starts.
Why Does Windows 11 Recommend Enabling Secure Boot?
One of Microsoft’s goals with Windows 11 is to improve security from the moment your PC starts. Secure Boot plays a key role in achieving that by establishing a trusted chain of boot components.
When enabled, Secure Boot helps:
- Prevent bootkits and rootkits from loading during startup.
- Verify the integrity of Windows boot files.
- Reduce the risk of firmware-level attacks that traditional antivirus software may not detect.
- Meet Windows 11 security requirements on supported hardware.
- Support modern anti-cheat systems used by some games that verify the security of your PC before launching.
While Windows 11 can technically run on some unsupported hardware, Microsoft designed the operating system with Secure Boot and TPM 2.0 in mind to provide stronger protection against increasingly sophisticated threats.
UEFI vs. Legacy BIOS: Why Secure Boot Only Works with UEFI
Many users searching for how to activate Secure Boot without BIOS confuse BIOS with UEFI, but they aren’t the same thing.
Older computers use Legacy BIOS, while most modern systems use UEFI firmware, which includes advanced security features like Secure Boot.
Here’s a quick comparison:
| Feature | Legacy BIOS | UEFI with Secure Boot |
|---|---|---|
| Boot Security | Minimal | Verifies trusted boot components |
| Boot Mode | Legacy | UEFI |
| Partition Style | MBR | GPT |
| Windows 11 Support | Limited | Recommended |
| Secure Boot Support | No | Yes |
If your computer is still using Legacy BIOS or CSM (Compatibility Support Module) mode, Secure Boot won’t be available until the system is configured to use UEFI boot mode.
Is Secure Boot Enabled by Default on Windows 11 PCs?
Not always. Many modern laptops and pre-built desktops ship with Secure Boot already enabled, but some custom-built PCs, older motherboards, or systems that have been reconfigured may have it turned off.
That’s why it’s always a good idea to check whether Secure Boot is already active before attempting to make any changes. In the next section, we’ll answer the most common question users have: Can you actually enable Secure Boot without accessing the BIOS or UEFI firmware?
What Should You Know Before Enabling Secure Boot?
Before you enable Secure Boot in Windows 11, it’s worth checking a few important requirements. Secure Boot isn’t a standalone Windows feature that you can simply switch on—it relies on your PC’s firmware, boot configuration, and storage setup working together. Verifying these prerequisites beforehand can save you time and help you avoid common errors, such as a missing, disabled, or grayed-out Secure Boot option.
Make Sure Your PC Supports Secure Boot
The first step is confirming that your computer actually supports Secure Boot. Most desktops and laptops manufactured in recent years include this feature because they use UEFI firmware instead of the older Legacy BIOS.
If your system uses Legacy BIOS only, Secure Boot won’t be available. Likewise, some older motherboards may not support it at all.
Tip: If your PC officially supports Windows 11, there’s a good chance it also supports Secure Boot. The issue is often that the feature is turned off or another setting is preventing it from being enabled.
Verify That Your System Is Using UEFI Boot Mode
Secure Boot only works when your computer boots in UEFI mode. If Windows is installed in Legacy or CSM (Compatibility Support Module) mode, Secure Boot cannot be activated until the system is configured to use UEFI.
In the next sections, we’ll show you how to check your current boot mode and what to do if your PC is still using Legacy mode.
Check Whether Your System Drive Uses GPT
Another important requirement is your disk’s partition style.
Most UEFI-based systems use the GUID Partition Table (GPT), while older systems typically use the Master Boot Record (MBR) format. If Windows is installed on an MBR disk, you may need to convert it to GPT before Secure Boot can be used.
Don’t worry if you’re unsure which partition style your PC uses—we’ll walk through how to verify it and safely convert an MBR disk to GPT later in this guide.
Keep Your UEFI Firmware Up to Date
An outdated firmware version can sometimes cause Secure Boot options to be unavailable or behave unexpectedly. Installing the latest firmware provided by your PC or motherboard manufacturer can improve compatibility, fix security issues, and restore missing firmware features.
If you’ve recently updated your motherboard or reset your firmware settings, checking for the latest UEFI or BIOS update is a good idea before troubleshooting further.
Back Up Important Data Before Changing Firmware Settings
Although enabling Secure Boot is generally a safe process, changing firmware or boot settings always carries some risk—especially if you’re also switching from Legacy mode to UEFI or converting your system disk from MBR to GPT.
Creating a recent backup of your important files or a full system image ensures you can recover your data if something doesn’t go as planned.
Important: Avoid changing multiple firmware settings at once unless you understand what each option does. Making one change at a time makes troubleshooting much easier if your PC doesn’t boot as expected.
Understand That TPM 2.0 and Secure Boot Are Different Features
Many users assume that TPM 2.0 and Secure Boot are the same because Windows 11 often checks for both during installation. In reality, they serve different purposes.
- Secure Boot verifies that trusted software is loaded during startup.
- TPM 2.0 (Trusted Platform Module) securely stores encryption keys, passwords, and other security credentials.
Your PC may support one feature even if the other is disabled. Enabling TPM 2.0 does not automatically enable Secure Boot, and vice versa.
Check Secure Boot Status Before Making Any Changes
Before attempting to enable Secure Boot, it’s always a good idea to confirm whether it’s already active. Many users spend time troubleshooting only to discover that Secure Boot was enabled all along.
In the next section, we’ll show you how to check if Secure Boot is enabled in Windows 11 using built-in tools and explain what each status—On, Off, or Unsupported—actually means.
Check Whether Secure Boot Is Already Enabled
Before trying to enable Secure Boot in Windows 11, take a moment to verify whether it’s already active. Many users assume Secure Boot is disabled simply because an installer or game displays an error, when in reality the issue could be related to another security requirement, outdated firmware, or an incorrect boot configuration.
Fortunately, Windows includes built-in tools that let you check your Secure Boot status without installing any third-party software.
Method 1: Check Secure Boot Status Using System Information (msinfo32)
The easiest way to verify whether Secure Boot is enabled is through the System Information utility.
Follow these steps:
- Press Windows + R to open the Run dialog.
- Type
msinfo32and press Enter. - In the System Information window, make sure System Summary is selected.
- In the right pane, scroll down until you find:
- BIOS Mode
- Secure Boot State
These two entries reveal whether your PC is configured correctly for Secure Boot.
How to Interpret the Results
Once you’ve located the values, here’s what they mean:
| BIOS Mode | Secure Boot State | Meaning |
|---|---|---|
| UEFI | On | Secure Boot is already enabled and working correctly. |
| UEFI | Off | Your system supports Secure Boot, but it isn’t currently enabled. |
| Legacy | Unsupported | Windows is running in Legacy BIOS mode, so Secure Boot isn’t available until the system is switched to UEFI. |
Tip: If Secure Boot State already shows On, you usually don’t need to enable it again. If a Windows installer or game still reports that Secure Boot is disabled, the issue may lie elsewhere, such as TPM, firmware settings, or outdated security certificates.
Method 2: Verify Secure Boot Using Windows PowerShell
If you prefer using command-line tools, Windows PowerShell provides another quick way to confirm whether Secure Boot is active.
- Click Start and search for PowerShell.
- Right-click Windows PowerShell and select Run as administrator.
- Enter the following command and press Enter:
Confirm-SecureBootUEFIDepending on your system, you’ll see one of these results:
- True – Secure Boot is enabled.
- False – Secure Boot is supported but currently disabled.
- Cmdlet not supported or a similar error – Your system may be using Legacy BIOS mode, or your hardware doesn’t support Secure Boot.
Unlike many online guides suggest, this command only checks the current Secure Boot status. It does not enable or disable Secure Boot.
Important: If you come across PowerShell commands claiming to instantly enable Secure Boot without BIOS, be cautious. Windows includes tools to verify Secure Boot, but actually enabling it still depends on your PC’s UEFI firmware or supported manufacturer management tools.
What If Secure Boot Is Disabled?
If the results show Secure Boot State: Off, don’t worry—you’ve already completed the most important first step by confirming its current status.
The next step is determining whether Secure Boot can be enabled without manually entering the BIOS and understanding the options available on your specific PC. We’ll cover exactly what is and isn’t possible in the following section.
How to Open UEFI Firmware Settings from Windows (Without Pressing BIOS Keys)
If your goal is to enable Secure Boot without manually entering the BIOS, the easiest solution is to let Windows take you directly to the UEFI Firmware Settings screen. This method eliminates the need to repeatedly press keys like F2, Delete, Esc, or F12 during startup, which can be difficult on some laptops and fast-booting PCs.
Many users searching for how to enable Secure Boot without BIOS are actually looking for a way to avoid guessing the correct BIOS key. Fortunately, Windows includes a built-in shortcut that opens the firmware interface directly, making the process much easier and more reliable.
Although your computer still needs to restart, you won’t have to manually interrupt the boot process or race against a fast startup screen.
Important: There is no way to enable Secure Boot without restarting your computer, because Secure Boot is configured in your PC’s firmware before Windows loads. The Advanced Startup method simply removes the need to press BIOS shortcut keys manually.
Why Use Advanced Startup Instead of BIOS Shortcut Keys?
On many modern computers, Fast Startup and fast SSD boot times leave only a fraction of a second to press the correct BIOS key. If you miss it, Windows starts normally, forcing you to reboot and try again.
Using Advanced Startup avoids these issues because Windows automatically opens the firmware interface for you. It’s especially useful if:
- Your PC boots too quickly to detect BIOS key presses.
- You’re unsure whether your system uses F2, Delete, Esc, F10, or another key.
- You’re using a wireless or Bluetooth keyboard that isn’t detected during startup.
- Your laptop manufacturer has changed the default firmware shortcut.
- You’re troubleshooting Windows 11 Secure Boot disabled and want the quickest route to the correct settings.
Step 1: Open the Windows Recovery Settings
To begin:
- Press Windows + I to open Settings.
- Click System.
- Select Recovery.
Under Recovery options, you’ll see Advanced startup, which allows Windows to boot into recovery and firmware management tools.
Step 2: Restart into Advanced Startup
Click Restart now beside Advanced startup.
Before your computer restarts:
- Save any unsaved work.
- Close running applications.
- Disconnect unnecessary USB storage devices if you’re troubleshooting boot issues.
Windows will restart into the Windows Recovery Environment (WinRE) instead of loading your desktop.
Step 3: Open the UEFI Firmware Interface
Inside the recovery menu, navigate through the following options:
Choose an option > Troubleshoot >Advanced options > UEFI Firmware Settings> Restart
After the final restart, your PC opens the firmware interface automatically.
This method works on most modern Windows 11 and Windows 10 systems that are installed in UEFI mode.
What You’ll See Inside the UEFI Firmware
Every motherboard manufacturer designs its firmware interface differently, so the appearance may vary.
For example:
- ASUS often places Secure Boot under Boot or Advanced Mode.
- MSI usually lists it under Settings > Security.
- Gigabyte commonly places it inside the Boot menu.
- Dell, HP, Lenovo, and Acer laptops frequently include Secure Boot under Security, Authentication, or Boot Configuration.
Don’t worry if the menu names don’t exactly match your screen—the feature is still generally located within one of these firmware sections.
Enable Secure Boot and Save Your Changes
Locate the Secure Boot setting and change it to Enabled.
After making the change:
- Save the new firmware configuration.
- Exit the UEFI setup.
- Allow Windows to restart normally.
If your PC already meets the required conditions—such as using UEFI boot mode, a GPT partition style, and having CSM disabled—Secure Boot should now become active.
What If the Secure Boot Option Doesn’t Appear?
Some users successfully reach the firmware interface but still can’t find the Secure Boot option.
This doesn’t necessarily mean your motherboard lacks Secure Boot support. Common reasons include:
- Legacy Boot is still enabled.
- Compatibility Support Module (CSM) is active.
- The Windows installation uses an MBR disk instead of GPT.
- Platform Keys (PK) or factory Secure Boot keys haven’t been installed.
- The firmware is outdated and needs an update.
- The feature has been hidden by your PC manufacturer until other requirements are met.
Avoid changing unrelated firmware options if you’re unsure what they do. Instead, verify each prerequisite one at a time to prevent unnecessary boot issues.
Tip: If UEFI Firmware Settings is missing from the Windows Recovery Environment, your PC may be running in Legacy BIOS mode, your firmware may not support UEFI, or access to firmware settings could be restricted by your device manufacturer or organization. We’ll cover these scenarios later in this guide.
Can You Enable Secure Boot Using PowerShell?
If you’ve searched for enable Secure Boot Windows 11 PowerShell, you’ve probably come across guides claiming that a simple command can instantly activate Secure Boot. While that sounds convenient, it’s important to separate fact from fiction before making changes to your system.
The short answer is no—PowerShell cannot directly enable Secure Boot on a standard Windows 11 or Windows 10 PC. That’s because Secure Boot is a UEFI firmware feature, and Windows doesn’t have permission to modify firmware security settings on its own.
Important: If a website claims that a single PowerShell command can enable Secure Boot without accessing your firmware, treat that information with caution. In most cases, the command either doesn’t exist on standard Windows installations or only reports the current Secure Boot status.
What Can PowerShell Actually Do?
Although PowerShell can’t activate Secure Boot, it can help you verify whether Secure Boot is currently enabled.
To check the status:
- Click Start and search for PowerShell.
- Right-click Windows PowerShell and select Run as administrator.
- Enter the following command and press Enter:
Confirm-SecureBootUEFIDepending on your system configuration, you’ll typically receive one of the following responses:
- True – Secure Boot is enabled and working correctly.
- False – Your PC supports Secure Boot, but it’s currently disabled.
- Cmdlet not supported on this platform – Your system may be using Legacy BIOS mode, your firmware doesn’t support Secure Boot, or Windows wasn’t installed in UEFI mode.
This command is useful for confirming your current configuration before making firmware changes, but it does not enable or disable Secure Boot.
Why Do Some Guides Mention Set-SecureBootUEFI -Enable?
You may also encounter tutorials recommending a command such as:
Set-SecureBootUEFI -EnableThis is one of the biggest misconceptions surrounding Secure Boot.
There is no built-in Windows PowerShell cmdlet that universally enables Secure Boot on consumer PCs. While certain enterprise environments or hardware manufacturers may provide proprietary management tools capable of interacting with firmware, these are vendor-specific solutions and are not part of Windows itself.
For most users, running this command will either produce an error or fail because the required cmdlet simply isn’t available.
Tip: If you’re following an online guide, always verify whether the commands use native Windows tools or manufacturer-specific utilities. Mixing the two can lead to confusion and unnecessary troubleshooting.
When Can Secure Boot Be Managed Without Opening the Firmware Manually?
In some business and enterprise environments, IT administrators can manage firmware settings remotely using technologies provided by computer manufacturers.
Examples include:
- Enterprise firmware management utilities from Dell, HP, Lenovo, and other OEMs.
- Microsoft Intune or other endpoint management platforms integrated with supported hardware.
- Vendor-specific WMI, BIOS Configuration Utility, or UEFI management tools designed for large-scale device administration.
These solutions communicate with supported firmware using manufacturer-approved interfaces. However, they don’t apply to most home users or custom-built PCs, so they’re not a practical method for enabling Secure Boot on a personal Windows 11 computer.
What’s the Best Way to Enable Secure Boot?
If Confirm-SecureBootUEFI returns False, the most reliable approach is to use the UEFI Firmware Settings method covered earlier in this guide. From there, you can enable Secure Boot directly in your firmware after confirming that your PC is using UEFI boot mode, a GPT partition style, and any other required settings.
In the next section, we’ll cover the most common reasons Secure Boot remains disabled even on supported systems, along with the steps you can take to resolve those issues.
Fix “Secure Boot Disabled” in Windows 11
If Secure Boot State shows Off, don’t assume your computer is incompatible with Windows 11. In most cases, Secure Boot is disabled because another firmware or boot configuration setting is preventing it from being activated. The good news is that these issues are usually easy to identify once you know where to look.
Let’s go through the most common reasons why Windows 11 Secure Boot is disabled and how you can fix each one.
Make Sure Your PC Is Using UEFI Boot Mode
One of the biggest reasons Secure Boot won’t activate is that Windows is still running in Legacy BIOS mode instead of UEFI. Since Secure Boot is a feature built into UEFI firmware, it simply won’t work while Legacy mode is enabled.
To verify your current boot mode:
- Press Windows + R to open the Run dialog.
- Type
msinfo32and press Enter. - In the System Information window, locate BIOS Mode.
If the value shows UEFI, your system already meets this requirement. However, if it shows Legacy, you’ll first need to switch your computer to UEFI mode before Secure Boot can be enabled.
Tip: Don’t switch from Legacy BIOS to UEFI without checking your disk partition style first. A mismatch between the boot mode and disk format can prevent Windows from starting properly.
Convert Your System Disk from MBR to GPT
Another common reason Secure Boot remains unavailable is that Windows is installed on an MBR (Master Boot Record) disk. Modern UEFI systems are designed to boot from a GPT (GUID Partition Table) disk, which is also a requirement for Secure Boot.
Windows includes the MBR2GPT utility, allowing many users to convert their system drive without reinstalling the operating system.
Before making any changes, validate the disk by running:
mbr2gpt /validate /disk:0If validation completes successfully, convert the drive using:
mbr2gpt /convert /disk:0After the conversion finishes, restart your computer and configure it to boot in UEFI mode if it isn’t already.
Important: Converting an MBR disk to GPT prepares your computer for Secure Boot, but it does not enable Secure Boot automatically. You’ll still need to activate the feature through your UEFI firmware.
Disable Compatibility Support Module (CSM)
If your motherboard supports both Legacy BIOS and UEFI, it may include a feature called Compatibility Support Module (CSM). This mode allows older operating systems to boot, but it also prevents Secure Boot from working on many systems.
Open your UEFI firmware settings and look for an option named CSM, Legacy Boot, or Legacy ROM Support. If it’s enabled, disable it, save your changes, and restart the computer. Once CSM is turned off, the Secure Boot option often becomes available.
Restore the Default Secure Boot Keys
Sometimes Secure Boot appears in the firmware menu but refuses to turn on. This usually happens because the required Platform Keys (PK) or factory Secure Boot certificates have been removed or reset.
Most modern motherboards include an option such as Install Default Secure Boot Keys, Restore Factory Keys, or Reset Secure Boot Keys. Restoring these keys recreates the trusted certificate database required for Secure Boot to function correctly.
If you recently updated your firmware or reset your BIOS settings, restoring the factory keys is often enough to resolve the issue.
Update Your UEFI Firmware
Firmware updates don’t just add new features—they also fix compatibility problems, improve hardware stability, and resolve security-related bugs. If you’re unable to find the Secure Boot option or it isn’t working correctly, installing the latest firmware from your computer or motherboard manufacturer may help.
Before updating your firmware, make sure you’re downloading the correct update for your exact model. Interrupting a BIOS or UEFI update can cause serious problems, so keep your laptop connected to power or ensure your desktop won’t lose power during the process.
Check for Manufacturer-Specific Restrictions
Some computer manufacturers add extra security requirements before allowing firmware settings to be changed. For example, certain systems require you to create a Supervisor Password or Administrator Password before the Secure Boot setting becomes editable.
Business laptops may also have firmware settings locked by your organization’s IT department. In these situations, you’ll need to remove the restriction or contact your administrator before making changes.
Confirm That Secure Boot Is Now Enabled
After completing the necessary changes, restart Windows and open System Information again by running msinfo32.
If Secure Boot State now displays On, the feature has been successfully enabled.
You can also verify the result from an elevated PowerShell window using:
Confirm-SecureBootUEFIIf PowerShell returns True, your computer is now booting with Secure Boot enabled.
Tip: If Secure Boot still isn’t working after completing these steps, review each prerequisite carefully. Your PC must be running in UEFI mode, the system disk should use GPT, CSM should be disabled, and the default Secure Boot keys should be present. Missing any one of these requirements can prevent Secure Boot from being activated.
Can You Enable Secure Boot on Windows 10?
Yes, you can enable Secure Boot on Windows 10, but the process is essentially the same as it is on Windows 11. Since Secure Boot is controlled by your computer’s UEFI firmware rather than the operating system itself, the version of Windows you’re using doesn’t change how the feature is enabled.
If your Windows 10 PC supports UEFI firmware and meets the necessary requirements, you can access the UEFI Firmware Settings from Windows, enable Secure Boot, save the changes, and restart your computer. If you’ve been following this guide, the same steps explained for Windows 11 also apply to Windows 10.
Does Windows 10 Require Secure Boot?
Unlike Windows 11, Windows 10 doesn’t require Secure Boot to install or run on supported hardware. Many Windows 10 systems continue to function normally with Secure Boot disabled, especially older computers originally configured in Legacy BIOS mode.
However, enabling Secure Boot is still recommended whenever your hardware supports it. It strengthens your PC’s startup security by verifying trusted boot components before Windows loads, helping protect against bootkits and other firmware-level threats.
You’ll also find that some modern applications, security features, and anti-cheat systems work best—or even require—Secure Boot to be enabled, regardless of whether you’re using Windows 10 or Windows 11.
Are the Prerequisites the Same as Windows 11?
For the most part, yes. Before enabling Secure Boot on Windows 10, your computer should:
- Boot using UEFI mode instead of Legacy BIOS.
- Use a GPT partition style for the system disk.
- Have Compatibility Support Module (CSM) disabled if applicable.
- Support Secure Boot at the motherboard or firmware level.
If any of these requirements aren’t met, Secure Boot may remain unavailable or appear grayed out in the firmware settings.
Tip: If you’re planning to upgrade from Windows 10 to Windows 11, enabling Secure Boot beforehand can save time during the upgrade process since it’s one of Microsoft’s recommended security requirements.
Should Windows 10 Users Enable Secure Boot?
For most users, the answer is yes. If your PC supports Secure Boot and you don’t rely on older operating systems or legacy hardware that requires Legacy BIOS mode, enabling it provides an additional layer of protection with very little downside.
That said, users who dual boot older operating systems, use unsigned bootloaders, or depend on certain legacy hardware configurations may need to keep Secure Boot disabled for compatibility reasons. In such cases, it’s worth checking whether your software or hardware supports Secure Boot before making any changes.
Overall, whether you’re using Windows 10 or Windows 11, the goal remains the same: configure your PC to use UEFI, meet the required boot configuration, and enable Secure Boot through the firmware for a more secure startup environment.
Frequently Asked Questions
How to activate Secure Boot in Windows 11 without BIOS?
There isn’t a way to activate Secure Boot in Windows 11 without BIOS or UEFI firmware because Secure Boot is a firmware-level security feature. However, you don’t have to manually press BIOS keys during startup. Windows allows you to access UEFI Firmware Settings through Settings > System > Recovery > Advanced startup, making it easier to enable Secure Boot without guessing the correct BIOS shortcut.
Can you enable Secure Boot without restarting?
No. Secure Boot cannot be enabled without restarting your computer. Since it is configured before Windows loads, your PC must reboot into the UEFI firmware interface to apply any changes. Windows can simplify the process by opening the firmware settings automatically, but a restart is always required.
How do I manually enable Secure Boot?
To manually enable Secure Boot, restart your computer and open the UEFI firmware settings. Locate the Secure Boot option—usually found under the Boot, Security, or Authentication menu—change it to Enabled, save the changes, and restart your PC. The exact location varies depending on your motherboard or laptop manufacturer.
Do I need TPM 2.0 to enable Secure Boot?
No. TPM 2.0 and Secure Boot are separate security features. Secure Boot verifies trusted software during the startup process, while TPM 2.0 securely stores encryption keys and security credentials. Although Windows 11 typically requires both on supported devices, enabling one does not automatically enable the other.
Should I enable Secure Boot?
For most users, yes. If your PC supports Secure Boot and you’re running Windows 11 or a modern Windows 10 installation, enabling it improves startup security by helping prevent bootkits, rootkits, and other low-level malware. Unless you rely on legacy operating systems or specialized hardware, leaving Secure Boot enabled is generally the recommended option.
Is enabling Secure Boot safe?
Yes. Enabling Secure Boot is safe for the vast majority of users and is recommended by Microsoft for supported systems. The feature only allows trusted, digitally signed boot components to load during startup, helping protect your computer from unauthorized software before Windows begins loading.
However, if you use custom operating systems, unsigned bootloaders, or certain older hardware, you should verify compatibility before enabling Secure Boot.
Is Secure Boot automatically enabled?
Not always. Many modern laptops and pre-built desktops ship with Secure Boot enabled by default, but some custom-built PCs or systems configured in Legacy BIOS mode may have it disabled. The easiest way to confirm its status is by checking System Information (msinfo32) or running the Confirm-SecureBootUEFI PowerShell command.
Why is the Secure Boot option missing?
If the Secure Boot option doesn’t appear in your firmware settings, your system may still be using Legacy BIOS mode, Compatibility Support Module (CSM) may be enabled, or your motherboard may require factory Secure Boot keys to be restored first. In some cases, an outdated firmware version or unsupported hardware can also prevent the option from appearing.
Why is Secure Boot greyed out?
A grayed-out Secure Boot option usually indicates that another firmware setting must be changed before Secure Boot can be enabled. Common causes include Legacy Boot or CSM being enabled, missing Platform Keys (PK), or manufacturer-specific security restrictions such as requiring a firmware administrator password. Once these prerequisites are addressed, the Secure Boot setting typically becomes editable.
How do I know if Secure Boot is active?
The easiest way to check is by opening System Information.
Press Windows + R, type msinfo32, and press Enter. In the System Summary section, locate Secure Boot State. If it displays On, Secure Boot is active. You can also verify the result in PowerShell using the Confirm-SecureBootUEFI command, which returns True when Secure Boot is enabled.
Final Thoughts
Enabling Secure Boot in Windows 11 without BIOS isn’t as simple as running a PowerShell command or editing the Windows Registry. Because Secure Boot is a UEFI firmware feature, it must ultimately be configured through your computer’s firmware. However, that doesn’t mean you have to struggle with BIOS shortcut keys or guess which settings to change.
As you’ve seen throughout this guide, Windows provides several built-in tools to simplify the process. You can verify whether Secure Boot is already enabled, access the UEFI Firmware Settings directly from Windows, and identify common issues—such as Legacy BIOS mode, an MBR partition style, CSM, or missing Secure Boot keys—that may prevent the feature from being activated.
If you’re trying to meet Windows 11 system requirements, prepare your PC for an upgrade, or resolve errors from applications and games that require Secure Boot, taking the time to configure your system correctly is well worth the effort. Once Secure Boot is enabled, your PC gains an additional layer of protection by ensuring that only trusted software is allowed to run during the startup process.
Key Takeaway: There is no universal Windows-only method to enable Secure Boot. The safest and most reliable approach is to prepare your system, access the UEFI firmware using Windows’ Advanced Startup option, and enable Secure Boot after confirming that your PC meets all the necessary requirements.
If you encounter problems such as Secure Boot remaining disabled, the option being missing, or it appearing grayed out, revisit the troubleshooting steps in this guide one by one. In most cases, the issue can be resolved by correcting the underlying boot configuration rather than replacing hardware.
We hope this guide helped you understand how to enable Secure Boot in Windows 11 without manually entering BIOS. If you have any questions, run into a specific error, or found another solution that worked on your PC, feel free to share your experience in the comments. Your feedback could help other readers facing the same issue.
Visit Our Post Page: Blog Page
Discover more from Izoate
Subscribe to get the latest posts sent to your email.