
Can’t find the exFAT option in Windows or getting the “file is too large for the destination file system” error? Learn how to safely format an external drive to exFAT using Command Prompt with the Format command or DiskPart in Windows 11 and 10.
Introduction
Have you ever plugged in an external hard drive or USB flash drive, opened the Format window, and wondered why exFAT isn’t available? Or maybe you tried copying a 5 GB video, a system backup, or another large file and Windows displayed the frustrating message: “The file is too large for the destination file system.” These are some of the most common reasons people look for a way to format a drive to exFAT.
The good news is that you don’t have to rely on File Explorer or Disk Management. If Windows doesn’t offer the file system you need, you can use Command Prompt to format your external drive to exFAT safely. Whether you’re preparing a USB flash drive, external SSD, portable hard drive, or SD card, this method gives you more control over the formatting process.
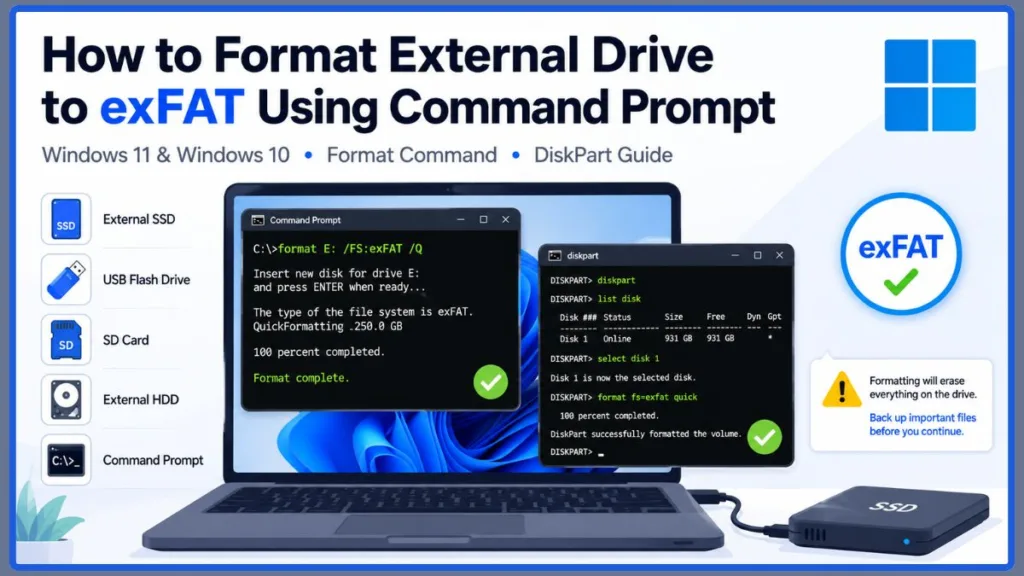
In this guide, you’ll learn two reliable ways to format an external drive to exFAT using Command Prompt in Windows 11 and Windows 10. We’ll explain when to use the standard Format command, when DiskPart is the better choice, what each command actually does, and how to avoid common mistakes like selecting the wrong drive or accidentally erasing important data.
Important: Formatting permanently erases everything on the selected drive. Before you begin, make sure you’ve backed up any files you want to keep and double-check that you’re working with the correct drive.
Quick Answer: Format an External Drive to exFAT Using Command Prompt
The quickest way to format your external drive to exFAT depends on how Windows currently recognizes it. If your drive already appears in File Explorer with a drive letter like E: or F:, you can usually format it with a single Command Prompt command. If Windows can’t format the drive normally, the exFAT option is missing, or the drive has partition issues, DiskPart is the better choice.
Use the Format Command if Your Drive Already Has a Drive Letter
If Windows already detects your external drive and assigns it a drive letter, this is the easiest and fastest method.
format E: /FS:exFAT /Q /V:MyDriveReplace E: with your drive’s actual letter. You can also replace MyDrive with any name you’d like to give the drive, or remove the /V option if you don’t want to assign a volume label.
For most people, this is all you’ll need. It’s the quickest way to format a healthy USB flash drive, external HDD, portable SSD, or SD card that Windows already recognizes.
Use DiskPart if Windows Won’t Format the Drive Normally
If your drive doesn’t have a drive letter, appears as RAW, doesn’t show the exFAT option, or refuses to format using the standard command, don’t worry. DiskPart is a built-in Windows tool that gives you more control and can often resolve these situations.
The basic DiskPart process looks like this:
diskpart
list disk
select disk X
list partition
select partition X
format fs=exfat quick
If these commands look unfamiliar, don’t worry—we’ll walk through each one later in this guide. You’ll learn what every command does, how to identify the correct disk, and how to format your drive safely without guessing.
Important: Both methods permanently erase everything on the selected drive. Before you continue, back up any important files and take a moment to confirm that you’ve selected the correct drive letter or disk number. A quick double-check now can help you avoid formatting the wrong drive.
What Is the exFAT File System and When Should You Format an External Drive to exFAT?
Before you start formatting your drive, it’s worth making sure that exFAT is the right file system for your needs. For most external drives, it is—especially if you want to store large files or use the same drive across different devices.
The biggest advantage of exFAT (Extended File Allocation Table) is that it removes the 4 GB file size limit found in the older FAT32 file system. That means you can copy large files, such as 4K videos, system backups, ISO images, or virtual machines, without running into the familiar “The file is too large for the destination file system” error.
Another reason exFAT is so popular is its compatibility. Unlike NTFS, which is mainly intended for Windows, exFAT works well with both Windows and macOS. If you regularly move files between different computers or use the same external drive for work, school, or travel, exFAT makes that process much simpler.
In short, exFAT is designed for USB flash drives, external hard drives, portable SSDs, and SD cards where you need a good balance of large file support and cross-platform compatibility.
If you’re still deciding which file system to choose, this quick comparison can help:
| File System | Best For | Maximum Individual File Size | Windows | macOS | Recommended For |
|---|---|---|---|---|---|
| FAT32 | Older devices and maximum compatibility | 4 GB | ✅ | ✅ | Legacy USB drives and older hardware |
| exFAT | External drives and large file transfers | More than 4 GB | ✅ | ✅ | USB drives, external SSDs, HDDs, and SD cards |
| NTFS | Internal Windows drives | Very large files | ✅ | Read-only by default | Windows system drives and internal storage |
Choose exFAT If You Want the Best Balance of Compatibility and Large File Support
For most people, exFAT is the right choice if you want to:
- Store and transfer files larger than 4 GB, including videos, ISO files, and system backups.
- Use the same external drive on both Windows and macOS without reformatting it.
- Format a USB flash drive, external HDD, portable SSD, or SD card for everyday storage.
- Move files between multiple computers and compatible devices without worrying about compatibility.
- Prepare removable storage for supported devices, such as gaming consoles, cameras, or media players.
Tip: If your external drive will only ever be used on Windows and you need features like file permissions or BitLocker encryption, NTFS may be a better fit. However, if you want a file system that’s easy to use across different devices while supporting large files, exFAT is usually the best choice.
Before You Format an External Drive to exFAT Using Command Prompt
If you’ve decided that exFAT is the right file system for your external drive, you’re almost ready to start formatting. Before you open Command Prompt, however, it’s worth taking a few minutes to prepare. These simple checks can help you avoid common mistakes, such as formatting the wrong drive or losing important files.
Back Up Any Files You Want to Keep
Formatting completely erases everything stored on the selected drive. Once the process begins, recovering your files can be difficult or even impossible without specialized recovery software.
If there’s anything on the drive you might need later, copy it to another storage device or a cloud service before continuing.
Important: Double-check that your backup is complete before formatting. It’s much easier to spend a few extra minutes backing up your files than trying to recover them afterward.
Confirm the Correct Drive Letter or Disk Number
One of the most common mistakes when using Command Prompt is selecting the wrong drive.
If you’re using the Format command, you’ll need the correct drive letter (such as E: or F:). If you’re using DiskPart, you’ll need to identify the correct disk number.
A quick check in File Explorer or Disk Management can help you confirm which drive you’re about to format. Taking a moment to verify this information can prevent accidentally erasing another drive connected to your computer.
Close Any Programs Using the Drive
Windows can’t format a drive that’s currently being used by another application.
Before you continue, close any programs that might be accessing the external drive, including:
- File Explorer windows opened to the drive
- Media players
- Backup or synchronization software
- Antivirus scans that may be running on the drive
If Windows reports that the volume is in use, closing these applications usually resolves the issue.
Make Sure the Drive Is Connected Properly
An unstable connection can interrupt the formatting process or prevent Windows from detecting the drive correctly.
If possible:
- Connect the drive directly to your computer instead of using a USB hub.
- Make sure the USB cable is securely connected.
- Wait until Windows finishes recognizing the device before opening Command Prompt.
If your external drive disconnects frequently, try another USB port or cable before formatting.
Open Command Prompt as an Administrator
Some formatting commands require administrator privileges to run successfully.
To avoid permission-related errors:
- Press the Windows key and type Command Prompt.
- Right-click Command Prompt and select Run as administrator.
- Choose Yes if you’re prompted by User Account Control (UAC).
Running Command Prompt with administrative privileges helps ensure the formatting commands work without unnecessary permission issues.
Tip: Once you’ve completed these quick checks, you’re ready to choose the formatting method that matches your situation. If your drive already has a drive letter, start with the standard Format command. If Windows can’t format the drive normally or it has partition issues, skip ahead to the DiskPart method.
Method 1: Format an External Drive to exFAT Using the Format Command in Command Prompt (Easiest Method)
If your external drive already appears in File Explorer with a drive letter like E:, F:, or G:, this is the easiest method to use. You won’t need DiskPart or any third-party software—the built-in Format command can usually format a healthy USB flash drive, external HDD, portable SSD, or SD card to exFAT in just a few moments.
Step 1: Find Your External Drive Letter
Before you run the formatting command, you’ll need to confirm your external drive’s drive letter. This is important because the command formats the drive you specify, so taking a moment to verify the correct letter helps prevent accidentally formatting the wrong device.
Here’s how to find it:
- Press Windows + E to open File Explorer.
- Select This PC from the left-hand pane.
- Under Devices and drives, locate your external drive and note its drive letter, such as E: or F:.
Tip: If you’re not sure which drive is your external device, compare its storage capacity or disconnect and reconnect it. The drive that disappears and reappears is the one you’ll be formatting.
Step 2: Open Command Prompt as an Administrator
Next, open Command Prompt with administrator privileges. While the Format command may work without them in some cases, running it as an administrator helps avoid permission-related errors and gives Windows the access it needs to complete the formatting process.
- Press the Windows key and search for Command Prompt.
- Right-click Command Prompt and choose Run as administrator.
- Select Yes if the User Account Control (UAC) window appears.
You should now have an elevated Command Prompt window open and be ready to run the formatting command.
Step 3: Run the exFAT Format Command
Now it’s time to format the drive.
Type the following command into Command Prompt, replacing E: with your external drive’s actual drive letter.
format E: /FS:exFAT /Q /V:MyDrivePress Enter to start the process.
If Windows asks whether you want to continue, type Y and press Enter to confirm.
What Does This Command Do?
If you’re using Command Prompt for the first time, the command above might look a little intimidating. Fortunately, each part has a simple purpose.
| Command Part | What It Does |
|---|---|
| format E: | Tells Windows which drive to format. Replace E: with your own drive letter. |
| /FS | Formats the drive using the exFAT file system. |
| /Q | Performs a quick format, which is much faster than a full format. |
| /V | Gives the drive a volume label. Replace MyDrive with any name you like, or remove this option if you don’t want one. |
Understanding these options isn’t required, but it does make it easier to customize the command the next time you need to format a drive.
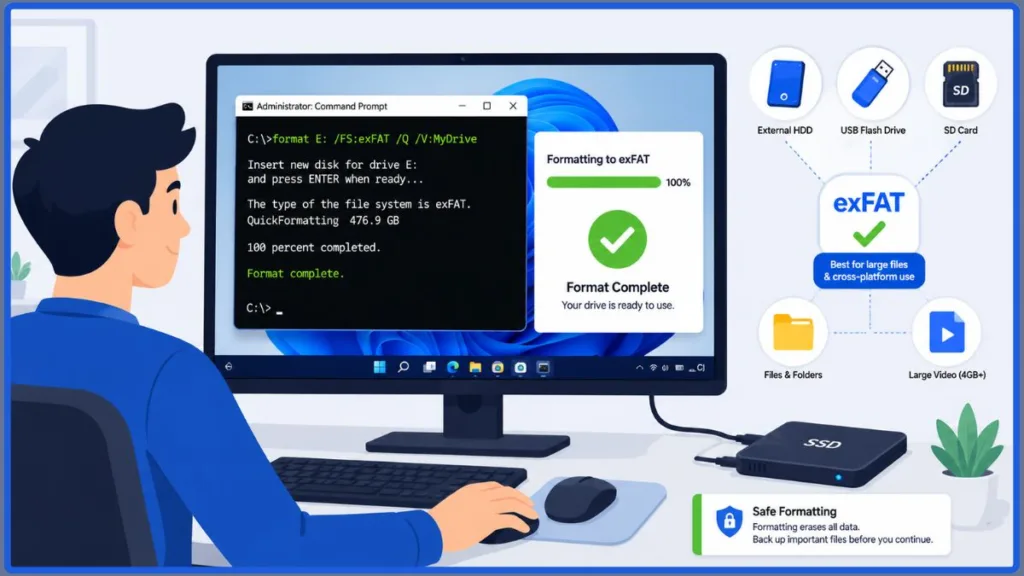
Step 4: Wait for the Format to Complete
Once the command starts, Windows will begin formatting your external drive. Depending on the drive’s size and condition, this may take anywhere from a few seconds to a few minutes.
When the process finishes, Windows will display a confirmation message. Your external drive is now formatted as exFAT and ready to store large files or be used across compatible Windows and macOS devices.
Tip: If you receive an error such as “Access is denied,” “The volume is in use,” or Windows can’t complete the format, don’t worry. That usually means the standard Format command can’t access the drive in its current state. In the next method, you’ll learn how to use DiskPart, which can often format drives that the standard command cannot.
Method 2: Format an External Drive to exFAT Using DiskPart in Command Prompt
If the Format command didn’t work, don’t worry. That doesn’t necessarily mean there’s something wrong with your external drive. In many cases, DiskPart can format drives that the standard command can’t.
DiskPart is a built-in Windows command-line tool that gives you more control over your storage devices. It’s especially useful if your external drive doesn’t have a drive letter, appears as RAW, contains damaged or unwanted partitions, or Windows simply refuses to format it through the usual methods.
Because DiskPart works directly with disks and partitions, it’s important to follow each step carefully. Selecting the wrong disk can erase data from another drive connected to your computer, so always double-check the disk number before running any formatting commands.
Step 1: Open DiskPart
If you don’t already have Command Prompt open with administrator privileges, open it now.
Then type the following command and press Enter:
diskpartIf User Account Control (UAC) asks for permission, select Yes.
After a few moments, you’ll see the DISKPART> prompt, which means the tool is ready to manage your storage devices.
Step 2: Display All Connected Disks
Next, ask DiskPart to display every storage device currently connected to your computer.
list diskDiskPart will show a table similar to this:
Disk ###   Status    Size     Free
--------   --------  -------  -------
Disk 0     Online    476 GB      0 B
Disk 1     Online    931 GB      0 B
Disk 2     Online     64 GB      0 B
Look at the Size column to identify your external drive.
Important: Don’t guess the disk number. Compare the drive’s storage capacity with what you see in DiskPart to make sure you’ve selected the correct device.
Step 3: Select Your External Drive
Once you’ve identified the correct disk, select it by replacing X with its disk number.
select disk XFor example, if your external drive is listed as Disk 2, you would enter:
select disk 2DiskPart will confirm your selection with a message similar to:
Disk 2 is now the selected disk.Take a moment to confirm you’ve selected the correct disk before moving to the next step.
Step 4: View the Partitions on the Drive
To see the partitions currently stored on the selected disk, run:
list partitionIf the drive already contains one or more partitions, DiskPart will display them in a list.
For most external drives that you’re reformatting, you’ll simply select the existing partition before formatting it.
Step 5: Select the Partition You Want to Format
Choose the partition you want to format by replacing X with the correct partition number.
select partition XFor example:
select partition 1DiskPart will confirm that the partition is now selected.
Tip: If your drive has multiple partitions and you’re unsure which one to format, stop and verify the partition layout first. Formatting the wrong partition will permanently erase its contents.
Step 6: Format the Partition as exFAT
Once the correct partition is selected, you’re ready to format it.
Run the following command:
format fs=exfat quickThis tells DiskPart to:
- Format the selected partition.
- Use the exFAT file system.
- Perform a quick format, which is much faster than a full format.
The formatting process may take anywhere from a few seconds to several minutes, depending on the size and condition of your drive.
When it’s finished, DiskPart will display a message confirming that the format completed successfully.
Step 7: Exit DiskPart
After the formatting process is complete, type the following command to close DiskPart:
exitYour external drive is now formatted with the exFAT file system and is ready to use.
Tip: If Windows still doesn’t recognize the drive after formatting, or you encounter errors such as “The media is write protected” or “Virtual Disk Service error,” don’t worry. We’ll cover these common issues and their solutions later in this guide.
Understanding Every Command Used to Format an External Drive to exFAT in Command Prompt
By now, you’ve seen two reliable ways to format an external drive to exFAT using Command Prompt. If you followed the steps exactly, your drive should already be formatted and ready to use.
You might still be wondering what those commands actually do. Don’t worry—you don’t need to memorize them. Most people simply copy and paste the commands when they need them. Understanding what each one does just makes it easier to troubleshoot problems, customize the command, and feel more confident the next time you format a drive.
Understanding the Standard Format Command
For most people, this is the only command they’ll ever need:
format E: /FS:exFAT /Q /V:MyDriveHere’s a simple breakdown of what each part does:
| Command | What It Does |
|---|---|
| format E: | Tells Windows which drive to format. Replace E: with your own external drive letter. |
| /FS | Tells Windows to format the drive using the exFAT file system. |
| /Q | Performs a quick format, which completes much faster than a full format. |
| /V | Gives the drive a volume label. Replace MyDrive with any name you prefer, or remove this option if you don’t want one. |
That’s really all there is to it. Once you understand these four options, you’ll be able to adjust the command whenever you need to format another external drive.
Understanding the DiskPart Commands
Unlike the standard Format command, DiskPart breaks the process into several smaller commands. Each one performs a specific task, helping Windows identify the correct drive before formatting it.
Here’s what each command does:
| Command | What It Does |
| diskpart | Opens the DiskPart utility. |
| list disk | Shows every storage device currently connected to your computer. |
| select disk X | Selects the disk you’ll be working with. Replace X with the correct disk number. |
| list partition | Displays the partitions on the selected disk. |
| select partition X | Selects the partition you want to format. |
| format fs=exfat quick | Formats the selected partition using the exFAT file system with a quick format. |
| exit | Closes DiskPart and returns you to the normal Command Prompt window. |
Although DiskPart uses more commands than the standard method, each one has a single purpose. Running them in the correct order makes the process much safer and helps prevent mistakes, such as formatting the wrong drive.
Tip: Before pressing Enter, take a quick look at the command you’ve typed. Spending a few extra seconds checking the drive letter or disk number is one of the easiest ways to avoid formatting the wrong device.
Quick Format vs. Full Format: Which exFAT Formatting Option Should You Choose?
If you noticed the /Q option in the Format command or the word quick in the DiskPart command, you might be wondering whether you should keep it or perform a full format instead. The answer depends on the condition of your external drive, but for most people, the default quick format is the right choice.
What Does a Quick Format Do?
A quick format prepares the drive for new data by creating a new file system without checking every sector of the drive.
For a healthy external drive, this is usually the best option because it’s:
- Fast, often finishing in just a few seconds.
- Perfect for USB flash drives, external SSDs, HDDs, and SD cards that are working normally.
- Ideal when you simply want to erase the drive and switch it to the exFAT file system.
If your drive has been working without any issues, there’s usually no reason to choose anything else.
When Should You Use a Full Format?
A full format does a little more than a quick format. While formatting the drive, Windows also checks it for bad sectors that could indicate storage problems. Because of this extra check, the process takes significantly longer.
A full format is worth considering if:
- Your external drive has started showing errors.
- Windows reports file system problems.
- The drive disconnects unexpectedly or behaves unusually.
- You’re reusing an older drive and want to check its condition before storing important files.
Keep in mind that a full format can identify bad sectors, but it won’t repair physical damage if the drive itself is failing.
Which Option Is Best?
For most situations, quick format is the recommended choice. It’s faster, works well for healthy drives, and is all you need when changing the file system to exFAT.
A full format is better suited to troubleshooting or checking the health of an older drive before putting it back into regular use.
Here’s a quick comparison:
| Feature | Quick Format | Full Format |
| Speed | ✅ Fast | ❌ Slower |
| Checks for bad sectors | ❌ No | ✅ Yes |
| Best for healthy drives | ✅ Yes | ✅ Yes |
| Best for troubleshooting drive issues | ❌ No | ✅ Yes |
Tip: If you’re unsure which option to choose, start with a quick format. If your drive continues to show errors afterward, you can always perform a full format later to check it more thoroughly.
Common Errors When Formatting an External Drive to exFAT Using Command Prompt and How to Fix Them
Even if you follow each step carefully, Windows may still display an error while formatting your external drive. Don’t worry—this doesn’t necessarily mean your USB drive, external SSD, or hard drive is damaged. In many cases, the problem is something simple, such as another program using the drive, an incorrect command, or a temporary Windows issue.
Let’s go through the most common formatting errors you might encounter and the quickest ways to fix them.
“Access Is Denied”
If Windows displays an “Access is denied” message, it usually means it doesn’t have permission to format the drive or another application is currently using it.
Try these solutions:
- Open Command Prompt as an administrator and run the command again.
- Close any File Explorer windows that are open for the drive.
- Exit programs that might be accessing the drive, such as backup software or media players.
- Safely disconnect the drive, reconnect it, and try again.
- If the problem persists, restart your computer and repeat the formatting process.
“The Volume Is in Use by Another Process”
This error appears when Windows detects that the drive is still being used by another application.
To resolve it:
- Close any folders that are open for the drive.
- Exit programs such as backup tools, antivirus software, media players, or file synchronization apps.
- If Command Prompt asks whether you want to dismount the volume, type Y and press Enter to let Windows continue.
Once the drive is no longer in use, the formatting process should complete normally.
“The Media Is Write Protected”
If Windows says the drive is write protected, it can’t make any changes to the storage device until the protection is removed.
Before assuming there’s a serious problem, try the following:
- Check whether your USB flash drive or SD card has a physical write-protection switch and make sure it’s unlocked.
- Disconnect the drive and reconnect it to a different USB port.
- Restart your computer if the issue appeared unexpectedly.
If the drive is still write protected afterward, you’ll need to remove the write protection before attempting to format it again.
“Windows Was Unable to Complete the Format”
This message simply means Windows couldn’t finish the formatting process successfully.
This can happen for several reasons, including:
- File system corruption.
- Damaged or inaccessible partitions.
- Problems with the storage device itself.
If you were using the standard Format command, try the DiskPart method covered earlier in this guide. Because DiskPart works directly with disks and partitions, it can often format drives that the standard command can’t.
If DiskPart also fails, it’s worth testing the drive on another computer. If the same error appears there as well, the drive itself may be developing hardware problems.
“Virtual Disk Service Error”
If you’re formatting the drive with DiskPart, you may occasionally encounter a Virtual Disk Service error.
This error usually appears when DiskPart can’t complete the requested operation. Some of the most common reasons include:
- The wrong disk or partition was selected.
- The drive is write protected.
- Windows can’t communicate properly with the storage device.
Take a moment to verify that you’ve selected the correct disk and partition, then reconnect the drive and try again.
Tip: If you’ve tried these fixes and the same error keeps appearing, test the drive on another computer if possible. If the problem follows the drive, it’s likely a hardware issue rather than a problem with Windows.
How to Verify That Your External Drive Was Successfully Formatted to exFAT
Once the formatting process is complete, it’s worth taking a minute to make sure everything worked as expected. A quick check now can save you from copying files back to a drive that’s still using the wrong file system.
Here are three simple ways to confirm that your external drive is now formatted as exFAT.
Method 1: Check the Drive Properties
The easiest way to verify the format is through File Explorer.
Here’s how:
- Press Windows + E to open File Explorer.
- Select This PC.
- Right-click your external drive and choose Properties.
- On the General tab, look for the File system field.
If everything went as expected, it should display exFAT.
Method 2: Verify the File System in Command Prompt
If you’re already working in Command Prompt, you can confirm the drive without opening File Explorer.
First, run the following command, replacing E: with your own drive letter:
vol E:Windows will display basic information about the drive, including its volume label.
To verify the file system, run:
fsutil fsinfo volumeinfo E:Look for the File System Name field. If the formatting completed successfully, it should display exFAT.
Method 3: Copy a File Larger Than 4 GB
If you formatted the drive because FAT32 wouldn’t let you copy files larger than 4 GB, now is the perfect time to test it.
Try copying a large video, system backup, or ISO file to the drive. If the file copies successfully without showing the “The file is too large for the destination file system” error, you’ll know the drive is using exFAT correctly.
This is also a good real-world test to confirm the drive is ready for everyday use.
Tip: If File Explorer still shows the old file system immediately after formatting, safely eject the drive, reconnect it, and check again. Windows occasionally needs to refresh the drive information before displaying the updated file system.
Best Practices After Formatting an External Drive to exFAT
Formatting your external drive is only the first step. Spending a few extra minutes setting it up properly can help you avoid data loss, improve compatibility, and keep the drive performing reliably over time.
Here are a few simple practices worth following after you’ve formatted your drive to exFAT.
Safely Eject the Drive Before Disconnecting It
Even after formatting is complete, Windows may still be finishing background tasks such as updating the file system.
Before unplugging the drive:
- Click the Safely Remove Hardware and Eject Media icon in the Windows taskbar.
- Select your external drive.
- Wait until Windows confirms that it’s safe to remove the device.
Doing this helps reduce the risk of file system corruption and protects your data from unexpected errors.
Give Your Drive a Meaningful Volume Label
If you didn’t assign a volume label while formatting, consider giving the drive a descriptive name now.
For example:
- Backup Drive
- Media Library
- Project Files
- Photos Archive
A clear label makes it much easier to identify the correct drive, especially if you regularly connect multiple USB drives or external SSDs.
Test the Drive Before Storing Important Files
Before copying valuable documents, photos, or backups, try transferring a few files to the drive first.
This helps confirm that:
- Files copy successfully.
- The drive can read and write data normally.
- Large files transfer without any issues.
If everything works as expected, you can confidently begin using the drive for everyday storage.
Keep More Than One Copy of Important Data
Formatting gives your drive a fresh start, but it doesn’t protect against accidental deletion, hardware failure, or physical damage.
If you’re storing important files, follow the 3-2-1 backup rule whenever possible:
- Keep three copies of your important data.
- Store them on two different types of storage.
- Keep one backup in a separate location, such as cloud storage or another external drive.
Having a backup is far easier than trying to recover lost files later.
Monitor the Health of Older Drives
If you’re formatting an older external HDD or SSD, keep an eye on how it performs over the next few weeks.
Watch for signs such as:
- Slow file transfers.
- Frequent disconnects.
- Unusual clicking or grinding noises (HDDs).
- Repeated formatting or file system errors.
If these issues continue after formatting, the drive may be reaching the end of its lifespan, and it’s a good idea to replace it before it fails completely.
Tip: Formatting fixes file system problems, but it doesn’t repair failing hardware. If your drive continues to show errors after formatting, back up any important files as soon as possible.
Frequently Asked Questions About Formatting an External Drive to exFAT Using Command Prompt
Can I format an internal hard drive to exFAT using Command Prompt?
Yes. The commands work for both internal and external drives. However, you should never format the drive that contains Windows unless you’re reinstalling the operating system.
Does formatting to exFAT erase everything on the drive?
Yes. Formatting deletes the existing file system and all stored data. Always back up any important files before you begin.
Is exFAT better than FAT32?
For most modern storage devices, yes. exFAT supports files larger than 4 GB, works with much larger drives, and is compatible with both Windows and macOS.
Should I choose exFAT or NTFS?
Choose exFAT if you need broad compatibility between different operating systems and devices. Choose NTFS if you’ll only use the drive with Windows and need features such as file permissions or encryption.
Why isn’t exFAT showing up in the Windows Format window?
This can happen because of driver issues, file system corruption, or limitations in the Windows formatting interface. Using Command Prompt or DiskPart often allows you to format the drive successfully.
Can I format an SD card or USB flash drive to exFAT?
Yes. The same methods work for USB flash drives, SD cards, microSD cards (using an adapter), external HDDs, and portable SSDs, provided the device supports the exFAT file system.
What’s the difference between a quick format and a full format?
A quick format recreates the file system and is much faster. A full format also checks the drive for bad sectors, making it a better choice if you suspect storage problems.
Why does Command Prompt say “Access is denied”?
This usually means the drive is being used by another application or Command Prompt wasn’t opened with administrator privileges.
Is DiskPart safe to use?
Yes, as long as you carefully verify the correct disk number before running formatting commands. Selecting the wrong disk can permanently erase data on another storage device.
How can I check that the drive is really using exFAT?
Open the drive’s Properties in File Explorer or run the fsutil fsinfo volumeinfo command in Command Prompt. Both methods will display the current file system.
Conclusion: Format an External Drive to exFAT Using Command Prompt Safely and Successfully
Formatting an external drive to exFAT using Command Prompt is a reliable way to prepare your storage device for large files and better compatibility across Windows and macOS. Whether the standard Windows formatting tool doesn’t offer exFAT or you simply prefer the extra control that Command Prompt provides, both the Format command and DiskPart can get the job done.
In this guide, you’ve learned when to use each method, what the commands actually do, how to choose between a quick format and a full format, how to troubleshoot common formatting errors, and how to verify that your drive was successfully formatted.
The most important thing to remember is to double-check the drive letter or disk number before formatting. Taking a few extra seconds to confirm you’re working with the correct drive can prevent accidental data loss and save you from unnecessary headaches.
Once your drive is formatted as exFAT, you’ll be able to store files larger than 4 GB and use the drive across a wide range of compatible devices without the limitations of FAT32.
If you ever need to format another USB flash drive, SD card, external HDD, or portable SSD in the future, you’ll know exactly which Command Prompt method to use and when to use it.
Visit Our Post Page: Blog Page
Discover more from Izoate
Subscribe to get the latest posts sent to your email.