
Downloaded a new font for your Windows 10 PC? This guide walks you through every installation method in simple, beginner-friendly steps so you can start using your new font right away.
How to Install Downloaded Fonts on Windows 10: Introduction
Downloaded a new font for your Windows 10 PC? Installing it is easier than you might think.
Windows 10 comes with a solid collection of built-in system fonts, but there are plenty of times when you need something specific — whether it’s for a graphic design project, a work document, a presentation, or simply to give your PC a more personal touch with custom typography. The good news is that Windows 10 font installation takes just a few steps, and you don’t need any special software to get started.
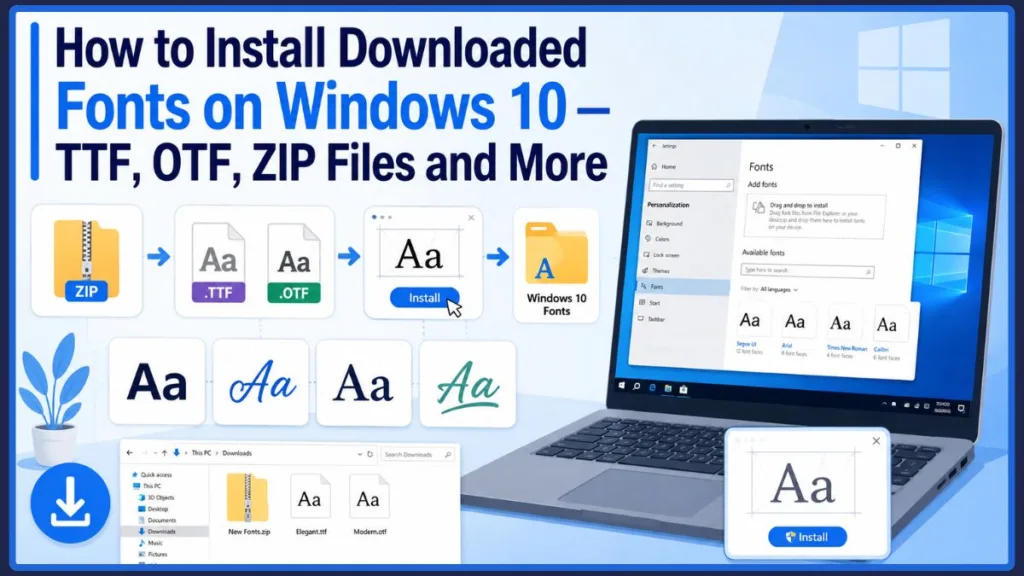
Most downloaded fonts arrive as a ZIP archive containing the actual font files inside, usually with a .TTF (TrueType Font) or .OTF (OpenType Font) extension. Before you can install the font, you’ll need to extract those files from the ZIP archive. Once you have the font file ready, Windows 10 gives you several ways to add it to your system.
In this guide, you’ll learn exactly how to install downloaded fonts on Windows 10 using every available method, including:
- Extracting downloaded font files from a ZIP archive
- Installing a single font by double-clicking the file
- Installing fonts using the right-click method in File Explorer
- Installing fonts for all users on your PC
- Installing multiple fonts at once
- Adding fonts through Windows Settings using drag and drop
- Installing fonts from the Microsoft Store
- Verifying that a font has been installed correctly
- Using your new font in Microsoft Word, Adobe Photoshop, and other applications
- Fixing a font that isn’t showing up after installation
Whether you’re installing your first custom font or managing a growing font library, this guide walks you through every step.
What You Need Before Installing Fonts on Windows 10
Before you start, here’s a quick checklist to make sure everything is in place.
You’ll need:
- A Windows 10 PC
- The downloaded font file (usually a .TTF or .OTF file, often inside a ZIP archive)
- Basic access to File Explorer and Windows Settings
That’s really it. You don’t need any additional font installer software to complete a standard Windows 10 font installation. The tools built into Windows handle everything.
A quick note on where to download fonts:
If you’re still looking for fonts to install, you can find a wide range of free fonts from trusted sources such as Google Fonts, Font Squirrel, DaFont, and FontSpace. For premium and commercially licensed options, sites like fonts.com and Adobe Fonts offer both free and paid typefaces. Always download from reputable sources — this keeps your PC safe and ensures you’re working with clean, properly formatted font files.
TTF, OTF, and Other Font File Formats You Can Install on Windows 10
When you extract a downloaded font package, you’ll typically find files with one of two common extensions:
- .TTF (TrueType Font) is one of the most widely used font formats and has been supported by Windows for decades. TrueType fonts display reliably at various sizes and work consistently across a broad range of Windows desktop applications, making them a solid choice for everyday use.
- .OTF (OpenType Font) is a more modern format developed by Microsoft and Adobe. OpenType fonts can include additional typographic features such as ligatures, alternate characters, and extended glyph sets — capabilities that are particularly valuable in graphic design and professional typography workflows.
You may occasionally encounter .TTC (TrueType Collection) files, which package multiple font faces into a single file, though TTF and OTF are by far the most common formats you’ll come across when downloading fonts online.
These .TTF and .OTF files are the actual font files that Windows installs. Everything else in the downloaded package — such as the ZIP archive itself, readme documents, or license files — is not the font file and doesn’t need to be installed.
Tip: When you open the extracted folder, look specifically for files ending in .ttf or .otf. Those are the files you’ll be installing.
How to Extract Downloaded Font Files From a ZIP Archive on Windows 10
Most fonts you download from the internet — whether from Google Fonts, DaFont, Font Squirrel, or similar sources — come packaged inside a ZIP archive. If your font comes in a ZIP file, extract it first so you can access the actual .TTF or .OTF files inside. Windows cannot install the ZIP archive directly.
Here’s how to extract font files from a ZIP archive using File Explorer:
- Open File Explorer.
- Go to your Downloads folder.
- Find the downloaded ZIP file containing your font.
- Right-click the ZIP file.
- Select Extract All.
- Click Extract in the window that appears. You can leave the destination path as it is — Windows will automatically create a new folder with the same name as the ZIP file.
- Open the newly created folder to find your .TTF or .OTF files.
Once you can see the font files inside the extracted folder, you’re ready to install them.
Tip: Don’t try to install the ZIP file itself. Always extract it first, then install the .TTF or .OTF files you find inside the extracted folder.
How to Install a Downloaded Font on Windows 10 Using File Explorer
This is the most direct way to add a new font to Windows 10. Once you have your extracted .TTF or .OTF file ready, you have a couple of options depending on whether you want to preview the font’s appearance first or just get it installed quickly.
How to Install a Font on Windows 10 by Double-Clicking the TTF or OTF File
Double-clicking is the simplest and most beginner-friendly way to install a font file on Windows 10. This method is a good choice if you want to see what the font looks like before you commit to installing it.
- Open the folder containing your extracted font files.
- Find the .TTF or .OTF file you want to install.
- Double-click the font file.
- Windows will open a font preview window showing you how the typeface looks at different sizes and with sample text — giving you a useful snapshot of the font’s style, weight, and character set before installation.
- Click the Install button at the top of the preview window.
- Wait a moment while Windows completes the font installation.
That’s it. The font is now part of your Windows font library and ready to use.
This method works especially well when you’re installing one font at a time and want to check its appearance before adding it to your system. If you’re installing a full font family with multiple style variants, the multi-font selection method covered later in this guide will save you time.
How to Install a Downloaded Font on Windows 10 Using Right-Click in File Explorer
If you already know which font you want and don’t need to preview it first, the right-click install method is faster. This is one of the most commonly used ways to install custom fonts on Windows 10, particularly when you’re adding several fonts in a single session.
- Open the folder containing your extracted font file.
- Right-click the .TTF or .OTF file.
- Select Install from the context menu.
- Windows will install the font immediately.
No preview window, no extra clicks — just a straightforward, fast installation. This is a practical option when you’re installing several fonts and don’t need to review each typeface individually before adding it to your system.
How to Install Downloaded Fonts for All Users on Windows 10
By default, when you click Install, the font is added only to your current Windows user account. This is a per-user installation, meaning other people who log in to the same PC with different user accounts won’t have access to the font. If other users on the same PC also need the font, you can perform a system-wide installation using the Install for all users option instead.
- Select the font file.
- Right-click it.
- Select Install for all users.
- If Windows asks for administrator permission, approve the prompt.
- Wait for the installation to finish.
The font will be installed for other user accounts on the PC as well.
Tip: Use Install for all users only when other accounts on the computer also need the font. For personal use on a single account, the standard Install option is all you need. Note that installing fonts for all users typically requires administrator privileges, so Windows may prompt you to confirm the action.
How to Install Downloaded Fonts in Windows 10 Using Settings
Windows 10 Settings includes a dedicated Fonts page under Personalization where you can manage your installed font collection and add new fonts using a simple drag-and-drop method. This is a clean, visual way to handle font installation, and it works particularly well when you’re adding fonts to Windows 10 from files you’ve already downloaded and extracted.
How to Add Fonts to Windows 10 Using the Settings Drag-and-Drop Method
Note: The drag-and-drop Fonts Settings method is available in newer versions of Windows 10, including version 1903 and later. If you’re using an older version of Windows 10, use the File Explorer right-click method described earlier in this guide.
- Press Windows + I to open Settings.
- Select Personalization.
- Select Fonts.
- Keep the folder containing your extracted fonts open alongside the Settings window. You can use the Windows Snap feature to place the Settings app on one side of your screen and the font folder on the other — this makes the drag-and-drop action much more convenient.
- Select the .TTF or .OTF files you want to install.
- Drag them into the area that says “Drag and drop to install”.
- Release your mouse when the Copy indicator appears.
- Wait for Windows to complete the installation.
Your fonts are now installed and ready to use across your Windows applications.
Adding fonts to Windows 10 using the Settings method is particularly convenient when you’re installing an entire font family — for example, all the weight and style variants of a typeface like Fira Sans or Source Sans Pro — since you can drag and drop multiple files into the installation area at once.
How to Verify a Newly Installed Font Using Windows 10 Fonts Settings
Once you’ve installed a font, it’s worth taking a moment to confirm that Windows has recognized it correctly before you start using it in your documents or design projects.
- Stay on the Settings > Personalization > Fonts page, or navigate back to it if you’ve moved away.
- Use the search box at the top of the Fonts page.
- Type the name of the font you just installed.
- Select the font from the results to view its available styles and confirm that Windows recognizes it.
If the font appears in the list with its style variants visible, the installation was successful. You can now use it in any supported Windows application.
How to Install Multiple Downloaded Fonts at Once on Windows 10
Font families typically come with several individual files — one for each style variant in the family. A single downloaded font package might include separate files for:
- Regular
- Bold
- Italic
- Light
- Medium
- Other weights and styles such as SemiBold, ExtraLight, or Black
Instead of double-clicking each file and clicking Install one by one, you can bulk install fonts on Windows 10 by selecting all the files together and installing them in a single action.
How to Select and Bulk Install Multiple TTF and OTF Font Files on Windows 10
- Open the extracted font folder.
- Click the first font file in the list.
- Hold the Shift key and click the last font file to select the entire range. Alternatively, you can click and drag to select multiple files, or press Ctrl + A to select everything in the folder at once.
- Right-click on any one of the selected files.
- Choose Install (or Install for all users if the font needs to be available to other Windows accounts on the same PC).
- Allow Windows to work through the installation — it will process each selected font file automatically.
You can also select all the font files and drag them directly into the Settings → Personalization → Fonts drag-and-drop area to install the entire selection at once using the Settings method.
Tip: Installing all the style variants together ensures that Bold, Italic, Light, and other weights are available in supported applications. If you only install the Regular variant, applications like Microsoft Word may attempt to simulate bold or italic text artificially rather than using the proper dedicated font files — which can affect the quality of your typography.
How to Install Fonts on Windows 10 From the Microsoft Store
If you haven’t downloaded a font file yet and want to browse and install fonts directly through Windows without visiting an external website, the Microsoft Store offers a convenient built-in alternative. This method handles downloading, licensing, and installation in a single streamlined process.
How to Find, Download, and Install Fonts Through the Microsoft Store on Windows 10
- Open the Microsoft Store by searching for it in the Start menu or clicking its icon on the taskbar.
- In the Store’s search bar, type “Fonts” and click on the Fonts option that appears in the results.
- Browse the available font collection and click on the font you want to install — for example, Arial Nova or any other typeface available in the Store.
- Click the Get button.
- The Store will automatically handle the necessary licensing, download the font files, and install them on your system.
- Once the installation is complete, you’ll see a confirmation notification.
- To verify the installation, click Manage on the Store page — this takes you directly to the Fonts section in Windows Settings, where you can search for the newly installed font and confirm it’s available.
This method is useful when you want to discover and add new fonts through Microsoft’s curated collection rather than managing downloaded files yourself. However, if you’ve already downloaded a font file from Google Fonts, DaFont, Font Squirrel, or another trusted source, the File Explorer or Settings methods described earlier in this guide are the faster and more direct choice.
How to Check if a Downloaded Font Is Installed on Windows 10
After completing the installation, it’s a good idea to confirm that Windows has registered the new font correctly. This is a quick check that can save you troubleshooting time later.
How to Find and Verify an Installed Font in Windows 10 Fonts Settings
- Open Settings.
- Go to Personalization → Fonts.
- Use the search bar to type the name of the font you installed — for example, type “Fira Sans” or “Source Sans Pro” to locate those specific fonts.
- Select the font from the results to view its available styles and confirm it’s been recognized by Windows.
If the font appears in the list with its style variants, the installation was successful and the font is ready to use.
You can also browse all installed fonts by navigating to the C:\Windows\Fonts folder in File Explorer. This is the traditional Windows system Fonts folder where installed system fonts are stored, and it gives you a complete view of everything currently on your system. For most day-to-day font management tasks, however, Settings > Personalization > Fonts is the more practical and user-friendly option.
How to Use a Newly Installed Font in Microsoft Word and Other Windows Applications
Once a font is installed on Windows 10, it should become available in desktop applications that use Windows-installed fonts — including Microsoft Word, other Microsoft Office applications such as PowerPoint and Excel, and design tools like Adobe Photoshop.
How to Find and Apply a Newly Installed Font in Microsoft Word and Other Apps
- Open Microsoft Word or another compatible application.
- Click on the font selection dropdown — the field that displays the name of the currently active font.
- Search for your newly installed font by typing its name directly into the font field, or scroll through the list to locate it manually.
- Select the font to apply it.
- Start typing — your text will now display in the new font.
The same process applies in other applications that include a font selection menu, such as Microsoft PowerPoint, Microsoft Excel, and Adobe Photoshop. If you’re working on a graphic design project and need a specific custom typeface, this is how you’d locate and apply it within your design software.
Important: If the application was already open when you installed the font, close it completely and reopen it before searching for the new font. Most desktop applications — including Word and Photoshop — load their available font list when they launch, so they won’t automatically detect fonts that were installed while the application was already running.
What to Do if an Installed Font Is Not Showing on Windows 10
Don’t worry if your newly installed font doesn’t appear straight away. This is a common situation and it’s almost always straightforward to fix. Here are the most likely causes and their solutions.
Restart the Application to Refresh the Font List in Word or Photoshop
The most frequent reason a newly installed font doesn’t appear in Word, Photoshop, or another application is simply that the application was already open when the font was installed.
Close the application completely and reopen it. Most desktop applications build their available font list at startup, so restarting gives them the opportunity to detect the newly installed typeface. This single step resolves the issue in the majority of cases.
Check Whether Windows 10 Recognizes the Installed Font in Settings
Before spending time troubleshooting within a specific application, first confirm that Windows itself has registered the font correctly.
Go to Settings > Personalization > Fonts and use the search bar to look up the font by name. If it appears in the results, Windows recognizes it and it should be available in supported applications after a restart. If it doesn’t appear here, the font may not have installed correctly — move on to the reinstallation step below.
Make Sure You Installed the Actual TTF or OTF Font File, Not the ZIP Archive
One of the most common font installation mistakes is accidentally attempting to install the ZIP archive rather than the font files it contains.
Check that you installed a file ending in .ttf or .otf, not the .zip file. If your font came inside a ZIP archive, make sure you extracted it first using Extract All in File Explorer, and then installed the .TTF or .OTF files from inside the extracted folder.
How to Reinstall a Downloaded Font That Windows Is Not Recognizing
If Windows doesn’t show the font in Settings → Personalization → Fonts after installation, the installation may not have completed successfully.
Try installing the font again by double-clicking the .TTF or .OTF file and clicking Install. If Windows presents a prompt asking whether you want to replace the existing version, click Yes to proceed. If the problem continues after reinstalling, try downloading a fresh copy of the font from the original source — the file may have been corrupted or incompletely downloaded the first time.
How to Handle Duplicate or Conflicting Font Installations on Windows 10
If Windows shows a warning during installation indicating that the font already exists on your system, it means a version of that font is already installed.
You can click Yes to replace it with the new version. Just be mindful about replacing fonts that other applications may be actively using — in particular, avoid unnecessarily replacing system fonts or fonts that ship with Microsoft Office or other software.
Restart Windows 10 if the Newly Installed Font Still Does Not Appear
If you’ve worked through all the steps above and the font still isn’t being recognized, try restarting your computer. A full system restart refreshes Windows system components including the font cache, and this can resolve persistent font recognition issues that don’t respond to other troubleshooting steps.
After restarting, check Settings > Personalization > Fonts again to confirm the font appears in the list.
How to Manage, Uninstall, and Remove Installed Fonts on Windows 10
As your font collection grows, you may want to remove fonts you no longer need. Whether you’re clearing out duplicates, cleaning up after a project, or troubleshooting a font-related display issue, Windows 10 makes it simple to uninstall fonts directly from Settings.
How to Uninstall a Font on Windows 10 Using Settings
- Open Settings.
- Go to Personalization > Fonts.
- Use the search bar to locate the font you want to remove.
- Select the font from the list to open its detail page.
- Click Uninstall.
- Confirm the removal when prompted.
The font will be removed from your system and will no longer appear in the font selection menus of supported applications.
There are several reasons you might want to uninstall a font: you no longer need it for the project it was originally downloaded for, you’ve accidentally installed a duplicate version, you’re trying to reduce the size of your font collection for performance reasons, or you’re troubleshooting a font display issue and want to start fresh with a clean installation.
Practical Tips for Safely Installing and Managing Downloaded Fonts on Windows 10
Here are some practical guidelines to help you build and maintain a clean, well-organized font library on Windows 10.
1. Download Fonts Only From Trusted and Reputable Sources
Always stick to reputable font websites such as Google Fonts, Font Squirrel, DaFont, FontSpace, and fonts.com. Avoid obscure or unfamiliar download sites, and be particularly cautious of any source that asks you to run an installer program just to download a font. Legitimate font files come as straightforward .TTF or .OTF files — not executable programs or scripts.
2. Keep Your Downloaded Font Files Organized Before and After Installation
Before installing, consider saving your original .TTF and .OTF files in a dedicated folder — for example, a Fonts folder on your Desktop or within your Documents directory. Keeping your source font files organized means you can easily reinstall a font if needed, share it with a colleague, or reference the license file later without having to re-download everything from scratch.
3. Check Font Licensing Before Using Downloaded Fonts for Commercial Projects
A font being free to download doesn’t automatically mean it’s free to use for commercial purposes. This distinction matters if you’re using a typeface for client work, business branding, marketing materials, or any other commercial application. Most downloaded font packages include a license file or a readme document that explains what the font can and cannot be used for. Take a moment to check this before using a font in a professional project. Fonts labeled “free for personal use” are generally fine for private documents or school assignments, but may require a separate commercial license for business use.
4. Avoid Installing Too Many Fonts at Once on Windows 10
It can be tempting to download and install large font collections all at once, but installing a very large number of fonts can make font-heavy applications harder to manage and, depending on the application and system, may affect startup or font-list loading. Keep your installed font collection focused on typefaces you actually use regularly. You can always download and install additional fonts later when a specific project requires them.
5. Install All Required Font Style Variants for the Best Results
If a font package includes Regular, Bold, Italic, Light, Medium, and other weight variants, install the specific styles you’ll actually be using in your documents or designs. Installing all the variants you need up front ensures that bold and italic formatting work correctly in applications like Microsoft Word and Adobe Photoshop. If you skip the Bold variant, for example, Word may attempt to simulate bold text artificially rather than using the dedicated bold font file — which can produce noticeably lower-quality results in printed or exported documents.
6. Restart Applications After Installing New Fonts if They Don’t Appear
If you install a font and it doesn’t immediately appear in your application’s font list, close the application completely and reopen it. This is one of the most common font-related issues on Windows 10 and is almost always resolved by a simple application restart.
TTF vs OTF: What Is the Difference Between Font File Formats on Windows 10?
When you’re downloading fonts, you’ll regularly encounter both .TTF and .OTF file formats. Understanding the basic difference between them can help you make the right choice for your projects — though for most everyday users, the distinction is a minor one.
What Is a TTF (TrueType Font) File?
TTF stands for TrueType Font, a format originally developed by Apple and later adopted by Microsoft. It’s one of the oldest and most widely supported font formats available, and it has been a standard part of Windows font management for decades. TrueType fonts render reliably at a wide range of sizes and display consistently across virtually all Windows desktop applications, from Microsoft Word to basic text editors.
What Is an OTF (OpenType Font) File?
OTF stands for OpenType Font, a more modern format developed jointly by Microsoft and Adobe. OpenType builds on the TrueType foundation and extends it with support for advanced typographic features, including ligatures, contextual alternates, small caps, additional glyph sets, and extended language support. These features are particularly useful in professional graphic design, branding, and publishing workflows where fine typographic control matters.
Should You Install TTF or OTF Fonts on Windows 10?
For most everyday purposes, it doesn’t matter much which format you choose. Windows 10 supports both TTF and OTF fonts, and both can be installed using the same basic process — whether you’re double-clicking the file, right-clicking and selecting Install, or dragging them into Settings → Personalization → Fonts.
If a font is available in both formats, either will work reliably for standard use in Word, Photoshop, PowerPoint, or other common applications. If you’re a designer or typographer who needs access to advanced OpenType features like ligatures or alternate characters, the .OTF version may give you more to work with in design applications that support those features. For general document and creative work, just install whichever format you have available.
Where Are Fonts Stored on Windows 10 After Installation?
When you install a font on Windows 10, the system typically stores it in:
C:\Windows\Fonts
You can navigate to this folder directly in File Explorer to browse your installed fonts. This is the traditional Windows system Fonts folder where installed system fonts are stored, and it gives you a complete view of every font file currently available on your system. It’s occasionally useful to check this folder if you’re troubleshooting a font installation issue or want to verify that a specific font file is physically present on the system.
That said, you generally don’t need to move font files into this folder manually. Every installation method described in this guide — double-clicking the file, right-clicking and selecting Install, or using drag and drop in Windows Settings — handles the placement of font files automatically.
For day-to-day font management tasks such as searching for a specific typeface, checking available style variants, or uninstalling fonts you no longer need, Settings → Personalization → Fonts is the more practical and user-friendly interface. It presents your font library in a clean, organized format that’s much easier to work with than browsing the raw system folder directly.
Key Limitations and Important Reminders for Windows 10 Font Installation
Before wrapping up, here are a few practical points worth keeping in mind as you work with downloaded fonts on Windows 10:
- Downloaded fonts usually come in a ZIP archive. If your font comes in a ZIP file, extract it first so you can access the actual .TTF or .OTF files — the ZIP archive itself is not something Windows can install directly.
- Font packages often contain multiple style files. Regular, Bold, Italic, Light, and other variants are separate files. Depending on your needs, you may want to install some or all of them together.
- Install and Install for all users serve different purposes. Use the standard Install option for your own user account, and Install for all users when other accounts on the same PC need access to the font.
- Some applications need to be restarted after a font is installed. If the app was already running when you installed the font, close and reopen it before checking for the new typeface in the font list.
- Not every application supports every font feature. Advanced OpenType features such as ligatures and contextual alternates may only be accessible in applications that are specifically built to support them.
- Font licensing matters for commercial use. A font being free to download doesn’t always mean it’s free for commercial projects. Always review the license before using a font in a business or client context.
- Download from reputable sources only. Trusted platforms like Google Fonts, Font Squirrel, and DaFont provide clean, properly formatted font files. Downloading from unknown or unverified sites carries the risk of malware or corrupted files.
Final Thoughts: How to Install Downloaded Fonts on Windows 10
Installing a downloaded font on Windows 10 is a straightforward process once you know the steps. Whether you’re adding a single custom typeface for a specific project or building out a broader font library for regular use, the basic workflow stays the same:
Download the font → Extract the ZIP file → Install the .TTF or .OTF file → Verify in Settings → Use in your applications
Windows 10 gives you several reliable ways to complete the installation, and the three most practical methods are:
- Double-click the font file → Click Install — Best for installing a single font when you want to preview how it looks first
- Right-click the font file → Select Install — Best for a fast installation when you don’t need a preview, especially useful for bulk installs
- Settings → Personalization → Fonts → Drag and drop — Best for installing multiple fonts at once, particularly full font families with several style variants
When multiple accounts on the same PC need access to a font, use the Install for all users option from the right-click context menu to perform a system-wide installation.
If a newly installed font doesn’t show up in Microsoft Word, Adobe Photoshop, or another application straight away, simply close the application and reopen it. That resolves the issue in the vast majority of cases.
Once installed, your new fonts will be available in supported desktop applications — ready for your documents, presentations, design projects, and any other creative work you have in mind.
Frequently Asked Questions About Installing Downloaded Fonts on Windows 10
How Do I Install Downloaded Fonts on Windows 10?
Download the font from a trusted source such as Google Fonts or Font Squirrel, extract the ZIP file if needed, then either double-click the .TTF or .OTF file and click Install, or right-click the file and select Install. The font will be added to your Windows 10 font library and will become available in supported applications.
How Do I Install a Font From a ZIP File on Windows 10?
Right-click the ZIP file in File Explorer and select Extract All, then click Extract. Open the newly created folder, locate the .TTF or .OTF file inside, and install it using any of the methods described in this guide. If your font comes in a ZIP file, extract it first so you can access the actual font files — Windows cannot install the ZIP archive directly.
How Do I Install TTF Fonts on Windows 10?
Locate the .TTF (TrueType Font) file in your extracted font folder, double-click it to open the font preview window, and click Install. Alternatively, right-click the .ttf file and select Install for a faster installation without the preview step.
How Do I Install OTF Fonts on Windows 10?
The process for installing an .OTF (OpenType Font) file is identical to installing a TTF. Locate the .otf file, double-click it and click Install, or right-click it and select Install. Windows 10 supports both TTF and OTF fonts, and both can be installed using the same basic process.
Can I Install Multiple Fonts at Once on Windows 10?
Yes. Open the extracted font folder, click the first font file, hold Shift and click the last file to select the entire range, then right-click any of the selected files and choose Install. Windows will install all the selected fonts in one go. You can also drag a multiple-file selection directly into the Settings → Personalization → Fonts drag-and-drop area for bulk installation.
How Do I Install Fonts for All Users on Windows 10?
Right-click the font file and select Install for all users instead of the standard Install option. Approve any administrator permission prompt that Windows displays. This performs a system-wide installation, making the font available to other user accounts on the PC as well as your own.
Why Isn’t My Installed Font Showing in Word?
The most likely reason is that Microsoft Word was already open when you installed the font. Close Word completely and reopen it — this allows the application to refresh its font list and detect the newly installed typeface. You can also confirm the font is correctly installed by checking Settings → Personalization → Fonts and searching for it by name.
Where Are Fonts Stored on Windows 10?
After installation, fonts are stored in C:\Windows\Fonts. This is the traditional Windows system Fonts folder where installed system fonts are kept, and you can browse it directly in File Explorer. For most font management tasks — searching, previewing, or uninstalling fonts — Settings → Personalization → Fonts is the easier and more practical interface.
How Do I Uninstall or Remove a Font on Windows 10?
Go to Settings → Personalization → Fonts, use the search bar to find the font you want to remove, select it to open its detail page, click Uninstall, and confirm the removal. The font will be removed from your system and will no longer appear in supported applications.
What’s the Difference Between TTF and OTF Font Files?
TTF (TrueType Font) is an older, widely supported format that works reliably across Windows desktop applications and has been a standard part of Windows font management for decades. OTF (OpenType Font) is a more modern format that can include advanced typographic features such as ligatures, alternate characters, and extended glyph sets. Windows 10 supports both TTF and OTF fonts, and both can be installed using the same basic process. For standard document work and everyday use, either format will serve you well.
How Do I Install Google Fonts on Windows 10?
Go to fonts.google.com, browse the font library, and click Download on the font you want. The font will download as a ZIP file. Right-click the ZIP file in File Explorer, select Extract All, and click Extract. Open the extracted folder, select the .TTF or .OTF files, and install them using any of the methods described in this guide — double-clicking and clicking Install, right-clicking and selecting Install, or dragging them into Settings → Personalization → Fonts.
Visit Our Post Page: Blog Page
Discover more from Izoate
Subscribe to get the latest posts sent to your email.