
Thinking about running Linux on your Chromebook? Here’s what actually works, what’s outdated, and how to pick the right method for your device.
Have you ever wished your Chromebook could do a little more—run a proper code editor, support a Linux-only tool, or even launch a Steam game? You don’t necessarily have to replace your Chromebook to get there. Despite their simple, browser-first reputation, Chromebooks are more capable than they may appear, and installing Linux is one of the easiest ways to unlock that extra flexibility.
The tricky part is that “installing Linux on a Chromebook” doesn’t refer to just one process. There are several ways to approach it, ranging from a completely safe, Google-supported option that you can enable from Settings to advanced methods that can wipe ChromeOS and replace it with a full Linux desktop. This guide walks you through all of these options, starting with the simplest and safest method first, so you can stop at whichever approach actually matches what you need.
Does Your Chromebook Already Have Linux on It?
Here’s an interesting fact that often catches Chromebook users off guard:
ChromeOS is technically already a Linux-based operating system—it is built on the Linux kernel and derived from the Gentoo Linux distribution.
That doesn’t mean, however, that your Chromebook already includes a usable Linux environment that you can work in. ChromeOS is closed-source, doesn’t include GNU software, and is designed around a browser-first experience rather than functioning like a traditional desktop operating system.
So although your Chromebook already relies on Linux underneath the surface, you can’t simply install traditional Linux applications or start using a terminal until you enable a separate Linux environment.
That’s exactly what the rest of this guide is here to help you do.
Getting Your Chromebook Ready for Linux: Know Your Options First
Before getting into the setup process, it helps to understand that there isn’t a single “correct” way to install Linux on a Chromebook. In broad terms, you’re choosing between three different approaches:
- A built-in Linux environment (Crostini) — this is the official, safe, and reversible option. It is what most users are actually looking for, and it is covered in this section.
- A dual Linux/ChromeOS setup (Crouton) — this allows you to run a full Linux desktop alongside ChromeOS and move between the two with a keyboard shortcut. This is covered in the next section of the guide.
- A full Linux installation that replaces or dual-boots with ChromeOS — this is the most advanced approach and is aimed at enthusiasts who want a more traditional Linux laptop. This method is covered later in the guide.
If your goal is simply to run a code editor, use the terminal, or install Steam, the built-in option below is all you need.
How to Install Linux on a Chromebook (No USB or Developer Mode Required)
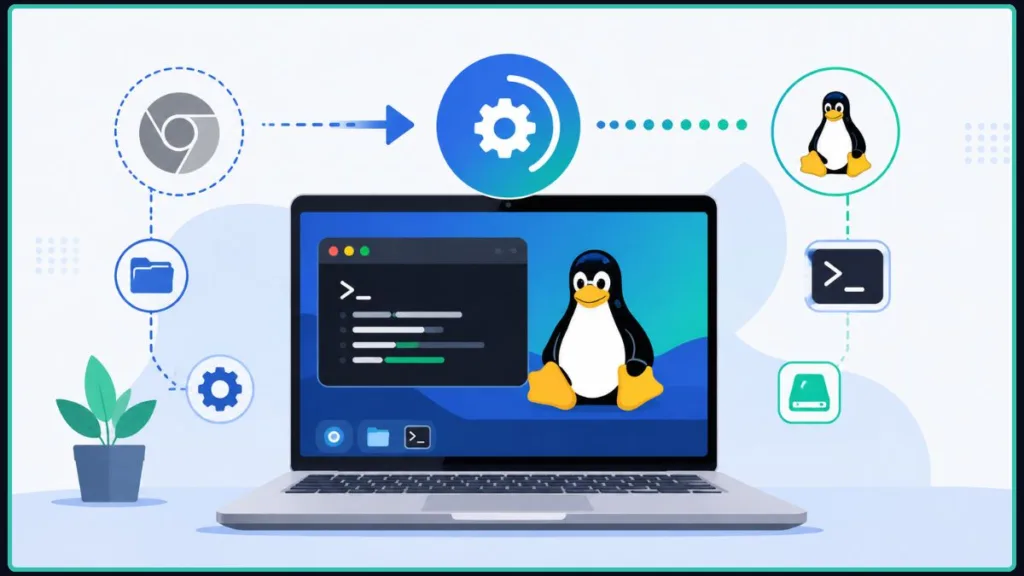
The built-in method is officially known as Crostini, although ChromeOS simply labels it Linux development environment in Settings. It runs Linux inside a secure container alongside ChromeOS, allowing your Linux apps to remain separated from the rest of the system.
The best part is that you don’t need developer mode, a USB drive, or a complete wipe of your existing files. You can also reverse the setup whenever you want using the same settings menu.
Checking Your Chromebook’s Linux Settings Before You Start
Not every Chromebook supports this feature, so it is worth checking a few requirements before you begin:
- ChromeOS version: Your Chromebook should be running a reasonably current version of ChromeOS. Most Chromebooks released since 2019 support Linux out of the box.
- RAM: Google’s general guidance is that 4GB of RAM gives you a noticeably smoother experience when running Linux applications alongside your normal browser tabs, although devices with less RAM can often manage lighter workloads.
- Storage: You’ll need some free storage for Linux. Google recommends allocating at least 10GB specifically for the Linux container, in addition to whatever storage ChromeOS needs for normal operation.
- Managed devices: If your Chromebook belongs to a school or workplace, your administrator may have disabled Linux completely.
Tip: If the Linux option doesn’t appear in Settings even though your Chromebook seems to meet the requirements, a managed-device restriction could be the reason. In that case, check with your IT department before concluding that your hardware is unsupported.
Turning On Crostini: A Simple Step-by-Step Walkthrough
Once you’ve confirmed that your Chromebook is compatible, enabling Linux only takes a few steps:
- Click the time in the bottom-right corner of your screen, then select the gear icon to open Settings.
- Scroll down and select Advanced to expand the advanced settings menu.
- Under the Developers section, find Linux development environment and click Turn On.
- You’ll be prompted to choose a username and allocate disk space. The default amount is enough for most users, but if you’re planning to install several applications or larger tools, assigning some additional space now can save you from having to resize it later.
- Click Install and wait for the process to complete. Your Chromebook will download and configure the Linux environment, so the process may take several minutes depending on your internet connection.
- After setup finishes, a Terminal window will open automatically. Your Linux environment is now ready.
Tip: Right-click the Terminal icon on your shelf and select Pin so you can access your Linux environment more easily the next time you need it.
Installing Your First Apps With APT (Terminal Basics)
Now that Linux is up and running, you’ll install most software through APT, the package manager used by the Debian-based Linux distribution that Crostini uses. It may sound technical, but the basic process is straightforward.
First, update your package list so your system has the latest available package information:
sudo apt update
sudo apt upgrade
To install software, the general pattern is sudo apt install followed by the package name. For example, to install the lightweight text editor nano, run:
sudo apt install nano
Once the application is installed, most Linux programs appear directly in your Chromebook’s app launcher under a Linux Apps folder. That means you don’t need to keep opening the terminal every time you want to launch an installed application.
Fact: Linux apps cannot automatically access your Chromebook’s normal folders. If you want to open a file you downloaded through Chrome in a Linux application, first drag it into the Linux files folder in ChromeOS’s Files app. The same works in reverse because you can also access your Linux files from ChromeOS.
Do You Really Need the Terminal? Here’s the Honest Answer
For the most part, yes—at least when it comes to setting things up and installing software. Crostini is built around the terminal and APT, and it doesn’t offer the same polished graphical app-store experience you might expect from a traditional Linux desktop.
You can also explore the official Linux on ChromeOS FAQ if you want to learn more about how the underlying container system works.
The good news is that once an application has been installed, you don’t need the terminal for regular everyday use. Your Linux apps can be opened directly through the Chromebook app launcher just like other programs. You’ll mainly return to the terminal when you want to install something new or run software updates.
Want to Game? Here’s How to Install Steam on Your Chromebook
Because Steam runs through the same Crostini environment, getting Linux working first takes care of much of the setup. From your Linux terminal, you can install Steam in much the same way you would install another Linux package:
sudo apt update
sudo apt install steam-installer
Fact: Most Chromebooks rely on integrated graphics instead of dedicated GPUs, so Steam through Crostini generally works best for lighter and less demanding games rather than the newest AAA releases. Older Chromebooks and devices with less RAM may struggle even with the Steam interface itself.
If gaming performance is your main priority instead of simply having Steam available, the more advanced full Linux installation discussed later in this guide will generally provide noticeably better results.
Ready for More? Installing Linux on a Chromebook With Crouton
If Crostini feels too limited—for example, if you want a complete Linux desktop instead of individual sandboxed applications—you may come across Crouton while researching your options. It is useful to understand what Crouton is and where it fits, but there is an important caveat to keep in mind first.
Fact: Crouton is officially end-of-life. Its maintainer has stopped releasing updates and bug fixes, and even Ubuntu’s own installation guide warns that the method is outdated. If you’re using a current Chromebook that still receives active updates, Crostini remains the officially supported and actively maintained option.
So why mention Crouton at all? It still has one legitimate use case: bringing an older Chromebook back to life after it has stopped receiving ChromeOS updates. Once your device reaches the end of its ChromeOS support period, Crostini may no longer receive updates either, while Crouton can remain a workable option specifically for that situation.
What Sets Crouton Apart From Crostini
Crouton uses a different technical approach from Crostini. Instead of running Linux inside an isolated container, it creates a chroot environment—a full Linux installation that shares your Chromebook’s existing kernel while operating as a separate desktop environment.
In practical terms, this gives you a complete Linux desktop environment such as XFCE, instead of individual sandboxed applications. You can also move between it and ChromeOS using a keyboard shortcut rather than rebooting every time.
The tradeoff is that Crouton requires developer mode, which is a much bigger commitment than Crostini.
Tip: Enabling developer mode wipes all local data from your Chromebook and puts the device in a less secure state because some of ChromeOS’s built-in protections are disabled. Back up anything important before continuing, and only proceed if you’re comfortable with that tradeoff.
Setting Up Crouton, Step by Step (Developer Mode Required)
If you’ve confirmed that Crouton makes sense for your situation—generally an older Chromebook that is no longer supported—here’s how the setup process works:
- Back up your data. Enabling developer mode erases everything stored locally on your Chromebook.
- Enter developer mode. Turn off your Chromebook, then hold Esc + Refresh and press the Power button. At the recovery screen, press Ctrl + D, then press Enter to confirm turning off OS verification. From this point onward, you’ll need to press Ctrl + D whenever the verification screen appears during startup.
- Download Crouton from its GitHub page. The file will be saved in your Downloads folder.
- Open the ChromeOS terminal by pressing Ctrl + Alt + T, type
shell, and press Enter to enter a full shell. - Copy the Crouton installer into an executable location:
sudo install -Dt /usr/local/bin -m 755 ~/Downloads/crouton
- Run the installer, specifying the XFCE desktop environment:
sudo crouton -t xfce
This process may take a while, so let it finish. Once it is complete, you’ll be prompted to create a username and password for your Linux environment.
- Enter your Linux desktop using:
sudo enter-chroot startxfce4
Switching Back and Forth Between ChromeOS and Your Linux Desktop
One of Crouton’s useful features is that you don’t have to restart the Chromebook every time you want to switch between environments. After everything is set up, you can move between ChromeOS and Linux using:
- Ctrl + Alt + Shift + Back — switch to your Linux desktop
- Ctrl + Alt + Shift + Forward — switch back to ChromeOS
Tip: If you ever want to return to a clean ChromeOS installation, shut down your Chromebook and hold Esc + Refresh while pressing the Power button to reach the recovery screen. This is exactly why creating a Chromebook Recovery Utility drive beforehand is worth the few minutes it takes.
Going All In: Chrome OS Dual Boot Linux Setups
If Crostini and Crouton still feel like they’re working around ChromeOS rather than giving you a traditional Linux machine, you can move to a more advanced setup. These approaches allow you either to dual-boot—choosing between ChromeOS and Linux whenever the Chromebook starts—or to remove ChromeOS entirely and run a standard Linux distribution as the only operating system on the device.
Fact: Chromebooks weren’t designed by Google or their hardware manufacturers to dual-boot. Doing so means modifying the device’s firmware and moving beyond official support. The process is well documented and tested by the community, but it isn’t risk-free and isn’t as easily reversible as Crostini.
One tool you may encounter for this process is chrx, a command-line installer designed to handle firmware updates, partitioning, and Linux distribution installation through a guided process. Unlike Crouton, chrx installs Linux as a genuinely separate, bootable operating system rather than a chroot environment that continues to use ChromeOS’s kernel.
How to Install Linux on a Chromebook Using a USB Drive
Before using chrx, you’ll need two things: a USB flash drive with at least 4GB of storage and confirmation that your Chromebook uses an Intel-based processor. ARM-based Chromebooks are significantly more limited for this type of installation and generally aren’t recommended for it.
Tip: Create a Chromebook Recovery Utility drive before getting started. If something goes wrong, you can use it to restore a working ChromeOS installation.
Here’s the general process:
- Back up everything. This process wipes your device.
- Enable Developer Mode by turning off your Chromebook, holding Esc + Refresh, and pressing Power. At the recovery screen, press Ctrl + D, then confirm that you want to turn off OS verification.
- Open a shell by pressing Ctrl + Alt + T, typing
shell, and pressing Enter. - Run the chrx installer to prepare your Chromebook:
cd; curl -Os https://chrx.org/go && sh go
- Follow the on-screen instructions to allocate storage between ChromeOS and Linux and select your distribution. If you’d like to install Ubuntu instead of the default option, for example, you can add a distribution flag as described in chrx’s documentation.
- Your Chromebook will reboot partway through the process. After restarting, run the same command again to complete the second stage.
- Once everything is finished, restart your Chromebook. At the boot screen, press Ctrl + L to boot into Linux or Ctrl + D to return to ChromeOS.
Installing Linux Mint on a Chromebook: What to Know
Here’s the straightforward answer rather than presenting a workaround as though it were built in: chrx doesn’t officially support Linux Mint in its built-in distribution list. It is designed around GalliumOS, Ubuntu, and Ubuntu derivatives such as Lubuntu and Kubuntu.
That doesn’t mean you can’t run Mint. However, getting Linux Mint working generally means taking the manual firmware route—flashing full UEFI firmware onto your Chromebook with a tool such as MrChromebox’s firmware utility, then booting and installing Mint from a standard USB installer much like you would on a regular PC.
This approach provides more freedom when choosing a Linux distribution, but it also means you’ll need to troubleshoot hardware compatibility issues involving things such as Wi-Fi, the trackpad, and function keys yourself rather than relying on Chromebook-specific tuning.
Tip: If you’re specifically committed to Linux Mint, allow extra time for driver troubleshooting and rely on general Linux hardware-compatibility forums for assistance. At this point, you’re essentially running a standard Linux installation rather than a Chromebook-focused setup.
A Quick Note for Lenovo Chromebook Owners
Lenovo makes Chromebooks with both Intel and ARM processors, and that distinction can make a significant difference here. If you’re considering a full Linux installation, check the chipset of your exact model before assuming the instructions above apply to your device.
Lenovo’s Intel-based models, including several Chromebook Duet and Flex models, tend to have stronger community documentation and firmware support for this process than their ARM counterparts.
Fact: Before starting, check chrx’s hardware compatibility notes for your exact Lenovo model. Some Intel Chromebook generations require a firmware update before dual-booting will work, while others strongly recommend one but don’t require it.
Ready to Say Goodbye to ChromeOS? Replacing It Entirely
If you don’t want ChromeOS at all, you can remove it and install Linux by itself. chrx also supports a single-boot installation, which lets you install Linux directly from a USB or SD card without reserving storage space for ChromeOS.
The downside is that this approach is less forgiving. Without ChromeOS available as a fallback, you’ll be relying entirely on your recovery drive if something goes wrong. Returning to ChromeOS later would require a complete reinstall using that recovery media instead of simply restarting the Chromebook.
Installing Linux on a Chromebook in 2026: Which Method Fits You Best?
| Method | Risk Level | Reversible? | Best For |
|---|---|---|---|
| Crostini | Very low | Yes, instantly | Most users — dev tools, terminal, casual Steam use |
| Crouton | Medium | Yes, via recovery | Older, unsupported Chromebooks only |
| chrx dual-boot | Higher | Only via recovery drive | Enthusiasts wanting a full separate Linux desktop |
| Full replacement | Highest | No easy fallback | Users who don’t need ChromeOS at all |
Something Not Working? Troubleshooting Common Setup Issues
“Linux development environment” option is missing from Settings
First, make sure your Chromebook is fully updated to the latest ChromeOS version. If the option is still missing, you’re most likely using a managed device where Linux has been disabled by policy, or older hardware that never received Crostini support.
Installation seems stuck
Crostini installation can take several minutes depending on your internet connection, so give it some time before assuming that something has gone wrong. If there has been no meaningful progress after 15–20 minutes, restart your Chromebook and try the setup process again from Settings.
Crouton fails to install or enter the chroot
This is becoming increasingly common on current ChromeOS versions because Crouton is no longer maintained against Google’s ongoing security changes. If you’re using a recent Chromebook that is still actively supported, this is a strong indication that Crostini is the better option.
Chromebook won’t boot after enabling developer mode or dual-boot
This is where your recovery drive becomes especially important. Boot into the recovery screen and follow the instructions to restore ChromeOS using the Chromebook Recovery Utility drive you created earlier.
FAQ
Does a Chromebook have Linux installed by default?
Not in a usable sense. ChromeOS itself is built on the Linux kernel, but you can’t run Linux applications or use a Linux terminal until you enable a Linux environment such as Crostini.
How do I install Linux on a Chromebook without developer mode?
Use Crostini. It is Google’s official method, doesn’t require developer mode, and doesn’t erase your existing data.
Can you install Linux on a Chromebook without a terminal?
Not entirely. Crostini’s setup and software installation rely on the terminal, although you won’t need to use it for everyday interaction with an application after that application has been installed.
Is it safe to dual boot Linux on a Chromebook?
It is a well-tested process on many models, but it is unofficial, requires developer mode, wipes your data, and carries more risk than Crostini. Always create a recovery drive before starting.
Do I need a USB drive to install Linux on a Chromebook?
Only for the dual-boot and full-replacement methods. Crostini and Crouton don’t require one.
Can I install Linux on any Lenovo Chromebook?
It depends on the Chromebook’s chipset. Intel-based Lenovo Chromebooks generally have much better support for dual-boot and full Linux installations than ARM-based models, so check your specific model’s compatibility before beginning.
Conclusion
Whether you choose a quick Crostini setup for a code editor or go all the way to a complete Linux replacement for a dedicated development machine, the right option ultimately comes down to how much effort and risk you’re willing to trade for greater control.
If you’re unsure, start with Crostini. It costs nothing to try, and you can always move to a more advanced setup later.
Visit Our Post Page: Blog Page
Discover more from Izoate
Subscribe to get the latest posts sent to your email.