
Looking to create a slideshow on Facebook? Learn the best ways to turn photos into a slideshow with music using Facebook’s built-in tools or free slideshow makers. Get step-by-step methods for mobile and desktop in 2026.
You’ve got a folder full of birthday shots, trip photos, or product pictures, and posting them one by one feels like a chore. You want them to play like a little movie, with music, smooth transitions, and one tap to share.
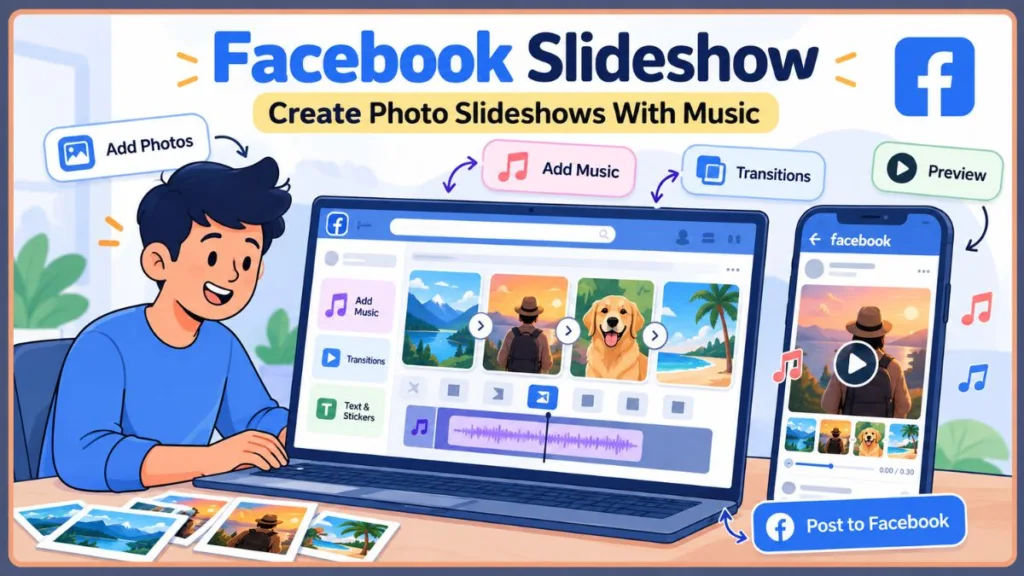
Here’s the catch: Facebook has changed how slideshows work, and the old “Create Slideshow” button that many guides still mention has been removed or hidden for most people. This guide shows you how to create a slideshow on Facebook the way it works now. You’ll get the built-in route, free slideshow makers, how to add music, what to do about a cover photo slideshow, and fixes for when options are missing.
The Rise of Photo-to-Video: Why Slideshows Still Win
Static photo posts are everywhere, and Meta has spent the last few years steering Facebook toward short-form video and Reels. A slideshow sits right in that sweet spot: it’s still your photos, but it moves, plays with sound, and finishes in a few seconds.
Key Insight: A slideshow turns a pile of photos into a story with a beginning, a middle, and an end. People tend to stop for movement and music more readily than for a still image, and you don’t ask them to tap through twenty pictures.
That’s why birthday recaps, wedding highlights, travel diaries, and “how it started vs. how it’s going” posts work so well as slideshows.
Can You Create a Slideshow on Facebook?
Yes, but not always with a button that says “Slideshow.” Facebook once offered a Create Slideshow option (mostly for Pages), and some older tutorials still describe it. In 2026, many people no longer see it at all, so the reliable approach is to turn your photos into a short video using Facebook’s Reels editor or a free slideshow maker, then post that video.
Izoate 2026 Update: If you can’t find a “Create Slideshow” option on your profile or Page, you haven’t done anything wrong. The classic tool has been removed or hidden for most users, which is why the methods below focus on what works today.
Slideshow vs. Photo Collage vs. Multi-Photo Post: What’s the Difference?
These get mixed up constantly:
- Slideshow: Photos turned into a video that plays one after another, usually with music.
- Photo collage: Several photos combined into one still image.
- Multi-photo post: A grid of photos that people tap through manually.
If you want movement and music, you want a slideshow video.
Where a Slideshow on Facebook Works Best
You can share a slideshow video on your personal profile, a Facebook Page, a Group, your Stories, or as a Reel. The same video also works on Instagram, WhatsApp Status, and Messenger, so you only need to make it once.
What You Need Before You Start
A few minutes of prep saves a lot of frustration later.
Gather and Organize Your Photos
Pick your best 10 to 20 photos, and put them in the order you want them to appear. Choose sharp, well-lit images and skip near-duplicates.
Pick a Theme or Story
A slideshow feels best when it tells a story. Easy themes include:
- A birthday, wedding, or anniversary
- A trip or weekend getaway
- A then-and-now comparison (our Facebook then and now post guide covers that idea in detail)
- A product showcase or event recap
Decide Where You’ll Post It
Your answer changes the shape of your video. Reels and Stories use tall vertical video, while a feed post can be square, portrait, or landscape. We cover exact sizes below.
How to Make a Slideshow on Facebook (Step-by-Step)
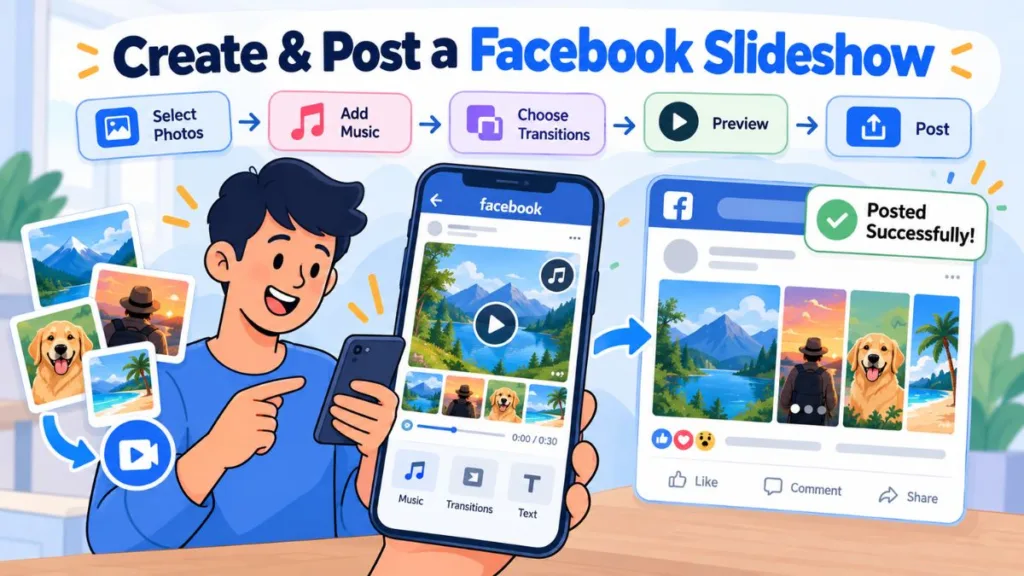
Method 1: Turn Photos Into a Reel With Facebook’s Built-In Editor (Mobile App)
This is the closest thing to a native Facebook slideshow, and you don’t need to download anything.
- Open the Facebook app on your Android phone or iPhone.
- Tap Create and choose Reel (or open the Reels tab and start a new Reel).
- Open your gallery and tap Select Multiple, then pick your photos in the order you want.
- Tap Next to open the editor.
- Add music from Facebook’s library, plus text, stickers, or effects.
- Adjust how long each photo shows by trimming each clip in the timeline.
- Tap Next, write a caption, and choose your audience.
- Tap Share.
Quick Tip: Put your most striking photo first. In a short video, the opening second decides whether people keep watching.
Facebook’s Reels editor lets you add many clips and photos into a single Reel, and Reel length limits have been changing, so check the maximum shown in your app. Keep your slideshow short anyway, since 15 to 30 seconds is plenty for most photo sets.
Menu names change when Facebook updates the app, so if a button looks slightly different, look for the closest match. The Reels editor is also mobile-only, so you can’t build one on desktop.
Method 2: Use the Classic Create Slideshow Option (If You Still Have It)
Some Pages may still see an older Create Slideshow option when starting a post. If you do:
- Open your Page on a computer.
- Click Photo/Video in the post box.
- Select Create Slideshow if it appears.
- Add your photos, choose a transition and duration, and add music if offered.
- Click Create Slideshow, add a caption, and publish.
This tool was only ever available on Pages, never on personal profiles, and older versions limited you to roughly 10 photos per slideshow. If you don’t see the option, skip to Method 3 or 4 rather than hunting for it.
If you manage a business Page, Meta’s Ads Manager can also build slideshow video ads from photos, which is handy when you want to promote the result.
Method 3: Use a Free Slideshow Maker, Then Upload It to Facebook
This is the most flexible route if you want to create a free slideshow for Facebook with custom transitions, text, and your own music.
- Open a slideshow maker compatible with Facebook, such as Canva, CapCut, InShot, Adobe Express, or Clipchamp.
- Choose a video or slideshow template, or start from a blank project.
- Add your photos and arrange them in order.
- Pick a transition style and set how long each photo displays (about 3 to 5 seconds works well).
- Add music and short text labels.
- Export as an MP4 video.
- Open Facebook and upload the video as a post, Story, or Reel.
Method 4: Make a Slideshow in PowerPoint and Export It as Video
If you already know PowerPoint, you can use it to build a slideshow video:
- Create one slide per photo.
- Add transitions and music if you like.
- Go to File > Export > Create a Video.
- Choose Full HD (1080p) for a good balance of quality and file size.
- Set the seconds to spend on each slide (the default is 5 seconds).
- Save it as an MP4 and upload it to Facebook.
Microsoft’s export saves as MP4 or WMV, so choose MP4 for Facebook.
How to Post a Slideshow on Facebook
Once your slideshow video is ready, sharing it takes only a minute.
Upload a Slideshow Video From Your Phone
Open the app, tap What’s on your mind?, tap Photo/Video, choose your video, add a caption, and tap Post.
Upload a Slideshow Video From Your Computer
Click Photo/video in the post box, select your MP4, add a caption, and hit Post. Large files can take a few minutes on slower connections, so keep the tab open until it finishes.
Share a Slideshow as a Story or Reel
Tap Create Story or Create Reel, pick your finished vertical video from your gallery, add text or stickers, and share. This works best if you exported at 1080 x 1920.
Post a Slideshow in a Group or on a Page
Open the Group or Page, tap the post box, upload the video, and publish. Some Groups require admin approval, so your post might not show up right away.
Add a Caption, Tags, and Audience Settings
A short caption gives your slideshow context. Tag people (with their permission), and check the audience setting before posting. Friends is a safer default than Public for personal photos.
How to Create a Slideshow With Music on Facebook
Music is what turns a photo sequence into something people feel. Here’s how to do it right.
Adding Music With Facebook’s Built-In Library
If you build your slideshow as a Reel or Story, you can pick songs and sounds from Facebook’s own music library during editing. That’s the simplest way to make a Facebook slideshow with music with no copyright worries.
Adding Your Own Music Through a Slideshow App
If you want a specific track, add it inside your slideshow maker (Canva, CapCut, InShot, and similar apps all support audio), then export the finished video with the music baked in.
Why Your Slideshow Music Might Get Muted
Facebook scans uploads for copyrighted music. If you use a popular song without the right license, the audio can be muted or blocked, or the post can be removed. To stay safe:
- Use music from Facebook’s own library when editing inside the app.
- Use royalty-free tracks from a library that clearly allows social media use.
- Use your own recordings or music you have permission to use.
Izoate 2026 Update: Music licensing between Meta and record labels has shifted over the years, so a song that worked in one post last year might get muted today. When in doubt, pick a track from the in-app library.
Best Music Formats for Slideshows
Here’s a plain-language guide to the audio files you’ll run into:
- MP3: The most common and widely supported format. Small files, good quality. A safe default.
- M4A (AAC): Similar quality to MP3 at small sizes, and common on iPhones. Also a great choice.
- WAV: Uncompressed and very high quality, but the files are large. Only worth it if you’re editing carefully.
For most people, MP3 or M4A is perfect. Whatever you import, your final exported slideshow should be an MP4, which carries the audio along with it.
Facebook Cover Photo Slideshow: Is It Possible?
This is one of the most searched questions, so here’s the honest answer.
Cover Photo Slideshow vs. Cover Video
Facebook used to let some Pages show a cover slideshow and, before that, a cover video. Cover videos were removed back in 2021, and cover slideshows were a Pages-only feature that many people no longer see.
How to Get a Slideshow Look on Your Cover
If you manage a Page and you still see a Create Slideshow option when you edit your cover, you can select it and add photos from your Page library or upload new ones. If you don’t see it, the feature isn’t available to you.
Here are the alternatives that work for everyone:
- Use a single cover collage. Build a wide image in Canva using a Facebook cover template and upload it as your cover.
- Pin or feature your slideshow video. Post your slideshow as a video and pin it to the top of your Page or profile so it’s the first thing visitors see.
Recommended Cover Photo Dimensions
Facebook’s Help Center lists Page cover photos at 851 x 315 pixels, with a minimum upload of 399 x 150. Covers display wider on desktop and narrower on mobile, so keep important content in the center.
Best Slideshow Makers Compatible With Facebook
Here’s a quick comparison to help you pick a slideshow maker compatible with Facebook.
| Tool | Best For | Works On |
|---|---|---|
| Canva | Templates, text, and Facebook-ready sizes | Web, iPhone, Android |
| CapCut | Transitions, effects, and music sync | Phone, desktop, web |
| InShot | Fast, simple phone editing | Phone |
| Adobe Express | Clean, professional layouts | Web, phone |
| Clipchamp | Beginner-friendly video editing on Windows | Windows, web |
| PowerPoint | Slideshows you already have as slides | Desktop |
| Google Photos | Instant highlight videos with music | Phone |
Most of these have free versions, but free-plan limits (watermarks, export quality, premium templates) change often. Check what each app includes before you start.
Free vs. Paid: What You Actually Need
For most people, the free version is plenty. Paid plans mainly add premium templates, extra music, higher export quality, and watermark removal.
Phone Apps vs. Desktop Tools
Phone apps are faster for casual posts and Reels. Desktop tools give you more control for longer or business-focused slideshows.
PowerPoint vs. Canva Slideshows: Which Should You Use?
Both can produce a Facebook-ready video, but they shine in different situations.
When PowerPoint Makes Sense
Choose PowerPoint if you already have slides, need precise control over timing, or want to turn a presentation into a video. Its Create a Video export saves an MP4 you can upload directly.
When Canva Is the Better Choice
Choose Canva if you want ready-made templates, easy text and stickers, and sizes built for social media. It’s faster for visual posts, especially on your phone.
Quick Verdict for Facebook Posts
For personal memories and social posts, Canva (or a phone video editor) is usually easier and better looking. For work presentations or formal slides, PowerPoint is the natural choice.
Slideshow Tips for Beginners
A few small choices make a big difference.
Keep Each Slide Short
About 3 to 5 seconds per photo works well. Too long, and viewers lose interest. Too short, and they can’t see the picture.
Use Consistent Photo Orientation
Mixing vertical and horizontal photos in one slideshow often leaves awkward black bars. Stick to one orientation, or crop before you start.
Match Transitions to the Mood
Gentle fades suit weddings and memories. Quick cuts suit parties and travel. Don’t use a different transition for every photo.
Add Text Sparingly
A date, location, or short title is enough. Long text is hard to read on a phone.
Pick Music That Fits the Story
Upbeat tracks for celebrations, softer ones for sentimental moments. Keep the volume balanced so it doesn’t overpower any spoken audio.
Preview Before You Post
Watch the whole slideshow once with sound on and once with sound off. Many people scroll with the sound off, so on-screen text helps.
Best Slideshow Size and Format for Facebook
A well-sized slideshow stays sharp instead of getting stretched or cropped.
- Reels and Stories: 1080 x 1920 pixels (9:16 vertical).
- Feed post (square): 1080 x 1080 pixels.
- Feed post (portrait): 1080 x 1350 pixels, which uses more screen space on phones.
- Landscape: 1920 x 1080 pixels (16:9), good for computer viewing.
- Format: MP4 is the safest choice, ideally with standard H.264 video and AAC audio.
Keep file sizes reasonable so uploads finish quickly on mobile data. If a video is huge, export at 1080p rather than 4K.
Fix: Facebook Slideshow Option Not Showing or Not Working
If you can’t find the option, or your video won’t post, try these fixes.
- Accept that the classic tool may be gone. If there’s no Create Slideshow button, use Method 1 (Reels) or Method 3 (a slideshow maker).
- Update the Facebook app. Reels editing features can vary by version.
- Check whether you’re on a profile or a Page. The old slideshow option was only for Pages.
- Use the mobile app, not desktop. Creating Reels is mobile-only.
- Clear the cache (Android) or reinstall the app. This fixes many small glitches.
- Video won’t upload? Make sure it’s an MP4, and try a different network if your connection is weak.
- Slideshow looks blurry? Export at 1080p, avoid screen recordings, and check the app’s media settings for a photo or video upload quality option.
Privacy and Safety Tips Before You Share
Slideshows show a lot, so a quick check is worth it.
- Review each photo. Make sure nothing reveals your address, documents, license plates, or a child’s school.
- Choose the right audience. Pick Friends if the slideshow includes children or private moments.
- Get permission before tagging or showing others. Not everyone wants to be in a public video.
- Be careful with third-party apps. Check what permissions a slideshow app asks for before you grant access to your photos or your Facebook account.
Accessibility: Make Your Slideshow Easy for Everyone to Enjoy
A little care helps more people enjoy your post.
- Add on-screen text or captions so viewers can follow along with the sound off.
- Use high-contrast text that’s large enough to read on a small screen.
- Hold text on screen long enough to read comfortably.
- Avoid rapid flashing transitions, which can bother some viewers.
- Describe the slideshow in your caption so people using screen readers know what it shows.
Using Slideshows for Business and Brand Pages
Slideshows aren’t just for personal memories. Businesses use them for:
- Product showcases: Several angles or a full collection in one short video.
- Before-and-after results: Renovations, makeovers, or project progress.
- Event recaps: Highlights from a launch, workshop, or community event.
- Customer stories: Photos with short quotes or results.
For brands, a slideshow is a quick, low-cost way to get a polished video without filming anything. Add your logo, keep the message short, and end with a clear next step.
Real-World Example: Imagine a small bakery posting a 20-second slideshow of its week’s best cakes, with a simple “Order by Friday” text on the last slide. It’s still just photos, but the movement, music, and clear call to action make it feel like a real ad.
Common Mistakes to Avoid
- Using too many photos in one slideshow
- Mixing horizontal and vertical photos without cropping
- Choosing the wrong aspect ratio for the placement
- Adding tiny or crowded text
- Using loud or unlicensed music
- Posting without a caption
- Skipping the preview
Pro Tips to Get More Views on Your Facebook Slideshow
- Lead with your strongest photo so the first second catches attention.
- Add on-screen text so the story works even without sound.
- Keep it short. Shorter videos tend to hold attention better.
- Post around meaningful moments like birthdays, holidays, and trips.
- Reply to comments to keep the conversation going.
- Reuse your slideshow as a Story or Reel, or share it to Instagram.
Caption Ideas for Your Facebook Slideshow
- Emotional: “Every photo here has a story I’m grateful for.”
- Funny: “Warning: contains too many photos of the same sunset.”
- Inspirational: “Collecting moments, not things.”
- Short: “A year in a minute.”
- Birthday: “Another year, so many reasons to smile.”
- Wedding: “Our favorite moments, all in one place.”
- Travel: “Where we went, in the order we loved it.”
FAQs About Facebook Slideshows
Can I create a slideshow on Facebook?
Yes, but the classic Create Slideshow button is no longer available to most people. Use the Reels editor to turn photos into a video, or make a slideshow in a free app and upload it.
How do I make a slideshow video on Facebook?
Open the Facebook app, create a Reel, select multiple photos, add music, and share. Or build it in Canva, CapCut, or PowerPoint, export an MP4, and upload it.
How do I upload a slideshow to Facebook?
Export your slideshow as an MP4, then tap Photo/Video on your phone (or click Photo/video on desktop), choose the file, add a caption, and post.
How to post a slideshow on Facebook from my computer?
Click Photo/video in the post box, select your MP4, add a caption, and post. You can also schedule posts for a Page through Meta Business Suite.
How do I make a Facebook slideshow with music?
Use Facebook’s built-in music library inside the Reels or Story editor, or add a track in your slideshow app and export the finished video with the audio included.
Can I use a slideshow as my Facebook cover photo?
Cover videos were removed in 2021, and the cover slideshow option is no longer available to many people. Use a cover collage or pin a slideshow video instead.
What’s the best free slideshow maker for Facebook?
Canva, CapCut, InShot, and Google Photos are all beginner-friendly. The best one depends on whether you want templates, effects, or speed.
What file format should I use for a Facebook slideshow?
MP4 is the safest choice for video. For music inside your editor, MP3 or M4A files work well.
How many photos can I add to a Facebook slideshow?
There’s no single rule, since it depends on the tool. For the best result, aim for 10 to 20 photos so each one has time to shine.
Conclusion: Start Sharing Your Story
Learning how to make a slideshow on Facebook comes down to one idea: turn your photos into a short video. For speed, use Facebook’s built-in Reels editor with music from its library. For a custom look, use Canva, CapCut, or PowerPoint, export an MP4, and upload it. Keep it short, choose licensed music, and check your privacy settings before you share.
Now it’s your turn. What slideshow are you planning, a birthday, a trip, or a business showcase? Drop a comment below or ask a question, and we’ll help you get it done.
Final Tip: Make one great slideshow, then reuse it. Post the vertical version as a Reel and Story, and keep a landscape version for your Page or Group so every photo works twice.
Visit Our Post Page: Blog Page
Discover more from Izoate
Subscribe to get the latest posts sent to your email.