
Want to make all your Facebook photos private? Learn what Facebook lets you change in bulk, what you still have to do by hand, and which photos can never be hidden. Step-by-step guides for Android, iPhone, and desktop in 2026.
You’re scrolling through your profile and notice an old holiday album, a college party, or a family photo still set to Public. Anyone can open it: a stranger, a former colleague, or someone who found your name through a search engine.
You’re far from alone. Meta reported 3.60 billion daily active people across Facebook, Instagram, Messenger, and WhatsApp in June 2026, up 3% from a year earlier. Meta stopped publishing Facebook-only user counts after 2023 (the last figure was 3.07 billion monthly users), so that family-wide number is the most current official one. With an audience that large, even a small share of public photos adds up to a lot of exposed pictures.
That’s why so many people search for how to make all photos private on Facebook. The question is simple, but the answer is not: Facebook has no single switch that turns every photo to “Only me.” What it does have is a mix of bulk tools and manual settings that, used together, get you very close.
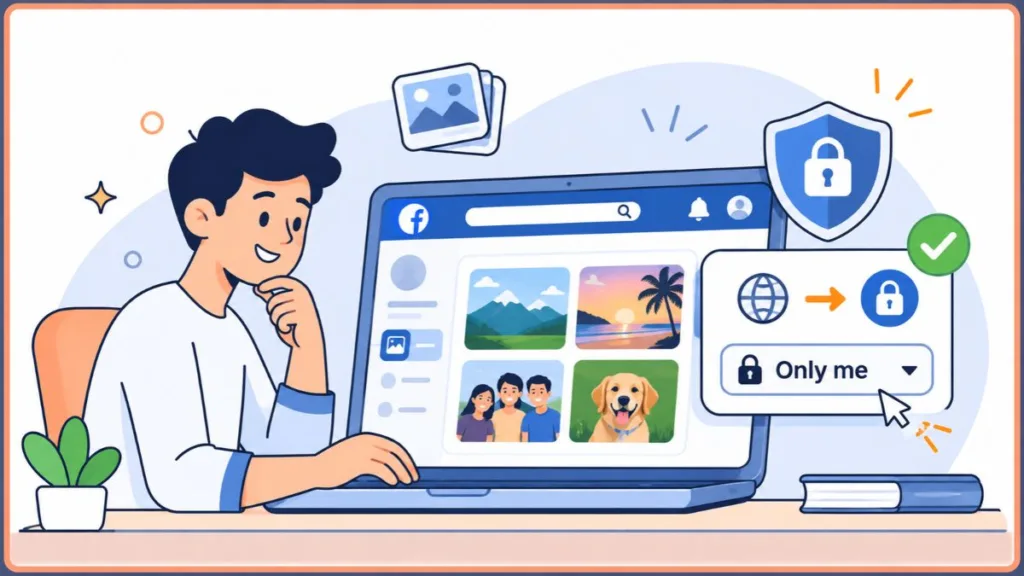
This guide covers each option, what it changes, what to expect afterward, and the photos Facebook always keeps visible. It also covers the settings that stop the problem from coming back.
Why Photo Privacy Matters More Than Ever in 2026
Photos are the most revealing thing most of us post. A single picture can show your face, your home, your workplace, your children, and your routine. When a photo is set to Public, it can be viewed, saved, and shared by people you’ll never meet.
Key Insight: Most oversharing isn’t deliberate. Facebook usually remembers the audience you last used, so one Public post can quietly make the next ten Public as well. And years-old posts keep whatever audience they had back then, which may be far wider than you’d choose today.
Here is what the evidence shows:
- People do act on privacy, but unevenly. A Pew Research Center survey of about 4,600 US adults (2018) found that 54% of Facebook users had adjusted their privacy settings in the past year. Only 33% of users aged 65 and older had done so, compared with 64% of younger users. The survey is dated, but it shows how many people never review their settings.
- Public information gets harvested at scale. In 2021, data on about 533 million Facebook users across 106 countries (including roughly 32 million in the US) surfaced on a hacking forum. Facebook said it was collected by scraping (automated tools gathering public information) before September 2019, using a contact-matching feature it has since fixed. The lesson for photos: anything set to Public is easier for automated tools to collect.
- Settings can fail without warning. In 2018, a Facebook bug set the new posts of up to 14 million users to Public, regardless of their chosen audience. A quick View As check (covered below) catches problems like this.
Cleaning this up has real benefits:
- Protects personal details: backgrounds can reveal your address, workplace, or daily routine.
- Reduces unwanted attention: employers, ex-partners, and strangers see less.
- Protects children’s photos: family pictures are often the first thing people want to lock down.
- Gives you a fresh start: a tidy profile is easier to keep private.
Key Terms Explained
A few terms come up throughout this guide:
- Audience selector: the drop-down on a post, photo, or album that sets who can see it (Public, Friends, Friends except, Specific friends, or Only me).
- Activity Log: your account’s list of everything you’ve posted and done on Facebook, where you can review, filter, and manage items.
- Archive: hides a post or photo from everyone except you while keeping it in your account.
- Trash: a holding area for removed posts that Facebook permanently deletes after 30 days unless you restore them first.
- Scraping: using automated software to collect information that’s publicly visible on a website or profile.
Can You Make All Photos Private on Facebook at Once?
Not fully. Facebook has no “make everything Only me” button, and the audience selector works per post or per album. Be wary of any article or app promising a one-click fix, since third-party tools that ask for your login put your account at risk.
Here is what you can do in bulk:
- Limit Past Posts: changes older posts visible to more than just your friends (such as Public posts) to Friends in one action.
- Manage Activity: lets you select many posts, photos, and videos and archive them (hidden from everyone but you) or move them to Trash.
- Edit album privacy: one change covers every photo in that album.
- Set your default audience: controls who sees photos you upload from now on.
Together, these cover almost everything people mean when they ask how to make all photos private on Facebook.
Which Method Should You Use? (Quick Guide)
| Your Goal | Best Method | Result | Approx. Time |
|---|---|---|---|
| Stop old Public photos being seen by everyone | Limit Past Posts | Public posts become Friends only | 1 to 2 minutes |
| Make a whole album fully private | Edit the album audience | Every photo in it follows the new audience | About 1 minute per album |
| Hide many photos without deleting them | Manage Activity → Archive | Hidden from everyone but you; stays in your account | 2 to 10 minutes, depending on how many you select |
| Stop new photos being Public by accident | Change your default audience | Future uploads use the audience you chose | Under 1 minute |
| Check what the public sees | View As | A preview of your profile as a stranger sees it | Under 1 minute |
| Keep Google from listing your profile | Search engine setting | Your profile stops appearing in outside search results over time | Under 1 minute |
Times are rough estimates and vary with your account size and connection.
Private vs Hidden vs “Only Me”: What’s the Difference?
Readers often use these words interchangeably, but the options behave differently:
| Audience | Who Can See It | Best For |
|---|---|---|
| Public | Anyone, on or off Facebook | Content you want everyone to see |
| Friends | Your Facebook friends | A safer everyday default |
| Friends except… | Friends minus the people you exclude | Hiding photos from specific people |
| Specific friends | Only the people you choose | Small, trusted groups |
| Only me | Only you | Fully private photos |
Quick Tip: If your goal is to hide pictures on Facebook without deleting them, Only me (or Archive, covered below) is what you want. The photos stay in your account, but nobody else can see them.
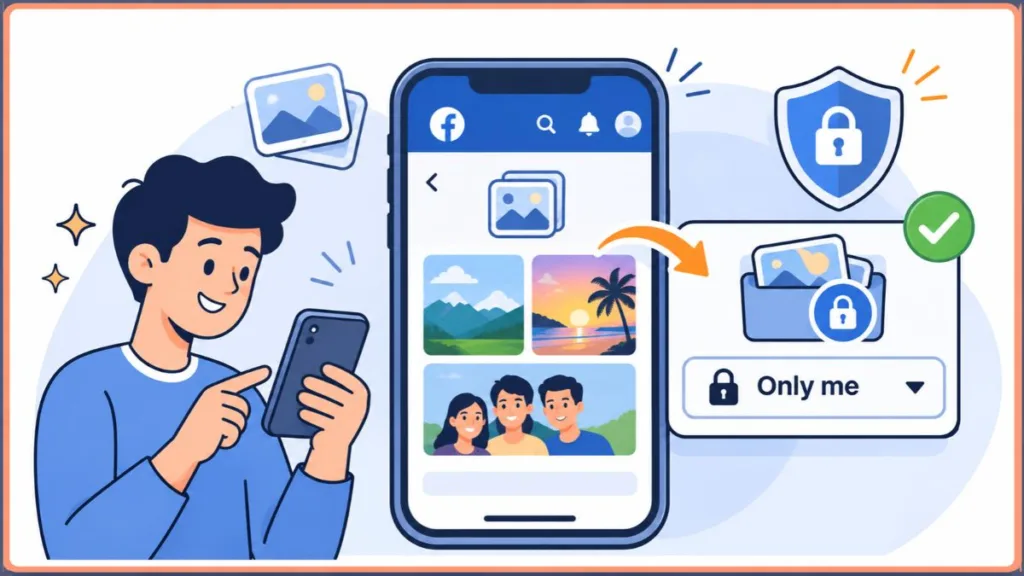
Method 1: Limit Past Posts (Bulk Fix for Old Photos)
This is the closest thing Facebook has to a mass audience setting, and it is the first step for most people.
Izoate 2026 Update: Menu names change between app versions. If a label below looks slightly different, look for Audience and visibility or Privacy in Settings, then Posts.
On Mobile (Android and iPhone)
- Open the Facebook app and tap the Menu icon.
- Tap Settings & privacy, then Settings.
- Scroll to Audience and visibility and tap Posts.
- Tap Limit who can see past posts.
- Tap Limit past posts (it may say Limit old posts), then confirm.
On Desktop
- Click your profile picture at the top right.
- Select Settings & privacy, then Settings.
- Open the Posts section (it may sit under Privacy).
- Next to Limit who can see past posts, click Limit past posts.
- Click Limit past posts again to confirm.
What It Does and Doesn’t Do
- It changes older posts that are visible to more than your friends, such as Public posts, to Friends. It does not change them to Only me.
- It doesn’t delete anything and doesn’t change who your friends are.
- Posts shared with a custom audience (such as Friends except Acquaintances) keep their audience.
- It can’t be undone in one click. To restore an old audience, you edit each post.
- It only covers posts you shared. Photos you’re tagged in, and posts on other people’s profiles, aren’t affected.
- It applies to your profile, not to a Facebook Page’s posts, which have their own audience rules.
What to expect: Strangers can no longer see your old Public photo posts, but your friends still can. If you need photos hidden from friends too, move on to Methods 2 and 3.
Warning: Think before confirming. If you want some old photos to stay Public, you’ll have to change them back one by one.
Method 2: Make Photo Albums (and Single Photos) Private
Because most photos take their album’s audience, this is the most efficient manual step. One edit can change hundreds of photos. A step-by-step guide from HelpDeskGeek shows the same flow if you want a second reference.
On Mobile
- Go to your profile and tap Photos.
- Tap the Albums tab.
- Open the album you want to change.
- Tap the three dots, then Edit (or the audience icon).
- Choose Only me (or Friends or Specific friends).
- Tap Save or Done.
On Desktop
- Open your profile and click Photos, then Albums.
- Open the album and click the three dots in the top right.
- Click Edit album.
- Click the audience icon (it shows two people) and choose Only me.
- Click Save.
Quick Tip: The same steps work for creating a private album on Facebook. Create a new album, set its audience to Only me before uploading, and every photo you add will follow that setting.
How to Make a Single Photo Private
If a photo was posted on its own (not inside an album), you can change just that photo:
- Open the photo from your profile.
- Click or tap Options (or the three dots) in the corner.
- Choose Edit post audience (in the app it may say Edit post privacy).
- Select Only me or Friends, then save.
Why You Can’t Change One Photo
If a photo sits inside an album, Facebook usually lets you change only the whole album. Individual photo edits are mainly available in special albums, such as Profile pictures and Cover photos. Also, only the person who created an album can change its privacy, so you can’t lock down a shared album someone else made.
What to expect: Every photo in that album immediately follows the new audience, including photos that were visible on your timeline before.
Method 3: Archive Photos in Bulk With Manage Activity
If you want photos hidden from everyone, including friends, without deleting them, Manage Activity is the most powerful bulk tool. Facebook introduced it in June 2020, and it lets you select many posts at once, filtered by date range, content type, or the people involved.
How to Use It on Mobile
- Open the Facebook app and tap Menu, then your profile.
- Tap Options (or the three dots) below your profile picture.
- Tap Activity log, then Manage activity.
- Use Filters to narrow the list by category (such as Your posts, check-ins, photos and videos), date range, or people.
- Select the posts, photos, or videos you want to hide.
- Tap Archive.
Archive vs Trash vs Change Audience
| Option | What Happens | Can You Reverse It? |
|---|---|---|
| Archive | Hidden from other people but kept in your account | Yes; restoring returns it to its original audience |
| Trash | Removed after 30 days unless you restore or delete it sooner | Yes, within 30 days |
| Change audience | Updates who can see an item (in Activity Log, per item) | Yes, anytime |
Limitation: Facebook says Manage Activity works in the Android, iPhone, and Facebook Lite apps. Some guides describe web versions too, so use whichever options your account shows. Not every item is eligible, and Facebook may only list content it can archive or trash. It can’t erase likes, comments, searches, or login records in one go. See this iTechGuides walkthrough for the limits in detail.
Warning: If you restore an archived item, it returns to the audience it had before. Set the audience to Only me first if you plan to bring something back later.
Quick Tip: If you’re thinking about trashing photos, download a copy of your Facebook data first, since Trash permanently deletes items after 30 days. Only about 9% of users in Pew’s 2018 survey had ever downloaded their data, so many people skip this step.
What to expect: Archived photos disappear from your profile, Feed, and search for everyone else, but you can still open them from your Activity Log.
Method 4: Set a Private Default for Future Photos
Fixing the past doesn’t help if the next upload goes out Public.
- Open Settings & privacy, then Settings.
- Find the Posts settings (under Audience and visibility or Privacy).
- Next to Who can see your future posts, choose Friends or Only me.
You can also change the audience while creating a post by tapping the audience button under your name before you tap Post.
Quick Tip: If you’d rather not think about it, a Friends default is the safest everyday choice. Choose Only me if you mostly use Facebook as a private archive.
What to expect: This only affects future posts. Existing photos keep their current audience until you change them with Methods 1 to 3.
Method 5: Use Privacy Checkup for a Guided Review
Facebook’s Privacy Checkup walks you through the main settings in one place, which makes it a good last step.
- Go to Settings & privacy, then Privacy Checkup.
- Open Who can see what you share and review your profile information, posts, stories, and tagged content.
- Open How people can find you on Facebook to control who can find or contact you.
- Follow the prompts and save each change.
How to Make Photos Private on Android and iPhone (Quick Version)
The steps are nearly identical on both platforms, so use this as a quick reference for searches like how to make all photos private on Facebook mobile or using phone Android / iPhone:
- Menu → Settings & privacy → Settings → Posts → Limit past posts for old posts.
- Profile → Photos → Albums → [Album] → Edit → Only me for albums.
- Profile → Options → Activity log → Manage activity → Archive for bulk hiding.
- Settings → Posts → Who can see your future posts for new uploads.
Menu icons may sit in different corners depending on your device and app version (often top right on iPhone, and top right or bottom on Android), but the labels are the same.
Photos You Can’t Make Private
There are limits you should know about before spending an hour on settings.
- Your current profile picture and cover photo are always public. Facebook treats them as part of your public identity.
- Older profile pictures and cover photos can be changed. Open Photos → Albums → Profile pictures (or Cover photos), pick the photo, and change its audience.
- Your name and profile photo remain visible even when everything else is locked down.
- Photos other people post are controlled by them, not you.
- Photos you’re tagged in follow the post owner’s audience, so you can only manage the tag.
Quick Tip: If an old profile picture bothers you, set its audience to Only me or remove it. For the current one, your only option is to replace it with a photo you’re comfortable showing publicly.
How to Hide Photos You’re Tagged In
Photos you don’t own can still appear on your profile. To control this:
- Go to Settings & privacy → Settings.
- Open Profile and tagging.
- Turn on the option to review tags people add to your posts before they appear.
- Set Who can see posts you’re tagged in on your profile? to Only me (or Friends) to keep tagged photos off your profile for everyone else.
- Adjust who can see what others post on your profile.
To remove a tag from a specific photo, open it, tap the three dots, and choose the option to remove tag. This doesn’t delete the photo from the other person’s profile; it only removes the link to your account. The original post stays visible to its owner’s audience.
Quick Tip: If you tag someone in a post set to Only me, the audience doesn’t expand to include them, so tagging won’t accidentally expose a private photo.
How to Hide All Photos From Friends
If the goal is to hide photos from friends, not just the public, there are several options:
- Set the album audience to Only me.
- Use Friends except… to exclude particular people.
- Use Specific friends to share only with a chosen few.
- Use Custom options to exclude lists of people.
- Archive the photos with Manage Activity.
Check Your Work With “View As”
After making changes, preview your profile the way a stranger sees it.
- Open your profile.
- Click or tap the three dots beneath your name or cover photo.
- Choose View As.
- Browse your profile and photos, then tap Exit View As.
What to expect: You’ll see your profile as a public visitor does. Your current profile and cover photos will still appear, since they’re always public.
Stop Search Engines From Linking to Your Profile
Even a locked-down photo set doesn’t help if your profile appears in search results. Facebook has a setting for this:
- Open Settings & privacy → Settings → Privacy.
- Find How people find and contact you.
- Next to Do you want search engines outside of Facebook to link to your profile?, choose Edit and turn it off.
Note: Facebook warns this can take time to take effect. One guide reports it can take a few days, but there’s no guaranteed timeframe, and results already cached by search engines may linger. People can also still find you by searching your name inside Facebook.
What About Facebook Messenger?
Searches for how to make all photos private on Facebook Messenger are common, but Messenger photos work differently. They are messages, not posts, so the audience selector doesn’t apply.
Only the people in a chat can see a photo sent there. To take one back, remove it from the conversation or unsend it, depending on the options your app shows. Anyone who already saved the photo keeps their copy.
Lock Your Profile (If It’s Available)
Some users can use Lock profile, which limits what strangers see on your profile, including photos. It is only available in certain countries, so you may not see it in your settings. If it isn’t there, use the methods above.
Real-Life Examples
- The old album: You find a party album from years ago set to Public. Open Photos → Albums, edit the album, and set it to Only me. Done in about a minute.
- A hundred old photos: Run Limit Past Posts to cover everything Public, then use Manage Activity to archive the photos you want hidden even from friends.
- A fresh start after a job change: Set your default audience to Friends, archive old posts, and check View As to see what recruiters would see.
- A settings slip: After a bug or app update, new posts may not follow your chosen audience, as happened to up to 14 million users in 2018. A View As check every few months catches this.
Fix: Can’t Find the Privacy Option or It Won’t Change
Try these fixes if a setting is missing or won’t save:
- Update the Facebook app. Menus and labels change between versions.
- Check the album owner. If someone else created the album, you can’t change its privacy.
- Look under Albums, not individual photos. Many photos only offer an album-level audience.
- Try the mobile app for Manage Activity. Facebook says it works there.
- Check Activity Log filters. Manage Activity may hide items it can’t archive or trash.
- Use the desktop site for settings that are hard to find in the app.
- Log out and back in. This refreshes the interface for many people.
- Clear the cache (Android). Settings → Apps → Facebook → Storage → Clear cache.
- Wait and re-check. Search engine changes in particular can take days.
Privacy and Security Tips
Making photos private is only part of staying safe.
- Audit your backgrounds. Remove photos showing house numbers, license plates, school uniforms, or workplace badges.
- Limit other public details too. The 2021 leak included names, locations, birth dates, and in many cases phone numbers and email addresses. Facebook said the data came from public profile information plus a since-fixed contact-matching feature. Tighten your profile details and your photos together.
- Think about children’s photos. Share them with Specific friends, not your whole friends list.
- Review your friends list. Your photos are only as private as the people you share them with.
- Check “Allow others to share your posts to their stories.” Find it in your sharing settings and turn it off if you don’t want reshares.
- Turn on two-factor authentication. A hijacked account exposes every private photo.
- Back up first. Download your Facebook data before archiving or trashing anything important.
Common Mistakes to Avoid
- Assuming Limit Past Posts makes everything private. It only narrows to Friends.
- Forgetting the default audience, so new photos are Public again.
- Ignoring tagged photos. They can show on your profile even after you’ve cleaned up your own albums.
- Overlooking old profile and cover photos.
- Trusting third-party “one-click” tools. They may ask for your login.
- Trashing instead of archiving, then missing the 30-day window to restore.
- Never reviewing again. Check your settings every few months, especially after an app update.
A Practical Privacy Checklist
- Run Limit Past Posts to narrow old Public posts to Friends.
- Set sensitive albums to Only me under Photos → Albums.
- Use Manage Activity to archive photos you want hidden from everyone.
- Check the Profile pictures and Cover photos albums for old images.
- Set your default audience for future posts.
- Turn on tag review in Profile and tagging.
- Turn off search engine links to your profile.
- Run Privacy Checkup, then confirm with View As.
FAQs About Making Facebook Photos Private
How do I make all my photos private on Facebook?
Use Limit Past Posts for old posts, set each album to Only me, archive anything else with Manage Activity, and change your default audience for future uploads. There’s no single button for everything.
Is there a way to make all photos private on Facebook at once?
Not completely. Limit Past Posts is the closest bulk tool, but it sets posts to Friends, not Only me.
Can you mass private posts on Facebook?
Yes, but only to Friends, through Limit Past Posts. For Only me, edit albums or posts individually, or archive posts with Manage Activity.
How do I make a single photo private?
Open the photo, choose Options, select Edit post audience (or Edit post privacy in the app), and pick Only me. If the photo is in an album, you may need to change the album instead.
How do I hide pictures on Facebook without deleting them?
Set their audience to Only me, or archive them in Manage Activity. Either way the photos stay in your account and nobody else can see them.
Who can see my photos on Facebook?
It depends on each post or album’s audience: Public, Friends, Friends except, Specific friends, or Only me. Use View As to see what the public can see.
Can I make my profile picture private?
Not your current one. Your current profile picture and cover photo are always public, but you can change the audience of older ones.
Can I undo Limit Past Posts?
Not in one step. You’d have to restore each post’s audience yourself.
Does Limit Past Posts affect my Facebook Page?
No. It applies to your profile. Page posts follow their own audience rules.
Do archived photos return to their old audience?
Yes. If you restore an archived item, it goes back to the audience it had before you archived it.
How long do trashed photos stay recoverable?
30 days. After that, Facebook deletes them permanently, though you can delete them sooner yourself.
Can strangers still find me after I make my photos private?
They can still find your profile by searching your name on Facebook, and they’ll see your name and current profile picture. Turning off the search engine link setting stops outside search engines from listing it.
Can public photos really be collected by outsiders?
Yes. In 2021, data on about 533 million Facebook users was scraped from public profile information and posted online. Keeping photos and details non-public makes this harder.
How do I create a private album?
Create a new album, choose Only me as the audience, then upload your photos.
How do I make my Facebook profile private?
Combine the steps above and, if available in your country, use Lock profile. A security.org guide covers the wider settings too.
How do I make photos private on Facebook Messenger?
Messenger photos aren’t posts, so there’s no audience setting. Remove or unsend the photos you don’t want in a chat.
Official Sources and Further Reading
For the latest wording and steps, check the Facebook Help Center pages for Limit Past Posts, changing the audience of photos and albums, Manage Activity, Privacy Checkup, and profile lock. Facebook updates these regularly, so they’re the best place to confirm menu names before you follow a guide.
The statistics in this article come from Meta’s Q2 2026 earnings results (family daily active people), the Pew Research Center’s 2018 survey on Americans and Facebook, and Facebook’s April 2021 statement on the scraped-data incident, as reported by outlets including Reuters.
Conclusion: Take Control of Your Photos
Making all your photos private on Facebook isn’t a single click, but it doesn’t take long once you know the order: limit your past posts, lock down your albums, archive what you want hidden, and set a safe default for the future. Then handle the exceptions, such as old profile pictures, cover photos, and photos you’re tagged in.
Final Tip: Review your photo privacy every few months. Settings and menu names change, and a quick check with View As keeps your photos in front of only the people you chose.
Visit Our Post Page: Blog Page
Discover more from Izoate
Subscribe to get the latest posts sent to your email.