
Find all 3 Gold Bar recipes in Crimson Desert, unlock the Witch formula, farm Gold Ore and alchemy materials, and get the best value at a Bank.
Gold Bars are valuable items in Crimson Desert, whether you’re building up your Silver reserves, preparing for advanced crafting or looking for another way to make money. The part that tends to cause confusion isn’t the crafting itself. It’s knowing which recipe uses which materials, where to unlock the required formula, and which NPC offers the correct service.
There are 3 ways to make Gold Bars in Crimson Desert. The first Witchcraft recipe combines 3 Gold Ore and 1 Golden Apple. The second uses 3 Brimstone, 3 Mercury, and 10 Silver Ore. If you’d rather avoid those combinations, a Blacksmith can convert 100 Gold Ore into 1 Gold Bar.
The two Witchcraft recipes require the Alchemy Formula: Gold Bar. The Blacksmith conversion is a separate crafting option, so learning the formula won’t automatically unlock every method. You can compare the ingredient requirements in the Crimson Desert Gold Bar crafting database.
You also have alternatives when crafting isn’t practical. A ready-made Gold Bar can be found at Lioncrest Manor, while wealthy nobles around Demeniss Wildlife Park are potential pickpocketing targets. These routes are particularly useful early in the game, when specialist alchemy materials and crafting services may take longer to unlock than finding a finished bar.
The best method comes down to your current progression and inventory. If you’ve discovered Anvil Hill and can collect Golden Apples, the first Witch recipe uses very little Gold Ore. If you’ve already gathered Brimstone, Mercury, and Silver Ore, the second combination gives you another route. And when you’ve built up a large supply of Gold Ore, the Blacksmith’s conversion provides a straightforward alternative.
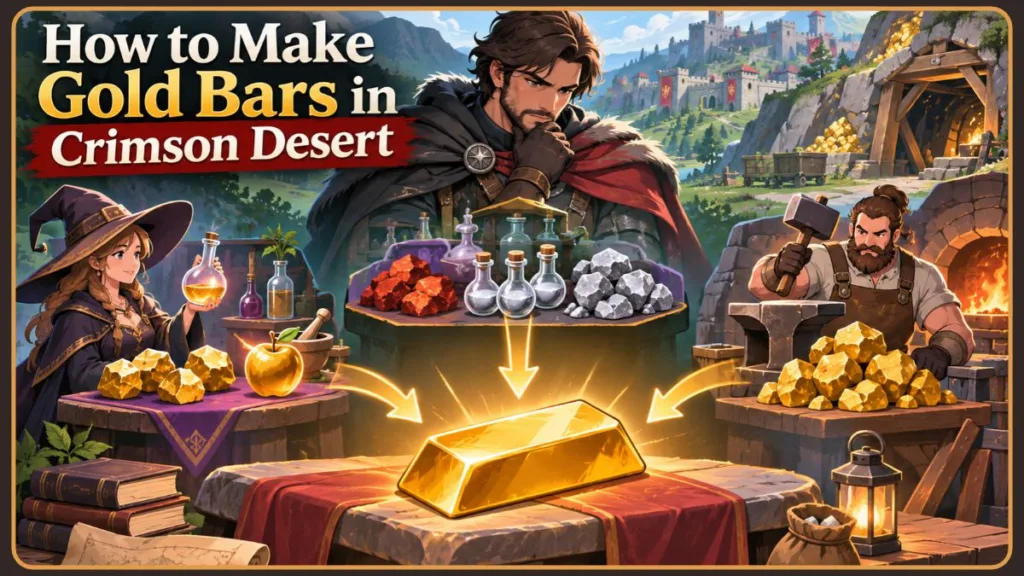
Don’t worry — you don’t need to unlock every method before making your first Gold Bar. Once you understand the three recipes, the formula requirements and the available material locations, you can choose the method that makes the most sense for your current stage of the game.
Let’s start with the crafting requirements. Knowing exactly what each recipe consumes will save you from farming ingredients you don’t actually need.
Which Three Gold Bar Recipes Can You Craft in Crimson Desert?
Crimson Desert has 3 documented Gold Bar crafting combinations. Two are handled through Witchcraft, while the remaining option belongs to a Blacksmith. Although all three methods produce one Gold Bar, their ingredient requirements are very different.
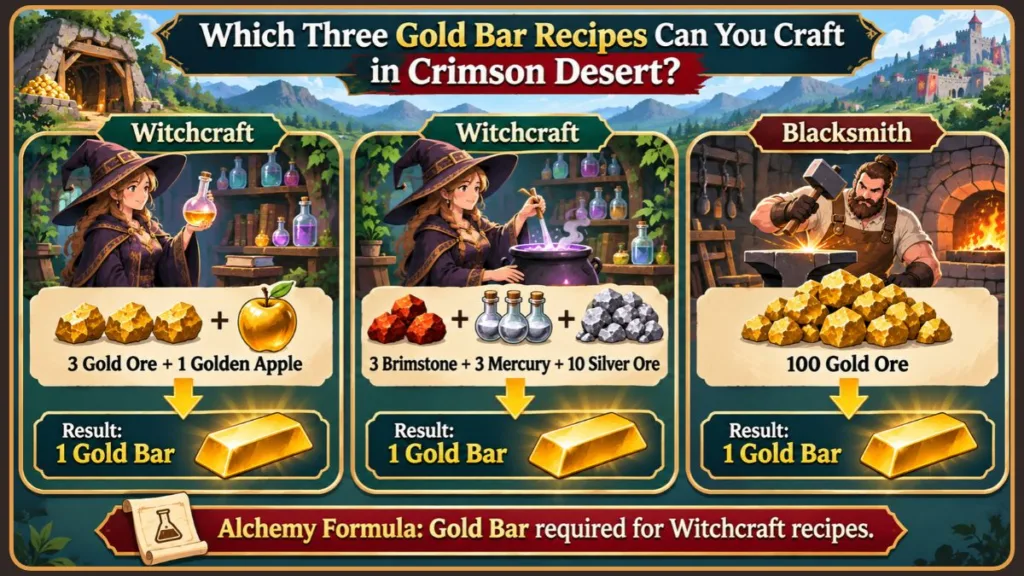
Here’s the breakdown:
| Crafting Method | Required Materials | Crafting Station |
|---|---|---|
| Witch Recipe 1 | 3 Gold Ore + 1 Golden Apple | Witch |
| Witch Recipe 2 | 3 Brimstone + 3 Mercury + 10 Silver Ore | Witch |
| Blacksmith Recipe | 100 Gold Ore | Blacksmith |
Each combination produces 1 Gold Bar.
The first Witch recipe is the lightest option in terms of Gold Ore, but it depends on finding a Golden Apple. The second recipe doesn’t consume Gold Ore at all, although you’ll need three different materials. The Blacksmith method is easier to understand because it uses only one ingredient, but 100 Gold Ore is a substantial amount to commit to a single bar.
That difference becomes important when you start farming. Spending 100 Gold Ore at a Blacksmith isn’t particularly attractive when you already have the materials for the Golden Apple recipe. On the other hand, if Golden Apple Hedgehogs aren’t appearing around your preferred locations, the Blacksmith conversion might save you time.
There’s also a progression difference to keep in mind. You must learn the Alchemy Formula: Gold Bar before using the two Witchcraft combinations. The Blacksmith’s 100-Ore conversion is separate, so check its crafting menu independently rather than assuming it depends on the same formula.
How Much Gold Ore and How Many Other Materials Do You Need for Multiple Gold Bars?
Before heading out to mine or collect alchemy materials, decide how many Gold Bars you actually need. The ingredient requirements scale with each additional bar, so preparing everything in one trip is usually more convenient than returning to the same locations repeatedly.
| Number of Gold Bars | Gold Ore + Golden Apple | Brimstone Recipe | Blacksmith |
|---|---|---|---|
| 1 | 3 Gold Ore + 1 Apple | 3 Brimstone + 3 Mercury + 10 Silver Ore | 100 Gold Ore |
| 2 | 6 Gold Ore + 2 Apples | 6 Brimstone + 6 Mercury + 20 Silver Ore | 200 Gold Ore |
| 3 | 9 Gold Ore + 3 Apples | 9 Brimstone + 9 Mercury + 30 Silver Ore | 300 Gold Ore |
| 5 | 15 Gold Ore + 5 Apples | 15 Brimstone + 15 Mercury + 50 Silver Ore | 500 Gold Ore |
The difference becomes particularly noticeable when you’re making several bars. Five Gold Bars through the first Witch recipe require 15 Gold Ore and 5 Golden Apples. The Blacksmith needs 500 Gold Ore for exactly the same result.
That doesn’t automatically make Golden Apples the better choice. Golden Apple Hedgehogs have a reduced spawn rate following a recent update, so collecting five fruits may take longer than the recipe’s small Gold Ore requirement initially suggests. If you’ve already stocked up on Brimstone and Mercury, the second Witch recipe may be the more convenient option.
Pro Tip: Check your storage before starting a Gold Bar farming session. Gold Ore, Mercury and Brimstone also have other crafting uses, so don’t spend your entire supply on Gold Bars without checking your equipment and research requirements.
Do You Need the Gold Bar Alchemy Formula for the 100-Ore Blacksmith Recipe?
No. The Blacksmith conversion and the two Witchcraft combinations are separate options.
The Alchemy Formula: Gold Bar unlocks the Witch recipes. The 100-Gold-Ore conversion is a different crafting option that you need to check through the Blacksmith’s services.
This distinction explains a common crafting problem. One player had collected 46 Gold Ore but couldn’t find an option to turn it into a Gold Bar at the Witch. The missing option wasn’t necessarily caused by insufficient materials or an unlearned formula. The 100-Ore conversion belonged to the Blacksmith instead.
So, if the Witch only displays the two alchemy combinations, there’s no reason to keep looking for another Gold Bar formula. Visit a suitable Blacksmith and check its available crafting services.
The original discussion about where to make Gold Bars covers this distinction and the confusion surrounding the two crafting stations.
Where Are the Gold Bar Formula and Blueprint Hidden in Crimson Desert?
The Alchemy Formula: Gold Bar unlocks the two Witchcraft recipes. There are two documented locations where you can obtain it:
- Spire of Insight in Demeniss.
- A hidden Witch’s Hideout south of Pailune.
You only need one copy because both locations provide the same formula. There’s no reason to complete both routes solely for Gold Bar crafting.
The Spire of Insight is the more involved option. Reaching the relevant bookshelf means working through several object-placement puzzles, so it’s worth allowing time to explore the tower properly. The Pailune Witch’s Hideout is a useful alternative when your immediate goal is unlocking the recipe and returning to material collection.
For additional location details, see the Gold Bar Alchemy Formula database.
Where Is the Gold Bar Formula on the Spire of Insight’s Upper Floor?
The formula is on a bookshelf in the upper section of the Spire of Insight, near the Celestial object.
The tower can be awkward to navigate if you concentrate only on reaching the next puzzle. You’ll first need to clear its entrance, then work through the object-placement challenges on the lower floors before reaching the bookshelf.
Here’s the route.
Open your world map and locate the Spire of Insight in Demeniss. Travel to the tower and approach its entrance. You’ll find thorny brambles blocking the way, so use Blinding Flash with Focus Light to burn them away. Once the entrance is clear, deal with the bandits guarding the area.
Next, find the required object for the first puzzle and place it in the golden pot. Continue through the tower, solving the object-placement puzzles on the following floors as you go.
When you reach the upper section containing the Celestial object, inspect the bookshelf beside it. Interact with the book or scroll containing the Alchemy Formula: Gold Bar, then collect the formula before leaving.
One detail worth watching is the distinction between the tower’s main objective and the formula itself. Completing the Spire’s main progression doesn’t simply hand you the document. It’s a separate collectible on a nearby bookshelf, so inspect the surrounding area before moving towards the next puzzle.
Important: You don’t need to finish the entire Spire just to collect the Gold Bar formula. The document is an exploration pickup. You can return later to complete the remaining puzzles and unlock the Abyss fast-travel point at the top.
How Do You Reach the Gold Bar Formula Through the Spire of Insight Puzzles?
The Spire’s puzzles use illustrations shown on book pages. You’ll need to find the objects that correspond to those illustrations and place them in the appropriate golden pots.
The reported progression starts at the Entrance. Burn away the brambles, clear the bandits and complete the entrance pot puzzle before moving further inside.
On the Ground floor, locate the gravestone and place it in the central pot. Once that puzzle is complete, continue to the First floor, where you’ll need to find the telescope and pen tip and use them to complete the relevant puzzle.
The Upper section is where you’ll collect the Gold Bar formula. Look for the bookshelf beside the Celestial object and pick up the document before continuing.
After that, you can proceed to the Top of the tower and complete the remaining puzzle sequence to unlock the Abyss fast-travel point.
The easiest mistake here is rushing between the golden pots without checking the room properly. Some required objects are easy to overlook when you’re concentrating on the illustrations. If you’re visiting the Spire specifically for the formula, collect it as soon as you reach the correct bookshelf. There’s no need to finish every remaining objective before adding it to your inventory.
Can You Get the Gold Bar Formula From the Pailune Witch’s Hideout Instead?
Yes. You can avoid the Spire’s puzzles by visiting the Witch’s Hideout south of Pailune. This hidden location contains another copy of the Alchemy Formula: Gold Bar.
The entrance is tucked into a cliff, which makes it easy to overlook when travelling along the main road. Start by making sure you’ve liberated Pailune and unlocked its Abyss Nexus. Fast-travel to the Pailune city Abyss Nexus, mount your horse and follow the main road south towards the city gate.
Continue past the main gate exit and watch the right-hand side of the road for fallen logs near a small cliff. When you spot them, ride up the slope towards the cliff and look for the stone stairs leading down into the rock face.
Follow those stairs inside the cave and turn right immediately after entering. Search the bookshelf behind the other books on the right-hand wall. Once you’ve located the document, collect the Alchemy Formula: Gold Bar.
The hideout has a little more to offer than the formula itself. You can also find a Tea Recipe and several alchemy flowers, making the detour worthwhile when you’re already gathering crafting materials.
There is another community-reported location description involving a house in a lumber village around Silver Wolf Mountain. However, that description is less consistently corroborated than the Spire and Pailune hideout locations. I’d prioritise those two documented routes rather than spending time searching for an uncertain third copy.
Pro Tip: When your immediate objective is unlocking Gold Bar crafting, check the Pailune hideout before committing to the Spire puzzles. You can always return to the tower later for its remaining rewards.
How Do You Register the Gold Bar Formula With Your Lantern?
Finding the document and registering its knowledge are two separate actions. Simply collecting the scroll doesn’t necessarily unlock the crafting recipe. You must examine it using your Lantern.
Open your inventory and locate the Alchemy Formula: Gold Bar document. Equip the formula, then activate your Lantern and shine it towards the glowing blue text on the document. Complete the interaction to register the knowledge.
Afterwards, open your Knowledge menu and check that the formula has been registered. Once learned, the recipe remains available through the appropriate Witchcraft menu, so you don’t need to carry the physical document around.
Don’t worry — if you’ve picked up the scroll but the Gold Bar recipe isn’t appearing, check the Knowledge menu before travelling to another formula location. You might simply have missed the final Lantern interaction.
Learned the Gold Bar Formula but Can’t Craft? Check These Things
Before retracing your route through the Spire or searching another hideout, check the crafting setup itself. The formula is only one part of the process.
Start with your Knowledge menu and confirm that the Alchemy Formula: Gold Bar is registered. Next, check your crafting station to make sure you’re interacting with a Witch who offers the appropriate services.
If the option is still missing, consider NPC availability. An apprentice Witch might have a more limited menu, so try another suitable Witch. Then inspect the crafting category and look in the Special Items section rather than ordinary alchemy or cooking.
Finally, remember the Blacksmith conversion. The 100-Gold-Ore method is separate from Witchcraft, so check a Blacksmith if that’s the recipe you’re trying to use.
The distinction between the Witch and Blacksmith menus is especially important. Having the correct formula doesn’t mean every NPC will display every Gold Bar crafting option.
How Do You Find the Right Witch and Craft Gold Bars in Crimson Desert?
Once you’ve learned the formula, the next job is finding a Witch with the appropriate crafting service. Gold Bar recipes are listed under the Witch’s special crafting options, so don’t assume the recipe will appear when you interact with an ordinary cauldron.
The menu path to remember is:
Craft Abyss Gear → Special Items → Gold Bar
Start by travelling to a Witch who provides the required services and interacting directly with the NPC. Select Craft Abyss Gear, then navigate to the Special Items category.
Find the Gold Bar crafting option and select the recipe that matches your available ingredients. Before confirming, check the material requirements carefully so you don’t select the wrong combination. Once everything is correct, confirm the crafting process.
You’ll receive one Gold Bar after the ingredients are consumed. Both Witch recipes appear as separate combinations, so pay attention to the ingredient icons, particularly when you’re carrying several types of minerals and alchemy materials.
Where Can You Find a Witch Who Offers Gold Bar Crafting?
Not every Witch necessarily offers the same services. This is one reason the Gold Bar process can be confusing: you might have the formula, enough ingredients and a Witch standing directly in front of you, yet the required option still isn’t available.
Community reports identify the Witch of Wisdom as an option after progressing through the main story, with some reports placing access around Chapter 5. However, completing every Witch Sanctum mission isn’t established as a universal requirement. Other reports describe access to Gold Bar crafting without completing those missions.
The most useful check is the Witch’s interaction menu, not an assumption that a particular quest must be finished. Look for Craft Abyss Gear, check whether you can move horizontally through the crafting categories, and open the Special Items tab. The Gold Bar crafting entry should be the option you’re looking for.
The Witch in Witches’ Woods, slightly southwest of Greymane Camp, is another location specifically recommended in the community’s location reports. One player initially couldn’t find the crafting option because the first NPC they approached was an apprentice. After visiting another Witch, the expected service became available.
If you’re already near camp, Witches’ Woods is a convenient place to check before travelling across Pywel. The original Where Do I Make Gold Bars? discussion includes this location recommendation.
How Can You Tell a Proper Witch From an Apprentice?
An apprentice Witch may have a limited selection of services, so don’t assume the first Witch you encounter will provide the complete crafting menu.
One account places access to a proper Witch around Chapter 5, while another identifies the Witch of Wisdom as the relevant story progression milestone. These observations point to story progression and NPC availability as factors worth checking, but they don’t establish a universal requirement for every Witchcraft service.
When you meet a new Witch, inspect the interaction options carefully. Look for Craft Abyss Gear and see whether you can navigate to Special Items. If those options aren’t available, continue the main story and revisit the Witchcraft locations later.
Do You Need to Complete Witch Sanctum Missions Before Crafting Gold Bars?
Not necessarily. This is one area where community accounts don’t agree.
One account initially suggested completing Witch Sanctum missions before attempting Gold Bar crafting. Another specifically reported accessing Gold Bars without completing a single Sanctum. That makes it difficult to treat Sanctum completion as a universal requirement.
The more useful checks are whether you’ve learned the formula and whether the Witch you’re visiting offers the appropriate crafting service. If the option is missing, check story progression and NPC availability before spending time fighting difficult Sanctum bosses solely for Gold Bar crafting.
Why Doesn’t the Ordinary Alchemy Cauldron Show Gold Bar Crafting?
The Gold Bar formula belongs to the Witchcraft special-item crafting system, which is different from ordinary alchemy and cooking interactions. If you’re only seeing conventional alchemy options, interact directly with the Witch and open the appropriate crafting service.
There is also a community-reported alternative worth checking. One contributor claims that the Brimstone, Mercury and Silver Ore combination can be performed at an ordinary Alchemy Cauldron without first learning the formula. The reported location is an abandoned Alchemy shop in Hernand.
To find the cauldron, travel to the abandoned Alchemy shop in Hernand and locate the grinding wheel inside or near the workshop. Stand facing the grinding wheel and check the opposite side of the building to the east. Along the southern side of the street, look for the cauldron.
Once you’ve found it, interact with the cauldron and check whether the required combination is available.
This is a useful workaround to investigate if the ordinary ingredient-combination interaction is available in your game version. However, it isn’t as consistently documented as the Witch’s Special Items menu. Other community reports specifically recommend visiting a Witch, and cauldrons attached to cooking stoves weren’t confirmed by the original contributor.
Important: Use the Witchcraft menu as your primary method. Treat the abandoned Hernand Alchemy shop as a community-reported alternative rather than assuming every cauldron can craft Gold Bars.
The original discussion about where to make Gold Bars contains the reported cauldron location.
How Do You Craft a Gold Bar With 3 Gold Ore and a Golden Apple?
The first Witch recipe is particularly useful when you’ve already discovered a Gold Mine and can obtain Golden Apples.
You’ll need:
| Material | Quantity |
|---|---|
| Gold Ore | 3 |
| Golden Apple | 1 |
| Result | 1 Gold Bar |
The crafting process is straightforward. Start by collecting 3 Gold Ore, then obtain 1 Golden Apple. With both ingredients ready, visit a suitable Witch and select Craft Abyss Gear.
Open the Special Items category and select the Gold Bar recipe requiring Gold Ore and Golden Apple. Check that you’ve chosen the correct combination, then confirm the crafting process. You’ll receive one Gold Bar.
The main advantage is the low Gold Ore requirement. Instead of spending 100 Gold Ore at a Blacksmith, you’re using just three pieces. For five Gold Bars, that’s the difference between 15 Gold Ore and 500 Gold Ore.
The catch is the Golden Apple. These fruits are carried by special hedgehogs, and finding enough of them can take time. The first Gold Bar crafting discussion specifically highlights Golden Apples as an ingredient for this Witch recipe. It’s worth remembering because the second Witch recipe doesn’t require them at all.
For additional collection details, see the Golden Apple Hedgehog farming guide.
When Is the Gold Ore and Golden Apple Recipe the Better Choice?
I’d prioritise this recipe when:
- You already have several Golden Apples.
- You’ve found a reliable hedgehog farming location.
- You want to preserve Gold Ore for jewelry refinement.
- You haven’t collected enough Brimstone or Mercury for the alternative Witch recipe.
If Golden Apple Hedgehogs aren’t appearing, don’t spend the entire session waiting at one field. Rotate between known locations or collect the ingredients for the second Witch recipe.
How Do You Craft a Gold Bar From Brimstone, Mercury and Silver Ore?
The second Witch recipe is a useful alternative when you don’t want to depend on Golden Apple Hedgehogs.
It requires:
| Material | Quantity |
|---|---|
| Brimstone | 3 |
| Mercury | 3 |
| Silver Ore | 10 |
| Result | 1 Gold Bar |
Start by collecting 3 Brimstone and obtaining 3 Mercury. Next, mine or purchase enough Silver Ore to reach 10 units.
Travel to a suitable Witch and open Craft Abyss Gear. Select the Special Items category, then find the Gold Bar recipe using Brimstone, Mercury and Silver Ore. Once you’ve checked the required materials, confirm the crafting process.
The result is one Gold Bar.
This combination gives several specialised materials another purpose. Brimstone and Mercury aren’t limited to unrelated alchemy projects, and Silver Ore can be collected in reasonably useful quantities from certain hidden caves.
If you’re already exploring the volcanic regions or working through Delesyia’s research, this recipe can be more convenient than repeatedly checking for Golden Apple Hedgehogs.
When Does the Brimstone Recipe Save You More Time?
Choose this method when those materials are already available in your storage.
For example, if you’ve been collecting Brimstone around Hexe Sanctuary and have unlocked Liquid Mercury extraction, you might already have most of the requirements. The recipe is also useful when Golden Apple Hedgehogs are proving difficult to find.
There’s one thing to check before committing to it: your remaining Mercury supply. Mercury is needed for other advanced crafting and research projects, and it’s not always quick to replace, particularly before unlocking Liquid Mercury collection.
Another reported source is the scholar orcs at Scholastone. Gifting them Hides can increase Trust and potentially reward Brimstone, Mercury or Rubber. We’ll cover that method in the material-farming sections below.
How Do You Turn 100 Gold Ore Into a Gold Bar at a Blacksmith?
Witchcraft isn’t the only way to produce Gold Bars. A Blacksmith can also convert Gold Ore directly into a finished bar.
The recipe is:
| Material | Quantity |
|---|---|
| Gold Ore | 100 |
| Result | 1 Gold Bar |
Start by collecting 100 Gold Ore, then travel to a Blacksmith and interact with the NPC. Open the available crafting options and find the Gold Bar recipe.
Before confirming, check that the required amount of Gold Ore is available. Once you’ve verified the materials, confirm the crafting process and collect your finished Gold Bar.
The obvious advantage is that you don’t need Golden Apples, Brimstone, Mercury or Silver Ore. The disadvantage is the quantity of Gold Ore involved. One hundred pieces take considerably longer to collect than the three required by the Golden Apple Witch recipe.
Why Does the Greymane Camp Blacksmith Work When Hernand’s Doesn’t?
If the recipe isn’t appearing at the Hernand Blacksmith, try the Blacksmith at Greymane Camp. This is a useful workaround reported by someone who had already obtained the Gold Bar formula from the Spire of Insight and collected plenty of Gold Ore, but couldn’t find the expected option at the Hernand smithy.
The suggested solution was to use the Blacksmith at the player’s camp instead.
The distinction matters because the Blacksmith conversion is separate from Witchcraft progression. Check the services offered by another suitable Blacksmith before assuming the recipe is permanently unavailable.
The original Blacksmith crafting discussion includes the player-reported workaround.
When Is the 100-Gold-Ore Blacksmith Conversion Worth It?
It depends on your current Gold Ore supply. The conversion is convenient because it uses just one ingredient, but 100 Gold Ore is a considerable investment.
| Gold Bars | Gold Ore Required |
|---|---|
| 1 | 100 |
| 2 | 200 |
| 3 | 300 |
| 5 | 500 |
If you’re still collecting Gold Ore for equipment upgrades, the Witch recipe is generally a better way to conserve it. The Blacksmith becomes more attractive when you’ve discovered several Gold Mines and don’t want to depend on rare alchemy ingredients.
It also avoids the need to wait for Golden Apple Hedgehogs or collect Mercury from specialised sources.
Where Can You Farm Every Material for Gold Bar Crafting?
The crafting itself isn’t the difficult part. The time-consuming work is gathering the right ingredients, especially when your chosen recipe needs a rare fruit or specialised alchemy material.
Depending on your method, you’ll need Gold Ore, Golden Apples, Brimstone, Mercury or Silver Ore. Some materials are available through ordinary exploration, while others require research, specialist equipment or particular enemy drops. Before travelling, check your inventory and identify exactly what’s missing.
| Material | Main Collection Method |
|---|---|
| Gold Ore | Mining Gold Mines and caves |
| Golden Apple | Collecting from Golden Apple Hedgehogs |
| Brimstone | Farming Brimstone Springs or suitable enemies |
| Mercury | Enemy drops, rewards or frozen Mercury pools |
| Silver Ore | Mining cave deposits |
Where Is the Anvil Hill Gold Mine and How Much Gold Ore Does It Yield?
Gold Ore is an uncommon mineral found in hidden Gold Mines throughout Pywel. For an early mining trip, Anvil Hill Cave in Demeniss is worth visiting.
The entrance sits at the bottom of a canyon in southwestern Demeniss. Look slightly east of the Gold Ore map marker for a large golden boulder blocking the passage.
Here’s how to reach the deposits.
Travel to Anvil Hill in Demeniss and search the bottom of the nearby canyon. When you find the large golden boulder, use Force Palm to break the obstruction.
Enter the cave and examine the gold-coloured mineral deposits. Use a Pickaxe or an appropriate mining ability to break them, then collect the Gold Ore from the surrounding deposits.
Anvil Hill reportedly provides approximately 15–20 Gold Ore per visit, making it a useful early-game location. Don’t leave after collecting from the first deposit. Explore the entire cave because several mineral nodes can be found deeper inside.
Anvil Hill is also recommended as a place to gather ore for the 100-Gold-Ore Blacksmith method. For further mining information, see the Gold Ore location database and the Crimson Desert Gold Ore item database.
When Do Anvil Hill and Other Gold Mines Restock?
Yes. Community reports indicate that Anvil Hill’s ore deposits and stalactites can respawn. One estimate places the wait at approximately 3–4 in-game days.
Other mining guides report longer intervals, including around 7 in-game days for certain deposits. Treat these as location- and version-dependent observations rather than a guaranteed timer for every mine.
The practical approach is to rotate between discovered Gold Mines instead of repeatedly checking an empty cave. Collect the available Gold Ore at Anvil Hill first, then visit another discovered Gold Mine. You can use the time to complete a quest or explore another region before returning.
After several in-game days, check whether Anvil Hill has replenished. This rotation makes Gold Ore farming less frustrating than repeatedly returning to a cave that hasn’t restocked.
See the original Anvil Hill Gold Ore farming discussion for the reported respawn observations.
How Do You Unlock the Gold Vein Map in Crimson Desert?
You won’t necessarily see every Gold Mine immediately on your world map. To reveal additional locations, you can obtain the Gold Vein Map by defeating the Marni Excavatron at Karin Quarry.
Karin Quarry is north of Rocca’s Hill in the Hernand region. Travel there and locate the Marni Excavatron. Before engaging the boss, prepare your healing items and combat equipment.
Once you’re ready, defeat the Marni Excavatron and collect the Gold Vein Map. Use the map from your inventory, then open the world map and inspect the newly revealed Gold Mine locations.
The map reportedly reveals approximately 10 Gold Mine cave entrances throughout Pywel. This is a worthwhile unlock if you intend to craft several Gold Bars through the Blacksmith or want to build a reserve of Gold Ore for equipment refinement.
Can You Reveal Gold Mines Without Fighting the Marni Excavatron?
Yes. There’s another option through the Gold Vein Research project at Urdavah Palace.
According to the current Gold Ore location database, this research costs 130 Silver and takes approximately 8 in-game hours. Once the research finishes, the Gold Mine locations are revealed on your map.
This gives you a choice between defeating the Marni Excavatron and spending Silver on research. If you’re already comfortable fighting the boss, collecting the map directly is an option. Otherwise, the research route provides an alternative.
Which Gold Mines Should You Add to Your Pywel Mining Route?
Once the Gold Vein Map or research has revealed additional locations, you can start rotating between several caves.
The documented locations include:
| Gold Mine | Region |
|---|---|
| Anvil Hill Cave | Demeniss |
| Mistshard Cave | Deadfire Mountain, Demeniss |
| Second Finger Cave | Five-Finger Mountain, Pailune |
| Silver Wolf Cave | Wayward Woods, Pailune |
| Sandpeak Gold Mines | Tashkalp |
| Cliffside Gold Mine | Crimson Mountain |
| Desert Lake Gold Mine | Varnia |
The Ironwood Gold Mine is another useful location because an Abyss Nexus sits close to the entrance. A Diamond Mine is also nearby, making it possible to collect two valuable resources during the same trip.
You don’t need to visit every mine in one session. Choose the locations closest to your current route and return to the others when your supply runs low.
How Long Does Gold Ore Take to Respawn in Crimson Desert?
Approximately 7 in-game days is a commonly reported respawn estimate for certain locations, including Ironwood. Anvil Hill discussions mention shorter estimates of around 3–4 in-game days.
Because these observations aren’t entirely consistent, don’t rely on one exact timer for every deposit. Rotating between several caves is the more practical solution.
Which Pickaxe or Mining Tool Makes Gold Ore Farming Easier?
A regular Pickaxe is enough to collect Gold Ore. You can purchase one from a Provisioner’s Shop in Hernand.
There are also upgraded mining options worth considering:
- Mining Knuckledrill: A specialised mining tool with a reported chance to produce additional minerals.
- Bernor’s Pickaxe: An upgraded tool option for improving your mining setup.
- Force Palm: Useful for breaking large boulders blocking certain mining passages and destroying some mineral deposits.
If you’re only collecting three Gold Ore for the Witch recipe, a regular Pickaxe is perfectly adequate. For repeated mining sessions, better equipment can make resource collection more convenient.
Should You Save Gold Ore for Jewelry Refinement Instead of Gold Bars?
Don’t treat every piece of Gold Ore as material reserved exclusively for Gold Bar production. Gold Ore also has a use in jewelry refinement at a Blacksmith.
Eligible equipment includes:
- Rings.
- Necklaces.
- Other accessories.
Higher refinement tiers may require Gold Ore alongside additional materials. If you’re still upgrading your equipment, keep some ore available instead of converting everything into Gold Bars.
Where Can You Find Golden Apples in Crimson Desert?
Golden Apples are required for the Witch recipe using 3 Gold Ore and 1 Golden Apple. Unlike ordinary apples, these aren’t collected from regular trees. They’re carried by special hedgehogs found in grassy areas throughout Pywel.
Look for a small glowing apple on the hedgehog’s back. Once you’ve found one, knock the fruit loose and collect it from the ground.
Three reported locations are particularly useful:
- Grey Rock Dock: Search around the river between Demeniss and Hernand.
- Tinkerton Fields: Explore the white-flower patches just north of Tinkerton in Delesyia.
- Tariv: Check the terraced flax and cotton fields in northern Demeniss.
The important detail is recognising the correct hedgehog. Ordinary hedgehogs won’t provide the Golden Apple you’re after. For additional collection details, see the Golden Apple Hedgehog farming guide and the Crimson Desert Golden Apple item database.
How Do You Knock a Golden Apple Off a Hedgehog?
You don’t need to defeat a Golden Apple Hedgehog. The objective is simply to knock the fruit off its back.
Approach the hedgehog and identify the glowing apple. Use Blinding Flash to hit the animal. Alternatively, use an arrow to knock the apple loose.
Watch where the apple lands, then approach the dropped fruit and select Take to collect it. The fruit can land close to the hedgehog or slightly underneath it, so check the ground carefully.
Important: Patch 2.04.00, released on October 29, 2026, officially reduced the spawn rate of Golden Apple Hedgehogs. Older farming routes may therefore produce fewer apples per visit than before the update. Check the official Pearl Abyss patch notes for the update information.
How Can You Improve Your Chances of Finding Golden Apple Hedgehogs?
Golden Apple Hedgehogs share their general spawn areas with other small animals. You might encounter rats, weasels, lizards and ordinary hedgehogs before finding one carrying a Golden Apple.
Rather than waiting at one location, move through the field and check the animals appearing along your route. Start by entering a known Golden Apple farming location and run from one side of the field to the other, checking the small animals that appear along the way.
Collect any Golden Apple you find, then leave the immediate area. Return and check for another group of animals, repeating the process until you’ve collected what you need.
If one location isn’t producing results, move to another. For example, check Grey Rock Dock before travelling to Tinkerton or Tariv. The reduced spawn rate makes rotating between locations particularly useful.
Do You Need a Mask to Pick Up Golden Apples?
Older community farming tips sometimes recommend wearing a mask because collecting dropped Golden Apples could be associated with stealing interactions. However, more recent reports suggest that picking up a Golden Apple from the ground doesn’t always trigger the same detection response.
Check the actual interaction prompt and crime indicator in your current game version. If the game treats the action as theft, equip a mask and leave the detection area before continuing.
Where Can You Find Brimstone in Crimson Desert?
Brimstone is required for the second Witch recipe, which combines 3 Brimstone, 3 Mercury and 10 Silver Ore.
One useful farming area is Brimstone Springs, around Hexe Sanctuary and the Crow Circle. You can also obtain Brimstone from suitable enemies in the surrounding volcanic and sulphur-rich terrain.
Which Enemies Drop Brimstone Near Hexe Sanctuary?
Several community reports identify enemies around Brimstone Spring as a source of Brimstone drops.
The farming process is straightforward. Travel towards Hexe Sanctuary and explore the surrounding Brimstone Spring area. Locate enemies around the sulphur vents and nearby terrain, then defeat them and collect their drops.
Repeat until you have at least 3 Brimstone. Stone crab enemies around Brimstone Lake Watchtower are another reported source worth checking.
Drop rates can vary, so don’t expect every enemy to provide Brimstone. The first discussion about Brimstone farming and Gold Bar crafting specifically recommends searching around Hexe Sanctuary, in the mountains near the Crow Circle. That gives you a useful landmark when navigating towards the farming area.
How Do You Collect Brimstone From Brimstone Springs?
Brimstone Springs also have environmental collection opportunities. Some farming instructions describe using Healing Force Palm and Nature’s Snare to collect material from the vents.
The reported method starts at the Brimstone Springs in the Smoking Lands, east of Tariv in northern Demeniss. Locate the active sulphur vents and use Healing Force Palm to close the individual vents, aiming carefully at the white target points.
Check that the closed vents show a green glow. Make sure you leave one vent open, as the collection method relies on having an active vent available.
Next, activate Nature’s Snare and direct it towards the remaining vent. Allow the Brimstone gas to gather, then wait for a golden sphere to form.
Once the sphere appears, cancel Nature’s Snare and collect the resulting material. Check around the vent after the process finishes because collected resources may scatter.
Pro Tip: Don’t close every vent before using Nature’s Snare. The reported method relies on leaving one active so you can collect the concentrated Brimstone.
Which Protection Do You Need Before Farming Brimstone Springs?
The fumes around Brimstone Springs can create an environmental hazard. A Demenissian Soldier’s Brimstone Gas Mask is recommended for spending extended periods in the area.
Equip suitable protection before starting a longer farming session. This is especially useful when you need several quantities of Brimstone rather than just enough for one Gold Bar.
Can Scholastone NPC Gifts Provide Brimstone?
Yes. The scholars at Scholastone Research Center are another reported source of Brimstone. Some players recommend gifting Hides to the scholar orcs to increase their Trust.
Travel to Scholastone and locate the relevant scholar orcs. Collect medium- or high-quality Hides, then give suitable Hides as gifts. Continue raising the NPC’s Trust until the required Trust level is reached, then collect the reward.
The possible gifts reported for this method include Brimstone, Mercury and Rubber. Some reports mention rewards of approximately 2–6 materials, although the exact reward depends on the NPC and gift outcome.
This is useful when you want additional resources without repeatedly fighting enemies.
How Many Hides Do You Need to Reach 100 Trust at Scholastone?
One particularly useful detail from the original discussion concerns how many gifts may be needed. A contributor explains that giving approximately 10 medium-to-high-quality Hides to the tall scholar orcs can raise their Trust to 100.
To follow the reported method, collect a supply of Hides before travelling to Scholastone and prioritise medium- or high-quality ones. Once you arrive, locate the tall scholar orcs rather than gifting random NPCs.
Give the Hides one at a time, checking the Trust progress after every gift. Continue until the NPC reaches 100 Trust, then collect the gift reward.
The reported present contains 2–6 units of Brimstone, Mercury or Rubber. The reward is random, so you might receive Rubber instead of the material required for Gold Bar crafting.
Pro Tip: Keep spare Hides from hunting trips instead of selling every one immediately. You can use them to build Trust with the scholar orcs and potentially obtain several rare crafting materials without repeatedly farming enemies.
Should You Farm Brimstone and Mercury From Enemies or Scholastone Gifts?
Both methods have their place.
| Method | Main Advantage | Main Limitation |
|---|---|---|
| Enemy farming | Provides materials while exploring | Drops are random |
| Scholastone gifts | Can produce multiple crafting materials | Requires Trust and suitable Hides |
| Brimstone Springs | Direct environmental collection method | Requires appropriate abilities and setup |
If you’re already near Gorthak or Brimstone Springs, enemy farming may be convenient. If you’ve accumulated plenty of Hides from hunting, Scholastone offers another way to obtain the materials.
Where Can You Find Mercury and Silver Ore for the Gold Bar Recipe?
Mercury and Silver Ore are the remaining ingredients for the second Witch combination.
Mercury deserves particular attention because it also appears in other advanced crafting recipes. Knowing more than one collection method will save you from having to return to the same enemy farming area every time you need it.
Where Can You Find Mercury in Crimson Desert?
One community-reported source is Ant enemies around Gorthak. Travel to the area, defeat the Ants and check their drops for Mercury.
The important thing is to expect random drops rather than guaranteed rewards. The original Gold Bar crafting discussion specifically describes Mercury from Gorthak Ants as a rare drop.
You might need to defeat several enemies before obtaining the three units required for one Gold Bar.
How Do You Unlock Liquid Mercury Collection?
Later in the game, you can collect Mercury directly from Liquid Mercury Pools using specialised equipment. This method requires progress through Delesyia’s Research system.
First, complete Chapter XI: Truth and Reality. Then visit the Delesyian Institute and complete the relevant Basic Science Research.
Continue with the Mercury Research project and reach the research checkpoint. Respond to the collection request from the researcher, then obtain the Electromagnetic Frostspitter.
The Frostspitter is the equipment needed to freeze Liquid Mercury so you can collect it.
Where Can You Find Liquid Mercury Pools in Crimson Desert?
Two useful locations are reported near:
- Hexe Sanctuary.
- Silver Wolf Mountain in Pailune.
The liquid has a shiny, silver-like appearance, so inspect the pools carefully. Once you’ve found one, equip the Frostspitter and prepare to freeze the surface.
How Do You Collect Mercury With the Electromagnetic Frostspitter?
Start by equipping the Electromagnetic Frostspitter and travelling to a Liquid Mercury Pool. Aim towards the silver-coloured liquid and fire the Frostspitter to freeze the Mercury.
Cover as much of the pool as possible before the ice begins to break. Allow the frozen material to shatter, then collect the Mercury chunks left behind.
Each piece of broken ice can produce collectible Mercury. Try to cover a large portion of the pool before the frozen surface starts breaking. This helps you make better use of the collection opportunity.
Where Can You Find Silver Ore in Crimson Desert?
One of the most useful Silver Ore locations is the cave behind Three Saints’ Falls in Hernand. The entrance is hidden behind the waterfall, so you’ll need a movement ability to get inside.
Here’s how to reach it.
Travel to Three Saints’ Falls in Hernand and climb to the rocky ledge halfway up the right waterfall. Stand directly in front of the flowing water and use Stab Level 1 or higher to pass through the waterfall.
Enter the hidden cave and use Force Palm to destroy the large boulder blocking the deeper passage. Continue until you reach the mineral deposits, then collect the Silver Ore using a Pickaxe or Force Palm.
The main deposit is reported to contain approximately 25–30 Silver Ore. That’s enough for multiple Gold Bar crafts using the Brimstone recipe.
Another reported deposit can be found in Ancients Heart Cave, north of Three Saints’ Falls near the Ancient Rift. Community reports mention collecting approximately 23 Silver Ore there.
The waterfall location is also mentioned in the original Gold Bar crafting discussion. One contributor specifically noted having already collected Silver Ore from behind the waterfall while trying to work out where Gold Bar crafting was available.
Can You Find More Than One Silver Ore Mining Deposit?
A contributor recommends using an interactive map to locate available Silver Ore deposits. The same account reports finding six Silver Ore mining spots.
This is worth checking if you intend to craft several Gold Bars through the Brimstone recipe. Instead of depending entirely on one waterfall cave, mark several deposits and rotate between them.
How Can NPC Gifts Help You Stock Up on Rare Crafting Materials?
Not every useful crafting ingredient comes from a mine or enemy drop. The NPC Trust system provides another way to obtain rare materials.
At Scholastone, scholars can reward suitable gifts with resources such as Mercury, Brimstone or Rubber. For the scholar orcs, Hides are a reported preferred gift.
Collect several during ordinary exploration and keep them for your next visit to Scholastone. Before giving away valuable materials, check the NPC’s gift preference and Trust preview.
The exact reward isn’t guaranteed, but it’s a useful way to turn spare Hides into additional crafting resources.
Which Gold Bar Recipe Saves the Most Time and Materials?
The easiest method depends on what you’ve unlocked and what’s already sitting in your inventory. All three recipes produce the same Gold Bar, but the time needed to gather their ingredients can be very different.
| Recipe | Main Requirements | Main Difficulty |
|---|---|---|
| Golden Apple | 3 Gold Ore + 1 Golden Apple | Finding Golden Apple Hedgehogs |
| Brimstone | 3 Brimstone + 3 Mercury + 10 Silver Ore | Collecting specialised materials |
| Blacksmith | 100 Gold Ore | Gathering large quantities of ore |
Golden Apple recipe: This is attractive when you’ve already collected Gold Ore and can find Golden Apple Hedgehogs. Its main advantage is conserving Gold Ore.
Brimstone recipe: Choose this when you have access to the necessary research and already possess some of the ingredients. It avoids Golden Apple farming but requires specialised materials.
Blacksmith recipe: This is useful when you’ve discovered several Gold Mines and don’t want to depend on rare alchemy ingredients.
Which Gold Bar Recipe Is Best for Early-Game Progress?
The Golden Apple recipe can be attractive if you’ve discovered Anvil Hill and can obtain the missing fruit. However, some of the later research and specialist collection methods won’t be available immediately.
The Blacksmith option can be more accessible when the 100 Gold Ore requirement is within reach and the recipe appears in your crafting menu. If you’re still progressing through the main story, don’t force yourself to follow an endgame farming route simply because another method looks more efficient on paper. Use the resources you can reliably obtain at your current stage.
There’s also another early-game option worth considering: stealing a ready-made Gold Bar. One account describes completing a Bounty to obtain a mask and unlock stealing, then visiting Lioncrest Manor to collect the first Gold Bar. This can be considerably quicker than gathering three different crafting ingredients.
The early-game Gold Bar farming discussion contains the original instructions.
Does Witchcraft Save More Gold Ore Than the Blacksmith?
In terms of Gold Ore consumption, the Golden Apple Witch recipe is considerably more efficient. It uses three Gold Ore, compared with 100 at a Blacksmith. The Brimstone recipe avoids Gold Ore altogether.
However, the lowest ingredient requirement doesn’t automatically mean the shortest farming time. Imagine you already have 100 Gold Ore but haven’t found a single Golden Apple Hedgehog. In that situation, the Blacksmith method might save you time. If you’ve got five Golden Apples sitting in storage, the opposite is true.
Check your existing resources before deciding.
How Can You Plan an Efficient Gold Bar Farming Route?
If you’re planning to make several Gold Bars, collect multiple resources during the same trip rather than repeatedly returning to a crafting station with only one ingredient.
Start by learning the Gold Bar formula. Then unlock the Gold Vein Map or complete Gold Vein Research. Visit the nearest discovered Gold Mine and collect Gold Ore from nearby deposits.
If you’re using the first Witch recipe, check a Golden Apple Hedgehog location. Alternatively, gather Brimstone, Mercury and Silver Ore for the second recipe.
Once you’ve collected the necessary materials, return to your chosen crafting station and make the Gold Bars you need. Finally, visit a Bank to exchange or invest them.
This approach avoids unnecessary trips back to a Witch after collecting only one ingredient.
You can also include Scholastone in a wider resource-gathering route. For example, collect Hides while hunting, visit the scholar orcs to build Trust, and then continue towards a Gold Mine or Silver Ore deposit. Each part of the journey contributes to your crafting requirements.
How Can You Get Gold Bars Without Crafting in Crimson Desert?
Crafting isn’t the only way to obtain Gold Bars. You can also steal ready-made bars through specific exploration and pickpocketing opportunities.
Two locations are particularly useful:
- Lioncrest Manor: Contains a hidden Gold Bar near the ground-floor fireplace.
- Demeniss Wildlife Park: Wealthy noble visitors can carry Gold Bars in their inventories.
These methods are especially attractive early in the game, when the necessary Witchcraft services or specialist materials might not be available.
How Can You Unlock Stealing and Get a Mask?
Before attempting either method, you need to unlock stealing and obtain a mask.
The reported early-game process involves completing a Bounty to obtain a mask and unlock stealing. After completing it, check your inventory for the reward and equip the mask before approaching valuable items.
If you don’t have an additional mask, search Bandit enemies for one. Alternatively, visit the Black Market slightly south of Hernand and check its stock. Masks can also be purchased through suitable Back Alley Shops.
One detail is easy to overlook: having a mask in your inventory isn’t enough. It needs to be equipped before attempting the theft.
Where Is the Hidden Gold Bar at Lioncrest Manor, and How Do You Steal It?
Lioncrest Manor, northwest of Hernand Town, contains a hidden Gold Bar near the fireplace on the ground floor.
The early-game farming method recommends entering through a second-floor window rather than approaching the fireplace directly from the main entrance.
First, travel to Lioncrest Manor and find a second-floor window you can access. Climb up and enter through the window, then head down to the ground floor and locate the fireplace.
Equip your Lantern and shine it towards the fireplace. Look for the Gold Bar icon. Once you’ve identified it, approach the item and select Steal.
Finally, leave the area without attracting attention. If successful, you’ll obtain a Gold Bar without collecting any crafting materials.
The early-game Gold Bar farming discussion specifically recommends the fireplace as the first theft opportunity.
How Can You Avoid Getting Caught at Lioncrest Manor?
The manor contains NPCs, so approaching the fireplace without checking the surrounding area can turn a simple theft into an unnecessary fight or penalty.
One recommended option is completing Bruna’s Request, which reportedly reduces the number of NPCs inside the manor. You can also try visiting during quieter periods.
Before stealing, check where nearby guards are standing and avoid approaching the fireplace while someone is watching. Keep your mask equipped and know which window you’ll use to escape. It’s also worth saving before attempting a risky theft.
The early-game instructions also describe the reported consequences of getting caught. The penalty includes a 5 Silver fine and the loss of your equipped mask.
That can make repeated attempts expensive, particularly when you need to visit the Black Market or defeat more Bandits to obtain another mask.
What Happens If You Keep Getting Caught While Stealing?
Repeated theft incidents can lead to more serious consequences. One reported warning is that getting noticed too many times can result in a 100 Silver bounty, after which bounty hunters may appear and attack.
Although the reported hunters aren’t particularly difficult to defeat, they’re an unnecessary distraction when you’re simply trying to collect a Gold Bar. Once the theft succeeds, leave the red detection area instead of lingering near the fireplace.
Tip: Save before attempting the theft, particularly if you don’t have spare masks. Recovering from a failed attempt is easier than repeatedly losing equipment and spending time clearing a bounty.
Do You Need to Extinguish the Fireplace to Steal the Gold Bar?
Some instructions mention interacting with the fireplace and extinguishing it before collecting the item.
If the Gold Bar icon or Steal prompt isn’t immediately available, inspect the fireplace interaction and check again. Use the Lantern to help identify the collectible.
Does the Lioncrest Manor Gold Bar Respawn?
Reports suggest that the fireplace Gold Bar can reappear after several in-game days. One commonly mentioned estimate is approximately 3 in-game days.
Treat this as a reported farming interval rather than a guaranteed timer for every game version. If the fireplace is empty, continue exploring or wait longer before revisiting.
Can You Steal Gold Bars From Nobles at the Archery Contest?
Yes. Another early-game theft opportunity is located outside Lioncrest Manor.
During the daytime, nobles gather around the archery contest area, where stands are set up outside the manor. You can use your Lantern to inspect them for Gold Bars.
Start by equipping your mask and travelling to the archery contest area outside Lioncrest Manor. Visit during the daytime when nobles are gathered around the stands. Shine your Lantern towards the visitors and look for the rectangular Gold Bar icon.
Be careful not to confuse it with an ordinary pouch icon. Once you’ve identified a suitable noble, walk into them to make them stagger. Wait for the Pickpocket prompt, then select the interaction and check the result.
Finally, leave the area before the theft detection indicator catches up with you.
This is different from walking up to an NPC and attempting to steal an ordinary pouch. The Gold Bar indicator is the detail worth watching.
However, the archery contest area is less forgiving than Wildlife Park because guards may notice theft and arrest you. Treat it as an alternative location rather than a guaranteed repeatable farming route.
How Does the Wildlife Park Pickpocketing Route Work?
Demeniss Wildlife Park is worth visiting because it contains numerous noble visitors. Some nobles carry Gold Bars that can be obtained through pickpocketing.
The location is east of Hernand and north of Mistveil Forest.
Start by travelling to Demeniss Wildlife Park and equipping a suitable mask. Explore the park and look for noble visitors. Use your Lantern to inspect nearby NPCs, paying particular attention to the long, ingot-shaped Gold Bar icon.
Once you’ve identified a suitable noble, approach them and bump into the NPC to trigger the interaction. Select Pickpocket when the prompt appears, collect the stolen item and repeat with other suitable nobles.
The important part is choosing the right targets. Ordinary villagers and visitors might carry food, pouches or small amounts of money. Nobles are the more promising targets for Gold Bars.
The early-game instructions specifically identify the park’s visitors as potential noble targets. The wolf-costumed park guards are harmless and don’t carry the valuable loot described in this farming method.
In other words, concentrate on the actual visitors rather than scanning every animal-themed guard.
Can One NPC Carry Multiple Gold Bars?
Yes. Reports indicate that some nobles can carry multiple Gold Bars, although a successful pickpocket doesn’t guarantee you’ll receive one.
The loot is random, and the item displayed by the Lantern might not reveal everything an NPC carries. Some observations suggest NPCs can have up to three items represented around their waist, while the Lantern may display only one at a time.
This can make it appear as though a noble has no Gold Bar when another item is occupying the visible indicator.
Why Might the Lantern Hide a Noble’s Gold Bar Icon?
The Lantern is useful for identifying valuable NPC loot, but it doesn’t necessarily make every carried item obvious.
If you’re checking a noble who looks promising, remember that other items may occupy the displayed position. Don’t assume the first visible indicator represents the NPC’s entire inventory. Scan several nobles and prioritise those displaying the Gold Bar icon.
The original early-game instructions also explain how to distinguish a Gold Bar from a normal pouch. The Gold Bar indicator is described as a rectangular icon resembling three stacked gold bars. An ordinary pouch icon isn’t enough to identify a valuable target.
What If a Noble Gives You Cheese Instead of the Gold Bar?
This is where the random nature of NPC loot becomes frustrating. A noble can visibly carry a Gold Bar but still give you another item after a successful pickpocket.
Several reports describe needing to pickpocket the same NPC more than once before obtaining the Gold Bar. One contributor specifically mentioned making 3–4 attempts on the same person.
If you’ve identified the Gold Bar icon but receive an ordinary item, don’t immediately move to another noble. Try the same NPC again when the Pickpocket interaction becomes available.
The item selection is random, so repeating the attempt can eventually produce the Gold Bar. Just remember that repeated theft attempts can increase detection risk.
How Can You Repeat the Wildlife Park Gold Bar Farming Route?
One advantage of Wildlife Park is its nearby Abyss Nexus. After checking the available nobles, you can fast-travel away and return to refresh the area.
A practical farming loop starts with scanning the nobles near the entrance and pickpocketing suitable targets. Move through the other sections of the park and check the remaining visitors.
Once you’ve finished checking the available nobles, leave using fast travel. Return and inspect the refreshed NPC group.
Some estimates suggest roughly two Gold Bars per three resets, although the results vary. You might find several quickly, or spend a long time without seeing one.
The original farming instructions recommend using the teleporter near the park because you can leave and return without travelling a long distance. A later account also describes finding another Gold Bar after teleporting away and re-entering the area.
You don’t necessarily need to sleep or advance several in-game days before trying another run.
Which Wildlife Park NPCs Are Not Worth Scanning?
Concentrate on the actual noble visitors. The early-game farming information specifically points out that the wolf-costumed park guards are harmless and don’t carry the valuable loot.
Scanning them repeatedly won’t help you find the Gold Bar icon. Move through the park and inspect the visitors instead.
Can You Escape the Pickpocket Detection Area After Stealing?
The early-game farming instructions include another useful detail about the red detection area.
When you successfully obtain the Gold Bar, run out of the red area to escape immediate detection. However, if the pickpocket attempt gives you a different item, running away can cause the NPC to flee too.
The original recommendation is to accept the Reputation loss rather than run after an unsuccessful attempt.
The distinction is straightforward: when you obtain the Gold Bar, move away from the detection area quickly. When you receive a different item, be careful about running because the NPC may flee. After repeated failed attempts, consider whether the remaining risk is worth continuing.
Can Great Thief’s Gloves Make Gold Bar Pickpocketing Safer?
Yes. The Great Thief’s Gloves are particularly useful if you intend to steal valuable items regularly.
Their special ability allows one theft without triggering the usual detection response. The gloves have a reported 30-minute cooldown between uses.
You can obtain them by completing the Heart of Anvil Hill quest associated with the House Serkis and Secret of the Lost Seal storyline.
When equipped, the gloves can help you steal a valuable item without immediately attracting attention. However, their special effect is limited. Don’t assume every pickpocketing attempt will remain protected during the cooldown.
Can Other Hidden Gold Bar Encounters Reward You Outside Wildlife Park?
There are reports of a traveling Goblin carrying a treasure chest. When approached or chased, the Goblin may drop the chest, which can contain a Gold Bar.
This is a random exploration encounter rather than a dependable farming location. If you encounter one while travelling, follow it and check the dropped chest.
How Do You Find the Traveling Goblin With a Gold Bar Treasure Chest?
The traveling Goblin is an unusual encounter that can occur while exploring Pywel. Keep an eye out for the NPC carrying a treasure chest along roads and open areas.
When you spot one, approach the Goblin carefully and follow it when it starts running. Watch for the treasure chest it drops, then pick up the chest and check its contents for the Gold Bar reward.
The Goblin’s appearance is random, so don’t spend an entire farming session searching for one. Treat this as an additional exploration reward when travelling between other Gold Bar locations.
Is Wildlife Park Gold Bar Farming Still Working After Patches?
Wildlife Park pickpocketing has been reported to continue working after several updates, but the results aren’t consistent.
Some accounts describe obtaining multiple Gold Bars in a few runs, while others involve searching the entire park for 30 minutes or longer without finding a suitable noble. There are also reports of needing multiple attempts on the same NPC before receiving the actual Gold Bar.
One particularly useful observation concerns NPC inventories. An NPC can reportedly carry up to three pickpocketable items, but the Lantern may display only one item indicator at a time.
A Gold Bar might occupy the second or third inventory slot, making it invisible during the initial scan. That doesn’t mean every pouch-carrying noble has a hidden Gold Bar. It simply explains why the visible icon isn’t always a complete picture.
Important: Wildlife Park farming is a random-loot strategy, not a guaranteed Gold Bar generator. If you’re repeatedly finding ordinary items or no Gold Bars at all, switch to crafting or another money-making activity rather than spending your entire session waiting for a rare spawn.
For the original farming instructions and observations, see the Wildlife Park Gold Bar discussion.
Where Can You Exchange Gold Bars for 500 Silver in Crimson Desert?
Once you’ve collected a few Gold Bars, don’t rush to sell them to the first merchant you encounter. A Bank offers a considerably better exchange value than an ordinary merchant.
| Selling Method | Reported Value |
|---|---|
| Bank | 500 Silver |
| Ordinary Merchant | 190 Silver |
That’s a difference of 310 Silver per Gold Bar.
For five Gold Bars, the difference becomes substantial:
- Bank: 2,500 Silver
- Ordinary Merchant: 950 Silver
The early-game farming information specifically warns against selling newly collected Gold Bars to random merchants. It’s easy to assume that a regular vendor will provide the same value as a Bank, but the reported prices are very different.
For additional farming and selling information, see How to Farm Gold Bars in Crimson Desert and Never Worry About Silver Again.
You can also check the Gold Bar item database for the listed item and crafting information.
How Much Is One Gold Bar Worth in Crimson Desert?
A regular Gold Bar has a reported Bank exchange value of 500 Silver. Ordinary merchants offer approximately 190 Silver.
Here’s how the totals compare:
| Gold Bars | Bank Exchange | Ordinary Merchant |
|---|---|---|
| 1 | 500 Silver | 190 Silver |
| 3 | 1,500 Silver | 570 Silver |
| 5 | 2,500 Silver | 950 Silver |
| 10 | 5,000 Silver | 1,900 Silver |
If you’re turning Gold Bars into money, the Bank is the better destination. Don’t automatically sell them to the first merchant you encounter.
The difference is large enough to justify a separate Bank trip, particularly when you’ve stolen or crafted several bars.
Pro Tip: Make a Bank your first stop after collecting a batch of regular Gold Bars. The higher exchange value can make a noticeable difference to your available Silver.
Can You Invest Gold Bars Through a Bank?
Yes. Crimson Desert’s banking system allows you to deposit Gold Bars into a personal strongbox and invest them.
To access these services, you’ll need a Personal Strongbox Permit. The permit is reportedly available from Bank clerks for 100 Silver.
Once you’ve obtained it, you can register a personal strongbox and choose an investment strategy.
The reported investment options are:
| Investment Plan | Reported Return Range | Risk |
|---|---|---|
| Low Risk | 0% to +2% | Low |
| Medium Risk | -15% to +20% | Moderate |
| High Risk | -50% to +55% | High |
These are possible outcomes, not guaranteed returns. A High Risk investment can produce a substantial gain, but it can also lose a significant portion of your deposited value.
The banking distinction is particularly useful when you’ve obtained Gold Bars through Wildlife Park pickpocketing. One account describes receiving only 190 Silver from a regular merchant, while the response points out that the Bank pays 500 Silver and that investing Gold Bars can help build a much larger balance over time.
How Do You Unlock the Personal Strongbox in Crimson Desert?
Start by travelling to a Bank and interacting with the Bank clerk. Open the available financial services and purchase the Personal Strongbox Permit.
Once you have the permit, register your personal strongbox. You can then deposit a Gold Bar and select an available investment strategy.
The permit is required to access the Gold Bar investment services.
The current item database also lists interest payments every 3 in-game days. Some farming guides describe investment result cycles differently, so check the timing displayed in your current Bank interface.
Which Bank Investment Plan Should You Choose?
Each option offers a different balance between potential profit and possible losses.
Low Risk
This plan is designed for smaller, steadier returns. It’s suitable when you prefer protecting your investment rather than chasing a large profit.
Medium Risk
Medium Risk provides a wider range of possible outcomes. It can be a reasonable choice when you have spare Gold Bars and can tolerate some losses.
High Risk
This option provides the largest potential gains but also carries the greatest risk. A loss of up to 50% is possible according to the reported range, so avoid investing everything simply because the maximum return looks attractive.
If you’re experimenting with the banking system, save before committing resources and understand that the investment outcome is random.
What Happens to Invested Gold Bars?
Once deposited, Gold Bars are tied to the investment system. The reported withdrawal restriction lasts 3 in-game days.
Plan your spending before making a deposit. For example, if you need Silver for a major equipment purchase, don’t invest every Gold Bar you own. Keep enough available for immediate purchases and unexpected upgrades.
Can You Give Gold Bars to NPCs to Increase Their Trust?
Yes. Gold Bars can also be used as gifts for eligible NPCs.
The Trust system tracks your relationship with individual characters, and gifts can improve that relationship. This can be useful when you’re trying to unlock additional merchant services, special interactions or other NPC rewards.
Some reports also identify Gold Bars as a way to build Trust quickly with eligible characters. However, giving away a Gold Bar means sacrificing the opportunity to exchange it for 500 Silver at a Bank.
Check the NPC’s gift preference and the displayed Trust gain before deciding.
What Are Crude Gold Bars and Where Can You Find Them in Crimson Desert?
While exploring Pywel, you might encounter another item called a Crude Gold Bar. Don’t mistake it for the regular Gold Bar used for banking and advanced crafting.
Crude Gold Bars are low-quality, impure gold items found in treasure piles, caves, dungeons and hidden rooms. They look similar to regular Gold Bars, but their value and uses are different.
| Item | Reported Selling Value | Main Purpose |
|---|---|---|
| Regular Gold Bar | 500 Silver at a Bank | Banking and crafting Platinum |
| Crude Gold Bar | 5 Silver at ordinary merchants | Selling as collectible loot |
Crude Gold Bars don’t have the same crafting or investment uses as regular Gold Bars.
For additional collectible locations, see the Crude Gold Bars guide from Console Pulse.
Which Treasure Locations Contain Large Crude Gold Bar Stashes?
Several locations contain substantial collections of Crude Gold Bars.
Harpy’s Nest in Pailune
This is one of the most commonly reported locations. Explore the treasure piles, containers and scattered loot around the nest. Some guides estimate roughly 150–200 Crude Gold Bars in the area, although exact counts vary between reports.
Demeniss Warehouse
The warehouse near Flame Knights Castle in the Golden Plains is another recommended location. Community guides report approximately 80 Crude Gold Bars among the available loot.
Delesyia Castle
There’s a hidden room accessible through a rotating bookshelf. You’ll need to satisfy the castle’s entry requirements, including wearing the appropriate Visione helmet where required. A mask is also useful when taking items treated as theft.
Island east of Demeniss
Search for the vine-covered trapdoor leading into a hidden cave. Burn away the vines, open the trapdoor and collect the Crude Gold Bars inside.
Grey Forest Sea Cave
This cave lies along the southeastern coastline of Delesyia. Approach the peninsula from the water, locate the cave entrance and search the treasure piles and containers.
How Much Are Crude Gold Bars Worth in Crimson Desert?
The current item database lists the ordinary selling value at 5 Silver per Crude Gold Bar.
For example:
| Crude Gold Bars | Total at 5 Silver Each |
|---|---|
| 10 | 50 Silver |
| 50 | 250 Silver |
| 100 | 500 Silver |
| 150 | 750 Silver |
Some older guides reported higher prices at specific merchants, including the Vellua Fishing Shop. However, later reports indicate that merchant prices were adjusted.
Check the actual selling preview in your current game version before travelling a long distance to sell a large collection. The Crude Gold Bars location guide provides additional information about the item and reported treasure locations.
Can You Craft Regular Gold Bars Using Crude Gold Bars?
No documented Gold Bar recipe uses Crude Gold Bars as an ingredient. The three crafting methods require Gold Ore, Golden Apples, Brimstone, Mercury and Silver Ore.
Treat Crude Gold Bars as separate loot items that can be sold for additional Silver.
Pearl Abyss has also clarified through its patch notes that certain previously placed world Gold Bars were converted into Crude Gold Bars worth 5 Silver. That distinction explains why some treasure locations no longer provide the same valuable Gold Bars described in older guides.
Check the official Crimson Desert patch notes for the relevant item and gameplay updates.
Can You Craft Platinum Using Gold Bars in Crimson Desert?
Yes. Gold Bars have another important use beyond banking and selling. You can combine a Gold Bar with several alchemy materials to craft Platinum through Witchcraft.
The recipe requires:
| Material | Required Quantity |
|---|---|
| Gold Bar | 1 |
| Brimstone | 4 |
| Mercury | 3 |
| Holy Water | 2 |
| Result | 1 Platinum |
Here’s how to craft it.
First, obtain and learn the Alchemy Formula: Platinum. Next, collect 1 Gold Bar, gather 4 Brimstone, obtain 3 Mercury and collect 2 Holy Water.
With all the materials ready, visit a Witch who provides the required crafting service. Open the Witchcraft crafting menu, select Platinum and confirm the recipe.
You’ll receive one Platinum after the crafting process finishes.
Remember that Platinum and Gold Bars are separate items. You need a finished Gold Bar as one of the ingredients.
Where Can You Find the Platinum Alchemy Formula?
There are two documented locations for the Platinum formula.
Scholastone Institute
One copy can be found on a bookshelf inside the Scholastone Institute Library. This location becomes accessible after completing Chapter IV: The Price of Knowledge.
Great Gate of Urdavah
Another copy is located near the scholars on the western side of the Great Gate of Urdavah. Search the upper-level library or laboratory area for the bookshelf containing the formula.
After collecting it, open your inventory and equip the Alchemy Formula: Platinum. Activate your Lantern and shine it towards the glowing blue text.
Complete the interaction, then check your Knowledge menu to confirm the recipe has been registered. The formula is learned permanently, so you don’t need to keep the physical document.
Why Is Platinum Important for Advanced Crafting in Crimson Desert?
Platinum is a rare material with strong durability and magical conductivity. It appears in advanced alchemical crafting and equipment recipes.
One important example is its role in crafting certain Aeserion weapons, including the Aeserion Longsword and related weapon recipes. Platinum can also be used for advanced crafting catalysts and endurance-enhancing applications.
Another reported use involves increasing the Trust of the Iron Eagle pet. The reported Platinum recipe consumes one Gold Bar, so consider your priorities before converting your Gold Bar reserves.
Should You Exchange Your Gold Bars or Save Them for Platinum?
This depends on your current progression and what you’re trying to accomplish.
| Your Goal | Better Choice |
|---|---|
| Need Silver for equipment upgrades | Exchange Gold Bars at a Bank |
| Want to experiment with investments | Use the Personal Strongbox |
| Need Platinum for advanced crafting | Save at least one Gold Bar |
| Want additional NPC Trust | Consider gifting an eligible NPC |
| Have plenty of spare Gold Bars | Divide them between banking and crafting |
If you’re still developing your equipment, exchanging one Gold Bar for 500 Silver might be more useful than immediately converting it into Platinum. However, keeping a few Gold Bars in storage is worthwhile if you’re approaching advanced crafting.
Gold Bar Crafting Not Working in Crimson Desert? Common Problems and Fixes
Even with the right materials, the Gold Bar crafting option might not appear immediately. In most of the situations described by the community, the problem involves an unlearned formula, the wrong crafting interaction or an NPC who doesn’t offer the required service.
Here’s what I’d check before repeating an entire farming route.
| Problem | What to Check |
|---|---|
| Gold Bar recipe isn’t appearing | Confirm that you’ve learned the Alchemy Formula: Gold Bar. |
| Witch doesn’t offer Gold Bar crafting | Visit a Witch with the appropriate Witchcraft services. |
| Only an apprentice Witch is available | Progress through the story or find another suitable Witch. |
| Hernand Blacksmith doesn’t show Gold Bar crafting | Try the Blacksmith at Greymane Camp. |
| Gold Bar option is difficult to find | Open Craft Abyss Gear and check Special Items. |
| Missing crafting materials | Compare your inventory against the exact recipe requirements. |
| Golden Apple Hedgehogs aren’t appearing | Rotate between known locations rather than waiting in one field. |
| Gold Bar icon doesn’t appear on nobles | Check additional NPC inventory indicators and remember that loot is random. |
| Brimstone can’t be collected | Check the relevant research and material collection method. |
| Mercury pool doesn’t provide resources | Make sure you’ve obtained the Electromagnetic Frostspitter. |
Why Doesn’t the Gold Bar Recipe Appear After Collecting the Formula?
Collecting the scroll and learning it are separate actions.
Open your inventory, select the Alchemy Formula: Gold Bar, equip it and use your Lantern to examine the glowing blue text. After registering it in the Knowledge menu, return to the Witch.
If the recipe still isn’t available, check the correct crafting category.
Why Does the Witch Only Offer Ordinary Alchemy or Cooking?
You might be using the wrong interaction. The Gold Bar recipe is available through the Witch’s crafting services, not necessarily through an ordinary cauldron.
Interact directly with the Witch and look for:
Craft Abyss Gear → Special Items
If the option isn’t present, try another Witch with the appropriate services.
One reported alternative involves an ordinary Alchemy Cauldron at the abandoned Alchemy shop in Hernand. If you’ve learned the formula and still can’t find the Witchcraft interaction, check that location as an experimental alternative.
The shop is described as being east of the grinding wheel, along the southern side of the street. Keep in mind that this is a community-reported workaround rather than a confirmed universal method.
Why Doesn’t the Hernand Blacksmith Show Gold Bar Crafting?
Some reports describe the Hernand Blacksmith missing the expected option. The suggested workaround is to visit the Greymane Camp Blacksmith.
Also check whether you’re using the appropriate recipe and whether the crafting service is available at your current progression stage.
Why Is Brimstone Missing From Your Inventory?
Brimstone collection can involve different methods, so make sure you’re collecting the actual crafting material rather than another item with a similar name.
Check your material research, the Brimstone Springs collection method and enemy drops. If you’re using the vent method, follow the required interactions with Healing Force Palm and Nature’s Snare.
Another option is to visit Scholastone and give Hides to the tall scholar orcs until their Trust increases.
Why Can’t You Collect Mercury From Liquid Mercury Pools?
Mercury pools require specialised equipment. Make sure you’ve completed the relevant research in Delesyia and obtained the Electromagnetic Frostspitter.
Use it to freeze the silver-coloured liquid, then collect the Mercury chunks after the frozen surface breaks. If you haven’t unlocked this equipment yet, try the Gorthak Ant farming method or obtain Mercury through Scholastone gifts.
Why Have Golden Apple Hedgehogs Stopped Appearing?
Pearl Abyss reduced their spawn rate in patch 2.04.00. Older farming videos may therefore show a much faster collection rate than you’ll experience in the current version.
Try rotating between Grey Rock Dock, Tinkerton Fields and Tariv rather than remaining in one spot. You can also check the official Pearl Abyss patch notes.
Why Did Pickpocketing Give You Something Other Than a Gold Bar?
Noble inventories contain random items, so a successful pickpocket doesn’t guarantee a Gold Bar. Scan multiple NPCs and prioritise those displaying the correct Gold Bar indicator.
Remember that the Lantern may not reveal every carried item at once. If you’ve identified a noble carrying a Gold Bar but receive an ordinary item, try the same NPC again when another pickpocket opportunity becomes available.
Some reports describe needing 3–4 attempts before receiving the desired item.
Why Am I Getting Arrested at Wildlife Park?
Make sure your mask is equipped before attempting to pickpocket. Having a mask in your inventory doesn’t automatically protect you, particularly when repeated theft attempts increase detection.
If you successfully steal a Gold Bar, leave the red detection zone. If you don’t obtain the item, be careful about running away because the NPC may flee as well.
At Lioncrest Manor, getting caught can result in a reported 5 Silver fine and the loss of your mask. Repeated incidents can also lead to a bounty.
Why Can’t I Find Gold Bar Loot on Wildlife Park Guards?
Concentrate on the actual noble visitors. The early-game farming information specifically points out that the wolf-costumed park guards are harmless and don’t carry the valuable loot.
Scanning them repeatedly won’t help you find the Gold Bar icon. Move through the park and inspect the visitors instead.
Why Does Wildlife Park Sometimes Have No Gold Bars?
The pickpocketing method depends on randomised NPC inventory and loot outcomes. Some reports describe collecting several Gold Bars in a few runs, while others mention checking the entire park for 30 minutes or longer without finding one.
Teleporting away and returning can refresh the area, but it doesn’t guarantee that the next group of visitors will carry Gold Bars.
If you’ve had several unsuccessful runs, switch to crafting or another farming activity rather than wasting your entire session.
Gold Bar Crafting, Farming and Selling: Crimson Desert FAQs
The following answers cover the questions that commonly come up when crafting, farming, selling and using Gold Bars.
How Do You Make Gold Bars in Crimson Desert?
There are three documented recipes.
The first is 3 Gold Ore + 1 Golden Apple at a Witch. The second is 3 Brimstone + 3 Mercury + 10 Silver Ore at a Witch. The third is 100 Gold Ore at a Blacksmith.
The Alchemy Formula: Gold Bar is required for the Witchcraft recipes. You can compare the combinations in the Gold Bar crafting database.
Can You Make Gold Bars Without a Witch?
Yes. A Blacksmith can convert 100 Gold Ore into 1 Gold Bar.
You can also obtain ready-made Gold Bars by stealing the hidden bar at Lioncrest Manor or pickpocketing wealthy NPCs at Wildlife Park. For the early-game stealing route, see the Reddit Gold Bar farming guide.
Where Can You Find the Gold Bar Alchemy Formula?
The formula is available at the Spire of Insight and in a hidden Witch’s Hideout south of Pailune.
The Pailune location is a convenient alternative if you don’t want to complete the Spire’s multi-floor puzzles. See the Gold Bar formula location guide for additional details.
How Much Gold Ore Do You Need to Make One Gold Bar?
You need 100 Gold Ore for the Blacksmith recipe. The Witch’s Golden Apple recipe requires just 3 Gold Ore and 1 Golden Apple.
Where Can You Find Golden Apples in Crimson Desert?
Golden Apples are carried by special hedgehogs around Grey Rock Dock, Tinkerton Fields and Tariv.
Knock the fruit off using Blinding Flash or an arrow, then collect it from the ground. For more details, check the Golden Apple farming guide.
What Is the Easiest Way to Get Gold Bars in Crimson Desert?
The easiest approach depends on your available materials and story progress.
For crafting, the Golden Apple recipe is attractive because it consumes only three Gold Ore. For direct acquisition, try finding the hidden Gold Bar at Lioncrest Manor or pickpocketing nobles at Wildlife Park.
Where Can You Sell Gold Bars for the Most Silver?
Exchange regular Gold Bars at a Bank for the reported value of 500 Silver each. Ordinary merchants offer approximately 190 Silver.
For additional banking and farming information, see How to Farm Gold Bars in Crimson Desert and Never Worry About Silver Again.
Are Crude Gold Bars the Same as Regular Gold Bars?
No. Crude Gold Bars are impure collectible items worth approximately 5 Silver each. Regular Gold Bars are valuable banking and crafting items worth 500 Silver at a Bank.
See the Crude Gold Bars location and value guide for more information.
Can You Use Gold Bars to Make Platinum?
Yes. The Platinum Witch recipe requires 1 Gold Bar, 4 Brimstone, 3 Mercury and 2 Holy Water. You’ll also need to learn the Alchemy Formula: Platinum.
Does the Gold Bar Formula Unlock All Three Crafting Recipes?
The Alchemy Formula: Gold Bar unlocks the Witchcraft recipes. The Blacksmith’s 100-Gold-Ore conversion is a separate crafting option, so check the available Blacksmith menu independently.
Can You Find Gold Ore Without the Gold Vein Map?
Yes. Anvil Hill Cave is a useful early mining location. The Gold Vein Map and Urdavah’s Gold Vein Research provide a way to reveal additional Gold Mines across Pywel.
For further mining details, see the Gold Ore location database.
How Long Does Gold Ore Take to Respawn?
Approximately 7 in-game days is a commonly reported farming estimate for several Gold Mines. Respawn behaviour can vary, so rotating between different caves is more reliable than repeatedly checking one location.
Can You Buy Mercury in Crimson Desert?
The Greymane Camp Quartermaster is a reported source of Mercury. You can also obtain Mercury from certain enemies or collect it from Liquid Mercury Pools after unlocking the required research and Frostspitter.
Can You Give Gold Bars to NPCs as Gifts?
Yes. Eligible NPCs can accept Gold Bars as gifts. This can increase Trust and help unlock certain character and merchant benefits.
Check the displayed Trust gain before giving away a valuable Gold Bar.
Do Golden Apple Hedgehogs Still Spawn After Patch 2.04.00?
Yes. The October 29, 2026 patch reduced their spawn rate rather than removing them. You can still find them at known locations, although repeated searches may be necessary.
Check the official Pearl Abyss update notes for the relevant patch information.
What’s the Most Practical Way to Make Gold Bars in Crimson Desert?
Making Gold Bars in Crimson Desert becomes much easier once you understand the formula requirements, ingredient locations and differences between crafting stations.
You have three main crafting options: 3 Gold Ore and 1 Golden Apple, 3 Brimstone, 3 Mercury and 10 Silver Ore, or 100 Gold Ore at a Blacksmith. The Golden Apple recipe is particularly useful when you want to conserve Gold Ore. The Brimstone combination gives you another route when you’ve already collected the necessary alchemy materials, while the Blacksmith method is straightforward if you’ve built up a large mining reserve.
You don’t have to rely entirely on crafting, either. The hidden Gold Bar at Lioncrest Manor, pickpocketing opportunities at Demeniss Wildlife Park, and occasional treasure discoveries provide alternative ways to obtain ready-made bars.
Once you’ve collected them, remember to visit a Bank for the reported 500 Silver exchange value instead of accepting the lower 190 Silver offered by ordinary merchants. You can also keep some Gold Bars for investments, eligible NPC gifts and Platinum crafting.
I’d recommend starting with the Gold Bar formula and discovering Anvil Hill. That gives you a useful foundation for the Golden Apple recipe while opening up a practical Gold Ore farming route.
As your progression improves, add the Brimstone and Mercury collection methods to your routine. You’ll have more flexibility when one particular ingredient becomes difficult to obtain.
Most importantly, don’t spend hours farming the wrong materials or visiting the wrong crafting station. Choose the recipe that matches your inventory, check the Witch’s Special Items menu, and put your Gold Bars towards the Silver and crafting upgrades that matter to your progression.
Visit Our Post Page: Blog Page
Discover more from Izoate
Subscribe to get the latest posts sent to your email.