
Want to hide Facebook photos without losing them? Learn how to make all pictures private on Facebook without deleting them and make photos visible only to you.
If your Facebook photos are visible to people you don’t want viewing them, you don’t need to delete them. Facebook lets you make individual photos, albums, and even tagged pictures private by changing their audience settings.
In this guide, you’ll learn how to hide Facebook photos from strangers, friends, or everyone except yourself using both the Facebook app and the desktop website.
Can You Make Facebook Pictures Private Without Deleting Them?
Yes. Changing a photo’s visibility is completely different from deleting it. When you adjust an image or an album’s setting to Only Me, you are not removing it from the platform.
Instead, the file remains intact on your profile so you can still look back on your memories whenever you log in. However, it becomes completely invisible to everyone else on the platform, including your friends, public visitors, and search engine results. You retain full access to your data, while the rest of the world loses visibility.
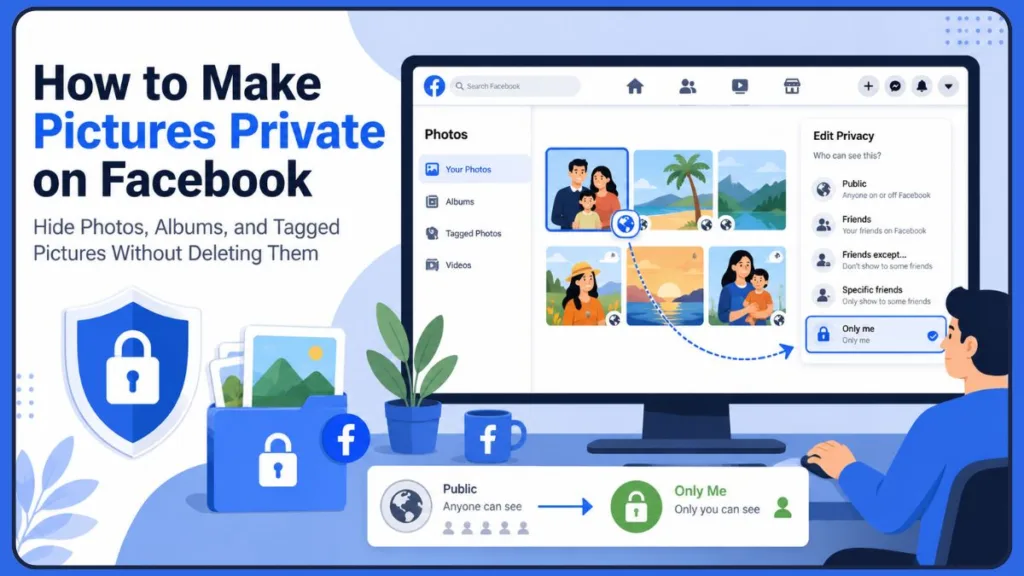
Understanding Your Facebook Photo Privacy Options
When you use the audience selector tool, you can choose from several distinct privacy levels to control exactly who sees your media:
| Privacy Level | Who Can See Your Photos? | Best Used For |
| Public | Anyone on or off the platform, including visitors without an account. | Public announcements or professional networking. |
| Friends | Only profiles you have formally accepted into your personal network. | Casual everyday sharing with people you actively know. |
| Friends Except… | Your entire friends list, excluding specific individuals you manually select. | Maintaining boundaries with specific coworkers or distant relatives. |
| Specific Friends | An exclusive list of specific individuals you hand-pick. | Sharing personal family moments with a select group. |
| Only Me | Absolutely no one except you. | Total lockdown of personal data, sensitive memories, or profile cleanups. |
How to Make a Single Picture Private on Facebook
If you want to target a few specific images, you can alter their visibility one by one using your phone or a desktop web browser.
Using the Facebook Mobile App
- Open the Facebook app and tap your profile picture to access your personal timeline.
- Scroll down and tap on the Photos button.
- Tap the Uploads tab at the top of the screen to display the images you have personally posted.
- Select the specific photo you want to hide, then tap the three dots in the top-right corner.
- From the menu that appears, tap Edit Post Privacy (or Edit Privacy).
- Tap See More to expose the complete list of options, then select Only Me.
Using a Desktop Web Browser
- Open your web browser, log into Facebook, and click your profile name at the top-right corner of the screen.
- Click on the Photos tab in the menu bar beneath your name.
- Click the sub-tab labeled Your Photos.
- Click on the individual photo you wish to restrict to view it in full screen.
- In the upper-right corner of the post details panel, click the three dots.
- Select Edit Post Audience from the dropdown menu.
- Choose Only Me to save your changes instantly.
How to Make an Entire Facebook Album Private
Modifying your photos one by one can take hours if you have a long history on the platform. Changing the privacy of an entire album is much faster because the restriction automatically applies to every single image nested inside that folder.
Changing Album Privacy on Mobile
- Go to your profile page, scroll down, and select the Photos button.
- Tap the Albums tab at the top of the interface.
- Open the specific album you want to hide.
- Tap the three dots in the top-right corner of the album screen and select Edit.
- Tap on the current audience selection (which often defaults to Public or Friends).
- Select Only Me, then navigate back a step and tap Done or Save.
Changing Album Privacy on Desktop
- Go to your profile page, click on your Photos tab, and then select Albums.
- Locate the specific folder you intend to hide and click the three dots in its upper-right corner.
- Click Edit Album from the options.
- On the left-hand configuration sidebar, locate and click the current audience button.
- Select Only Me from the pop-up window.
- Click the Save button at the bottom of the left sidebar.
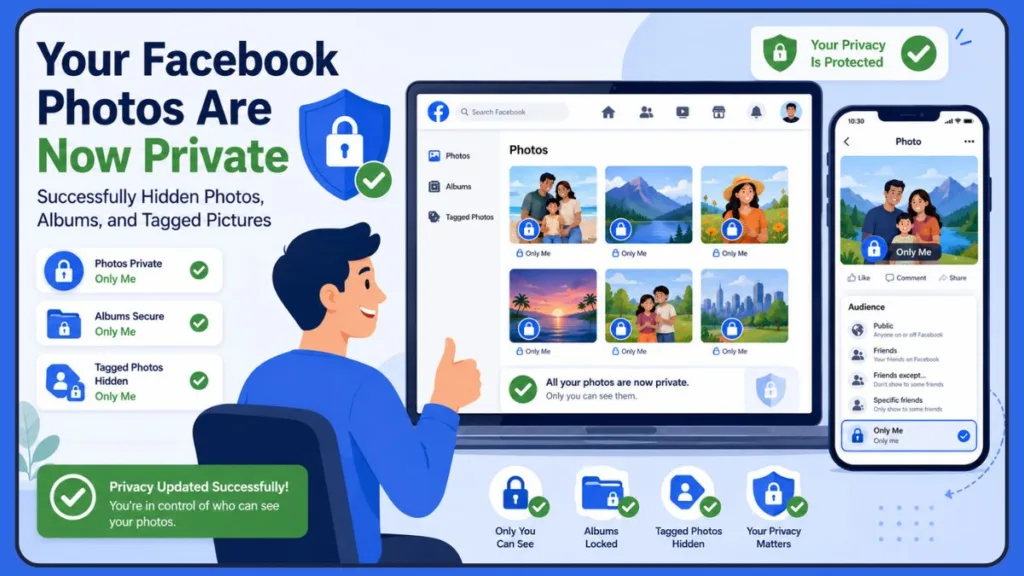
How to Make All Your Existing Facebook Photos Private
Because Facebook does not offer a singular master switch to hide everything with one click, you must use a systematic approach to clean up your profile.
To hide your entire historical footprint quickly, use this checklist:
- Audit Your Custom Folders: Go album by album through your self-created galleries and switch them to Only Me.
- Target System Folders: Look closely at default system folders like Mobile Uploads, Timeline Photos, and Cover Photos, which frequently serve as holding areas for loose, public images.
- Review Connected Accounts: Check your automated sharing preferences to make sure updates from linked apps like Instagram aren’t accidentally pushing private images onto your Facebook feed.
How to Hide Tagged Photos Posted by Other People
Securing the files that you personally uploaded only solves half of the privacy puzzle. If a friend uploads a picture of you and leaves it public, it will still show up online. You cannot change the privacy settings of media uploaded by someone else, but you can control whether those images appear on your personal profile.
Adjusting Profile and Tagging Settings
- Open the Facebook menu, scroll down to Settings & Privacy, and open Settings.
- Open the Profile and Tagging section.
- Find the parameter that asks, “Who can see posts you’re tagged in on your profile?”
- Modify this option to Only Me to instantly prevent external tags from appearing on your visible timeline.
How to Enable Timeline Review
To completely cut off future surprises, find the Reviewing section inside those same options and toggle on the feature to review posts you are tagged in. This forces the platform to ask for your explicit approval before any external photo attaches itself to your public identity.
Note: Moving an image to your private collection or adjusting your timeline settings changes your personal profile view, but it does not erase the file from Facebook entirely. The original image remains active on the uploader’s account. If a post poses a direct threat to your safety or home privacy, you will need to ask the person who posted it to take it down, or file a formal report through official reporting channels.
How to Set New Facebook Photos to Private by Default
To avoid making privacy changes after every upload, you can adjust your preferences so that everything you post is secure from the start.
- Access Settings & Privacy and choose Settings.
- Open the Privacy menu located within the navigation sidebar.
- Locate the section titled Your Activity.
- Find the option reading “Who can see your future posts?” and click Edit.
- Adjust that setting from Public to Friends or Only Me.
Why Are My Facebook Photos Still Visible? (Troubleshooting)
If you have followed the steps but a specific image continues to show up to the public, you are likely dealing with one of these common exceptions:
The Photo Is in a Shared Album
If you contributed to a collaborative album built by a friend, your personal modifications won’t alter the folder. The creator of that shared album holds the overall privacy controls. You must either delete your contribution from the album or ask the administrator to change the folder visibility.
You’re Tagged in Another User’s Post
If someone searches for your name and can still see an image of you, check the author of the post. If you are simply tagged in another user’s public post, changing your personal settings only removes it from your own page. The image will remain viewable on their profile.
Profile or Cover Photos Have Different Rules
Your primary cover art and the thumbnail of your profile picture must remain public so people can verify your identity. However, you can click on your profile picture, select View Profile Picture, tap the three dots, and set the expanded post visibility to Only Me. This prevents people from clicking it to see the full image, browse older versions, or read historical comments and likes.
Meta App Caching Delays
Digital networks rely on temporary storage called a cache to serve content quickly. If you adjust an album to Only Me but a friend claims they can still see it, their device is likely displaying a cached preview. Have them log out, clear their application data, or look up your profile using a completely clean incognito window to see the updated status.
Frequently Asked Questions
Can someone see my photos if we are not friends on Facebook?
Not if you have restricted your audience. If your images are set to Friends, Specific Friends, or Only Me, anyone outside of your approved network will be met with a blank media tab when viewing your timeline.
Can I make an album private after posting it?
Absolutely. You can alter the audience of any folder or individual post retroactively, whether it was published five minutes ago or years down the line.
How do I turn off face recognition on Facebook?
To prevent automated tools from identifying your face in other people’s photo uploads, open your advanced account preferences, navigate to the media settings panel, and disable face matching options completely.
Will unlinking my Instagram account protect my Facebook privacy?
Separating your profiles inside the Account Center provides an extra layer of security. It ensures that an image meant for a close circle on one app doesn’t accidentally mirror over to a completely different audience on another.
Conclusion
Reclaiming your online privacy does not mean you have to abandon your personal memories. By working through your historical albums folder by folder, mastering your tagging approvals, and locking down your future upload rules, you can completely preserve your personal history while removing it from public view.
Were you trying to hide a single photo, clean up an entire era of old albums, or secure your page for an upcoming job hunt? Let us know what worked for you in the comments below!
Visit Our Post Page: Blog Page
Discover more from Izoate
Subscribe to get the latest posts sent to your email.