
Mic not working or using the wrong input? Learn how to manage audio input devices in Windows 11, switch microphones, and get your audio working properly.
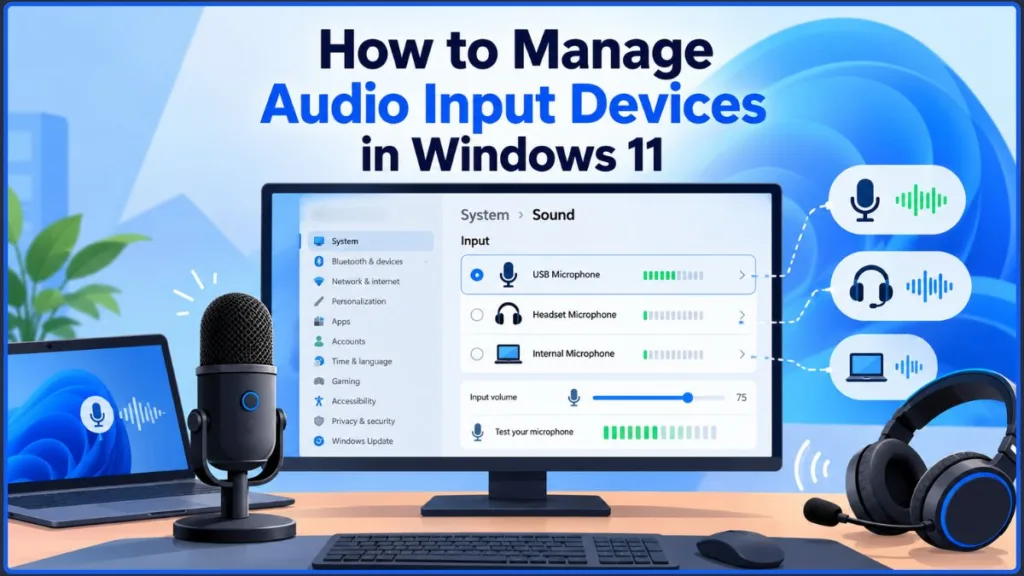
Windows 11 lets you manage microphones and other audio input devices from Settings > System > Sound. You can choose an input device, set a default microphone, adjust input volume, test it, manage microphone permissions, and troubleshoot devices that are missing or not working.
Quick answer: Open Settings > System > Sound and scroll to Input. Select the microphone you want to use and adjust its available settings. For deeper control, press Windows + R, enter mmsys.cpl, and use the Recording tab.
How Do I Manage Audio Input Devices in Windows 11?
The main place to manage a microphone or other audio input device is the Windows 11 Sound page.
Open Sound Settings
- Press Windows + I to open Settings.
- Select System.
- Click Sound.
- Scroll down to the Input section.
Windows 11 lists connected microphones and detected audio input devices in this area. Select a device to access its available controls.
This is where you can start when you need to choose your sound input device, change microphone settings, or check whether Windows 11 can see your hardware.
What you should see: Your connected microphone should appear under Input. If it is missing, check the disabled-device and troubleshooting steps below.
How to View All Audio Input Devices in Windows 11
Before changing settings, check which microphones Windows 11 actually detects.
Check the Input List
Go to:
Settings > System > Sound > Input
Review the available devices and select the microphone you want to configure.
When a microphone is connected but does not appear, it may be disabled or there may be a driver problem.
Check the All Sound Devices Page
Some Windows 11 version 25H2 builds include an All sound devices page.
- Open Settings > System > Sound.
- Select All sound devices when it is available.
- Review the listed input and output devices.
- Check the live volume indicator beside an input device to see whether the microphone is detecting sound.
- Use the available controls to configure the device.
The supplied data notes that this feature has rolled out gradually, so it may not appear on every Windows 11 installation. If you do not see All sound devices, continue using the regular Input section.
Show Disabled and Disconnected Devices
The classic Sound Control Panel can reveal devices that are hidden from the regular list.
- Press Windows + R.
- Type mmsys.cpl.
- Press Enter.
- Open the Recording tab.
- Right-click an empty area of the device list.
- Turn on Show Disabled Devices and Show Disconnected Devices.
You can then check whether a missing microphone appears in the list.
How Do I Set a Default Audio Input Device in Windows 11?
When you have multiple microphones, choosing the correct default audio input device helps Windows 11 and applications use the microphone you actually want.
Set the Default Microphone from Windows 11 Settings
- Press Windows + I.
- Go to System > Sound.
- Scroll to Input.
- Select your preferred microphone under Choose your input device.
The Windows 11 Settings workflow saves the selection automatically.
Set the Default Device from the Classic Sound Control Panel
For more detailed control:
- Press Windows + R.
- Type mmsys.cpl and press Enter.
- Select the Recording tab.
- Right-click your preferred microphone.
- Select Set as Default Device.
- Click Apply, then OK.
The classic panel also lets you set a separate Default Communication Device. Setting both to the same microphone can help prevent communication applications from choosing another input device.
Pro tip: Use Default Device for your general microphone and Default Communication Device for calling scenarios. Setting both to the same microphone is useful when you want consistent behavior in applications such as Teams or Zoom.
How to Quickly Change the Audio Input Device in Windows 11
When you only need to switch microphones temporarily, the taskbar provides a faster route than opening the full Settings app.
Switch from the Taskbar
- Click the speaker icon in the system tray.
- Click the small arrow near the volume controls.
- Pick the microphone or input device you want to use.
This is useful when switching microphones during a call.
You can also right-click the taskbar speaker icon and select Sound settings to return to the main Sound page.
Remember: A quick switch changes the active input, while Default Device and Default Communication Device provide more persistent configuration.
How to Manage Multiple Audio Input Devices in Windows 11
If you use a laptop microphone, headset microphone, USB microphone, or other recording hardware, keeping one main input device configured can make switching between devices easier.
Keep Your Main Microphone as the Default
- Connect your microphones.
- Go to Settings > System > Sound > Input.
- Confirm Windows 11 detects each device.
- Select your main microphone.
- Use mmsys.cpl > Recording to set it as Default Device and Default Communication Device when you want stronger default control.
- Use individual application settings for microphones that should only be used by specific programs.
The supplied data recommends checking the default settings again after connecting new hardware because Windows can reassign the selected device when new audio hardware is detected.
Practical tip: After adding a new microphone, reopen the Recording tab and confirm that your main device is still the intended default.
How to Adjust Audio Input Settings in Windows 11
Change Input Volume
- Open Settings > System > Sound.
- Scroll to Input.
- Select your microphone.
- Find Input volume.
- Move the slider left or right.
A starting point around 75–80% is suggested in the supplied source, leaving room before the signal becomes too loud.
Speak into the microphone while adjusting the level.
What you should see: The input level indicator should respond to your voice. If it remains flat, increasing the volume will not solve the underlying detection problem.
Increase Microphone Boost
If the microphone remains too quiet, the classic Sound Control Panel may provide additional gain controls.
- Press Windows + R.
- Enter mmsys.cpl.
- Open Recording.
- Double-click your microphone.
- Select Levels.
- Look for Microphone Boost.
- Increase it gradually and test the microphone again.
The supplied data notes that +10 dB or +20 dB can be used for quieter microphones when the option is available, but too much boost can add noise.
How to Test an Audio Input Device in Windows 11
Testing your microphone after changing its settings confirms that Windows 11 is actually receiving audio.
Check the Input Level
- Go to Settings > System > Sound.
- Select the microphone under Input.
- Speak normally into the microphone.
- Watch the input level indicator.
If the indicator responds, Windows 11 is receiving audio from the selected input device.
Test with Voice Recorder
You can also create a short recording.
- Search for Voice Recorder from Start.
- Start a recording.
- Speak into the microphone.
- Stop the recording.
- Play it back.
This provides a practical check that the selected microphone is capturing your voice.
How to Enable or Disable an Audio Input Device in Windows 11
A microphone that seems to have disappeared may simply be disabled.
Enable a Disabled Microphone
- Press Windows + R.
- Type mmsys.cpl.
- Open Recording.
- Right-click an empty area.
- Turn on Show Disabled Devices.
- Find your microphone.
- Right-click it and select Enable.
If the device appears greyed out, enabling it can make it available again.
Disable an Unwanted Input Device
When you do not want Windows 11 to use a particular microphone:
- Open mmsys.cpl.
- Select Recording.
- Right-click the microphone.
- Choose Disable.
The device remains listed, so you can enable it again later without uninstalling it.
How to Manage Microphone Privacy Permissions in Windows 11
A microphone can be connected and selected correctly but still fail inside an application if Windows 11 is blocking microphone access.
Go to:
Settings > Privacy & security > Microphone
Turn On Microphone Access
- Press Windows + I.
- Open Privacy & security.
- Select Microphone.
- Make sure Microphone access is turned On.
- Make sure Let apps access your microphone is also turned On.
- Check the permissions for the application you are using.
- For traditional desktop applications, make sure Let desktop apps access your microphone is enabled.
The supplied material identifies microphone permissions as an overlooked cause of input problems and notes that updates can reset these settings.
Important: If a microphone works in one environment but not in a desktop application, check Let desktop apps access your microphone before changing other settings.
How to Set a Different Input Device for Specific Apps in Windows 11
Your Windows 11 default microphone does not always determine which microphone an application uses. Some applications provide their own input selector.
Choose the Microphone Inside the App
The supplied examples include:
- Microsoft Teams: Settings > Devices > Microphone
- Zoom: Settings > Audio > Microphone
- Discord: User Settings > Voice & Video > Input Device
- OBS Studio: Audio settings and input sources
These applications can manage microphone selection themselves, so changing the Windows default may not change the microphone used by the application.
Use Windows 11 Volume Mixer
For Windows-level app audio controls:
- Right-click the speaker icon.
- Select Open Volume mixer.
- Review the applications listed there.
- Adjust the available controls for individual apps.
Per-app microphone selection may still need to be handled inside the application itself.
How to Access Advanced Audio Input Settings in Windows 11
For basic microphone management, Windows 11 Settings provides the main controls. The classic Sound Control Panel is useful when you need deeper input-device settings.
Open the Recording Tab
- Press Windows + R.
- Type mmsys.cpl.
- Press Enter.
- Select the Recording tab.
- Choose your microphone.
- Click Properties.
The supplied material identifies additional controls in this interface, including Levels, Advanced, and Enhancements.
Check Advanced Microphone Properties
Depending on the device and driver, you may find:
- Microphone Boost
- Default Format
- Audio Enhancements
- Exclusive Mode
The Default Format setting controls the sample rate and bit depth available for the device. The supplied source notes that the hardware must support the selected format.
Check Exclusive Mode
Exclusive Mode can cause conflicts when one application takes control of the microphone.
- Open mmsys.cpl.
- Select Recording.
- Double-click your microphone.
- Open Advanced.
- Find Allow applications to take exclusive control of this device.
- Disable it when an application conflict is causing the microphone to become unavailable to other programs.
This is included in the supplied troubleshooting guidance.
How to Fix Missing Audio Input in Windows 11
When a microphone disappears or stops responding, work through these checks in order.
1. Check for Disabled or Disconnected Devices
Open mmsys.cpl > Recording and enable Show Disabled Devices and Show Disconnected Devices.
If your microphone appears greyed out, right-click it and choose Enable.
2. Check Microphone Permissions
Open:
Settings > Privacy & security > Microphone
Confirm that microphone access and the required application permissions are enabled.
3. Update the Audio Input Driver
If the microphone is still missing:
- Press Windows + X.
- Select Device Manager.
- Expand Audio inputs and outputs.
- Right-click your microphone.
- Select Update driver.
- Choose Search automatically for drivers.
- Restart the PC after the update.
These steps are included in the supplied driver troubleshooting workflow.
4. Reinstall the Audio Input Driver
When updating does not solve the problem:
- Open Device Manager.
- Expand Audio inputs and outputs.
- Right-click the microphone.
- Select Uninstall device.
- Confirm the removal.
- Restart Windows 11.
The supplied source notes that Windows can reinstall the driver during startup.
5. Use the Manufacturer’s Audio Driver
For Dell, HP, Lenovo, or ASUS systems, generic Windows drivers may not fully support branded audio hardware. The supplied source recommends checking the laptop manufacturer’s support page for the official Realtek or Waves audio driver for the specific model.
6. Run the Recording Audio Troubleshooter
Windows 11 also includes a recording-audio troubleshooter.
- Go to Settings > System > Troubleshoot > Other troubleshooters.
- Find Recording Audio.
- Click Run.
- Follow the on-screen instructions.
The supplied material identifies this as a way to check for common issues involving drivers, disabled devices, and incorrect default settings.
7. Check the USB Connection
For a USB microphone, connect it directly to a USB port on the computer instead of using a hub. The supplied troubleshooting guidance recommends this to rule out power-delivery problems through the hub.
How to Troubleshoot Common Windows 11 Microphone Problems
Default Microphone Keeps Changing
Connecting new audio hardware can cause Windows to reassign the input. Set the preferred microphone as both Default Device and Default Communication Device, then check Properties > Advanced when an application is overriding the selection.
Microphone Is Selected but No Sound Is Detected
Check Settings > Privacy & security > Microphone, confirm microphone access is enabled for the application, and then check Input volume and any physical mute control on the microphone or headset.
Input Volume Is Too Low Even at Maximum
Open mmsys.cpl > Recording > Microphone Properties > Levels and check for Microphone Boost. The supplied source suggests adding +10 dB or +20 dB and retesting where the option is available. USB microphones with a built-in preamp may not provide this Windows control.
Microphone Has Echo or Feedback
Open the microphone properties through mmsys.cpl and select the Listen tab.
Make sure Listen to this device is unchecked when it is creating a feedback loop. You can also use headphones or enable Acoustic Echo Cancellation under Enhancements when that option is available.
Crackling or Noisy Audio After Updating to Windows 11 25H2
The supplied source identifies this as a potential issue, particularly on systems using Realtek audio.
Start with the audio driver. You can roll it back or check:
Settings > Windows Update > Advanced options > Optional updates
If necessary, the supplied troubleshooting procedure also describes temporarily selecting the generic High-Definition Audio Device (Microsoft) driver through Device Manager to determine whether the problem is related to the installed driver.
Microphone Sounds Robotic or Muffled After a Windows Update
Updates can change microphone-related settings. Recheck Settings > Privacy & security > Microphone, then open the microphone properties through mmsys.cpl and review Enhancements and Default Format. The supplied source specifically recommends checking whether enhancements have been re-enabled after an update.
Restart Windows Audio Services
If the microphone still does not appear after checking permissions and drivers, restart the Windows audio services.
- Press Windows + R.
- Enter services.msc.
- Find Windows Audio.
- Double-click it.
- Click Stop.
- Wait about five seconds.
- Click Start.
- Also restart Windows Audio Endpoint Builder.
The supplied source recommends checking that both services use Automatic startup.
You can also restart Windows Audio through an elevated Terminal or Command Prompt:
net stop audiosrv && net start audiosrvAfter the service restarts, check Settings > System > Sound > Input again.
How to Manage Bluetooth Audio Input Devices in Windows 11
Bluetooth headsets can behave differently from wired microphones because they use audio profiles that change depending on whether microphone input is active.
Select a Bluetooth Microphone
- Open Settings > Bluetooth & devices.
- Make sure the headset is paired and connected.
- Go to Settings > System > Sound > Input.
- Select the Bluetooth headset as your input device.
- If it does not appear, open mmsys.cpl > Recording and check for disabled devices.
These steps follow the Bluetooth-specific workflow in the supplied data.
Why Bluetooth Audio Quality Can Change During Calls
Bluetooth can use A2DP for higher-quality stereo output and HFP/HSP for hands-free microphone input. When the microphone is active during a call, the headset may switch to the hands-free profile, which can noticeably reduce playback quality.
Check Bluetooth Microphone Format
If you need to configure the Bluetooth microphone further:
- Open mmsys.cpl.
- Select Recording.
- Right-click the Bluetooth headset.
- Choose Properties > Advanced.
- Set Default Format to the highest supported sample rate; the supplied source notes that this is usually 16 kHz for Bluetooth microphones.
In the Playback tab, the supplied source recommends using Stereo (A2DP) for music and accepting the HFP switch when microphone input is needed during calls.
If a Bluetooth microphone keeps disconnecting or shows lag, check the headset connection, reduce wireless interference, or update the Bluetooth adapter driver through Device Manager > Bluetooth.
How to Reset Audio Settings in Windows 11
When several sound settings have been changed and you want to restore the relevant mixer settings to their defaults:
- Open Settings.
- Go to System > Sound.
- Select Volume mixer.
- Scroll to the bottom.
- Click Reset.
This restores the available Volume Mixer settings to their defaults.
Frequently Asked Questions
How do I control a microphone in Windows 11?
Use Settings > System > Sound > Input to select the microphone and adjust Input volume. The classic Sound Control Panel provides additional controls such as Microphone Boost, Default Format, Enhancements, and Exclusive Mode.
How do I choose my sound input device in Windows 11?
Open Settings > System > Sound, scroll to Input, and select the microphone you want to use. For a faster temporary switch, use the taskbar sound controls.
How do I fix missing audio input in Windows 11?
Check for disabled or disconnected devices, verify Microphone permissions, update or reinstall the audio input driver, run Recording Audio under Other troubleshooters, and restart the Windows audio services when necessary.
Can different apps use different microphones in Windows 11?
Yes. Applications such as Teams, Zoom, Discord, and OBS Studio can provide their own microphone selectors, allowing them to use a different input from the Windows default.
How do I increase microphone sensitivity in Windows 11?
Raise Input volume under Settings > System > Sound > Input. When available, you can also use Microphone Boost under mmsys.cpl > Recording > Properties > Levels.
Why does my default microphone keep changing automatically?
Windows can reassign the input when new audio hardware is detected. Set the preferred microphone as both Default Device and Default Communication Device, and check Exclusive Mode when applications are overriding your selection.
How do I test a microphone in Windows without third-party software?
Open Settings > System > Sound > Input, select the microphone, and speak while watching the input indicator. You can also use Voice Recorder to make a short recording and play it back.
What does Default Communication Device do?
It tells Windows which microphone to use for communication scenarios such as calls and online meetings. Setting it alongside the Default Device can help keep communication applications on the intended microphone.
How do I disable an audio input device in Windows 11?
Open mmsys.cpl, select Recording, right-click the microphone, and choose Disable. You can enable it again later from the same location.
Can a Bluetooth microphone be the default input device in Windows 11?
Yes. Once paired and connected, a Bluetooth headset can appear as an input device. Select it under Settings > System > Sound > Input or configure it through the Recording tab in mmsys.cpl.
Conclusion
Managing audio input devices in Windows 11 starts with the Input section under Settings > System > Sound. From there, you can choose your microphone, adjust its level, and test whether it is capturing sound.
For deeper control, mmsys.cpl provides access to default devices, disabled and disconnected microphones, microphone boost, advanced properties, enhancements, and exclusive-mode settings.
When an input device is missing or stops working, check the problem in this order:
Input device list → Disabled devices → Microphone permissions → Input volume → Drivers → Recording Audio troubleshooter → Windows Audio services
That keeps troubleshooting focused and lets you move from the quickest checks to deeper fixes without changing settings unnecessarily.
Visit Our Post Page: Blog Page
Discover more from Izoate
Subscribe to get the latest posts sent to your email.