
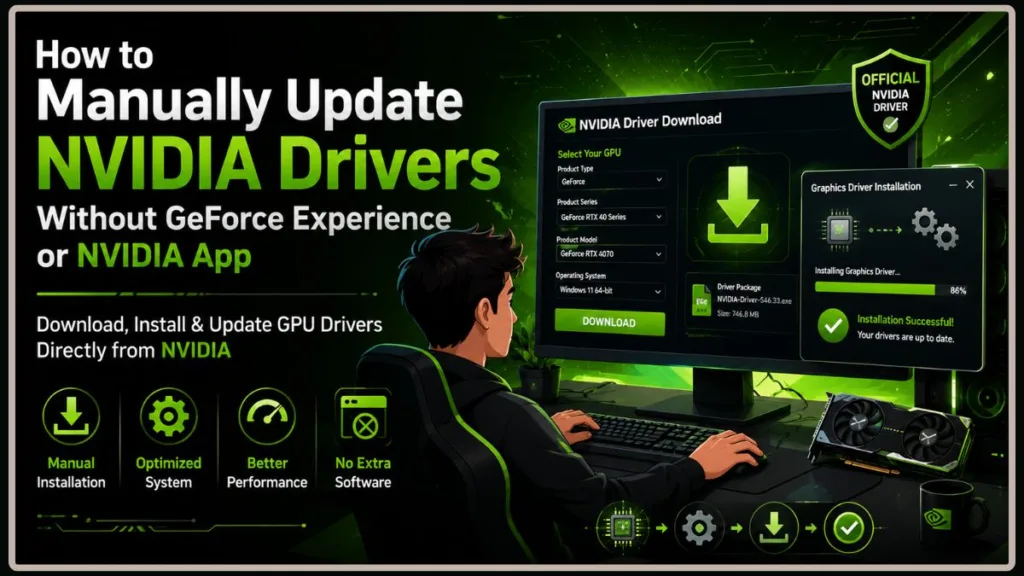
Want to update your NVIDIA drivers without installing GeForce Experience? Here’s a simple step-by-step guide to downloading, installing, and verifying your driver update — no extra software required.
If you’ve ever gone to update your graphics card and felt a little annoyed at being pushed toward GeForce Experience, you’re not alone. A lot of PC owners just want the driver — not another background app, not another sign-in screen, not another icon in the system tray.
Good news: you don’t need it. You can update your NVIDIA drivers manually, straight from NVIDIA’s own website, and skip the extra software entirely. It takes a few more clicks than letting an app do it for you, but once you’ve done it once, you’ll see how simple it really is.
In this guide, we’ll show you exactly how to find the right driver for your GPU, install it without GeForce Experience, verify it installed correctly, and fix the most common hiccups along the way. We’ll also touch on the NVIDIA App, which has actually replaced GeForce Experience on most new driver downloads — so if you’re being offered that instead, you’re not imagining things, and we’ll show you how to skip that too.
Quick tip: Always download your driver from NVIDIA’s official website. Third-party download sites sometimes bundle outdated or altered installers, and it’s just not worth the risk.
Quick Answer: Updating NVIDIA Drivers Without GeForce Experience
Short on time? Here’s the whole process in a nutshell:
- Find out exactly which NVIDIA GPU you have and which version of Windows you’re running.
- Go to NVIDIA’s official driver download page.
- Search for your card and pick either a Game Ready Driver or a Studio Driver.
- Download the installer.
- When you run it, choose just the graphics driver — skip GeForce Experience or the NVIDIA App if it’s offered.
- Restart your PC and confirm the new driver installed properly.
That’s it. You’ll keep full use of your GPU and the NVIDIA Control Panel — you’re just leaving out the extra software.
Why Some People Choose to Skip GeForce Experience
Let’s be fair to GeForce Experience for a second — it’s not a bad piece of software. It handles driver notifications for you, optimizes game settings automatically, and includes ShadowPlay for recording gameplay. For a lot of gamers, that’s genuinely useful.
But not everyone wants those extras, and that’s completely reasonable too. Here’s why plenty of people choose to install drivers manually instead:
- You’d rather not sign in. Depending on NVIDIA’s current requirements, GeForce Experience has historically asked for an account just to check for updates.
- You only want the driver. No overlay, no game optimizer, no recording tools running in the background.
- You like having fewer processes running. On lower-spec systems especially, trimming background software can make a noticeable difference.
- You want to choose your own driver version. Instead of installing every release automatically, you decide when — and whether — to update.
- You’re troubleshooting a graphics issue. A clean, manual install is often the more reliable path when something’s already gone wrong.
If you’re a gamer, going manual also means you get to decide whether a new driver is actually worth installing — maybe it adds support for a game you’re excited about, or maybe your current setup is running great and you’d rather leave it alone for now. If you do creative work in Adobe Premiere Pro, DaVinci Resolve, Blender, or similar software, you’ll probably want the Studio Driver anyway, which we’ll get to shortly.
Worth remembering: A newer driver isn’t automatically a better one. If everything’s working well, there’s no rush to update just because a new version exists.
Do You Actually Need GeForce Experience — or the NVIDIA App?
No, you don’t. It’s entirely optional.
It’s an easy assumption to make, though, since NVIDIA promotes it heavily during installation. In reality, the driver itself works completely independently. When you install just the NVIDIA Graphics Driver, you still get the essential display driver and access to NVIDIA Control Panel (which, on some systems, installs separately through the Microsoft Store).
Here’s something worth knowing if you haven’t updated your drivers in a while: as of late 2024, NVIDIA officially replaced GeForce Experience with a new application called the NVIDIA App. If you download a current driver, you’ll likely see the NVIDIA App bundled in instead of GeForce Experience — the installer name has changed, but the choice to skip it works the same way. So whether you’re seeing “GeForce Experience” or “NVIDIA App” during your install, the steps in this guide apply either way.
With a driver-only install, you’ll still get:
- Full GPU performance
- The latest Game Ready or Studio Driver improvements
- NVIDIA Control Panel access
- Security patches and bug fixes
- Compatibility with new Windows updates
What you’ll be leaving out is the convenience layer: automatic update alerts, one-click game optimization, built-in recording, and streaming tools. For a lot of users, that trade-off is well worth it.
Good to know: Change your mind later? You can always install GeForce Experience or the NVIDIA App afterward without touching your existing graphics driver.
Before You Download Anything: A Quick Prep Checklist
A few minutes of prep now can save you a headache later. Here’s what to check first.
Find Your Exact GPU Model
NVIDIA publishes separate driver packages for different GPU families — GeForce GTX, GeForce RTX, Laptop GPUs, Quadro, and RTX Enterprise cards all have their own listings. Installing the wrong one can cause errors or a failed install, so it’s worth getting this right upfront.
You can check your GPU model through any of these:
- Device Manager → Display adapters
- Task Manager → Performance → GPU
- NVIDIA Control Panel → System Information
- DirectX Diagnostic Tool (type
dxdiaginto the Windows search bar)
If your PC has both integrated graphics and a dedicated NVIDIA card, make sure you’re noting the NVIDIA one — not the Intel or AMD integrated graphics listed alongside it.
Heads up: Laptop GPUs use different drivers than their desktop counterparts, even when the model name looks identical. Always select the “Laptop” or “Notebook” version if that’s what you have.
Confirm Your Windows Version
Head to Settings → System → About and note whether you’re on Windows 10 or Windows 11, and whether you’re running 64-bit (almost every modern PC is). Matching this correctly avoids compatibility errors during install.
Pick the Right Driver Type: Game Ready or Studio?
NVIDIA offers two main driver branches, and choosing the right one matters more than people expect.
Game Ready Driver (GRD) — best if you:
- Play PC games regularly
- Want day-one support for new releases
- Care about the latest performance optimizations
Studio Driver (SD) — best if you spend most of your time in:
- Video editing software
- 3D rendering or animation tools
- Photo or graphic design applications
Studio Drivers go through extra testing with creative software, prioritizing stability over gaming-day optimizations. If your PC is mainly a gaming rig, go with Game Ready. If you’re doing more content creation than gaming, Studio is usually the smarter long-term pick.
Method 1: Download the Driver Straight From NVIDIA
This is the safest and most reliable route, and it’s the one we’d recommend for most people.
Step 1 — Go to NVIDIA’s official driver page. Open your browser and head to NVIDIA’s Driver Downloads page. You’ll see a Manual Driver Search section — that’s what you want.
Step 2 — Select your hardware. Fill in the dropdowns for Product Type, Product Series, Product, Operating System, Download Type, and Language. Take your time here — cards with nearly identical names (like a GeForce RTX 4070 versus the RTX 4070 Laptop GPU) actually need different drivers.
Tip: On a gaming laptop, always pick the Laptop GPU listing when it’s available. Desktop and laptop drivers generally aren’t interchangeable.
Step 3 — Choose your driver branch. Game Ready or Studio — pick whichever matches how you actually use your PC, based on what we covered above. Then hit Search.
Step 4 — Double-check the details. Before downloading, glance over the driver info NVIDIA shows you. Confirm the GPU model, Windows version, and driver type all match what you selected, and that your card shows up under Supported Products.
Step 5 — Download it. Click Download, confirm on the next page if asked, and let the file finish downloading fully — it’s usually a few hundred megabytes. Once it’s done, you’ll find it in your Downloads folder, ready to install.
Important: Stick to NVIDIA’s official site for this. Unofficial download sources can carry modified or outdated installers, and it’s simply not worth the risk to your system.
Method 2: Install It Without GeForce Experience (or the NVIDIA App)
You’ve got the driver downloaded — now let’s install just the parts you actually want.
Step 1 — Run the installer as administrator. Right-click the file and choose Run as administrator. It’ll extract its files and run a quick compatibility check on your system. If it flags your hardware as unsupported, stop and double-check that you grabbed the correct driver for your exact GPU and Windows version.
Step 2 — Choose the driver-only option. When prompted, select:
NVIDIA Graphics Driver
instead of:
NVIDIA Graphics Driver and GeForce Experience (or NVIDIA App, depending on your driver version)
This installs the essential display driver on its own, leaving out the companion software.
Step 3 — Pick Express or Custom installation.
- Express Installation — the quicker route, using NVIDIA’s default settings. Great if you’re simply updating an already-stable system.
- Custom (Advanced) Installation — gives you more control. Use this if you want to select individual components, skip features you don’t use, perform a clean installation, or reset previous NVIDIA settings. You’ll also see optional add-ons here like PhysX System Software and the HD Audio Driver.
Step 4 — Let it finish. Follow the remaining prompts through to completion. Don’t be alarmed if your screen flickers, briefly goes black, or changes resolution during this part — that’s completely normal, since Windows is swapping out the active graphics driver in real time. Once it’s done, restart if you’re prompted to.
Tip: Before you start, close any games, video editors, GPU monitoring tools, or other graphics-heavy apps. It helps the installer swap drivers cleanly without interruptions.
Method 3: Update Through Device Manager
If you’d rather skip the full NVIDIA installer altogether, Windows has a built-in option too. Just know upfront that it typically pulls a Microsoft-approved driver through Windows Update — which may lag behind what’s currently available on NVIDIA’s own site.
For casual, everyday use, that’s often perfectly fine. If you’re gaming seriously or doing creative work, though, going straight to NVIDIA usually gets you a more current driver.
To update automatically:
- Right-click the Start button and open Device Manager.
- Expand Display adapters and find your NVIDIA card.
- Right-click it and select Update driver.
- Choose Search automatically for drivers.
- Restart your PC once it’s finished, even if Windows doesn’t explicitly ask you to.
To install a driver you’ve already downloaded through Device Manager:
Instead of the automatic search, choose Browse my computer for drivers, point it to the folder with your extracted NVIDIA files, enable Include subfolders, and let Windows take it from there. This comes in handy if the standard installer isn’t cooperating, or you’re deploying drivers across multiple machines.
Good to know: Device Manager is convenient, but it often trails behind NVIDIA’s newest Game Ready and Studio releases. For the latest optimizations and fixes, downloading directly from NVIDIA is still the better bet.
Method 4: When You Need a Clean Installation
Running into installation failures, random crashes, black screens, or a missing NVIDIA Control Panel? A clean installation clears out your previous driver settings before installing the new one, which resolves a surprising number of driver headaches caused by leftover files or corrupted profiles.
When it’s worth doing:
- Your driver keeps failing to install
- Games started crashing right after an update
- You’re seeing odd graphical glitches
- NVIDIA Control Panel settings look off
- You’re jumping to a significantly newer driver version
For a routine update on a system that’s already running fine, you likely won’t need this step.
How to do it:
- Launch the NVIDIA installer.
- Select Custom (Advanced).
- On the component screen, check Perform a clean installation.
- Continue through the rest of the install as usual.
Just know that this resets your NVIDIA Control Panel preferences — things like custom refresh rates, scaling, or per-game 3D settings — so you may need to set those up again afterward.
Tip: A clean install resets your graphics driver, not your files. Your games, apps, and personal data are completely untouched.
What About Display Driver Uninstaller (DDU)?
Most people will never need this tool — but if driver problems keep coming back no matter what you try, DDU can help. It’s worth considering if:
- Drivers repeatedly fail to install correctly
- You’re switching from an AMD card to an NVIDIA one
- Windows keeps defaulting to “Microsoft Basic Display Adapter”
- Black screens or driver timeouts persist after several reinstalls
If you go this route, download DDU only from its official source, disconnect from the internet first (so Windows Update doesn’t jump in and install something else), and run it in Safe Mode before reinstalling your NVIDIA driver.
Important: Think of DDU as a last-resort troubleshooting tool, not something to reach for during routine updates. NVIDIA’s built-in clean install option covers the vast majority of cases with far less risk.
How to Confirm the Update Actually Worked
Once the install finishes, it only takes a minute to double-check that Windows is actually running your new driver.
Check Device Manager
- Right-click Start → Device Manager.
- Expand Display adapters and double-click your NVIDIA GPU.
- Open the Driver tab.
You’ll see the driver version, date, and provider listed here. If the version matches what you downloaded, you’re all set.
Check NVIDIA Control Panel
If it’s installed, right-click your desktop, open NVIDIA Control Panel, and click System Information in the bottom-left corner. You’ll find your installed driver version, GPU model, available memory, and connected display details — another easy way to confirm everything matches up.
Note: On some Windows setups, NVIDIA Control Panel comes through the Microsoft Store separately from the driver itself. If you don’t see it after installing, grab it from the Store and restart your PC.
Take It for a Test Run
Numbers are useful, but a quick real-world test tells you even more. Try:
- Launching a game you play often
- Opening a GPU-heavy app like Blender or Premiere Pro
- Running a benchmark, if you use one
- Watching GPU usage in Task Manager
Look for steady frame rates, the correct resolution and refresh rate, smooth performance, and no visual glitches. If all that checks out, your manual driver update was a success.
Tip: It’s a good habit to hang onto your last stable driver installer. If a future update causes trouble, you can roll back right away without hunting through NVIDIA’s archive.
Common Driver Problems (and How to Fix Them)
Even with the right driver downloaded, small hiccups can pop up here and there. Here’s how to handle the most common ones.
“Driver isn’t compatible with this version of Windows”: Usually caused by the wrong GPU selection, a desktop driver on a laptop, or an incorrect Windows version. Double-check your exact GPU, whether it’s desktop or laptop, your Windows version, and grab the correct download from NVIDIA’s official page. Comparing your card against the Supported Products list before downloading helps avoid this entirely.
NVIDIA Control Panel is missing: This doesn’t necessarily mean anything went wrong. On newer Windows systems, it’s often distributed separately via the Microsoft Store. Restart your PC, search for it from the Start menu, and install it from the Store if it’s not already there.
Black screen or flickering after installing: A brief flicker or black screen during install is completely normal. If it continues well after restarting, give it a few extra minutes first, then restart again, try Safe Mode if Windows won’t load, or run a clean installation. DDU should only come into play if you suspect deeper driver corruption.
Games run worse after updating: Not every new driver improves every game. If performance drops, restart your PC, reset any GPU overclocking, restore default Control Panel settings, and make sure the affected game is also updated. If the issue started right after the driver update, reinstalling your previous stable version is a reasonable next step.
Windows keeps replacing your driver: Sometimes Windows Update swaps in a different driver after you’ve manually installed the one you wanted. Reinstall your preferred driver, and if it’s an ongoing issue, pause Windows Update temporarily while you test, or check your device management settings if you’re on a managed system.
Worth remembering: If your PC is running well, there’s no need to feel pressure to install every new driver release. Stability often matters more than chasing the newest version number.
Can You Download NVIDIA Drivers Without a GPU Installed?
Yes — and this comes up more often than you’d think, especially from people prepping a new build or grabbing drivers for a different computer.
NVIDIA’s driver packages are publicly available, so you don’t need a working NVIDIA card in your current PC just to download one. This is handy if you’re:
- Downloading drivers ahead of building a new gaming PC
- Saving an installer to a USB drive
- Preparing drivers for a different desktop or laptop
- Keeping an offline copy on hand for future troubleshooting
That said, downloading and installing are two separate things. NVIDIA’s installer runs a compatibility check, and if it doesn’t detect supported hardware, it’ll stop short of actually installing anything. So while you absolutely can download a driver without a GPU present, you generally can’t complete the install without one.
Tip: If you’re building a new PC, grabbing the latest driver ahead of time — before your card is even installed — can save you a step once everything’s assembled.
Frequently Asked Questions
Do I need GeForce Experience to update my NVIDIA drivers?
No. Download the correct driver from NVIDIA’s official site and install just the NVIDIA Graphics Driver component. Your card will work exactly as expected, and NVIDIA Control Panel remains available.
How do I download NVIDIA GeForce drivers?
Head to NVIDIA’s official Driver Downloads page, select your Product Type, Series, Graphics Card, Windows Version, and Driver Type, then download either the Game Ready or Studio Driver that fits your setup.
Does NVIDIA update GPU drivers automatically?
Not on its own. With a driver-only install, you’ll need to check NVIDIA’s site periodically for new releases. Automatic notifications come through GeForce Experience or the NVIDIA App, and Windows Update occasionally installs compatible drivers too — though usually later than NVIDIA’s own releases.
Should I pick Game Ready Driver or Studio Driver?
It comes down to how you use your PC. Go with Game Ready if you’re mostly gaming and want day-one support for new titles. Go with Studio if you spend more time in video editing, 3D rendering, design, or photography software. Both support the same hardware — they’re just tuned differently.
Is Express or Custom installation better?
Express works fine for most people. Reach for Custom if you want to handpick components, run a clean installation, reset your NVIDIA settings, or troubleshoot an existing issue.
Can I install NVIDIA drivers without the app?
Yes — select NVIDIA Graphics Driver during setup instead of the bundled app option (GeForce Experience or NVIDIA App, depending on your driver version). This driver-only approach is popular with anyone who wants a lighter setup.
Can I download NVIDIA drivers without having a GPU?
Yes, downloading is no problem. Installing generally requires Windows to detect compatible NVIDIA hardware first.
Can I uninstall GeForce Experience after installing my driver?
Absolutely — and it won’t touch your graphics driver at all. Your display driver and Control Panel keep working normally; you’ll just be checking for updates manually going forward.
What if the driver installation fails?
First, confirm you downloaded the right driver for your GPU, Windows version, and desktop/laptop configuration. If it still fails, restart your PC, run the installer as Administrator, try a Custom install with the clean installation option enabled, or use DDU as a last resort if corruption seems to be the culprit.
Can I roll back to an older driver?
Yes. If a newer release is giving you trouble, you can install a previous stable version from NVIDIA’s driver archive. For the cleanest results, uninstall the problematic driver first, or run a clean installation when putting the older one back on.
Quick advice: Unless a new driver fixes something you’re actually running into, staying on a version that’s already working well for you is usually the smarter call.
Wrapping Up
Updating your NVIDIA drivers without GeForce Experience — or the NVIDIA App, if that’s what you’re seeing now — is a lot more manageable than it might seem at first glance. Once you know your GPU model and grab the right driver directly from NVIDIA, the whole process takes just a few minutes, and you’re left with exactly the software you actually want on your system.
Whether you’re chasing better gaming performance, smoother creative work, or simply trying to fix a graphics issue, going the manual route puts you in control. You’ll always know which version is installed, when it changed, and what’s included.
And if something does go sideways, you’ve got options — Custom Installation, a clean install, or DDU for the tougher cases — to get things back on track.
Just remember to grab your drivers from NVIDIA’s official site, confirm your GPU model before downloading, and restart your PC after every update so the new driver loads the way it should. Do that, and you’ll keep your system running smoothly on your own terms.
Got a question we didn’t cover, or run into an issue during your update? Drop it in the comments below — we’re happy to help you sort it out.
Visit Our Post Page: Blog Page
Discover more from Izoate
Subscribe to get the latest posts sent to your email.