
Want to launch Device Manager using CMD? Here’s the quick way on how to open device manager from CMD using Windows 10/11, plus 5 other easy ways to launch it.
When troubleshooting a hardware problem or following a Windows guide that asks you to check a device, opening Device Manager directly from Command Prompt (CMD) is a practical way to access it without navigating through the Start menu or Control Panel. This method works on both Windows 11 and Windows 10, giving you access to installed hardware, device status, and driver settings.
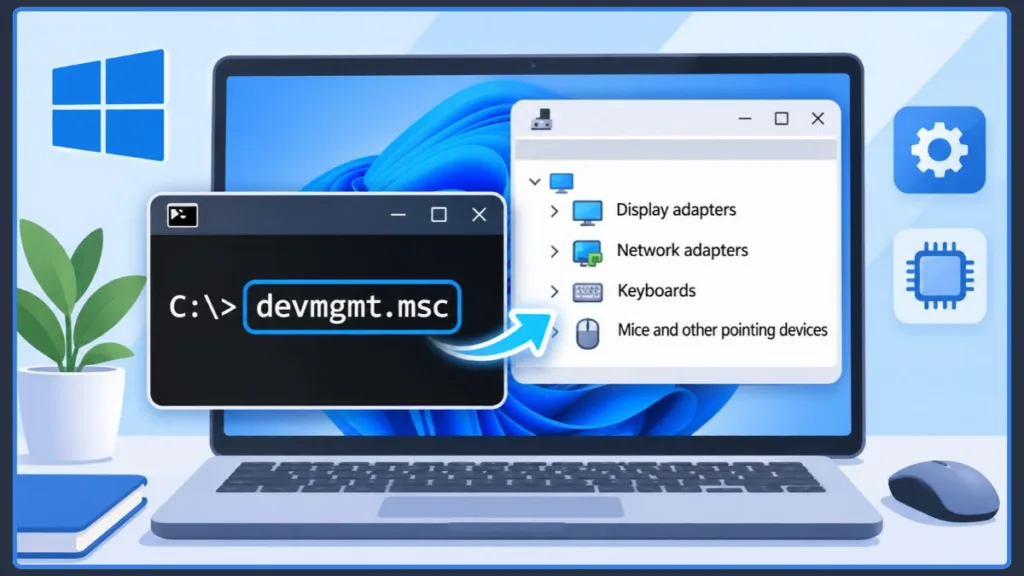
Let’s go through the CMD method first, along with other ways to open Device Manager and the tasks you can perform once it’s running.
What Is the Quickest Way to Open Device Manager from CMD?
To get started, open Command Prompt and run Windows’ built-in Device Manager command. You don’t need additional software or complicated instructions to launch the management console. Follow these steps to enter the command correctly and open Device Manager on your computer.
Follow these steps:
Step 1. Open Command Prompt
First, open Command Prompt on your Windows computer. Press the Windows key, type cmd or Command Prompt in the search bar, and select the result to launch it.
You can use a standard Command Prompt window for this task. Do you need administrator privileges to open Device Manager? No, not just to launch or view the utility. You can open it without selecting Run as administrator.
Step 2. Enter the CMD Command for Device Manager
Once Command Prompt opens, type the following command:
devmgmt.mscThis is the standard Device Manager CMD command used to launch the management console in Windows. If you’re looking for the devmgmt.msc command to open Device Manager, this is all you need. Make sure you include the .msc extension to avoid typing errors.
Windows also supports an alternative command through Microsoft Management Console (MMC):
mmc devmgmt.mscBoth commands open Device Manager, but devmgmt.msc is the simpler and recommended option for everyday use.
Step 3. Press Enter to Open Device Manager
After entering the command, press Enter. Windows will process it and open the Device Manager window separately from Command Prompt.
You can now access your computer’s hardware categories, check device status, and find the available driver-management options.
Important: The Device Manager command launches its graphical interface; it does not display your installed hardware directly inside CMD or automatically change any device or driver settings.
Although you don’t need administrator access just to open Device Manager, Windows may require elevated permissions when you perform certain hardware or driver-management operations.
What Are the Other Ways to Open Device Manager in Windows?
If you prefer not to use Command Prompt, Windows provides several other ways to access Device Manager. You can open it through the Run dialog, PowerShell, Windows Search, Task Manager, or Computer Management. These methods work on Windows 11 and Windows 10, so you can choose whichever is most convenient.
1. Open Device Manager Using the Run Dialog
The Run dialog is one of the quickest ways to open Device Manager without navigating through Windows menus.
- Press Windows + R on your keyboard to open the Run dialog.
- Type the following command:
devmgmt.msc- Press Enter or click OK.
Windows will launch the Device Manager window. This method is particularly useful when you want to open Device Manager directly without searching through the Start menu.
2. Open Device Manager Using PowerShell
You can also open Device Manager using Windows PowerShell. This is convenient when you’re already working in a PowerShell window and don’t want to switch to Command Prompt.
- Open the Start menu and search for PowerShell.
- Select Windows PowerShell from the search results.
- Enter the following command:
devmgmt.msc- Press Enter to launch Device Manager.
The Device Manager console will open in a separate window, just as it does when you launch it through Command Prompt.
3. Open Device Manager Through Windows Search or the Quick Link Menu
If you don’t want to enter a command, you can use Windows’ built-in navigation options to find Device Manager.
Using Windows Search:
- Press Windows + S to open Windows Search.
- Type Device Manager in the search box.
- Select Device Manager from the results.
Using the Quick Link Menu:
- Press Windows + X or right-click the Start button.
- Select Device Manager from the menu.
Both options provide direct access without requiring you to open a command-line tool. Windows Search is useful for finding the utility by name, while the Quick Link Menu provides a convenient shortcut from the desktop.
4. Launch Device Manager Through Task Manager
Task Manager provides another way to open Device Manager, especially when the Start menu or Windows Search isn’t responding.
- Press Ctrl + Shift + Esc to open Task Manager.
- In Windows 11, select Run new task. In Windows 10, open File and select Run new task.
- Enter the following command:
devmgmt.msc- Press Enter or click OK.
Device Manager should open in a separate window. This method is particularly helpful when you can still access Task Manager but are having trouble using other Windows navigation options.
5. Access Device Manager Through Computer Management
You can also access Device Manager through Computer Management, a Windows console that brings several system-management tools together.
- Open File Explorer.
- Right-click This PC and select Manage.
- In the Computer Management window, expand System Tools in the left-hand panel.
- Select Device Manager.
The installed hardware categories will appear in the main window. This option is useful when you want to access Device Manager alongside other tools available in Computer Management.
Create a Desktop Shortcut for Faster Access
If you frequently use Device Manager, creating a desktop shortcut can save you time. Once created, you can open the utility by double-clicking its shortcut instead of entering a command each time.
- Right-click an empty area of your desktop.
- Select New > Shortcut.
- In the location field, enter:
devmgmt.msc- Click Next and name the shortcut Device Manager.
- Select Finish.
You can now double-click the new desktop shortcut whenever you need to access Device Manager.
What to Do If Device Manager Still Won’t Open?
If Device Manager won’t open through CMD, Run, or the other methods above, the problem may be related to an incorrectly entered command, a temporary Windows issue, or corrupted system files.
Try these checks before moving to more advanced repairs:
- Check the command: Make sure you entered
devmgmt.msccorrectly, including the.mscextension. - Restart your computer: A restart can resolve temporary Windows issues that prevent management tools from launching.
- Try another access method: If Device Manager doesn’t open through CMD, try Windows Search, Task Manager, or Computer Management. This can help determine whether the problem is limited to one access method.
- Check for Windows updates: Install available Windows updates and restart your computer before attempting system-file repairs.
Repair potentially corrupted Windows system files
If multiple Windows management tools are failing, corrupted system files may be contributing to the problem. You can use the built-in DISM and System File Checker (SFC) tools to check and repair Windows components.
First, open Command Prompt as an administrator and run:
DISM.exe /Online /Cleanup-Image /RestoreHealthWait for the DISM operation to finish. Then run:
sfc /scannowDISM checks and repairs the Windows image, while SFC scans protected system files and attempts to repair corrupted files. Run DISM before SFC, as recommended by Microsoft.
After both operations finish, restart your computer and try opening Device Manager again.
What Can You Do After Opening Device Manager?
Once Device Manager is open, you can view the hardware connected to your computer, check whether Windows detects any device problems, and manage installed device drivers. Whether you’re troubleshooting a keyboard, checking a network adapter, or dealing with a display issue, this Windows utility helps you find useful information about your hardware in one place.
Here are four useful things you can do in Device Manager to inspect hardware and troubleshoot common device or driver problems.
1. Check Hardware and Device Status
Device Manager organizes your computer’s hardware into categories, making it easier to find a particular device and check its current status.
To explore your installed hardware:
- Open Device Manager and look through the available device categories.
- Expand a category to see the devices listed under it.
- Find the hardware you want to inspect, such as Display adapters, Network adapters, Keyboards, or Mice and other pointing devices.
- Look for any warning symbols next to a device.
- Right-click the device and select Properties to view more information.
A yellow exclamation mark next to a device indicates that Windows has detected a problem that needs attention. To investigate it, open the device’s Properties window and check the Device status area under the General tab.
Windows may display an error message or code explaining the issue. Depending on the code, the problem could involve a missing driver, a device that cannot start, or another hardware configuration issue. Checking this message can help you understand what needs troubleshooting before making changes.
2. Update, Roll Back, or Reinstall Device Drivers
Device drivers help Windows communicate with connected hardware. Outdated, incompatible, or problematic drivers can affect how a keyboard, display adapter, network device, or other hardware component works.
Device Manager lets you check for available driver updates directly through Windows.
How to update a device driver:
- Expand the relevant hardware category in Device Manager.
- Right-click the device you want to update.
- Select Update driver.
- Choose Search automatically for drivers.
- Follow any instructions displayed by Windows.
Windows will search for an available driver and install one if a suitable update is found. However, an automatic search does not guarantee that the newest driver available from the manufacturer will be installed.
What if Windows can’t find an updated driver?
You can also check Windows Update for available driver updates.
- In Windows 11, open Settings > Windows Update > Advanced options > Optional updates, then check the available driver updates.
- In Windows 10, open Settings > Update & Security > Windows Update > View optional updates, if that option is available.
You can also visit your computer manufacturer’s or hardware manufacturer’s official support website to find a compatible driver. Check your exact device model and Windows version before installing a driver manually.
Roll back a driver if an update causes problems
Sometimes a device stops working correctly after a driver update. In that situation, rolling back to the previous driver version may help restore normal operation.
- Right-click the affected device and select Properties.
- Open the Driver tab.
- Select Roll Back Driver, if the option is available.
- Follow the on-screen instructions and restart your computer if prompted.
The rollback option may be unavailable if Windows doesn’t have a previous driver version to restore.
Reinstall a problematic device driver
If updating or rolling back doesn’t resolve the issue, you can try reinstalling the device driver.
- Right-click the affected device in Device Manager.
- Select Uninstall device.
- Confirm the action if Windows asks you to do so.
- Restart your computer.
After restarting, Windows may automatically detect the hardware and attempt to reinstall its driver. If the device still doesn’t work, you may need to install a compatible driver from Windows Update or the manufacturer’s official support website.
Before uninstalling a driver, make sure you understand which device it belongs to, particularly when troubleshooting essential hardware.
3. Enable or Disable Hardware Devices
Device Manager also lets you enable or disable supported hardware devices. This can be useful when troubleshooting a device or temporarily preventing Windows from using it.
To manage a device:
- Expand the relevant hardware category.
- Right-click the device you want to manage.
- Select Disable device or Enable device, depending on its current status.
- Confirm the action if Windows asks you to do so.
For example, you might disable a supported touchscreen temporarily while investigating an input problem, then enable it again when you’re finished.
Important: Disabling a device can stop it from working until you enable it again. Avoid disabling unfamiliar hardware or essential components, such as storage controllers or devices needed for your computer’s operation, unless you’re following specific troubleshooting instructions.
4. Find Driver Details and Hardware IDs
When troubleshooting a device, knowing its driver version, provider, and hardware details can help you understand what is installed and identify compatibility issues.
To view this information:
- Find the device in its relevant category.
- Right-click it and select Properties.
- Open the General tab to check its current status and any reported error message.
- Select the Driver tab to review details such as the driver provider, date, and version.
- Open the Details tab to view additional device properties.
The Details tab is particularly useful when Windows displays an unknown device or you need to identify a specific hardware component.
How to find a device’s Hardware IDs:
- Open the device’s Properties window.
- Select the Details tab.
- Open the Property dropdown menu.
- Choose Hardware Ids or Compatible Ids.
- Review the identification strings displayed.
Hardware IDs help identify a device and can be useful when searching for a compatible driver. You can use this information to narrow down the hardware model before checking the manufacturer’s official support website.
The available properties and driver-management options may vary depending on the device and its installed driver. For example, Roll Back Driver may only appear when Windows has a previous driver version available.
Overall, Device Manager gives you a convenient way to inspect installed hardware, investigate device errors, and manage drivers without installing a separate hardware-management utility. Before updating, uninstalling, enabling, or disabling a device, make sure you understand what the change does and how it may affect your computer.
Frequently Asked Questions
1. Can I Open Device Manager from Windows Terminal?
Yes. You can open Device Manager from Windows Terminal using either a Command Prompt or PowerShell profile. Enter devmgmt.msc in the terminal and press Enter. Windows will launch the Device Manager console in a separate graphical window.
2. Can I Use mmc devmgmt.msc to Open Device Manager?
Yes. You can use mmc devmgmt.msc to launch Device Manager through Microsoft Management Console (MMC). Both mmc devmgmt.msc and devmgmt.msc open Device Manager, but the simpler devmgmt.msc command is sufficient for everyday use.
3. What Does the .msc Extension Mean in devmgmt.msc?
The .msc extension identifies a saved Microsoft Management Console console file. Windows uses these files to open management tools through MMC. In devmgmt.msc, the file launches the Device Manager console, allowing you to view and manage your computer’s hardware.
4. How Do I Open Device Manager as an Administrator Using CMD?
First, search for Command Prompt in Windows Search. Right-click it and select Run as administrator, then approve the User Account Control prompt. Enter devmgmt.msc and press Enter to launch Device Manager from the elevated Command Prompt.
However, you don’t need administrator privileges just to open or view Device Manager. Elevated access is useful when performing hardware or driver-management operations that require additional permissions.
5. How Do I Show Hidden Devices in Device Manager?
To display hidden devices, open Device Manager and select View > Show hidden devices from the top menu. Windows will display additional device entries, including some devices that are not currently connected to your computer.
Some disconnected devices may appear grayed out. This view can help when investigating previously connected hardware or looking for a device that isn’t visible in the normal list.
6. How Do I Scan for Hardware Changes in Device Manager?
You can ask Windows to check for newly detected or changed hardware through Device Manager.
- Open Device Manager.
- Select the Action menu.
- Choose Scan for hardware changes.
Windows will scan for Plug and Play hardware changes and update the device list when it detects them. This can help when you’ve connected a device that isn’t appearing in Device Manager.
7. What Do Common Device Manager Error Codes Mean?
Device Manager displays error codes when Windows encounters problems with particular hardware devices or their drivers. Some common examples include:
- Code 10: Windows cannot start the device.
- Code 28: The drivers for the device are not installed.
- Code 45: The hardware device is not currently connected to the computer.
To check an error code, right-click the affected device, select Properties, and look under Device status in the General tab. You can then use the error code to find the appropriate troubleshooting instructions in Microsoft’s Device Manager error-code documentation.
Conclusion
Opening Device Manager from CMD is simple with the built-in devmgmt.msc command. Whether you’re using Windows 11 or Windows 10, you can run this command to access your computer’s hardware and driver settings without navigating through multiple Windows menus. If Command Prompt isn’t convenient, you can also use other built-in Windows methods to launch Device Manager.
Once it’s open, you can check device status, investigate hardware errors, and manage installed drivers. If you’re looking for routine driver updates, Windows Update is a good place to start, while Device Manager helps you inspect individual devices and troubleshoot specific problems.
Tip: The next time a hardware component isn’t working as expected, open Device Manager and check its status before making changes. This can help you identify the problem and choose the right troubleshooting step for your Windows PC.
Useful Resources
If you want to explore more Windows management commands or need additional help troubleshooting hardware and driver problems, these official Microsoft resources can help:
- Open Device Manager in Windows – Learn alternative ways to access Device Manager without using Command Prompt.
- MMC Command Reference – Understand how Microsoft Management Console works and how to launch saved
.mscconsole files using commands such asmmc devmgmt.msc. - Update Drivers Through Device Manager – Find instructions for updating, reinstalling, and rolling back device drivers when troubleshooting hardware problems.
- Device Manager Error Codes – Understand common device error codes and find Microsoft’s recommended troubleshooting steps.
- Use System File Checker to Repair Windows System Files – Learn how to use DISM and SFC to check and repair potentially corrupted Windows system files.
- Fix Missing or Undetected Audio Devices – Explore additional troubleshooting methods, including showing hidden devices and scanning for hardware changes.
These resources provide additional guidance when you need to investigate device errors, manage drivers, or resolve Windows hardware problems.
Visit Our Post Page: Blog Page
Discover more from Izoate
Subscribe to get the latest posts sent to your email.