
Struggling with dull or washed-out HDR? Discover how to optimize HDR settings in Windows 11 with the best HDR configuration, plus Reddit-tested tips for gaming, movies, and desktop use.
If you are reading this, you probably just hooked up a brand-new monitor, eagerly enabled High Dynamic Range in your system settings, and immediately thought, “Why does everything look worse?”
You certainly aren’t alone. High Dynamic Range (HDR) is a display technology designed to drastically enhance your viewing experience by pushing your peak brightness and nits higher, deepening shadow contrast, and unlocking incredibly lifelike color accuracy. When it is correctly configured, HDR makes your favorite games and movies look absolutely breathtaking.
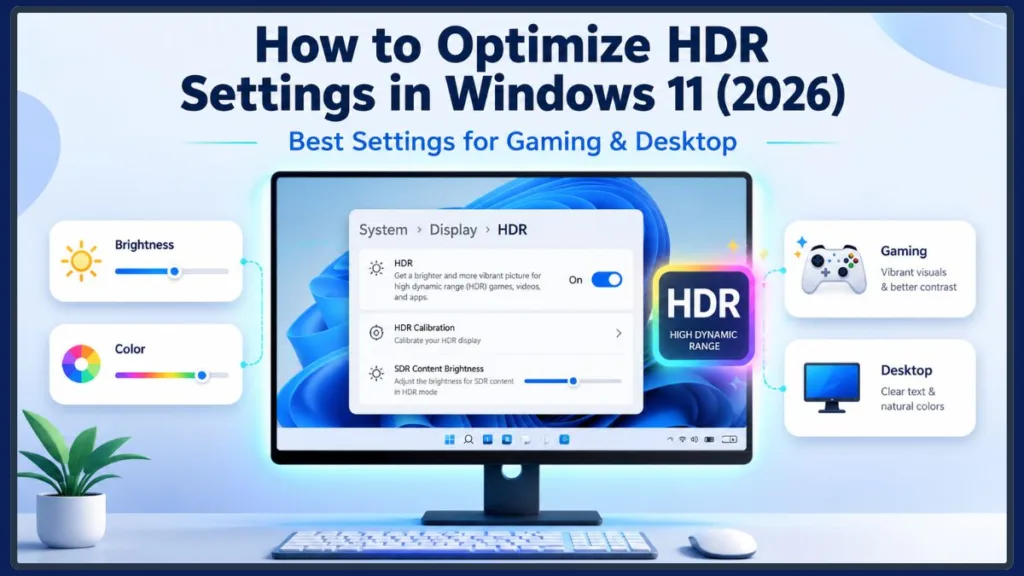
However, Windows 11 rarely handles it perfectly out of the box. Instead of vibrant visuals, you are likely dealing with a few incredibly common frustrations:
- Your HDR display looks completely washed out.
- The Windows desktop colors appear incredibly dull, faded, or gray.
- The overall screen feels inexplicably too dark.
- Your PC games look wildly different or more pale than you expected.
- You are experiencing general confusion about what Auto HDR actually does.
If you are trying to figure out how to fix washed out colors in Windows 11 HDR, the good news is that your expensive new monitor isn’t broken. The issue almost always boils down to how the operating system manages its SDR brightness balance alongside your physical monitor settings and your graphics card software.
Things to Check Before Changing HDR Settings in Windows 11
Before you dive into the Windows settings menu and start dragging sliders, you need to lay the groundwork. If your hardware or software isn’t prepared to handle the intense data bandwidth that HDR requires, no amount of tweaking will give you the results you want.
Here are the essential prerequisites you need to check to ensure you get the absolute best HDR experience possible.
Check Whether Your Monitor Supports HDR
Not all HDR monitors are created equal. Just because there is a sticker on the box that says “HDR” doesn’t mean you will get eye-watering brightness and inky blacks. Your physical display panel dictates your peak brightness and nits (how bright the screen can actually get).
Here is what you need to know about HDR certification levels:
- HDR400: This is an entry-level certification. While it can process an HDR signal, it typically lacks the physical brightness and local dimming required for a true HDR experience. If you have an HDR400 monitor, your screen might actually look better in standard sRGB mode vs wide color gamut HDR.
- HDR600: This is where HDR starts to look good. These monitors have noticeable peak brightness and usually feature basic local dimming to improve shadow detail.
- HDR1000: This is the premium tier. Monitors with this certification can deliver blindingly bright highlights and incredibly deep contrast.
The type of panel you are using also changes everything:
- OLED: If you are using an OLED gaming monitor, you will get the best HDR experience possible. Because OLEDs can turn off individual pixels, they offer infinite contrast and perfect, absolute blacks.
- Mini-LED: These panels use thousands of tiny backlight zones to get incredibly bright while still offering excellent contrast. They are often the best choice for brightly lit rooms.
- IPS / VA: Standard IPS and VA panels often struggle with HDR. Because their backlights are always on, darker scenes can look gray and washed out when HDR is enabled.
Update Windows 11 to the Latest Version
Windows 11 has dramatically improved its tone mapping and HDR color management over the years. Microsoft frequently pushes updates that fix bugs related to Auto HDR and how the system handles SDR brightness balance.
Before doing anything else, go to Settings > Windows Update and click Check for updates. Making sure you are on the latest 2026 build ensures you have the most recent HDR calibration features built directly into the operating system.
Install the Latest NVIDIA or AMD Graphics Driver
Your graphics card is the engine driving your HDR experience. If you are running outdated drivers, you might run into color banding, screen flickering, or the inability to select a 10-bit color depth in your GPU control panel.
Open the NVIDIA App (or GeForce Experience) or AMD Radeon Software and check for the newest driver update. A clean driver installation often fixes the dreaded Windows 11 HDR washed out bug before you even have to touch a system setting.
Use the Correct Display Cable for HDR
HDR requires a massive amount of data bandwidth, especially if you are gaming at a high refresh rate or 4K resolution. If you are using an old, cheap display cable, Windows 11 will literally block you from turning HDR on.
To ensure you can unlock your monitor’s full potential, you must use one of the following:
- DisplayPort 1.4 (or higher): This is the gold standard for PC gaming. It provides plenty of bandwidth for high resolutions, high refresh rates, and full 10-bit HDR color.
- HDMI 2.1: If your monitor and graphics card both support it, an ultra-high-speed HDMI 2.1 cable is fantastic, especially if you are connecting your PC to a modern OLED TV. (Avoid older HDMI 2.0 cables, as they will force you to lower your refresh rate or color depth to enable HDR).
Enable HDR in Your Monitor’s On-Screen Display (OSD) Menu
This is the most common mistake people make! Windows 11 cannot turn on HDR if your monitor is physically blocking it.
Before you flip the switch in Windows, reach under your monitor and use the physical buttons to open its internal menu (the OSD). Look for a setting called Smart HDR, HDR Mode, or Color Profile. Ensure that it is set to Auto or On. If you leave your monitor locked in standard SDR mode, Windows will try to force an HDR signal through, resulting in a terribly faded, gray picture.
How to Enable HDR in Windows 11
Now that your hardware is ready, cables are plugged into the right ports, and your monitor’s internal menu is set up, it is time to turn on HDR inside the operating system.
Turning this feature on is simple, but do not be alarmed if your screen goes completely black for a split second when you flip the switch. Your graphics card and monitor are just resetting their connection to establish a much wider color space and pass a higher volume of data.
To turn on your windows 11 hdr settings, follow these exact steps:
- Right-click anywhere on an empty space on your desktop and select Display settings from the context menu. (Alternatively, you can press the Windows Key + I to open the main settings app and click on System, then select Display).
- Look at the top section of the display menu. If you are using multiple monitors, make sure you click on and select the specific HDR-capable display you want to configure.
- Scroll down slightly to the “Brightness & color” section and click directly on the word HDR (clicking the text instead of the toggle opens up the advanced HDR sub-menu, which gives you access to crucial optimization tools).
- Locate the Use HDR toggle switch and flip it to On.
Once enabled, you will immediately unlock access to other ecosystem features like Auto HDR, which uses machine learning to upgrade older SDR video games on the fly. You can also quickly toggle this entire mode on or off at any time without opening this menu again by using the keyboard shortcut Win + Alt + B.
If your desktop suddenly looks a bit dim or less saturated right after flipping this switch, do not panic. This happens because Windows is now managing your standard applications through an HDR container. We are going to fix that visual imbalance completely in the very next sections.
Best HDR Settings for Windows 11 (Recommended Configuration)
Now that you have the switch flipped, let’s look at the absolute best HDR settings for Windows 11. Dialing in these options will ensure your system is outputting the highest quality image possible before we move on to fine-tuning the colors.
Use this quick-reference table as your master checklist for your PC and monitor:
| Setting | Recommended Configuration |
| HDR | Enable when viewing HDR movies or gaming. |
| Auto HDR | Enable for supported SDR games (optional but highly recommended). |
| SDR Content Brightness | Adjust slider until desktop apps look natural. |
| Windows HDR Calibration | Run immediately after enabling HDR for the first time. |
| Refresh Rate | Highest supported by your monitor. |
| Color Depth | 10-bit color depth (if supported by your GPU/Monitor). |
| RGB Range | Full (configured via NVIDIA/AMD control panel). |
| Resolution | Native monitor resolution. |
| Monitor HDR Mode | Enabled / Auto (via physical OSD buttons). |
Tip: Do not set your RGB Range to “Limited” unless you are using your PC on an older television screen. For standard computer monitors, keeping it on “Full” prevents crushed blacks and ensures you get the most accurate color representation.
Run Windows HDR Calibration to Improve HDR Colors and Brightness
If you just turned HDR on and thought, “Why does everything look slightly off?” this is where we fix it.
Every monitor handles light differently. Windows 11 relies on tone mapping to translate extreme brights and deep darks onto your screen. If the operating system doesn’t know exactly what your specific monitor is capable of, it will guess—and its guesses usually result in a washed-out desktop or crushed shadows.
To teach Windows exactly how your monitor behaves, you need to run a quick setup tool.
- Open the Microsoft Store, search for Windows HDR Calibration, and click install. (This is an official Microsoft app, but it does not come pre-installed on most PCs).
- Launch the app and drag the window to your HDR display if you have a multi-monitor setup.
- Click Get Started to begin the calibration patterns.
You will be guided through three crucial visual tests:
- Adjusting Minimum Brightness (Black Level): You will see a dark gray crosshair on a black background. Use the slider to lower the brightness until the crosshair completely disappears into the blackness. If you are using an OLED gaming monitor, you can safely drag this slider all the way down to zero for perfect, inky blacks.
- Adjusting Maximum Luminance (Peak Brightness): Here, you are telling Windows your monitor’s true peak brightness and nits. You will see a white crosshair on a bright white background. Slowly raise the slider until the crosshair perfectly blends into the white background and vanishes.
- Adjusting Max Full Frame Luminance: This is identical to the previous step but tests how your monitor handles a full screen of bright white light, which is crucial for displays with aggressive automatic brightness limiters.
- Adjusting Color Saturation: Finally, you can adjust a slider to tweak your overall color saturation, similar to adjusting digital vibrance in your GPU settings. If your colors feel a little flat, bump this up slightly until the test image looks rich and natural.
Once finished, name your new color profile and save it. Your screen will instantly apply the new tone mapping rules, creating a much more accurate and vibrant picture.
Important Tip: While the Windows HDR Calibration app dramatically improves your overall desktop and system accuracy, remember that many AAA video games have their own internal HDR calibration screens. You will still need to adjust the brightness and paper-white settings inside those individual game menus for the absolute best results!
Adjust SDR Content Brightness to Fix Washed-Out Desktop Colors
If you have enabled HDR and run the calibration tool, but your standard Windows desktop still looks completely gray and lifeless, you are experiencing the infamous windows 11 hdr washed out effect. Don’t worry—your monitor isn’t broken, and there is a single slider designed specifically to fix this.
When you turn on HDR, Windows places your entire operating system inside an HDR “container.” Because standard applications are built for Standard Dynamic Range (SDR), Windows has to translate their light levels. If the baseline brightness of these SDR apps doesn’t match the intense brightness of your monitor, everything looks incredibly faded.
To fix this, you need to adjust your SDR brightness balance. Here is how to do it:
- Go back to Settings > System > Display and click directly on the HDR menu.
- Scroll down until you find the SDR content brightness slider.
- Drag this slider left or right to change the baseline brightness of your standard desktop apps.
Important Tip: Do not just crank this slider all the way up to 100%. The goal is to set it so a blank, white webpage or Word document looks comfortably bright without burning your eyes. For most setups, leaving this slider somewhere between 10 and 30 provides a perfectly natural look for desktop use.
Why HDR Looks Great in Games but Washed Out on the Windows Desktop
It can be incredibly frustrating to launch an HDR-supported game, marvel at the breathtaking colors, and then close the game only to be greeted by a gloomy, gray desktop. Why is there such a massive difference?
It all comes down to how different types of software communicate with your monitor.
Modern PC games that feature native HDR are specifically programmed to send dynamic lighting metadata directly to your screen. They know exactly how to leverage your display’s peak brightness and nits to create blinding sun flare and how to turn pixels off for pitch-black shadows.
However, almost everything else you use on your PC—like Google Chrome, File Explorer, and your Office apps—is strictly SDR content. These apps were never designed to use a 10-bit color depth or display extreme highlights.
When HDR is turned on, Windows relies on tone mapping to stretch those basic SDR applications across an ultra-wide HDR color space. Stretching that standard color data inevitably dilutes it, flattening the contrast and stripping away the saturation. This is exactly why your games look fantastic while your desktop looks like a dreary, faded photograph.
Workflow Tip: Because Windows struggles to make standard desktop apps look perfect in HDR, many users prefer to leave HDR turned off during the workday. When it is time to game or watch a movie, you can simply press the Win + Alt + B keyboard shortcut to instantly turn HDR on without ever opening the settings menu!
Best Monitor Settings for HDR in Windows 11
Every monitor brand has a slightly different menu layout, but you will generally find these core settings across Asus, LG, Samsung, Dell, and other major manufacturers.
Set the Right Brightness Level
When HDR is engaged, your monitor’s physical brightness should automatically lock to 100%. If your monitor allows you to adjust the brightness while HDR is active, make sure it is cranked all the way to maximum. HDR relies on having access to your display’s absolute peak brightness to correctly display glaring highlights like explosions or the sun.
Adjust Contrast for Better HDR
Similar to brightness, many monitors lock the contrast slider when in HDR mode. If yours remains unlocked, leave it at its factory default (usually around 75 or 80). Pushing the contrast too high will “crush” your shadows, removing all the fine details in dark rooms, while lowering it will wash out the entire image.
Enable the Correct HDR Mode
Many monitors offer different “flavors” of HDR in their menus, such as Cinema HDR, Gaming HDR, or DisplayHDR.
- Always choose DisplayHDR or True HDR if available. This tells the monitor to follow the exact tone mapping instructions coming from Windows.
- Avoid Cinema or Vivid modes for gaming, as they artificially oversaturate colors and can severely mess up your SDR brightness balance.
Configure Local Dimming
If you are using an IPS, VA, or Mini-LED display, Local Dimming is the most important setting in your entire menu. This feature physically dims or turns off the backlight in dark areas of the screen to improve contrast. Set this to High or Max. Without local dimming, your shadows will look like a glowing, milky gray.
Optimize Peak Brightness
Some premium displays have a specific setting labeled Peak Brightness or Max Luminance. Make sure this is set to High. This allows the monitor to push extra voltage to small areas of the screen (like a flashlight beam in a dark game) to hit its maximum advertised peak brightness and nits.
Enable Game Mode
Always ensure Game Mode is turned on. Not only does this drastically reduce input lag so your mouse and controller feel responsive, but it often unlocks the specific color and refresh rate bandwidth required for a smooth 10-bit color depth signal.
Turn On VRR or Adaptive Sync
Don’t forget your frame rates! Make sure Variable Refresh Rate (VRR), AMD FreeSync, or NVIDIA G-Sync is enabled in your monitor menu. Smooth, tear-free gameplay is just as important as vibrant colors.
Important Tip: If you are using an AMD graphics card, look for FreeSync Premium Pro in your monitor settings. The “Pro” tier specifically includes built-in HDR tone mapping to lower latency and improve color accuracy in supported games.
Why OLED, Mini-LED, and IPS Monitors Produce Different HDR Results
You can copy the exact same windows 11 hdr settings onto three different monitors and get three drastically different results. Why? Because the physical panel technology completely dictates the final picture.
- OLED: If you are playing on an OLED gaming monitor, you are getting the gold standard. OLEDs do not use a backlight; every single pixel creates its own light and can turn completely off. This gives you infinite contrast, perfect blacks, and zero glowing halos around bright objects.
- Mini-LED: These monitors use thousands of tiny backlight zones. They get significantly brighter than OLEDs—often hitting 1,000 to 2,000 nits—making them incredible for brightly lit rooms. However, you might notice slight “blooming” or a faint halo effect around bright objects on dark backgrounds.
- IPS / VA Panels: Standard IPS and VA panels struggle heavily with HDR. Because they rely on a single, large backlight, they cannot make one side of the screen pitch black while the other side is blindingly bright. If you have an entry-level IPS HDR400 monitor, you will often find that your colors look better if you simply leave HDR off and stick to your standard sRGB mode.
Whenever you are ready, just let me know, and we will move right into setting up the Best NVIDIA and AMD HDR Settings inside your graphics control panel!
Best NVIDIA and AMD HDR Settings for Windows 11
Even if your Windows settings are perfect and your monitor is physically set up for success, your graphics card still acts as the final gatekeeper for your picture quality.
By default, graphics drivers often choose “safe” baseline settings to ensure they work with as many displays as possible. Unfortunately, these default settings frequently compress your color range and lock out the true potential of your display. To get the richest, most accurate HDR experience, we need to manually tell your GPU to push uncompressed, high-bandwidth color data directly to your screen.
Here is exactly how to optimize your control panels based on the graphics card you are using.
Recommended NVIDIA HDR Settings
If you are using an NVIDIA GeForce GPU, you will need to bypass the default Windows color management and force your graphics card to do the heavy lifting.
- Right-click on your desktop and select NVIDIA Control Panel (you may need to click “Show more options” in the Windows 11 context menu first).
- On the left-hand navigation pane, expand the Display tree and click on Change resolution.
- Under step 3 on this screen (“Apply the following settings”), select the bubble for Use NVIDIA color settings.
Once you have that selected, configure these four critical values:
- Desktop color depth: Leave this on Highest (32-bit).
- Output color depth: Change this from 8 bpc to 10 bpc (10-bit color). This is mandatory for smooth HDR gradients. If your monitor doesn’t support 10-bit, or you are using an older HDMI cable, this option might not appear or may reset to 8 bpc.
- Output color format: Set this to RGB.
- Output dynamic range: Change this from Limited to Full. This single setting often completely cures a washed-out desktop by instantly restoring your deep blacks and peak whites.
Important Tip: Make sure you scroll up to step 2 on that same screen and verify you are running your monitor’s native resolution and the highest refresh rate possible. Sometimes, applying 10-bit color can cause older display cables to drop your refresh rate to compensate for the bandwidth.
Recommended AMD HDR Settings
If you are running a Radeon RX series card, the process is slightly different but achieves the exact same uncompressed color output.
- Right-click on your desktop and open the AMD Software: Adrenalin Edition application.
- Click the gear icon in the top right corner to open your Settings, then navigate to the Display tab.
- If you have multiple monitors, click on your HDR-capable display at the top of the menu.
Look down the list and configure the following settings:
- 10-Bit Pixel Format: Toggle this to Enabled. Just like on NVIDIA, this unlocks the billions of colors required for a smooth, banding-free HDR image.
- Pixel Format: Click the dropdown menu and select RGB 4:4:4 Pixel Format PC Standard (Full RGB).
Workflow Tip: While you are in the AMD display settings, scroll down and double-check your Adaptive Sync options. If your monitor supports it, ensure FreeSync Premium Pro is enabled, as this specific AMD tier includes specialized HDR tone mapping built directly into the variable refresh rate pipeline.
Auto HDR vs Native HDR: Which One Should You Use?
Once your hardware is optimized and Windows knows exactly what your display can do, you will likely encounter a massive point of confusion in the Windows 11 settings menu: Auto HDR.
You might be wondering if turning this on overwrites your game settings, or if it is somehow better than the HDR settings built directly into your favorite titles. To get the best visual experience, you need to know exactly how your PC handles different types of games.
Let’s break down the differences so you know exactly which one to use and when.
What Is Native HDR?
Native HDR means that the video game or movie you are playing was built from the ground up to support a High Dynamic Range display.
The developers specifically programmed the game engine to output an incredibly wide color gamut and high peak brightness and nits. When you launch a native HDR game—like Cyberpunk 2077 or Horizon Forbidden West—the game communicates directly with your monitor. It knows exactly how bright to make the sun, and exactly how to turn off the pixels in a pitch-black cave.
Native HDR always provides the absolute best, most accurate picture quality possible.
What Is Auto HDR?
Auto HDR is a completely different beast. It is a machine-learning algorithm built directly into Windows 11.
Historically, thousands of incredible PC games were built using Standard Dynamic Range (SDR). Games running on older DirectX 11 or DirectX 12 engines simply do not have the code required to tell your monitor how to display ultra-bright highlights or a 10-bit color depth.
When you enable Auto HDR, Windows acts as a middleman. It analyzes the SDR image of your older game in real time and automatically applies tone mapping to artificially expand the colors and boost the brightness. It essentially injects HDR into games that never officially supported it.
Auto HDR vs Native HDR Comparison
To make it incredibly simple, here is how the two technologies stack up against each other:
- Quality: Native HDR is vastly superior. Because it uses developer-intended lighting, it will always look more natural. Auto HDR is a fantastic enhancement, but because it relies on an algorithm guessing where the bright spots should be, it can occasionally make certain UI elements or text look slightly overexposed.
- Performance: Native HDR has virtually zero performance cost. Auto HDR requires a tiny bit of processing power from your PC to analyze the frames, though the impact on your frame rate is usually negligible on modern hardware.
- Compatibility: Native HDR only works on modern games that explicitly include the feature in their graphics menus. Auto HDR works on a massive library of older SDR titles.
When Should You Use Auto HDR?
You should enable Auto HDR in your Windows settings and leave it on for any game that does not have its own internal HDR calibration menu.
Is Windows 11 Auto HDR worth it for PC gaming? Absolutely. If you are playing older classics, indie games, or competitive shooters that were never updated with modern lighting engines, Auto HDR breathes entirely new life into them. It takes flat, dull lighting and gives it that glorious, eye-catching punch you expect from your expensive monitor.
Workflow Tip: If you have an NVIDIA graphics card, you also have access to a brand-new feature called RTX HDR inside the NVIDIA App. This acts as a driver-level replacement for Auto HDR and often provides even better color mapping for SDR games. Just remember: you cannot use both at the same time. If you want to use RTX HDR, you must turn Windows Auto HDR off!
Common Auto HDR Misconceptions
Because HDR terminology is incredibly confusing, there are a few major myths we need to clear up right now so you don’t accidentally ruin your picture quality.
- Auto HDR does not automatically switch Windows into HDR mode. The name is terribly misleading. “Auto HDR” does not mean your PC automatically turns HDR on when you launch a game. You still have to manually enable HDR in your Windows Display settings (or use the Win + Alt + B shortcut).
- It does not replace Native HDR. If you launch a game that has native HDR built-in, Windows 11 is smart enough to step out of the way. Auto HDR will automatically disable itself so the game can run natively. You do not need to constantly toggle the setting on and off depending on what game you are playing.
Best HDR Settings for Gaming on Windows 11
When it comes to gaming, HDR is not a “set it and forget it” feature. Because every game engine handles light differently, your PC needs a little bit of guidance to ensure it is outputting the perfect image.
Here is exactly how to ensure your gaming sessions look absolutely spectacular every single time you boot up.
Enable HDR Before Launching HDR-Compatible Games
While some modern games can forcefully engage Windows HDR on their own, relying on this is a gamble. It often results in a glitchy screen, crashed display drivers, or a game that launches in a faded SDR mode because it didn’t recognize your monitor in time. Always toggle HDR on (either via the settings menu or the Win + Alt + B shortcut) before you double-click the game icon.
Calibrate HDR Settings Inside Each Game
Even though you ran the Windows HDR Calibration tool earlier, almost all modern AAA games completely bypass Windows and rely on their own internal settings. When you boot up a new game, you must navigate to its display or graphics menu and find the HDR calibration screen.
You will typically need to adjust three core sliders:
- Peak Brightness: Set this to match your monitor’s true capabilities. If you are using an OLED gaming monitor rated for 800 nits, set this slider to 800. Pushing it higher than your monitor can handle will “blow out” bright skies, turning textured clouds into a solid, blinding white blob.
- Paper White (or UI Brightness): This controls the brightness of standard on-screen elements like menus, your health bar, and subtitles. Keep this relatively low (around 150 to 200 nits) so reading your inventory doesn’t burn your eyes in a dark room.
- Black Level: Just like the Windows tool, lower this until the test image disappears into pure black.
Use Auto HDR for Older SDR Games
If you are playing a game from a few years ago that only supports SDR, make sure Auto HDR is enabled in your Windows Display settings. Windows will automatically detect the game launch and apply its own algorithm to widen the color gamut and boost the contrast, giving the classic title a brilliant, modern facelift.
Adjust Auto HDR Intensity with Xbox Game Bar
Sometimes, the Auto HDR algorithm gets a little too aggressive, making a game look artificially neon or blowing out the highlights. You can actually fine-tune this on the fly without closing your game!
- While playing your supported game, press Win + G to open the Xbox Game Bar overlay.
- Click the gear icon (Settings) at the top of the screen.
- Select Gaming features from the left-hand menu.
- Click Adjust HDR Intensity to bring up a specialized slider.
Lower the slider if the game looks too blown out or you are losing fine detail in bright areas. Raise it if the image feels too flat. Windows will save this specific intensity level for this specific game the next time you play!
Recommended HDR Workflow for Everyday Use
Should you leave HDR on all the time in Windows 11? The short answer is no.
Because of the way Windows forces standard applications into an HDR container, leaving it on 24/7 often results in eye strain and a perpetually washed-out desktop. To get the absolute best out of your PC, you should treat HDR as a specialized tool that you turn on only when you need it.
Here are the most practical workflows for your daily routine.
Best HDR Setup for Everyday Browsing and Office Work
When you are answering emails, scrolling through Reddit, or typing in Microsoft Word, turn HDR off.
Your standard desktop apps are built for an SDR color space. Leaving HDR off ensures text looks crisp, colors remain perfectly accurate to standard web formatting, and you avoid the blinding glare of a pure white Excel spreadsheet pushing maximum voltage to your monitor. You will also save a significant amount of electricity and reduce the risk of burn-in if you are using an OLED panel.
Best HDR Workflow for Gaming
When you sit down to play a visually immersive game, this is your time to shine.
- Use the keyboard shortcut to flip HDR on.
- Ensure your monitor physically shifts into its dedicated HDR mode.
- Launch your game.
- If it is a native HDR title, verify the in-game peak brightness settings. If it is an older game, let Auto HDR work its magic.
Best HDR Workflow for Watching HDR Movies
If you are settling in to watch 4K HDR content on Netflix, YouTube, or via local video files, you must turn Windows HDR on first.
- Browser Warning: Not all web browsers handle high dynamic range video correctly. For the absolute best color accuracy and tone mapping when streaming movies, use Microsoft Edge. It has the most robust, native support for Windows 11 color management. If you prefer Chrome, you may need to dig into the browser’s hidden
chrome://flagsmenu and manually force the color profile to scRGB linear.
Quickly Toggle HDR with the Win + Alt + B Keyboard Shortcut
You do not need to dig through five layers of Windows settings every time you want to switch workflows.
Microsoft built a system-level shortcut specifically for this: Win + Alt + B.
Pressing these three keys simultaneously will instantly toggle HDR on or off. Your screen will briefly go black for a second while the graphics driver resets the color space. This single shortcut makes the “on-demand” HDR workflow incredibly fast and completely frictionless.
How to Fix Common HDR Problems in Windows 11
Even with the perfect hardware and the right initial setup, Windows 11 can still throw a few curveballs. If you are running into issues, don’t panic. Almost every single visual glitch or software bug can be fixed in a few clicks.
Here is your ultimate troubleshooting guide to solving the most frustrating HDR headaches.
Fix HDR That Looks Washed Out
If your entire screen looks like it has a milky, white filter over it, your graphics card is likely compressing your color signal.
- Open the NVIDIA Control Panel or AMD Adrenalin Software.
- Find the output dynamic range setting and change it from Limited to Full.
- Double-check your monitor’s OSD menu. If you accidentally left it on a “Cinematic” or “FPS” preset instead of the dedicated DisplayHDR mode, the physical monitor will aggressively wash out the image.
Fix HDR That Looks Too Dark
If your shadows are crushing all the detail in your game, or the entire screen feels uncomfortably dim, your tone mapping is misaligned.
- First, re-run the Windows HDR Calibration app. Make sure you aren’t dragging the minimum brightness slider too far left. If you are using a Mini-LED or IPS panel, zeroing out the black level will completely crush your shadows.
- Check your monitor menu and ensure Local Dimming is set to High. If it is turned off, the monitor physically cannot push enough backlight to illuminate the dark scenes.
Fix Dull or Faded HDR Colors
If your colors just aren’t “popping” the way you expected them to, you might be stuck in an 8-bit color space.
- Verify in your GPU control panel that your 10-bit color depth is enabled.
- If you want an extra punch, open the Windows HDR Calibration app and use the final Color Saturation slider. Bumping this up by 5% to 10% works wonders, similar to adjusting digital vibrance on your graphics card. (Just don’t push it too high, or skin tones will look neon!).
Fix a Gray or Washed-Out Desktop
As we covered earlier, if your games look great but your desktop looks dreary, the issue is your SDR brightness balance.
- Navigate to Settings > System > Display > HDR and adjust the SDR content brightness slider until your white windows look natural.
- Remember, standard desktop apps are not meant to blast your eyes with peak brightness and nits. If you are mostly doing office work, just use the Win + Alt + B shortcut to turn HDR off until you are ready to game.
Fix HDR Not Working in Windows 11
If you flip the HDR switch in Windows and the screen immediately reverts to SDR, you have a bandwidth bottleneck.
- You are likely pushing too much data through an older display cable. Lower your refresh rate from 144Hz down to 120Hz or 60Hz. If HDR suddenly stays on, you need to buy a brand new DisplayPort 1.4 or ultra-high-speed HDMI 2.1 cable to support the full data load.
Fix Missing Auto HDR Settings
If you cannot find the Auto HDR toggle in your Windows display settings, two things might be happening:
- You forgot to turn the main HDR switch on first. Auto HDR is a sub-feature; the toggle physically will not appear until the main HDR mode is active.
- Your Windows 11 build is outdated. Auto HDR was added in a specific feature update, so go to Windows Update and ensure your system is fully patched.
Fix Windows 11 Not Detecting an HDR Display
If Windows flat-out says “HDR Not Supported” under your display capabilities, the operating system is locked out by the hardware.
- Reach under your monitor and open the physical OSD menu. You must enable Smart HDR or Auto HDR Detection on the monitor itself before Windows can see it.
Fix HDR Screen Flickering
If your screen flashes black, flickers wildly, or shows strange artifacting when HDR is on, you are experiencing a “handshake” issue between your GPU and monitor.
- The Quick Fix: Press Win + Ctrl + Shift + B to instantly reset your graphics driver without restarting your PC.
- The Long-Term Fix: This is frequently caused by a conflict with variable refresh rates. Turn off G-Sync or FreeSync in your monitor menu, test the HDR, and then turn it back on. If the flickering persists, completely uninstall your graphics drivers using a tool like DDU (Display Driver Uninstaller) and cleanly install the newest version.
Fix HDR Turning Off Randomly
If HDR randomly disables itself when you launch a game, it is usually because the game is trying to force an exclusive fullscreen mode that conflicts with Windows 11’s modern display management.
- Go into the specific game’s video settings and change the display mode from Exclusive Fullscreen to Borderless Windowed. Windows 11 handles HDR much better in borderless windowed mode, preventing the game from overriding your system-level color settings.
Common HDR Myths You Should Know
Because display technology is full of confusing marketing jargon, there is a lot of bad advice floating around the internet. If you want to master your setup, it is time to bust a few of the most common myths holding back your picture quality.
- Myth: HDR should always stay enabled.
- Reality: Keeping it on 24/7 is the number one cause of a washed-out desktop. Standard apps are meant for SDR. Treat HDR like a light switch—turn it on for gaming and movies, and turn it off for office work and browsing.
- Myth: Auto HDR automatically turns HDR on.
- Reality: The name is incredibly misleading. Auto HDR does not automatically detect a game and flip your Windows settings for you. It is simply an algorithm that upgrades SDR games after you have already manually enabled HDR in Windows.
- Myth: Windows HDR Calibration fixes every HDR issue.
- Reality: The Windows calibration tool sets the baseline for your operating system’s tone mapping, but it doesn’t control everything. Most AAA video games completely ignore Windows and require you to calibrate your peak brightness and nits inside the game’s own graphics menu.
- Myth: Every HDR monitor delivers the same experience.
- Reality: A $200 IPS monitor with a basic HDR400 sticker will look completely different than a premium OLED gaming monitor. The quality of your HDR is entirely dependent on your monitor’s physical backlight hardware.
- Myth: HDR always looks better than SDR.
- Reality: If your monitor lacks local dimming or high peak brightness, forcing HDR will actually look worse than your display’s native sRGB mode. Sometimes, sticking to high-quality SDR is the better choice.
Common HDR Mistakes That Can Reduce Picture Quality
Even experienced PC builders make mistakes when setting up a new display. If your games still aren’t looking quite right, double-check that you aren’t committing any of these common errors:
- Skipping the Windows HDR Calibration app: Without this, Windows is just guessing what your monitor can handle, leading to crushed blacks and clipped white highlights.
- Leaving SDR Content Brightness at its default value: If you don’t adjust this slider, your desktop will permanently look like a faded, gray mess.
- Forgetting to enable HDR on the monitor: Windows cannot send a high-dynamic-range signal if your physical monitor menu is still locked in standard mode.
- Using incorrect GPU color settings: Leaving your NVIDIA or AMD control panel on “Limited” RGB range instead of “Full” restricts your contrast and ruins color depth.
- Ignoring in-game HDR calibration: Expecting the game to perfectly read your Windows profile often leads to blinding menus or overly dark shadows. Always check the in-game display settings!
- Expecting identical HDR performance across different displays: If you run a dual-monitor setup with one OLED and one IPS panel, they will never look exactly the same, no matter how much you tweak the settings.
Tip: Whenever you update your graphics drivers, always double-check your GPU control panel. Sometimes, driver updates will reset your 10-bit color depth and RGB Range back to their safe, compressed defaults!
Frequently Asked Questions About HDR Settings in Windows 11
What are the best HDR settings for Windows 11? The best setup involves turning on HDR, enabling Auto HDR for older games, setting your GPU to Full RGB with a 10-bit color depth, and running the Windows HDR Calibration app to match your specific monitor’s capabilities.
Why does HDR look washed out? This is usually caused by your graphics card compressing your color range. Ensure your GPU output dynamic range is set to “Full,” and verify your monitor is physically set to its DisplayHDR mode.
Why does the Windows desktop look dull with HDR enabled? Because standard Windows apps are built for Standard Dynamic Range. When Windows places them inside an HDR container, the colors get stretched and flattened.
Should I leave HDR enabled all the time? No. It is highly recommended to leave it off for general desktop use to prevent eye strain and color fading. Just press Win + Alt + B to toggle it on when you launch a game.
Is Auto HDR worth enabling? Yes! It uses machine learning to significantly boost the colors and contrast of older SDR games that never natively supported HDR.
Does Auto HDR automatically switch Windows into HDR mode? No. You still have to manually turn HDR on in your Windows display settings.
What SDR Content Brightness should I use? For most users, a setting between 10 and 30 provides the most natural balance, keeping white webpages from searing your eyes in a dark room.
Is Windows HDR Calibration necessary? Absolutely. It is the only way to teach Windows exactly what your monitor’s absolute black levels and peak maximum brightness are.
Does HDR reduce gaming performance? Native HDR has zero impact on your frame rate. Auto HDR requires a very tiny amount of processing power, but the impact is negligible on any modern PC.
Why do HDR settings look different on OLED and IPS monitors? OLEDs can turn individual pixels completely off, providing perfect black levels and infinite contrast. Standard IPS monitors have a large backlight that is always on, which can make dark scenes look gray in comparison.
Does every PC game support HDR? No. Only modern games typically support Native HDR. However, hundreds of older DirectX 11 and 12 titles can be upgraded using Windows Auto HDR.
Can I automatically turn HDR on and off? While Windows doesn’t have a native “auto-switch” feature based on the app you are running, you can instantly manually toggle it using the Win + Alt + B shortcut.
Final Thoughts on Choosing the Best HDR Settings for Windows 11
Getting your monitor to look absolutely perfect doesn’t have to be a frustrating guessing game. By taking a few minutes to configure your hardware and software to work together, you can unlock an incredibly vibrant, lifelike visual experience.
To recap, here is your ultimate checklist for HDR perfection:
- Enable HDR correctly: Make sure it is on in your physical monitor menu, then enable it in Windows.
- Run Windows HDR Calibration: Teach the operating system your display’s limits.
- Adjust SDR Content Brightness: Balance this slider to fix a dull, faded desktop.
- Configure your monitor and GPU settings: Force your graphics card to output Full RGB and uncompressed 10-bit color.
- Calibrate HDR inside each game: Never rely solely on Windows for in-game lighting.
- Use native HDR whenever available: It will always look better than an algorithm.
- Use Auto HDR for compatible SDR games: Breathe new life into your classic library.
Remember, the “perfect” picture is ultimately the one that looks best to your eyes based on your specific monitor, graphics hardware, and room lighting.
Have you managed to fix your washed-out desktop colors, or do you have a specific HDR gaming monitor you absolutely love? Let me know in the comments below, and feel free to share this guide with anyone struggling to get their Windows 11 setup looking right!
Visit Our Post Page: Blog Page
Discover more from Izoate
Subscribe to get the latest posts sent to your email.